
Elevated garden beds have revolutionized how home gardeners grow vegetables, herbs, and flowers. Whether you’re working with poor soil, limited space, or physical limitations, building elevated garden beds offers a practical solution that improves drainage, reduces pest pressure, and makes gardening more accessible. After years of helping gardeners transform their outdoor spaces, I’ve learned that the right elevated bed setup can increase yields by 20-30% while requiring significantly less maintenance than traditional in-ground gardens.
The beauty of elevated garden beds lies in their versatility and efficiency. You control the soil quality completely, warm up faster in spring, and create defined growing zones that keep your garden organized and visually appealing. Whether you choose wood, metal, composite materials, or stone, these structures adapt to any landscape while delivering exceptional growing conditions for your plants.
Why Choose Elevated Garden Beds
Elevated garden beds solve multiple gardening challenges simultaneously. First, they provide superior drainage compared to ground-level planting. Excess water moves through the soil quickly, preventing root rot and fungal diseases that plague traditional gardens during wet seasons. This is especially valuable in clay-heavy soils or areas with poor natural drainage.
Second, elevated beds warm up faster in spring. The soil in an elevated bed can be 5-10 degrees warmer than surrounding ground in early spring, allowing you to plant earlier and extend your growing season. This temperature advantage continues throughout the year, creating optimal conditions for heat-loving crops like tomatoes, peppers, and basil.
Third, these beds create a natural barrier against soil-borne pests and diseases. By filling your bed with fresh, quality soil, you avoid many problems associated with contaminated or depleted ground soil. You’ll notice fewer issues with wireworms, root knot nematodes, and fungal pathogens that persist in established garden areas.
Accessibility represents another major advantage. Elevated beds reduce bending and stooping, making gardening comfortable for seniors, people with mobility challenges, or anyone with back problems. Waist-high beds allow you to work while standing, transforming gardening from a painful chore into an enjoyable activity.
Additionally, building raised garden beds gives you complete control over soil composition. You’re not fighting existing soil deficiencies or chemical imbalances. Instead, you create the ideal growing medium tailored to your plants’ specific needs, whether that’s a rich vegetable blend, well-draining herb mix, or acidic medium for blueberries.
Material Selection and Durability
Choosing the right materials for your elevated beds determines both longevity and growing success. Each option presents distinct advantages and considerations.
Cedar and other rot-resistant woods remain the most popular choice for home gardeners. Cedar’s natural oils provide excellent rot resistance, often lasting 10-15 years or longer. The warm appearance blends beautifully into landscapes, and wood conducts temperature gradually, creating stable growing conditions. When selecting cedar raised garden bed materials, choose heartwood rather than sapwood for maximum durability. Avoid pressure-treated wood from older sources, though modern pressure-treated lumber is safe for vegetable gardens according to current research.
Composite materials combine wood fibers and plastic for exceptional longevity. These boards resist rot, insects, and weathering for 20+ years, requiring minimal maintenance. While more expensive initially, composites eliminate annual staining or sealing needs. They don’t splinter, won’t rot from moisture exposure, and maintain their appearance through multiple seasons.
Metal options provide modern aesthetics and durability. Galvanized steel, aluminum, and corten steel create clean lines while lasting indefinitely. Metal garden edging works particularly well for geometric designs and contemporary landscapes. Metal conducts heat readily, warming soil quickly in spring but potentially overheating during intense summer heat. Consider afternoon shade in hot climates.
Stone and brick offer permanence and classic appeal. Garden stones create raised beds that last decades without degradation. The thermal mass of stone moderates soil temperature fluctuations, beneficial in variable climates. Stone construction requires more labor and expertise but delivers unmatched longevity and visual impact.
Recycled materials provide budget-friendly alternatives. Old pallets, reclaimed barn wood, and salvaged materials work temporarily but may lack durability. Pallets occasionally contain chemicals or contaminants, so research their history before using them for vegetable gardens.
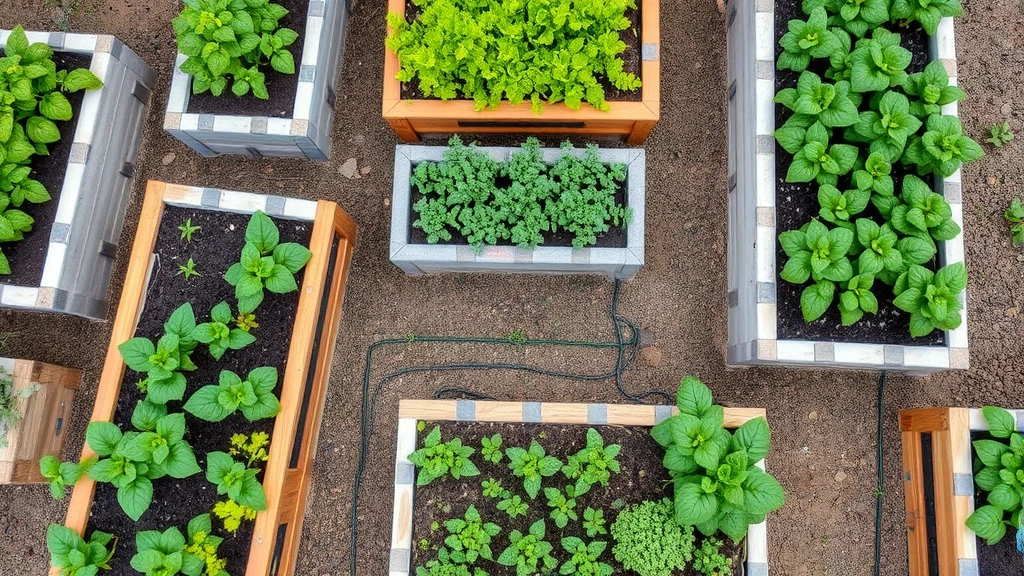
Design and Sizing Considerations
Proper dimensions ensure your elevated beds function efficiently and remain accessible. Standard recommendations emphasize practical functionality over arbitrary sizing.
Width matters most for accessibility. Beds should be no wider than 4 feet, allowing you to reach the center from either side without stepping into the bed. Narrower beds (3 feet) work better for elderly gardeners or those with limited reach. Depth depends on what you’re growing: 8-12 inches suffices for herbs and shallow-rooted vegetables, while 12-18 inches accommodates tomatoes, peppers, and root vegetables. Deep-rooted crops like carrots and parsnips benefit from 18-24 inch depths.
Length offers flexibility. Short beds (4-6 feet) work well in small spaces and remain manageable for one person. Longer beds (8-12 feet) maximize production in larger gardens. Consider your water access and irrigation needs when planning length—you want no point in the bed more than 3-4 feet from a water source.
Height influences both aesthetics and functionality. Knee-high beds (18-24 inches) provide significant accessibility benefits while maintaining attractive proportions. Waist-high beds (30-36 inches) minimize bending entirely, ideal for accessibility-focused gardens. Very tall beds (above 36 inches) can look disproportionate and require substantial filling material and weight distribution considerations.
Orientation matters for sunlight exposure. North-south orientation allows even sun exposure throughout the day. East-west orientation can create shaded areas, useful for protecting cool-season crops during hot summers but problematic for sun-loving vegetables during spring and fall.
Building Your Elevated Bed
Construction requires careful planning and proper technique. Start by selecting a level location with adequate drainage. Slightly sloped ground works, but avoid areas where water collects or where underground utilities run.
Clear the area of grass and weeds. You can remove sod completely or suppress it with cardboard and newspaper layers beneath your bed. The suppression method saves effort while providing a moisture-retaining barrier that eventually decomposes, improving soil structure.
Assemble your frame according to material specifications. For wood, use exterior-grade fasteners like galvanized or stainless steel screws (avoid nails, which loosen over time). Corner braces reinforce large beds and extend longevity. For composite materials, follow manufacturer guidelines for fastening and expansion allowances.
Ensure corners are square using the 3-4-5 triangle method: measure 3 units along one side, 4 units along an adjacent side, and the diagonal should measure 5 units. This confirms 90-degree angles essential for structural integrity.
Position your frame and check level in multiple directions. Minor adjustments now prevent water pooling and uneven soil settling later. Once positioned correctly, you’re ready to fill your bed with quality growing medium.
Soil Preparation and Filling
Soil quality determines your garden’s success more than any other factor. Rather than using pure topsoil, create a custom blend tailored to your crops.
The ideal vegetable garden blend combines 40% topsoil, 30% compost, 20% peat moss or coconut coir, and 10% perlite or vermiculite. This ratio provides nutrient density, water retention, and drainage. Adjust proportions based on your climate: increase compost in nutrient-poor regions, increase perlite in areas with excessive rainfall.
When filling your elevated bed, layer materials strategically. Start with 1-2 inches of cardboard or newspaper on the bottom to suppress weeds and provide a decomposition layer. Add 2-3 inches of coarse compost or aged manure for microbial activity and nutrient cycling. Then add your primary soil blend, watering as you go to settle material and eliminate air pockets.
Fill to within 2 inches of the top, accounting for settling over the first growing season. Top-dress with finished compost annually to maintain soil quality and add nutrients. Consider adding garden fertilizer appropriate to your crops at planting time.
Soil pH matters significantly. Most vegetables prefer slightly acidic to neutral pH (6.0-7.0). Test your soil before planting and amend accordingly. Lime raises pH, sulfur lowers it. These amendments work slowly, so apply them several weeks before planting for best results.
Install irrigation before planting. Drip lines or soaker hoses deliver water directly to roots, reducing waste and disease pressure. Best expandable garden hose options provide flexibility for connecting to your main water source. Proper irrigation prevents the common problem of uneven moisture that leads to blossom end rot in tomatoes and splitting in root vegetables.
Seasonal Management Tips
Elevated beds require seasonal attention to maintain productivity year after year.
Spring preparation begins with soil assessment. Check moisture levels—elevated beds dry out faster than ground-level gardens. Add 1-2 inches of compost before planting to replenish nutrients removed by previous seasons. Warm soil temperatures mean you can plant earlier than traditional gardens, typically 2-3 weeks before your last frost date.
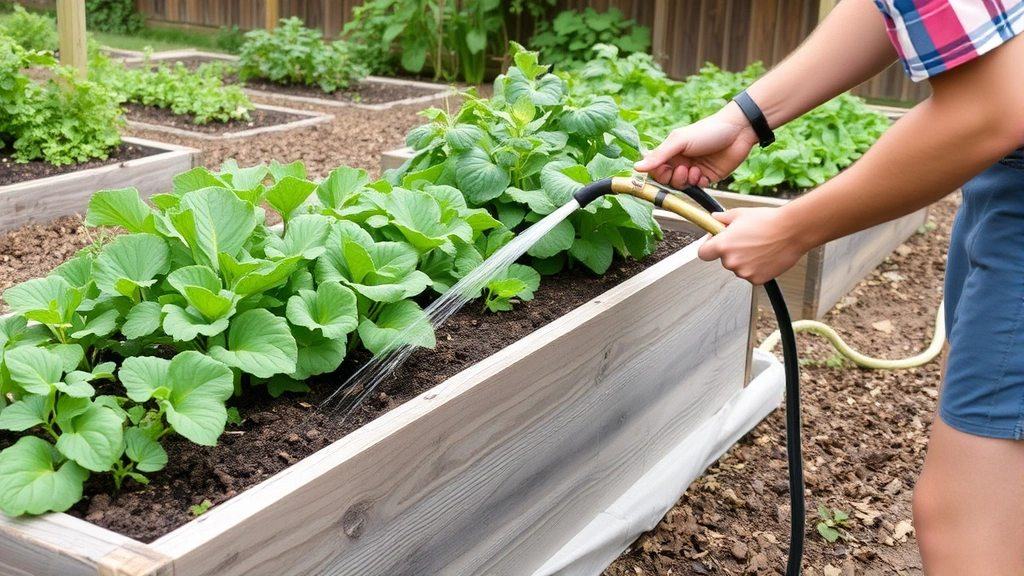
Summer maintenance focuses on consistent moisture and nutrient management. Elevated beds require more frequent watering than in-ground gardens due to increased drainage and sun exposure. Water deeply but less frequently to encourage deep root development. Mulch heavily (3-4 inches) with straw or shredded leaves to retain moisture, moderate soil temperature, and suppress weeds.
Monitor for pests regularly. Elevated beds attract beneficial insects and predators that control pest populations naturally. However, Japanese beetles, squash bugs, and other pests still visit. Hand-pick larger insects and use appropriate organic controls when populations exceed acceptable levels.
Fall management extends your growing season and prepares beds for winter. Plant cool-season crops like lettuce, kale, and root vegetables in late summer for fall harvest. Cover beds with row covers to extend seasons by several weeks. Remove spent plants and add them to compost piles—diseased material should be disposed of separately.
Winter care protects your investment. In cold climates, beds may heave slightly as soil freezes and thaws. This rarely causes damage but looks unsightly. Avoid walking on frozen beds, which compacts soil. Add leaves or compost to beds in fall; decomposition over winter improves spring soil quality while providing insulation.
Annual maintenance includes checking structural integrity, replacing rotted boards, and refreshing soil. Most gardeners find that top-dressing with 1-2 inches of compost annually maintains soil quality indefinitely. Every 3-5 years, consider complete soil replacement in older beds to prevent nutrient depletion and disease accumulation.
FAQ
How deep should elevated garden beds be?
Depth depends on what you’re growing. Herbs and shallow-rooted vegetables need 8-12 inches minimum. Most vegetables perform well with 12-18 inches. Deep-rooted crops like carrots, parsnips, and asparagus benefit from 18-24 inches of soil. Very deep beds (24+ inches) work for permanent perennial plantings but require substantial filling material and expense.
Can I use regular wood for elevated beds?
Regular untreated wood deteriorates quickly, typically lasting 3-5 years before rotting. Cedar, redwood, and pressure-treated lumber last significantly longer. Composite materials and metal provide the longest lifespan. For temporary beds or budget-conscious gardeners, regular wood works fine with the understanding that replacement will be necessary relatively soon.
Should I line the bottom of my elevated bed?
A cardboard or newspaper layer suppresses grass and weeds while allowing drainage and eventual decomposition. Hardware cloth or metal mesh prevents burrowing rodents from accessing your crops. A solid liner (plastic, rubber) prevents drainage and isn’t recommended for most situations. Most gardeners find cardboard provides the best balance of weed suppression and drainage.
How much does it cost to build elevated garden beds?
Costs vary dramatically by material. A 4×8 foot bed costs $50-150 for untreated wood, $150-300 for cedar, $300-500 for composite materials, and $400+ for metal or stone. Soil and amendments add $100-300 depending on quality and quantity. Budget-conscious gardeners can build functional beds for $200-300 total; premium installations cost $1,000+.
Can elevated beds be used year-round?
Yes, elevated beds work excellently for year-round gardening. Spring and summer production is obvious, but fall and winter crops extend your harvest. Cool-season crops like kale, spinach, and root vegetables thrive in fall. In mild climates, winter gardening produces fresh greens continuously. Row covers and cold frames further extend seasons.
How often should I water elevated garden beds?
Frequency depends on weather, soil composition, and plant types. Most vegetables need consistent moisture—roughly 1-1.5 inches weekly. Elevated beds dry faster than ground-level gardens, requiring more frequent watering during hot, dry periods. Drip irrigation or soaker hoses deliver consistent moisture efficiently. Mulching reduces watering frequency significantly.


