Grow Your Own Oats? Expert Gardener Tips
Growing oats in your home garden might seem unconventional, but it’s an achievable and rewarding project for gardeners looking to expand beyond traditional vegetables. Oats are a cool-season grain crop that can thrive in most climates with proper planning and care. Whether you’re interested in harvesting grain for homemade porridge, animal feed, or simply exploring grain cultivation, this comprehensive guide will walk you through every step of the process.
Unlike many specialty crops, oats require minimal maintenance once established and can be grown in relatively small spaces. With the right knowledge about planting times, soil preparation, and harvesting techniques, you can successfully produce your own nutritious oats. This guide combines expert insights with practical gardening wisdom to help you get started.
Why Grow Oats at Home
Growing oats offers numerous advantages for home gardeners seeking self-sufficiency and a deeper connection to their food sources. Oats are nutrient-dense grains packed with fiber, protein, and essential minerals, making them a valuable addition to any homestead. When you cultivate oats yourself, you control exactly what goes into your food supply without pesticides or chemical treatments.
For those interested in gardening tips for beginners, oats present an excellent opportunity to learn about grain cultivation. Unlike high-maintenance crops, oats are relatively forgiving and don’t demand constant attention. They also improve soil health through their root systems and can serve as a cover crop to prevent erosion and suppress weeds.
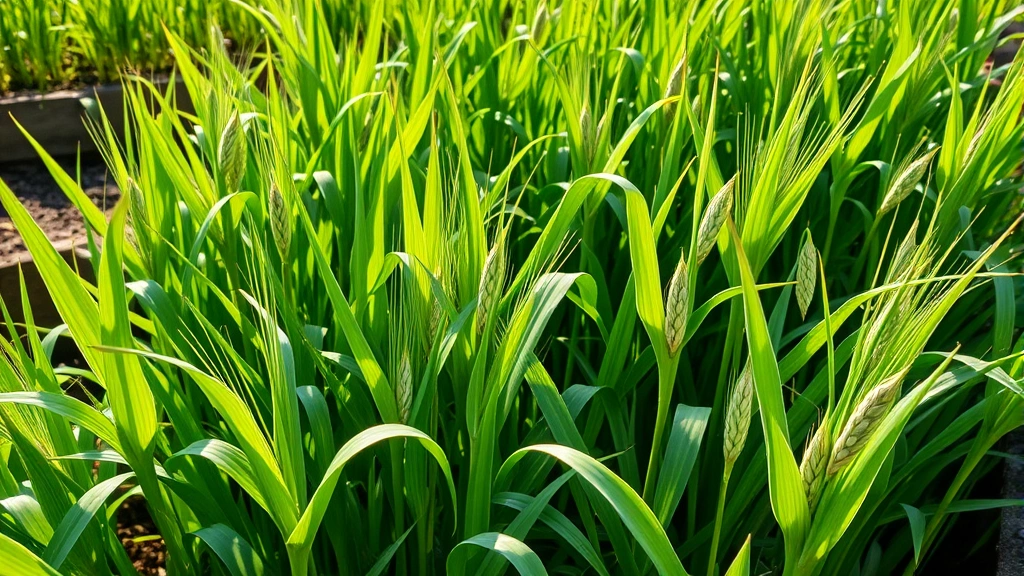
Additionally, growing oats provides educational value for families, allowing children to witness the complete journey from seed to harvest. The process teaches valuable lessons about plant biology, seasonal cycles, and food production. Many gardeners also appreciate oats for their aesthetic appeal during the growing season, with their delicate, nodding seed heads creating visual interest in the landscape.
Choosing the Right Oat Varieties
Selecting appropriate oat varieties is crucial for success in your home garden. The two primary categories are spring oats and winter oats, each suited to different climates and planting schedules. Spring oats are planted in early spring and harvested in late summer or early fall, making them ideal for most home gardeners in cooler climates.
Spring Oat Varieties: Popular spring varieties include ‘Avena,’ ‘Pinnacle,’ and ‘Marion.’ These cultivars mature in 90-120 days and perform well in northern regions. They’re typically more forgiving for beginners and don’t require vernalization (a cold period) to produce grain.
Winter Oat Varieties: Winter oats like ‘Horizon’ and ‘Nubark’ are planted in fall and harvested the following summer. They’re better suited for regions with mild winters and offer higher yields. However, they require proper cold exposure to develop properly and may not survive harsh winters in northern areas.
Consider your local climate, available space, and harvest timeline when selecting varieties. If you’re unsure which option suits your region, contact your local American Society of Agronomy or extension service for region-specific recommendations.
Soil Preparation and Garden Setup
Proper soil preparation is fundamental to growing healthy, productive oats. Begin by testing your soil to understand its composition, pH level, and nutrient content. Oats prefer slightly acidic to neutral soil with a pH between 6.0 and 7.5. A soil test will reveal any deficiencies that need addressing before planting.
Following guidelines for preparing garden soil for a thriving garden, work in organic matter such as compost or well-aged manure. Oats aren’t extremely demanding about fertility but benefit from moderate nitrogen levels and good drainage. Avoid waterlogged conditions, as oats are susceptible to root rot in overly wet soil.
If your garden has heavy clay soil, consider implementing raised bed gardening advantages to improve drainage and create optimal growing conditions. A raised bed measuring 4 feet by 8 feet provides sufficient space for a productive oat patch. Till or loosen the soil to a depth of 8-10 inches, removing any rocks, roots, or debris that might impede seed-to-soil contact.
For small-space gardeners, even a 3-foot by 5-foot area can yield a respectable harvest. Container growing is also possible, though you’ll need large, deep containers at least 12 inches in depth with adequate drainage holes.
Planting Your Oat Seeds
Timing is critical when planting oats. Spring oats should be sown as soon as soil can be worked in early spring, typically 2-3 weeks before the last frost date. Winter oats require planting in fall, usually 4-6 weeks before the first hard frost, allowing sufficient time for germination and establishment before cold weather arrives.
Prepare your seedbed by creating a smooth, firm surface. Oat seeds need excellent soil contact to germinate reliably. Scatter seeds directly across prepared beds at a rate of approximately 3-4 pounds per 1,000 square feet, or follow packet instructions for your specific variety. For smaller gardens, this translates to roughly 1-2 tablespoons per 25 square feet.
Planting Steps:
- Broadcast seeds evenly across the prepared soil
- Gently rake or tamp seeds into soil to ensure contact
- Water thoroughly but gently to avoid displacing seeds
- Keep soil consistently moist until seedlings emerge (7-14 days)
- Thin seedlings if they become too crowded, spacing plants 2-3 inches apart
Some gardeners prefer drilling seeds in rows spaced 6-8 inches apart, which simplifies weeding and harvesting. This method also allows easier monitoring of plant health and development throughout the growing season.

Watering and Fertilizing Guidelines
Oats require moderate, consistent moisture throughout their growing season. Provide approximately 1 inch of water per week through rainfall or irrigation. During dry spells, water deeply to encourage strong root development. Avoid overwatering, which promotes fungal diseases and lodging (when plants fall over).
Regarding fertilization, oats have relatively modest nutrient requirements compared to easy-to-grow vegetables for beginners. If you’ve amended your soil with compost before planting, additional fertilization may be unnecessary. However, if soil testing indicated nitrogen deficiency, apply a balanced fertilizer (10-10-10) at half strength when plants reach 4-6 inches in height.
Organic gardeners can side-dress plants with compost or apply fish emulsion every 3-4 weeks during active growth. Avoid excessive nitrogen, which encourages leafy growth at the expense of grain production and increases susceptibility to lodging and disease.
Monitor plants throughout the season for signs of nutrient deficiency such as yellowing leaves or stunted growth. Address these issues promptly with appropriate soil amendments to ensure optimal development and grain yield.
Managing Pests and Diseases
One of the major advantages of growing oats is their relative resistance to pests and diseases. However, several issues can occasionally occur in home gardens. Early identification and intervention prevent serious problems from developing.
Common Pests: Armyworms, wireworms, and Hessian flies can damage oat plants, though infestations are usually minimal in home gardens. Encourage beneficial insects like ladybugs and parasitic wasps by planting flowers nearby. If pest pressure becomes problematic, organic insecticidal soaps or neem oil provide effective control options.
Disease Management: Crown rust, powdery mildew, and leaf spots occasionally affect oats in humid conditions. Ensure adequate air circulation by not overcrowding plants. Remove affected leaves promptly and avoid overhead watering, which promotes fungal development. Select disease-resistant varieties when available, and practice crop rotation by planting oats in different garden locations each year.
Most home gardeners find that healthy plants in well-maintained gardens experience minimal pest and disease pressure. Focus on creating robust growing conditions through proper soil preparation, appropriate spacing, and consistent care.
Harvesting and Processing Your Oats
Knowing when to harvest is essential for obtaining quality grain. Oats are ready for harvest when the seed heads turn golden-brown and the grains are hard enough that you cannot easily dent them with your fingernail. This typically occurs 90-120 days after planting, depending on variety and weather conditions.
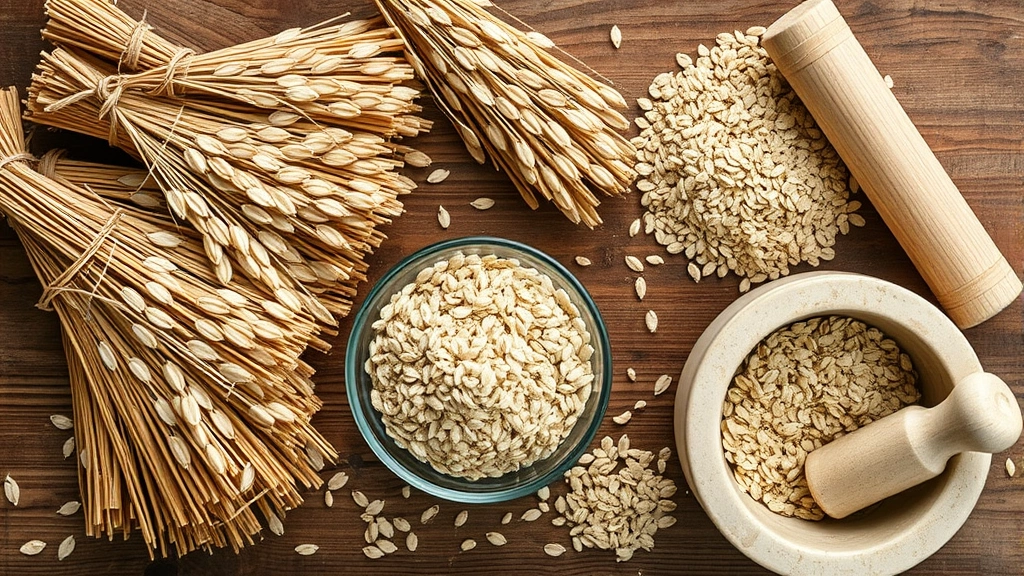
Harvesting Methods: For small gardens, hand-harvesting works perfectly. Cut plant stems just below the seed heads using a sharp sickle, scythe, or hedge clippers. Bundle the cut material and allow it to dry further in a warm, dry location for 1-2 weeks, standing the bundles upright in a garage or shed to facilitate air circulation.
Alternatively, allow plants to dry completely in the field before cutting, which reduces post-harvest processing time. However, this method risks grain loss from shattering if weather turns wet or windy.
Threshing and Winnowing: Once fully dried, separate the grain from the chaff through threshing. For small quantities, place dried bundles in a clean sheet or bag and beat them with a stick or flail. The grain will fall to the bottom while chaff remains on top. Alternatively, rub bundles between your hands over a container to release grains.
Winnowing removes remaining chaff by pouring grain slowly from one container to another in a gentle breeze or in front of a fan. The lighter chaff blows away while heavier grain falls straight down. This process requires patience but yields clean, usable oats.
Store harvested oats in airtight containers in a cool, dry location. Properly stored oats remain viable for 1-2 years, though flavor and nutritional quality are best within the first year.
Making Porridge from Your Homegrown Oats
The ultimate reward for growing oats is enjoying delicious porridge made from your own harvest. Homegrown oats offer superior flavor and nutritional value compared to commercially processed alternatives. Before cooking, ensure your oats are completely dry and free of debris.
Basic Oat Porridge Recipe:
- 1 cup rolled or steel-cut homegrown oats
- 2-3 cups water or milk (or combination)
- Pinch of salt
- Sweetener to taste (honey, maple syrup, or brown sugar)
- Optional toppings: cinnamon, berries, nuts, or seeds
If using whole oat groats from your harvest, you’ll need to process them first. Whole groats require dehulling, which can be accomplished by gently crushing them with a mortar and pestle or running them through a hand mill. This removes the inedible hull while preserving the nutritious bran and germ.
Cooking Instructions: Bring water or milk to a boil in a pot. Stir in oats and salt, then reduce heat to medium-low. Simmer for 30-40 minutes if using steel-cut oats, or 20-30 minutes for rolled oats, stirring occasionally to prevent sticking. The porridge is ready when it reaches your desired consistency. Add sweetener and toppings according to preference.
Many gardeners find that homegrown oats develop a nuttier, more complex flavor than store-bought varieties. This enhanced taste makes homemade porridge a truly special breakfast experience. Experiment with different cooking methods and flavor combinations to discover your favorite preparations.
Beyond porridge, homegrown oats work beautifully in granola, baked goods, smoothies, and oatmeal cookies. The versatility of this grain makes it a valuable crop for home gardeners interested in culinary applications.
FAQ
Can I grow oats in containers?
Yes, container growing is possible with large pots at least 12 inches deep filled with quality potting soil. Containers require more frequent watering and may produce lower yields than in-ground gardens, but they work well for small-space gardeners.
How much space do I need to grow a meaningful oat harvest?
A 4-foot by 8-foot raised bed or similar garden space can produce 15-25 pounds of grain, depending on variety and growing conditions. For larger harvests, dedicate more space or plant multiple beds.
What’s the difference between spring and winter oats?
Spring oats are planted in early spring and harvested in late summer, while winter oats are planted in fall and harvested the following summer. Winter oats typically yield more grain but require proper cold exposure and may not survive harsh winters in northern regions.
Do I need special equipment to process homegrown oats?
Basic equipment like sieves, fans, and hand mills are sufficient for small-scale processing. Many home gardeners use simple methods like rubbing dried bundles and winnowing with fans or natural breezes.
Can oats improve my garden soil?
Yes, oats serve as excellent cover crops that prevent erosion, suppress weeds, and improve soil structure through their root systems. After harvesting grain, you can leave roots in the ground to decompose and enhance soil health.
What yield can I expect from a home garden?
A well-maintained 100-square-foot garden typically yields 10-20 pounds of cleaned grain. Yields depend on variety, climate, soil quality, and growing practices. First-time growers often achieve lower yields as they develop experience.
Are there any companion plants that grow well with oats?
Oats grow well alongside other cool-season crops like peas and beans. Avoid planting with crops that have similar pest or disease issues. Flowers like calendula and sunflowers planted nearby attract beneficial insects that help manage pests.


