Build Raised Garden Beds: DIY Expert Tips
Raised garden beds are one of the most rewarding projects you can undertake as a gardener. Whether you’re working with poor soil, limited space, or simply want better control over your growing environment, learning how to make a raised garden bed opens up endless possibilities for cultivating vegetables, herbs, and flowers. These elevated growing spaces offer superior drainage, warmer soil in spring, easier access for planting and harvesting, and a cleaner, more organized garden aesthetic.
Building your own raised beds doesn’t require advanced carpentry skills or expensive materials. With the right planning, tools, and materials, you can create durable, attractive garden beds that will serve you for years. This comprehensive guide walks you through every step of the process, from selecting materials and sizing your beds to filling them with quality soil and preparing them for planting.
Why Choose Raised Garden Beds
Raised garden beds solve numerous gardening challenges while providing substantial benefits. If you’re dealing with compacted clay soil, contaminated ground, or uneven terrain, raised beds allow you to bypass these issues entirely. You control the soil composition from the start, ensuring optimal growing conditions for whatever you plant.
The elevated design also improves drainage significantly, preventing waterlogging that can rot roots and encourage fungal diseases. In cooler climates, raised beds warm up faster in spring because the soil receives more sun exposure and air circulation. The defined boundaries make garden organization simpler and reduce the spread of weeds from surrounding areas.
For accessibility, raised beds are invaluable. Gardeners with mobility challenges, back pain, or those simply preferring to work at a higher level find raised beds dramatically reduce strain. The contained space also makes it easier to implement pest management strategies and maintain consistent watering schedules. Additionally, raised beds create clear visual definition in your landscape, enhancing curb appeal while maximizing your growing potential.
Materials and Tools You’ll Need
Selecting the right materials is crucial for durability and safety. The most popular choice is untreated cedar or redwood, which naturally resist rot and last 10-15 years. Composite materials blend wood fibers with plastic for extended longevity (20+ years) but cost more initially. Avoid pressure-treated wood containing harmful chemicals that can leach into soil.
For a standard 4x8x12 inch bed, gather these materials:
- Four boards (cedar or composite): typically 2×12 or 2×10 lumber
- Corner brackets or galvanized wood screws (3-inch length)
- Landscape fabric (optional but recommended)
- Soil mix and amendments
- Wood stain or sealant (food-safe if desired)
Essential tools include:
- Power drill or screwdriver
- Circular saw or miter saw (if cutting boards)
- Level
- Measuring tape
- Work gloves
- Safety glasses
- Shovel and spade
- Wheelbarrow
You’ll also want proper garden gloves to protect your hands during construction and soil preparation.
Choosing the Right Location
Location determines your garden’s success more than any other factor. Most vegetables need 6-8 hours of direct sunlight daily, so observe your yard throughout the day before deciding. Morning sun is particularly valuable as it dries dew, reducing disease pressure. If you want to grow herbs or shade-tolerant greens, 3-4 hours of afternoon light suffices.
Consider proximity to water sources. A bed positioned near a spigot saves time and effort with watering. However, avoid areas where water pools during heavy rain, as this leads to waterlogging and root rot. Good air circulation prevents fungal issues, so don’t tuck beds into corners or against fences where air stagnates.
Check for existing tree roots and underground utilities before digging. You want level or slightly sloping ground (maximum 5% slope). If your yard is significantly sloped, build a retaining wall on the downslope side for stability. Avoid areas directly under trees, as falling leaves create excessive shade and root competition while draining moisture from the soil.
Sizing Your Raised Bed
Standard raised beds measure 4 feet wide by 8 feet long, a size that balances accessibility with efficient space use. The 4-foot width allows you to reach the center from either side without stepping into the bed. Lengths can vary—8 feet is common, but 6, 10, or even 12-foot beds work depending on your space and preferences.
Height typically ranges from 8 to 18 inches. Shallower beds (8-10 inches) work for greens and herbs, while 12 inches accommodates most vegetables. Go deeper (14-18 inches) for root vegetables like carrots, beets, and parsnips. Taller beds (18-24 inches) benefit those with mobility challenges or back pain.
For small spaces, consider 2×2, 2×4, or 3×3 foot beds. These work wonderfully for focused plantings or vertical growing. You can also arrange multiple smaller beds in patterns that suit your landscape design. Calculate the square footage you need based on what you want to grow—generally, 100 square feet per person provides a substantial vegetable supply throughout the season.
Step-by-Step Construction Guide
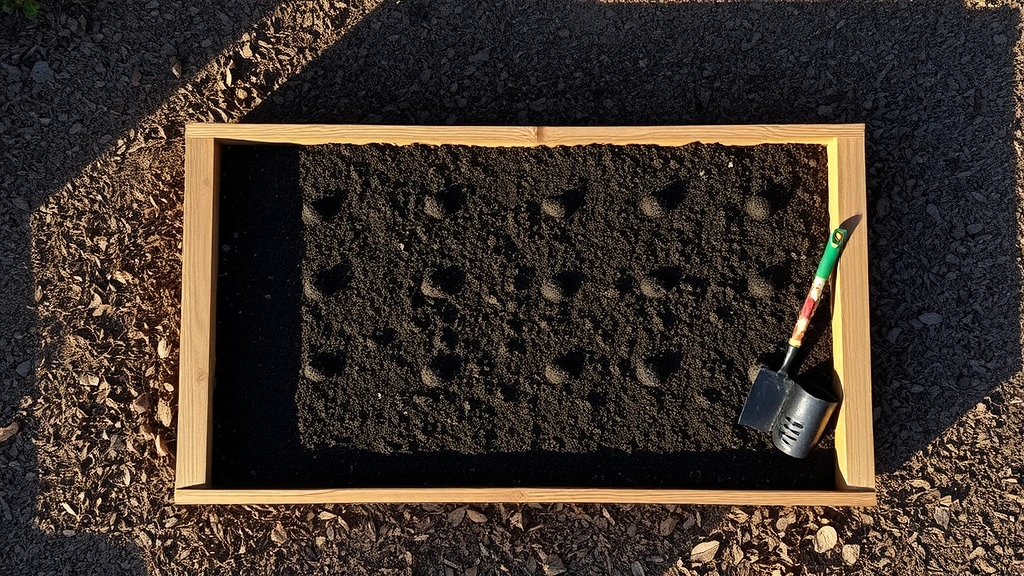
Step 1: Prepare the Ground
Choose your location and mark the perimeter with string or chalk. Remove grass, weeds, and debris from the area. You don’t need to dig out the sod entirely—simply mow it short and remove any large rocks. This cleared space prevents weeds from growing up through your bed.
Step 2: Assemble the Frame
Lay your boards in a rectangle on level ground. For corners, you have several options: use L-brackets bolted to the boards’ interior, drive 3-inch galvanized screws through the end grain of one board into the side of another, or use corner posts. Pre-drill screw holes to prevent wood splitting. Use at least two fasteners per corner for stability.
Step 3: Level and Position
Once assembled, carefully move the frame to your prepared location. Use a level to check both directions. Minor adjustments can be made by adding or removing soil beneath the frame. Don’t skip this step—an unlevel bed causes water to pool on one side.
Step 4: Add Landscape Fabric
Line the bottom with landscape fabric to suppress weeds while allowing water drainage. Overlap pieces by 6 inches and secure with staples or landscape pins. This barrier keeps perennial weeds from penetrating upward, though annual weeds still germinate in your soil.
Step 5: Fill with Soil
This is covered in detail in the next section, but generally, you’ll layer materials starting with coarser components at the bottom and finishing with quality topsoil at the top.
Filling Your Bed with Soil
Don’t simply fill raised beds with native soil. Instead, create a quality growing medium. The most economical approach uses a lasagna method: layer cardboard or newspaper at the bottom, then alternate coarse materials (wood chips, straw, aged compost) with finer materials (grass clippings, leaves) and topsoil.
For immediate planting, the simplest method combines three parts quality topsoil, one part compost, and one part peat moss or coconut coir. This blend provides excellent drainage while retaining adequate moisture and nutrients. A 4x8x12 inch bed requires approximately 32 cubic feet or about 12 bags of bagged soil.
When preparing garden soil for a thriving garden, consider adding amendments based on your plants’ needs. Vegetables typically benefit from 2-3 inches of well-rotted compost mixed into the top layer. If growing acid-loving plants, incorporate sulfur. For alkaline-loving plants, add lime. Work amendments in thoroughly before planting.
Fill the bed in stages, watering each layer lightly to help it settle. This prevents settling issues after planting. Allow the bed to sit for a few days before planting, especially if using fresh compost or manure. The soil will compact slightly, and this settling period helps identify any drainage issues.
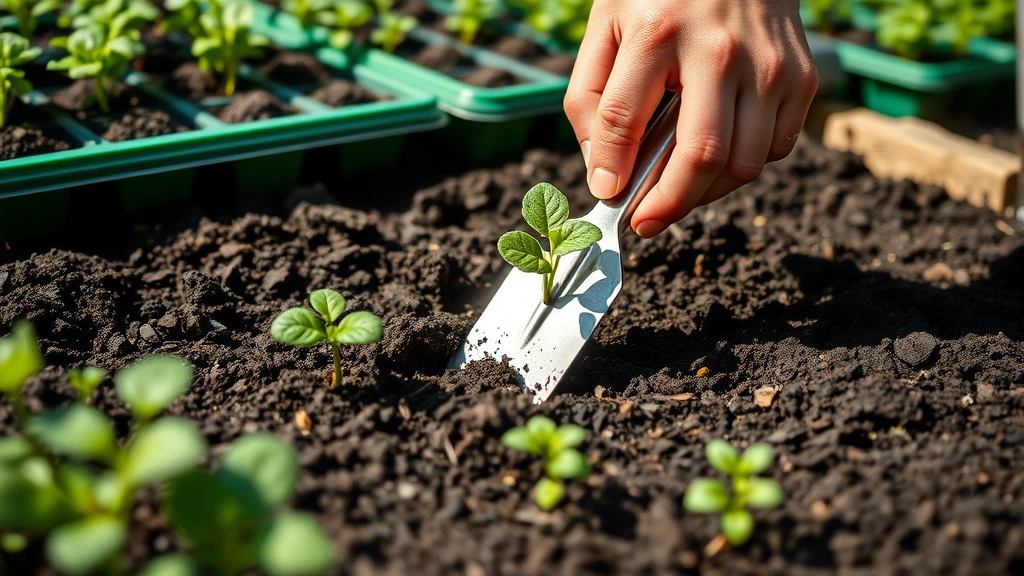
Preparing for Planting
Before planting, test your soil if possible. A simple pH test from your local extension office costs little and provides valuable information. Most vegetables prefer slightly acidic soil (6.0-7.0 pH). Once you know your pH, you can adjust with amendments.
Plan your layout before planting. Tall plants like tomatoes and beans should be positioned where they won’t shade shorter plants. Consider companion planting—basil grows beautifully with tomatoes, while marigolds deter pests throughout the garden. If growing peas in your garden, position them where they can climb a trellis without creating excessive shade.
Install irrigation before planting. Drip lines or soaker hoses deliver water directly to root zones, reducing waste and disease. A simple setup connects to your best garden hose with a timer for consistent, automated watering. This is especially valuable during hot summer months when daily watering becomes necessary.
Create pathways between beds if you’re building multiple raised beds. These prevent soil compaction and make access easier. Mulch pathways with wood chips to suppress weeds and improve appearance. This organized layout also makes it simpler to spot pests and diseases early.
Maintenance Tips for Longevity
Protecting Your Wood Structure
Cedar and redwood naturally resist decay, but applying a food-safe sealant extends their life significantly. Avoid pressure-treated products and toxic stains. Linseed oil or commercial food-safe sealants work well. Reapply every 2-3 years for maximum protection. Check corners and joints annually for signs of rot, and replace boards as needed.
Soil Management
Raised beds gradually settle as organic matter decomposes. Add 1-2 inches of compost annually to maintain level and replenish nutrients. This practice also improves soil structure and water retention. Top-dress with compost in early spring and again in mid-summer if growing season is long.
Weed Control
Even with landscape fabric, some weeds establish in raised beds. Remove them promptly before they set seed. Mulch the soil surface with 2-3 inches of straw or wood chips to suppress weed germination and conserve moisture. Keep mulch a few inches away from plant stems to prevent rot.
Rotation and Rest
Practice crop rotation annually to prevent pest and disease buildup. Don’t grow the same plant family in the same bed consecutively. After several years of intensive production, consider giving a bed a rest year, planting a cover crop like clover that you’ll turn into the soil to boost fertility.
Seasonal Preparations
In fall, remove spent plants and add them to compost. Plant cover crops in vacant beds to prevent erosion and suppress weeds over winter. In spring, add fresh compost before planting. Winter in cold climates may crack wooden frames, so inspect thoroughly when soil thaws.
Joining Community Gardening
If you’re interested in expanding your gardening knowledge and connecting with fellow gardeners, look for a community garden near me where you can share experiences and learn from experienced gardeners.

FAQ
How deep should a raised garden bed be?
For most vegetables, 12 inches of depth is ideal. Shallow beds (8 inches) work for greens and herbs, while deep beds (18 inches) accommodate root vegetables. Consider your plants’ needs and your physical capabilities when deciding.
Can I use pressure-treated wood for raised beds?
Modern pressure-treated lumber is safer than older formulations, but untreated cedar or composite materials are better choices for vegetable gardens. These avoid any potential chemical leaching into soil and food.
How often should I water raised beds?
Raised beds dry faster than in-ground gardens due to increased air circulation. Water when the top inch of soil feels dry. In hot weather, this may mean daily watering. Drip irrigation systems maintain consistent moisture with minimal effort.
What’s the best soil mixture for raised beds?
A blend of three parts topsoil, one part compost, and one part peat moss or coconut coir creates an excellent growing medium. Adjust based on what you’re growing—vegetables need richer soil than ornamentals.
How long do raised garden beds last?
Cedar and redwood beds typically last 10-15 years. Composite materials last 20+ years. Regular maintenance, including applying sealant and replacing rotted sections, extends lifespan significantly.
Can I build raised beds on top of grass?
Yes, though removing grass first prevents it from creeping into your bed. Landscape fabric at the bottom provides additional weed suppression. The grass underneath will decompose, enriching your soil over time.
What size raised bed is easiest to maintain?
A 4×8 foot bed balances accessibility with efficiency. Beds wider than 4 feet are difficult to reach the center without stepping in. Shorter or narrower beds work well for small spaces or specific plantings.


