
How to Grow Sage: Expert Herb Gardening Tips
Sage is one of the most rewarding herbs to cultivate in any garden, offering culinary versatility, medicinal properties, and stunning ornamental appeal. Whether you’re a seasoned gardener or just beginning your journey into easy-to-grow plants for beginners, sage presents an excellent opportunity to expand your herb garden with minimal fuss. This Mediterranean native thrives in various climates and requires surprisingly little maintenance once established, making it an ideal choice for anyone seeking reliable, productive herb gardening.
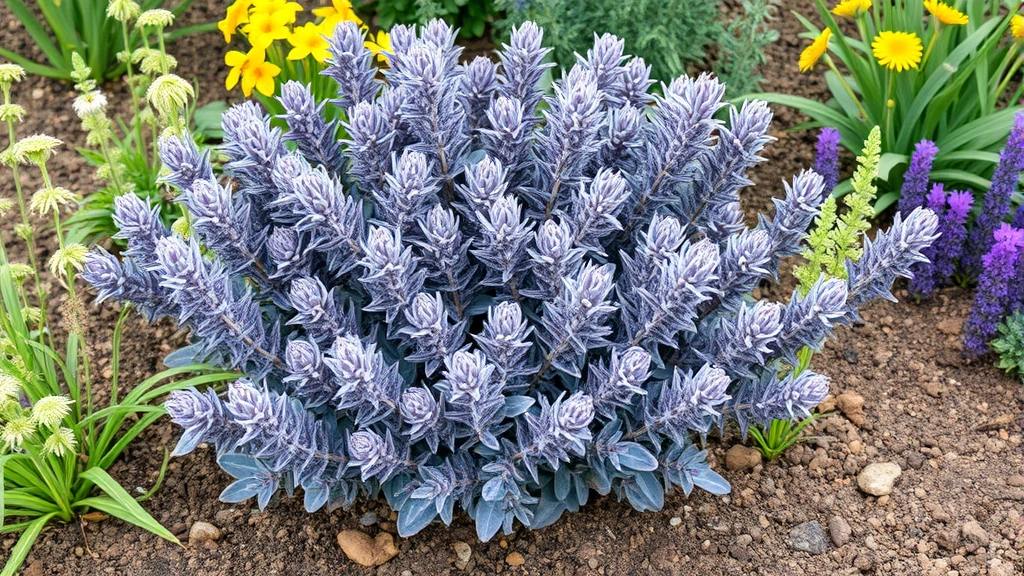
With its distinctive velvety leaves, subtle earthy flavor, and attractive purple, pink, or blue flowers, sage deserves a prominent place in your garden beds or containers. From common garden sage to decorative varieties like purple sage and golden sage, there’s a cultivar suited to nearly every gardening preference and climate zone. In this comprehensive guide, we’ll walk you through everything you need to know about growing, nurturing, and harvesting this exceptional herb.
Understanding Sage Varieties and Selection
Before you begin your sage-growing journey, familiarize yourself with the various types available. Common sage (Salvia officinalis) is the most popular culinary variety, featuring gray-green leaves and a robust flavor perfect for cooking. This hardy perennial is your best bet if you’re new to herb gardening and want reliable results year after year.
Purple sage offers both aesthetic beauty and culinary merit, with deep purple foliage that adds visual interest to your garden landscape. Its slightly peppery flavor works wonderfully in meat dishes and herbal teas. Golden sage brings warmth to garden designs with its yellow-variegated leaves, while maintaining the classic sage taste you expect.
Other noteworthy varieties include pineapple sage, which produces delightful tropical-scented foliage and brilliant red flowers that attract hummingbirds, and clary sage, prized for its ornamental qualities and historical medicinal uses. Consider your primary use—culinary, ornamental, or medicinal—when selecting your sage variety. For most gardeners, starting with common garden sage ensures success while you develop your herb-growing skills.
Ideal Growing Conditions and Site Selection
Sage thrives in full sunlight, requiring at least 6-8 hours of direct sun daily for optimal growth and flavor development. Choose a location in your garden that receives consistent morning sun, which helps dry dew and prevents fungal issues. If you live in extremely hot climates, afternoon shade during peak summer heat can prevent stress on established plants.
This Mediterranean herb strongly prefers well-draining soil and excellent air circulation. Avoid planting sage in low-lying areas where water collects or in spots prone to excessive humidity, as these conditions create an environment where root rot and powdery mildew thrive. Elevated beds or slightly sloped areas provide ideal drainage characteristics that sage demands.
Temperature-wise, sage is remarkably cold-hardy, surviving winters in USDA zones 5-9 depending on variety. Common sage tolerates temperatures down to -20°F (-29°C) once established, making it suitable for northern gardens. However, consistent moisture combined with freezing temperatures can damage roots, so ensure proper drainage during winter months. If you’re in colder zones, consider raised bed gardening advantages that naturally improve drainage and soil warmth.
Soil Preparation and Garden Setup
Understanding proper soil preparation is fundamental to sage success. Begin by preparing your garden soil for a thriving garden with special attention to drainage characteristics. Sage demands well-draining soil with a pH between 6.0 and 7.0, though it tolerates slightly alkaline conditions. Unlike many herbs, sage actually prefers moderately poor to average soil—overly rich soil promotes excessive leafy growth at the expense of essential oil concentration.
If your garden soil is heavy clay, amend it generously with coarse sand, perlite, or fine gravel to improve drainage. Mix in aged compost or well-rotted manure, but use restraint; 1-2 inches worked into the top 8-12 inches of soil provides sufficient organic matter. For container growing, create a mix of 50% quality potting soil and 50% perlite or coarse sand to ensure superior drainage.
Avoid adding fresh manure or excessive nitrogen-rich amendments, which encourage soft, weak growth susceptible to disease and pest damage. Sage’s evolution in rocky, sparse Mediterranean habitats means it thrives in conditions many other plants would struggle with. Your goal is creating lean, well-draining conditions that encourage deep root development and concentrated flavor compounds.
Planting Sage: Seeds and Transplants
You can start sage from seeds, though transplants offer faster results and more consistent performance for beginners. Starting from seed indoors requires starting 6-8 weeks before your last frost date. Scatter seeds on moist seed-starting mix, press lightly into the surface, and provide bottom heat around 70°F for germination, which typically occurs within 10-14 days. Sage seeds need light to germinate, so don’t cover them with soil.
Once seedlings develop their first true leaves, thin them to 2-3 inches apart and provide bright light to prevent leggy growth. Harden off seedlings gradually over 7-10 days before transplanting outdoors after the last frost danger passes.
Transplanting purchased plants or your homegrown seedlings requires spacing them 18-24 inches apart, allowing room for mature spread. Dig a hole slightly larger than the root ball, position the plant so the soil level matches the container surface, and firm soil around the base. Water thoroughly to settle soil and eliminate air pockets. Avoid planting too deep, as buried stems are prone to rot.
For companion planting with other garden herbs, sage pairs beautifully with rosemary, thyme, and lavender—all Mediterranean natives sharing similar growing requirements. This creates a cohesive herb garden section with consistent care needs.
Watering and Moisture Management
Proper watering is crucial for sage establishment yet surprisingly simple once you understand the plant’s preferences. Newly planted sage requires consistent moisture for the first 2-3 weeks while roots establish, but never allow standing water or waterlogged conditions. Water when the top inch of soil feels dry to the touch, typically every 2-3 days depending on weather and soil type.
Established sage plants become remarkably drought-tolerant, requiring watering only during prolonged dry spells or when grown in containers. In most climates, spring rainfall and occasional deep watering suffice for in-ground plants. The key principle: it’s better to underwater than overwater. Sage evolved in Mediterranean climates with dry summers and tolerates moisture deficit far better than excess moisture.
Container-grown sage needs more frequent watering since pots dry quickly, especially in hot weather. Check container soil daily and water when the top inch becomes dry. Ensure containers have drainage holes; standing water is sage’s primary enemy. Reduce watering frequency in fall and winter when growth slows and evaporation decreases.
Water at soil level rather than overhead to minimize leaf wetness and reduce fungal disease pressure. Morning watering allows any inadvertent foliage moisture to dry quickly. Mulching around plants with 1-2 inches of straw or wood chips helps moderate soil moisture while suppressing weeds, though keep mulch several inches away from the plant base to prevent rot.
Fertilizing Your Sage Plants
Sage’s minimal fertilizer requirements often surprise new growers accustomed to heavy-feeding plants. In fact, over-fertilizing creates more problems than it solves, promoting excessive soft growth that attracts pests and dilutes the concentrated flavors you’re growing sage for. Established plants typically need no supplemental feeding if grown in reasonably decent soil with annual mulch applications.
For container-grown sage or plants showing yellowing leaves, apply a balanced, slow-release fertilizer (such as 5-5-5 or 10-10-10) once in early spring as new growth emerges. A light application—half the package-recommended rate—provides adequate nutrition without excess. Alternatively, work aged compost into the soil surface around plants in early spring for a gentle organic boost.
Avoid nitrogen-heavy fertilizers, which encourage leafy growth at the expense of the essential oils responsible for sage’s flavor and fragrance. If you notice plants becoming leggy or weak despite good light conditions, suspect over-fertilizing rather than under-fertilizing. The solution is typically to reduce or eliminate fertilizer applications rather than apply more.
Pruning and Maintenance Techniques
Strategic pruning keeps sage compact, productive, and visually appealing while preventing the woody, bare-stemmed appearance that develops on neglected plants. Begin pruning when plants reach 6-8 inches tall, pinching off the top inch of growth to encourage branching. This simple action creates bushier plants with more harvestable leaves.
Throughout the growing season, harvest regularly by pinching or cutting stem tips. This ongoing harvest serves dual purposes: providing fresh sage for your kitchen while naturally pruning the plant into a compact form. Remove any dead, diseased, or damaged branches immediately.
In early spring, before new growth emerges, perform more substantial pruning to remove any winter-damaged wood and shape the plant. Cut back stems by one-third to one-half their length, making cuts just above leaf nodes where new shoots will emerge. Avoid cutting into old woody growth from the previous year, as sage doesn’t regenerate well from extremely old wood.
For comprehensive pruning techniques applicable to woody herbs, apply similar principles: remove dead wood, maintain an open center for air circulation, and encourage outward-facing buds. After 3-4 years, even well-maintained sage plants may become too woody; consider replacing them with younger plants propagated from cuttings for continuous productivity.
Harvesting and Preservation
Begin harvesting sage leaves once plants are established, typically 2-3 months after transplanting. For fresh use, pinch or cut individual leaves or stem tips as needed throughout the growing season. The best flavor develops in morning hours after dew dries but before afternoon heat, when essential oils reach peak concentration.
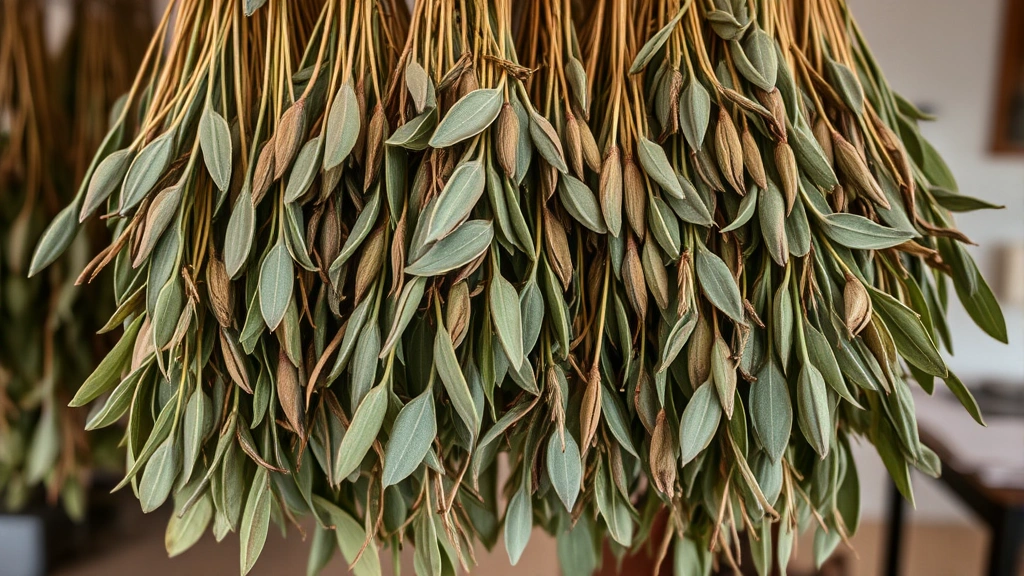
For dried sage, harvest in early morning just as flowers begin to open—this timing captures maximum flavor. Cut stems 6-8 inches long with at least three leaf nodes remaining on the plant. Tie stems in small bundles and hang upside-down in a warm, dry, well-ventilated location away from direct sunlight. Drying typically takes 1-2 weeks; leaves should crumble easily when completely dry.
Store dried sage in airtight containers away from light and heat, where it maintains quality for 6-12 months. Alternatively, freeze fresh sage by placing leaves in ice cube trays with a bit of water, then storing frozen cubes in freezer bags for convenient cooking. Frozen sage works wonderfully for cooking applications though loses some texture for garnishing.
You can harvest sage year-round in mild climates, but in colder regions, focus harvesting before winter arrives. Leave at least one-third of the plant’s foliage intact to maintain plant health. Avoid heavy harvesting during the first year after planting, allowing the plant to establish a strong root system before intensive use.
Common Pests and Disease Management
Sage’s aromatic oils naturally repel many garden pests, making it remarkably pest-resistant compared to other herbs. However, several issues occasionally arise, particularly in humid conditions or on weakened plants.
Powdery mildew appears as white coating on leaves and stems, especially in humid conditions with poor air circulation. Prevention through proper spacing, avoiding overhead watering, and ensuring good air flow is far more effective than treatment. If mildew develops, spray affected areas with sulfur-based fungicide following package directions, or use a baking soda spray (1 tablespoon per gallon water with a few drops of dish soap).
Root rot develops in waterlogged soil, causing wilting despite moist soil. Once established, root rot is difficult to reverse. Prevention through excellent drainage and proper watering practices is essential. If suspected, remove the plant, examine roots for black, mushy tissue, and consider replanting in fresh, well-draining soil if any healthy white roots remain.
Spider mites occasionally appear in hot, dry conditions, creating fine webbing and stippled leaves. Increase humidity through regular misting or spray with insecticidal soap if infestations become severe. Scale insects and mealybugs may appear on container plants; remove manually with a soft brush or treat with neem oil following label directions.
Healthy, properly maintained sage plants in appropriate growing conditions rarely require pest management. Focus on cultural practices—good drainage, adequate spacing, appropriate watering, and regular harvesting—which naturally maintain plant vigor and pest resistance.
Frequently Asked Questions
Can I grow sage indoors?
Yes, though sage prefers outdoor conditions. Indoor sage needs bright light (at least 6 hours daily from a south-facing window or grow light), well-draining soil, and lower humidity than typical indoor environments. Container growing indoors works best with careful attention to watering and air circulation. Harvest lightly to avoid stressing indoor plants.
How long does sage live?
Sage is a perennial herb living 5-7 years or longer with proper care. Plants become increasingly woody over time; many gardeners replace plants every 3-4 years for optimal productivity. Propagating new plants from cuttings ensures continuous sage supply.
When is the best time to plant sage?
Plant sage in spring after the last frost danger passes, allowing the growing season to establish strong roots before winter. Fall planting works in mild climates but risks winter losses in cold regions. Container plants can be planted anytime, though spring and early fall are ideal.
Can I propagate sage from cuttings?
Absolutely. Take 3-4 inch cuttings from new growth in spring or early summer, remove lower leaves, and place in moist potting mix. Cover with plastic to maintain humidity and provide bright, indirect light. Rooting typically occurs within 2-3 weeks. Once rooted, gradually acclimate to normal conditions before transplanting outdoors.
Why is my sage flowering?
Sage flowers naturally in late spring or early summer, producing beautiful purple, pink, or blue blooms. Flowering is normal and doesn’t harm the plant, though some prefer removing flowers to encourage leaf production. Flowers are edible and attractive to pollinators, so leaving some is beneficial for your garden ecosystem.
Is sage cold-hardy?
Yes, common sage is cold-hardy to USDA zone 5 (-20°F/-29°C) once established. Some varieties like pineapple sage are less cold-hardy (zone 9). Mulch around plants in fall for extra winter protection in cold climates, and ensure excellent drainage to prevent root damage from freeze-thaw cycles.


