Herb Garden Planter: DIY Tips from a Pro Gardener
Creating your own herb garden planter is one of the most rewarding gardening projects you can undertake. Whether you’re a seasoned gardener or just starting your journey into cultivating fresh herbs, building a custom planter allows you to tailor the growing environment to your specific needs. I’ve spent years designing and constructing herb planters for both residential and commercial spaces, and I’m excited to share the professional techniques that will help you create a thriving herb garden right in your home or backyard.
An herb garden planter isn’t just a container for growing herbs—it’s a carefully designed system that considers drainage, soil composition, sunlight exposure, and accessibility. The beauty of a DIY approach is that you can customize every aspect, from the materials used to the herbs you cultivate. This guide will walk you through everything you need to know to build a professional-quality planter that will produce fresh herbs for years to come.
The joy of harvesting homegrown basil, thyme, oregano, and rosemary from a planter you built yourself is incomparable. Not only will your herbs taste fresher and more flavorful than store-bought alternatives, but you’ll also gain the satisfaction of knowing exactly how they were grown. Let’s explore the essential steps to create your perfect herb garden planter.
Choosing the Right Container Materials
The foundation of any successful herb garden planter starts with selecting appropriate container materials. Over my years of gardening experience, I’ve worked with numerous materials, each offering distinct advantages and considerations. The material you choose will affect water retention, durability, temperature regulation, and the overall aesthetic of your garden space.
Terracotta and clay pots remain classics for herb gardening. These naturally porous materials allow air circulation around the roots and provide excellent drainage. However, they’re heavy, can break easily, and tend to dry out quickly—which means more frequent watering during hot months. They’re ideal if you prefer a traditional look and don’t mind the maintenance commitment.
Plastic containers are lightweight, affordable, and come in various sizes and colors. They retain moisture longer than terracotta, making them perfect for herbs that prefer consistent moisture like parsley and cilantro. The downside is that plastic can degrade under intense UV exposure and may not provide the same aesthetic appeal. Look for food-grade plastic if you’re concerned about chemical leaching.
Wooden planters offer warmth and natural beauty to your garden space. Cedar and redwood are naturally rot-resistant and create an attractive rustic appearance. If you’re interested in building raised structures, you might want to explore our guide on how to make a raised garden bed, which covers similar construction principles. Wooden planters require some maintenance and eventual replacement, but they provide excellent insulation for roots.
Fabric grow bags have become increasingly popular among professional gardeners. They promote excellent drainage and air pruning of roots, resulting in healthier plants. They’re affordable, durable, and portable. Their only limitation is aesthetic—they don’t blend seamlessly into formal garden designs.
Concrete and stone planters are permanent solutions that provide excellent durability and heat retention. They’re ideal for garden decor purposes and can define spaces beautifully. However, they’re heavy and expensive to install.
Understanding Drainage Requirements
Proper drainage is absolutely critical for herb survival. Most culinary and medicinal herbs originate from Mediterranean climates where water drains quickly through soil. Poor drainage is the number-one killer of herb planters, leading to root rot and fungal diseases. As a professional, I never compromise on drainage—and neither should you.
Every container must have drainage holes in the bottom. I recommend at least one hole per four to six square inches of planter surface area. If your chosen container doesn’t have adequate drainage holes, drill them yourself using appropriate tools for your material. For containers deeper than twelve inches, consider adding additional side holes near the bottom.
Beyond basic drainage holes, create a drainage layer inside your planter. Place one to two inches of coarse gravel, broken pottery shards, or specialized drainage material at the bottom. This prevents soil from compacting and blocking drainage holes. I often add a layer of landscape fabric between the drainage material and soil to prevent fine particles from washing through.
The slope of your planter matters too. If you’re building a vertical garden or tiered herb planter, ensure each tier slopes slightly toward drainage points. This prevents water pooling in low spots where roots can become waterlogged.
Consider your climate when planning drainage. In humid regions, you may want extra drainage capacity. In arid climates, you might add a slight moisture-retaining layer. The key is finding balance—your herbs need consistent moisture, but not soggy soil.
Soil Selection and Preparation
The soil you use in your herb garden planter is as important as the container itself. Container growing differs fundamentally from in-ground gardening because your herbs’ entire nutrient and water supply comes from the soil in that specific planter. You cannot rely on deeper soil layers or groundwater, so quality soil preparation is essential.
Never use garden soil or topsoil from your yard in containers. These materials compact excessively in pots, restricting drainage and root development. Instead, use a high-quality potting mix specifically formulated for containers. Look for mixes containing peat moss or coconut coir, perlite or vermiculite, and compost. The peat/coir provides water retention, perlite creates air pockets, and compost supplies nutrients.
For herb-specific applications, I recommend creating a custom blend: 40% high-quality potting mix, 30% compost, 20% perlite, and 10% worm castings. This combination provides excellent drainage while maintaining adequate moisture and nutrients for vigorous herb growth. Worm castings add beneficial microorganisms and slow-release nutrients that herbs love.
Mix your soil components thoroughly before filling the planter. Break up any clumps and ensure even distribution. Fill the planter to about one inch below the rim, allowing space for water without overflow. Lightly tamp the soil—you want it firm enough to support plants but not compacted.
Add a one-inch mulch layer after planting. For herb planters, I prefer finely shredded bark or coconut coir mulch. This moderates soil temperature, reduces water evaporation, and provides a finished appearance. Keep mulch one inch away from herb stems to prevent stem rot.
Selecting Herbs for Your Planter
Not all herbs are created equal when it comes to container growing. Some thrive in pots while others prefer in-ground cultivation. Understanding which herbs suit planter growing will set you up for success. I typically categorize herbs into three groups based on their planter compatibility.
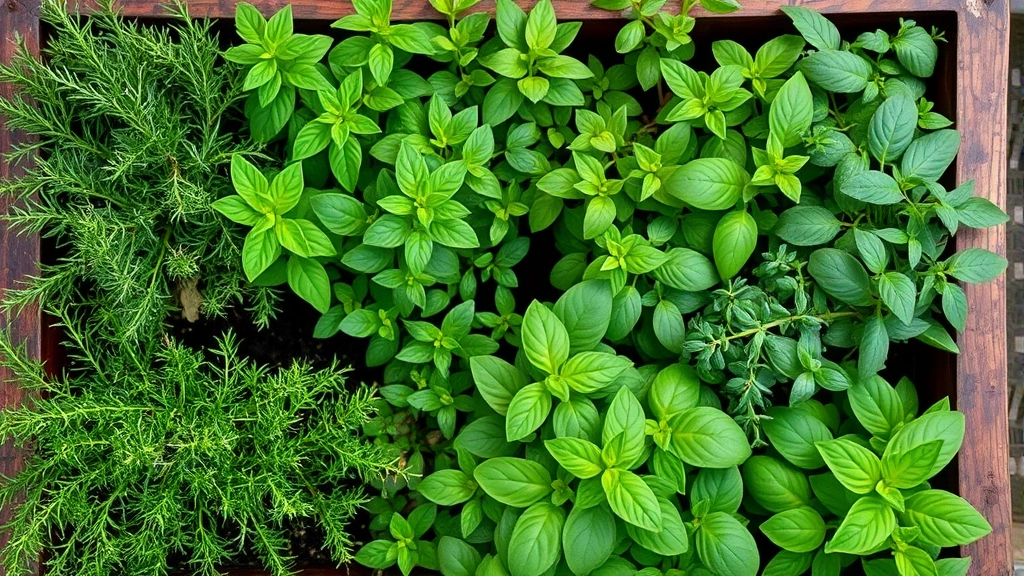
Excellent container herbs include basil, parsley, chives, oregano, thyme, and rosemary. These Mediterranean natives prefer the drier conditions that container growing provides and don’t require deep root systems. Basil is particularly prolific in pots, often producing more foliage than you can harvest. If you’re specifically interested in sage, our herb garden sage guide provides comprehensive growing information.
Good container herbs that require slightly more attention include mint, cilantro, dill, and tarragon. These perform well in containers but may need more frequent watering or occasional fertilizing. Mint is particularly aggressive and benefits from container growing since it prevents the plant from taking over your entire garden.
Challenging container herbs include fennel, angelica, and some perennial varieties that develop deep tap roots. These can work in deeper containers but often perform better in ground. If you’re building a traditional oriental garden, you might incorporate specific herbs suited to that style.
Consider your climate zone when selecting herbs. Mediterranean herbs like rosemary and lavender thrive in warm, sunny conditions. Cool-season herbs like parsley and cilantro prefer partial shade in hot climates. Match your herb selections to your available sunlight—most culinary herbs require six to eight hours of direct sunlight daily.
Think about your intended use when planning your herb garden planter. Are you growing for cooking, medicinal purposes, or ornamental appeal? This determines which specific varieties you should select. Cooking herbs tend to be more compact and productive. Medicinal herbs may require larger containers and more specialized care. Ornamental varieties like purple basil or variegated mint add visual interest to your garden space.
Layout and Spacing Strategies
How you arrange herbs in your planter significantly impacts their growth and your ability to harvest efficiently. Proper spacing ensures adequate air circulation, reduces disease pressure, and allows each plant to access sufficient light and nutrients. Poor spacing is the second-most common mistake I see in home herb planters.
For a standard rectangular planter approximately three feet long, eighteen inches wide, and twelve inches deep, I typically recommend spacing herbs in a triangular pattern rather than rows. Place taller herbs like rosemary or standard basil toward the back or center, with shorter varieties like thyme or oregano toward the front edges. This creates a tiered visual effect and ensures all plants receive adequate light.
Spacing depends on mature plant size. Basil needs six to eight inches between plants. Thyme and oregano require eight to twelve inches. Rosemary and sage need twelve to eighteen inches. These guidelines assume you’re harvesting regularly, which keeps plants compact. If you prefer larger, fuller plants, increase spacing accordingly.
Consider root space, not just above-ground space. Most culinary herbs develop relatively shallow root systems, but they still need adequate soil volume. A minimum of one gallon of soil per herb is my standard recommendation. In a three-foot planter with adequate depth, you can typically grow four to six herbs comfortably.
Create visual interest through height variation. Trailing varieties like creeping thyme can cascade over planter edges. Upright herbs provide structure. Bushy herbs fill in middle spaces. This layered approach creates an attractive, productive planter that functions as both food source and garden feature.
Plan for accessibility. Position frequently-harvested herbs like basil and parsley where you can easily reach them without disturbing other plants. Place less-frequently used herbs toward the back or edges. This simple planning step makes daily harvesting more enjoyable and sustainable.
Installation and Setup Process
Now that you’ve selected your materials, prepared your soil, and planned your herb selections, it’s time to build and install your herb garden planter. I’ll walk you through the professional installation process step-by-step.
Step One: Prepare Your Container
If you’re using a purchased container, inspect it thoroughly for cracks or damage. Clean it with a dilute bleach solution (one part bleach to nine parts water) to eliminate any pathogens. Rinse thoroughly and allow to dry completely. If you’re building a wooden planter, assemble it according to your design, ensuring all corners are square and wood is treated with food-safe sealant if desired.
Step Two: Add Drainage Infrastructure
Place your prepared drainage material in the planter bottom. If using gravel, aim for one and one-half inches. Add your landscape fabric layer, allowing it to extend slightly up the sides. This prevents soil from washing through drainage holes while allowing water to drain freely.
Step Three: Fill with Prepared Soil
Add your custom soil mixture, filling to within one inch of the rim. Lightly firm the soil as you fill, creating an even surface. Water the soil thoroughly before planting—this settles it and ensures good root-to-soil contact when you plant your herbs.
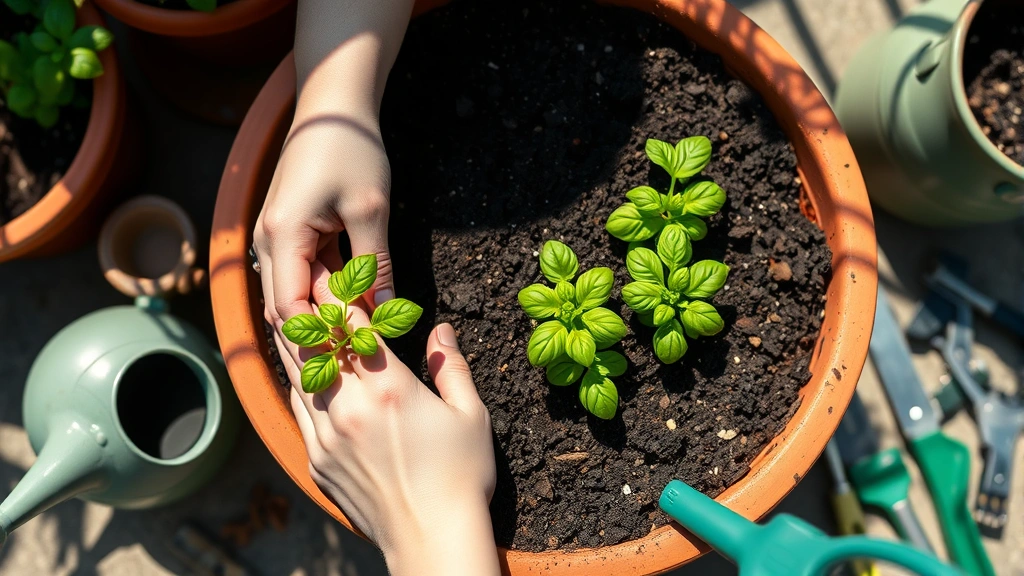
Step Four: Position Your Herbs
Arrange herb seedlings or transplants according to your spacing plan. I prefer using young transplants rather than seeds for faster productivity, though seeds work if you’re patient. Gently remove each plant from its nursery pot, loosen the root ball slightly with your fingers, and position it in the prepared planter. The top of the root ball should be level with the soil surface.
Step Five: Fill Around Plants
Fill soil around each plant, gently firming as you go. Ensure no air pockets remain around roots, but don’t compress soil excessively. Water thoroughly after planting to settle soil and eliminate air gaps.
Step Six: Apply Mulch and Label
Add your one-inch mulch layer around plants, keeping it away from stems. Label each herb clearly—this is invaluable when you have multiple varieties. I use small wooden stakes with herb names written in permanent marker, though ceramic markers or plant labels work equally well.
Maintenance and Seasonal Care
Building your herb garden planter is only the beginning. Proper maintenance throughout the growing season ensures consistent productivity and plant health. I’ve developed specific protocols based on seasonal conditions and herb requirements.
Watering Schedule
Container herbs typically need watering more frequently than in-ground herbs because soil dries faster in limited volume. During growing season, check soil moisture daily by inserting your finger one inch into soil. If it feels dry, water thoroughly until water drains from drainage holes. The frequency depends on climate, container size, and soil composition—anywhere from daily in hot climates to every other day in mild conditions.
Water in early morning when possible. This reduces disease pressure and allows foliage to dry quickly. Avoid wetting herb leaves, which can promote fungal issues. Direct water to soil level, saturating the root zone completely.
Fertilizing Your Herbs
Container herbs require regular fertilization because nutrients leach from soil with frequent watering. Begin fertilizing four to six weeks after planting. Use a balanced, water-soluble fertilizer diluted to half-strength, applied every two weeks during active growth. Alternatively, add compost or worm castings to the top layer monthly—this provides slow-release nutrients and improves soil structure.
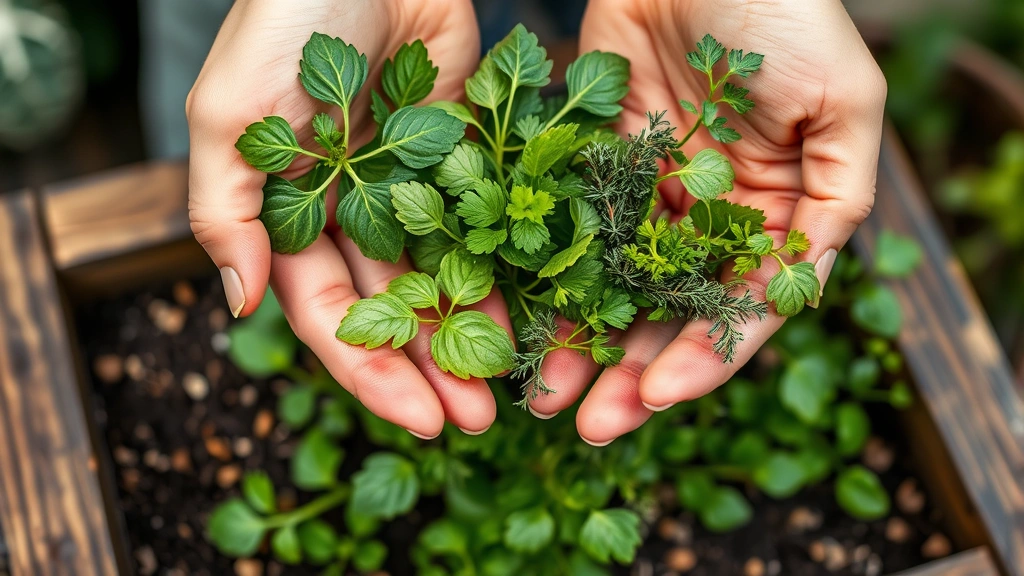
Pruning and Harvesting
Regular harvesting encourages bushier, more productive plants. Pinch off flower buds as they appear to redirect energy into foliage production. Harvest leaves from the top of plants, working downward—this encourages branching and fuller growth. Never remove more than one-third of plant foliage at once, as this stresses the plant.
Pest and Disease Management
Container herbs are less susceptible to many pests than in-ground gardens, but problems can still occur. Inspect plants weekly for aphids, spider mites, or whiteflies. Treat infestations with insecticidal soap or neem oil spray. Powdery mildew occasionally affects herbs in humid conditions—improve air circulation and reduce overhead watering to prevent issues.
Seasonal Transitions
In fall, reduce fertilizing as growth naturally slows. Some herbs like basil are frost-sensitive and should be harvested heavily before first frost or brought indoors. Cold-hardy herbs like rosemary, thyme, and oregano can remain outdoors through winter in most climates. Move containers to sheltered locations in harsh winters to protect from extreme wind and cold.
Creative Design Options
Your herb garden planter doesn’t need to be a simple rectangular box. With creativity and planning, you can create stunning functional art pieces that enhance your garden aesthetics while producing abundant herbs. I’ve designed numerous decorative planters over the years, and I’m excited to share some innovative approaches.
Tiered Pyramid Planters
Create a stunning focal point by stacking rectangular planters of decreasing sizes. Fill each level with complementary herbs, creating a vertical garden that maximizes space and visual interest. This design works beautifully in small spaces and provides excellent light exposure for all plants. For more detailed guidance on vertical growing systems, explore our vertical garden information.
Spiral Tower PlantersConstruct a spiral-shaped planter using stacked terracotta pots or custom-built wooden spirals. Plant herbs around the spiral, creating a dramatic architectural element. This design is particularly striking in formal gardens and makes an excellent conversation piece while serving practical purposes.
Hanging Basket Collections
Combine multiple hanging baskets at varying heights to create a dynamic vertical herb display. This approach works well for trailing herbs like creeping thyme or trailing rosemary, and takes advantage of overhead space in patios or near kitchen windows.
Repurposed Container Gardens
Think creatively about containers. Old wooden crates, galvanized metal troughs, ceramic urns, or even hollowed logs can become beautiful herb planters. Ensure proper drainage and follow the same soil and spacing principles regardless of container origin. This sustainable approach adds character to your garden.
Themed Garden Designs
Create specialized herb garden planter collections based on cuisine or purpose. A Mediterranean collection might feature rosemary, oregano, basil, and thyme. An Asian collection could include cilantro, Thai basil, and mint. A medicinal collection might focus on chamomile, sage, and echinacea. These themed planters create cohesive garden spaces and simplify harvesting for specific cooking or wellness purposes.
For gardeners interested in themed aesthetics, our guide to fairy ideas for the garden offers inspiration for creating magical garden spaces that incorporate planters beautifully.
FAQ
What size planter do I need for an herb garden?
Minimum planter size depends on herb quantity and type. A single herb needs at least one gallon of soil. A productive herb garden planter for a family should be at least three feet long, eighteen inches wide, and twelve inches deep, accommodating four to six herbs comfortably. Larger planters provide better temperature moderation and water retention.
Can I grow herbs indoors in planters?
Absolutely! Indoor herb planters work well near south-facing windows receiving six to eight hours of direct sunlight daily. Supplement with grow lights if natural light is insufficient. Use the same soil, drainage, and spacing principles as outdoor planters. Indoor environments may require more frequent inspection for pests and diseases due to reduced air circulation.
How long do herb planters last?
Wooden planters typically last five to ten years depending on wood type and climate. Plastic containers last ten to fifteen years before degradation. Terracotta is permanent but breakable. Fabric grow bags last three to five years. Regardless of container longevity, soil should be refreshed or replaced annually to maintain nutrient levels and prevent disease buildup.
Can I use the same planter for different herbs each season?
Yes, but refresh the soil first. Remove old soil completely and replace with fresh potting mix to eliminate accumulated salts and potential pathogens. You can rotate herb varieties seasonally—growing warm-season herbs like basil in summer and cool-season herbs like cilantro in spring and fall.
What’s the best location for an herb garden planter?
Most culinary herbs prefer six to eight hours of direct sunlight daily. Position planters where they receive morning sun and afternoon shade in extremely hot climates. Ensure convenient access for regular harvesting and watering. Near kitchen doors or windows is ideal for easy access during meal preparation.
How do I overwinter my herb planter?
Cold-hardy herbs like rosemary, thyme, oregano, and sage can remain outdoors in most climates. Move containers to sheltered locations against south-facing walls for wind protection. In harsh climates, insulate containers with burlap or move them against building foundations. Tender herbs like basil should be harvested before first frost or brought indoors to sunny windowsills.
Should I use organic potting mix for herb planters?
Organic potting mixes are excellent for herb growing, particularly if you’re harvesting for consumption. They typically contain sustainably sourced materials and avoid synthetic additives. The slightly higher cost is justified by superior long-term soil structure and plant health. Look for certified organic mixes from reputable manufacturers.


