DIY Garden Flag Stand: Expert Instructions for Custom Outdoor Displays
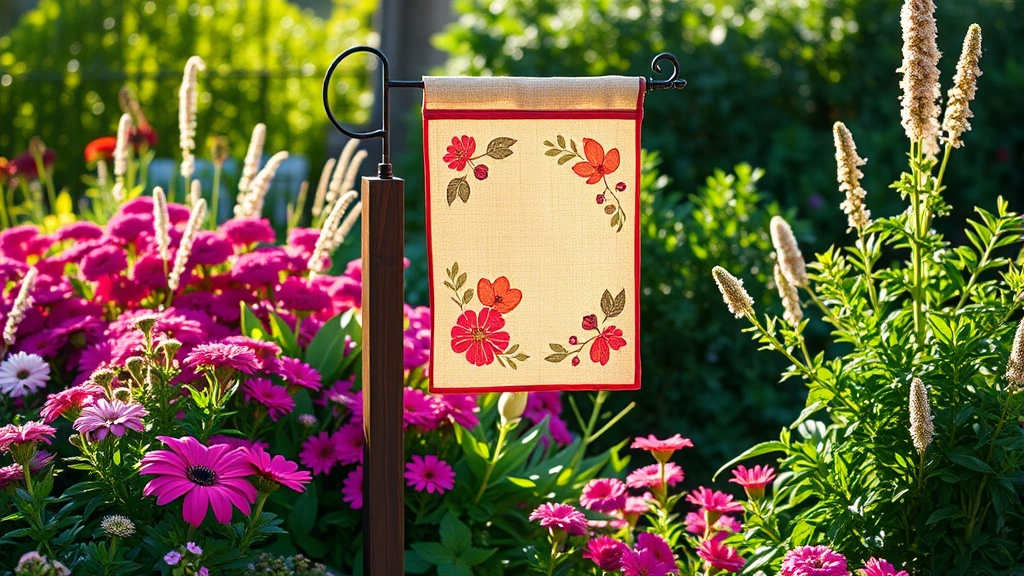
A garden flag stand serves as both a functional and decorative element in any outdoor space, allowing you to display seasonal flags, personalized designs, or festive decorations throughout the year. Whether you’re welcoming guests with a cheerful springtime flag or celebrating holidays, a well-constructed flag stand becomes a focal point in your landscape design. The beauty of building your own is that you can customize it to match your garden’s aesthetic while saving money compared to purchasing pre-made options.
Creating a DIY garden flag stand doesn’t require advanced carpentry skills or expensive equipment. With basic materials and straightforward instructions, you can construct a sturdy, weather-resistant stand that will last for years. This comprehensive guide walks you through material selection, step-by-step construction, and maintenance tips to ensure your flag stand remains functional and attractive through all seasons.
Materials and Tools You’ll Need
Before beginning your garden flag stand project, gather all necessary materials and tools to ensure a smooth building process. Having everything prepared prevents interruptions and helps maintain workflow efficiency. Most materials can be found at local home improvement stores or online retailers specializing in garden supplies.
Essential Materials:
- One 4×4 inch pressure-treated wood post (6 feet long)
- Two 2×4 inch boards (3 feet long) for the base
- One 2×2 inch board (3 feet long) for cross-bracing
- 2.5-inch exterior-grade wood screws (approximately 16-20)
- 1.5-inch wood screws (approximately 12-16)
- Metal L-brackets (2-3 pieces) for reinforcement
- Exterior wood stain or weather-resistant paint
- Polyurethane sealant for wood protection
- Flag pole socket or mounting hardware
Required Tools:
- Power drill with bits
- Circular saw or hand saw
- Measuring tape (25-foot minimum)
- Carpenter’s square
- Level (4-foot)
- Pencil for marking
- Sandpaper (80-grit and 120-grit)
- Paintbrushes or foam applicators
- Work gloves and safety glasses
- Shovel for ground preparation
Choosing the Right Wood and Hardware
Selecting appropriate materials significantly impacts your garden flag stand’s longevity and appearance. Pressure-treated lumber resists rot and insect damage, making it ideal for outdoor projects exposed to moisture and temperature fluctuations. Unlike untreated wood, pressure-treated options maintain structural integrity through harsh weather conditions.
The 4×4 post serves as your stand’s primary support structure, requiring strength and durability. This dimension provides excellent stability while supporting flag weight and wind resistance. Ensure the post is rated for ground contact if you plan to install it directly into soil, as this treatment prevents decay at the base where moisture accumulation occurs most frequently.
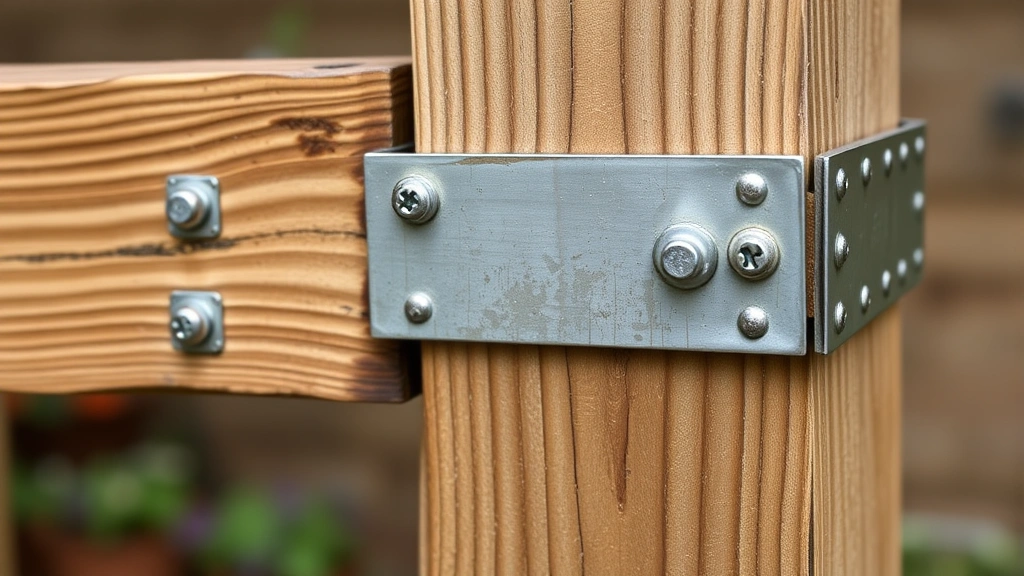
For hardware selection, galvanized or stainless steel components resist rust and corrosion better than standard steel. These materials withstand outdoor exposure without deteriorating, ensuring your flag stand remains attractive and functional. L-brackets provide additional diagonal support, preventing wobbling and enhancing overall structural integrity. When selecting a flag pole socket, choose models designed for 1.5-inch diameter poles, which are standard for most decorative garden flags.
Consider visiting your local cooperative extension service for recommendations on wood treatments and hardware options suited to your specific climate region. Different areas experience varying weather patterns, and local experts can advise on materials that perform best in your environment.
Step-by-Step Construction Guide
Step 1: Cut and Prepare Your Wood
Begin by cutting your wood pieces to the correct dimensions. The main post should remain at 6 feet in length, though you can adjust this based on your flag size preferences and garden aesthetics. Cut the two 2×4 base boards to 3 feet each, and the 2×2 cross-brace to approximately 2.5 feet. Sand all cut edges with 80-grit sandpaper, then finish with 120-grit sandpaper for a smooth surface that prevents splinters and accepts stain more evenly.
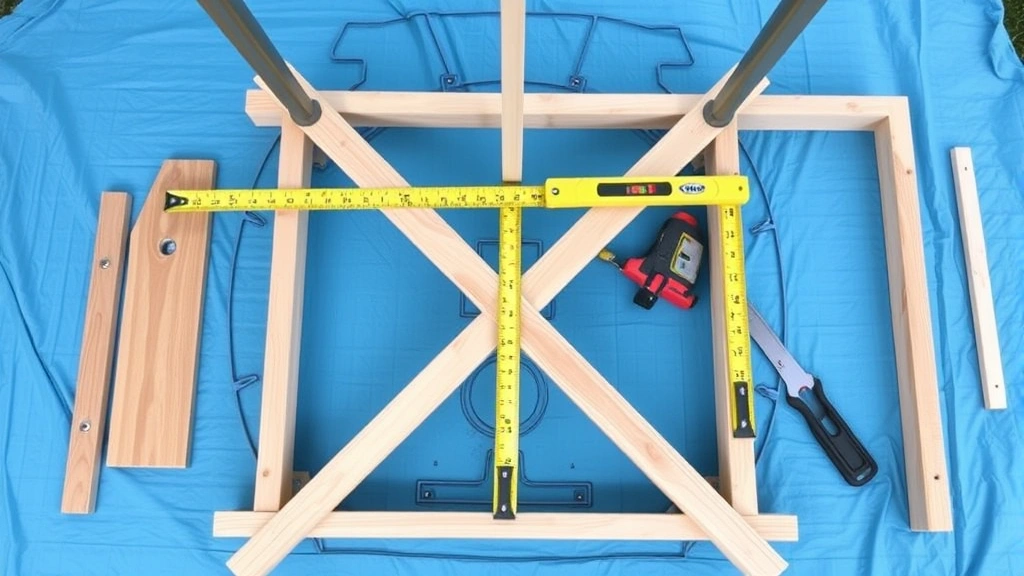
Step 2: Create the Base Structure
Lay the two 3-foot 2×4 boards in an X pattern on a flat work surface. Position them so they intersect near the center, creating a stable diamond-shaped base. This configuration distributes weight effectively and prevents tipping. Using your carpenter’s square, ensure the angles are as equal as possible. Mark the intersection point with a pencil.
Step 3: Attach the Cross-Brace
Position the 2.5-foot 2×2 cross-brace perpendicular to where the two 2×4 boards intersect. This horizontal support prevents the base from spreading under the post’s weight. Drill pilot holes through the 2×2 into each 2×4 board using a drill bit slightly smaller than your screw diameter. This prevents wood splitting. Insert 2.5-inch exterior-grade screws, ensuring they penetrate at least 2 inches into each base board.
Step 4: Secure the Main Post
Position your 4×4 post vertically at the base structure’s center. Use a 4-foot level to ensure the post stands perfectly vertical in all directions. Drill pilot holes through the base boards into the post’s bottom. Install 2.5-inch screws at multiple angles to create a secure connection. Install metal L-brackets on at least two sides of the post-to-base junction, bolting them securely for maximum stability.
If you’re integrating your flag stand into a raised concrete block garden bed, ensure the base structure doesn’t interfere with your garden layout planning.
Step 5: Install the Flag Pole Socket
Measure down from the post’s top approximately 12-18 inches, depending on your flag size and personal preference. Mark this location clearly. Drill a hole slightly larger than your flag pole socket’s diameter. Insert the socket according to manufacturer instructions, typically using set screws or lag bolts. Test the socket’s stability by gently tugging on it; it should not move or rotate.
Assembly and Finishing Touches
Once construction is complete, prepare your stand for outdoor display through proper finishing. Apply exterior wood stain in your chosen color, following product instructions for application and drying times. Stain protects wood from UV damage while enhancing natural grain patterns. Apply at least two coats, sanding lightly between applications for better adhesion.
After staining dries completely, apply a polyurethane sealant to create a protective barrier against moisture, insects, and temperature fluctuations. This additional layer significantly extends your stand’s lifespan. Use a foam brush for even application, and apply at least two coats, allowing proper drying time between applications.
For hardware, apply a thin coat of clear protective spray to prevent rust and corrosion. This step is particularly important for galvanized components exposed to salt air or extreme moisture conditions. Check all screws and bolts, tightening any that have loosened during the construction process or initial weathering.
Consider your stand’s placement relative to other garden features. If you maintain an herb garden nearby, ensure the flag stand doesn’t cast excessive shade on sun-loving plants. For those with a vertical garden setup, position your flag stand where it complements rather than competes for visual attention.
Placement and Installation Tips
Selecting the optimal location for your garden flag stand involves considering both aesthetic and practical factors. Choose a spot visible from your home’s main entrances and windows, where you can enjoy seasonal flag displays throughout the day. High-traffic areas near mailboxes, front gates, or garden entries work particularly well.
Ground preparation ensures long-term stability and prevents settling over time. Dig a hole at least 18-24 inches deep where your base will sit. For permanent installation, consider setting the base in a concrete footing, which prevents water accumulation and wood rot at the soil interface. For temporary or seasonal placement, simply position the base on level ground, checking with a level to ensure proper alignment.
Wind exposure significantly impacts flag stand performance and longevity. Position your stand where it receives moderate wind exposure but isn’t in a wind tunnel that could stress connections and damage flags. Avoid placement directly against structures that could create wind vortexes. If your region experiences high winds, consider additional diagonal bracing or anchoring systems.
Proximity to plantings requires thoughtful planning. Keep your stand at least 3-4 feet from trees and shrubs to prevent branch damage and maintain clear sight lines. If you’re developing a succulent garden nearby, ensure adequate spacing to avoid competition for visual interest and prevent shading issues.
Seasonal Maintenance and Care
Regular maintenance keeps your garden flag stand looking attractive and functioning properly throughout the year. Inspect the structure quarterly, checking for loose screws, hardware corrosion, or wood damage. Tighten any loose fasteners immediately, as vibration from wind can gradually loosen connections over time.
Spring Maintenance: As weather warms, inspect the wood for winter damage. Check for cracks, splits, or areas where the finish has deteriorated. Sand affected areas lightly and reapply stain and sealant as needed. This preventive approach prevents minor damage from becoming structural problems.
Summer Care: During peak season when you’re displaying flags frequently, ensure the flag pole socket remains clean and free of debris. Lubricate the socket mechanism with a light silicone spray to maintain smooth flag changes. Check that flags are secure and not rubbing against the post, which could cause wear.
Fall Preparation: Before winter arrives, apply an additional coat of protective sealant to prepare for increased moisture and temperature fluctuations. Clean gutters and downspouts near your stand to prevent water runoff issues. If your region experiences heavy snow, consider installing a temporary protective cover or removing the flag temporarily.
Winter Protection: In areas with harsh winters, monitor your stand after heavy snow or ice storms. Clear accumulated snow carefully to prevent structural stress. If you live in an extreme climate, you might temporarily remove the flag and consider protective wrapping for the post.
When performing maintenance tasks, consider how your stand integrates with surrounding garden features. If you use quality garden shears to maintain nearby plantings, do so carefully to avoid damaging the flag stand’s base or hardware.
Design Variations and Customizations
Once you’ve mastered basic garden flag stand construction, you can explore creative variations that reflect your personal style and garden theme. Consider these popular modifications:
Double Flag Design: Install two flag pole sockets on opposite sides of your post, allowing simultaneous display of coordinating flags or different seasonal designs. This requires reinforced hardware and careful weight distribution planning.
Decorative Finials: Top your post with a decorative wooden or metal finial that adds architectural interest. Finials can be purchased or hand-carved, transforming your stand into a true garden focal point. Ensure finials are securely attached and won’t become projectiles in high winds.
Planter Base Integration: Modify your base to incorporate a planter box around the post’s bottom. This creates a cohesive garden display where your flag stand doubles as a planter for seasonal flowers or foliage. Ensure adequate drainage to prevent water accumulation that could damage the base structure.
Painted Designs: Rather than staining, apply exterior paint in creative patterns or colors. Use painter’s tape to create geometric designs, stripes, or custom motifs that coordinate with your home’s exterior. Multiple paint colors allow you to change the design seasonally by repainting.
Rustic Metal Elements: Incorporate decorative wrought iron brackets, scrollwork, or metal art pieces that complement your flag stand’s design. These elements add visual interest while reinforcing the structure’s stability.
Height Adjustments: Customize post height based on your flag size and visibility preferences. Taller posts (8-10 feet) create dramatic statements, while shorter versions (3-4 feet) work well in smaller gardens or near low-growing plants.
Your flag stand can complement various garden styles and themes. Whether you’re creating a traditional cottage garden, modern minimalist space, or rustic farmhouse aesthetic, your stand’s design should harmonize with your overall garden vision. For inspiration and planning guidance, consult resources like the American Horticultural Society, which provides extensive garden design guidance.
FAQ
How deep should I bury the base of my garden flag stand?
For temporary placement, simply position the base on level ground. For permanent installation, bury the base 18-24 inches deep in soil or set it in a concrete footing. This depth provides stability while preventing water accumulation at the wood-soil interface that causes rot.
What type of wood is best for outdoor flag stands?
Pressure-treated lumber rated for ground contact offers the best longevity for outdoor applications. Cedar and redwood provide natural rot resistance but require more frequent sealing. Avoid untreated pine or softwoods that deteriorate quickly when exposed to moisture.
Can I make a garden flag stand without power tools?
Yes, though it requires more effort and time. Use a hand saw for cutting and a hand drill for making pilot holes. A level and carpenter’s square remain essential for ensuring proper construction regardless of tool type.
How often should I reseal my garden flag stand?
Inspect your stand quarterly and reseal affected areas as needed. Plan for complete resealing every 2-3 years depending on your climate’s severity. Harsh UV exposure, moisture, and temperature fluctuations increase maintenance frequency requirements.
What size flags work best with DIY garden flag stands?
Standard garden flags measure 12×18 inches or 18×24 inches. These sizes provide good visibility while remaining manageable for most DIY stands. Larger flags (24×36 inches) require reinforced structures and additional bracing to handle wind stress safely.
How can I prevent my flag stand from tipping in high winds?
Use a wide, stable base with adequate weight distribution. Install metal L-brackets for reinforcement, and consider additional diagonal bracing on windy sites. Anchoring the base with concrete footings provides maximum stability in extreme weather.
Can I customize my flag stand for my specific garden style?
Absolutely! Paint colors, decorative finials, metal accents, and planter base integration all allow personalization. Your stand should complement your garden’s overall aesthetic while reflecting your personal preferences.
What maintenance does my garden flag stand require in winter?
Clear accumulated snow carefully, monitor for ice damage, and apply protective sealant before cold weather arrives. In extreme climates, consider temporary removal of flags or protective wrapping to prevent weather damage.
How can I incorporate my flag stand into existing garden designs?
Position your stand where it complements rather than competes with other features. Ensure adequate spacing from trees, plantings, and structures. Your stand should serve as a focal point while harmonizing with the broader landscape design.
Are there professional resources for garden design inspiration?
Yes! The Association of Professional Landscape Designers and your local Master Gardener program provide excellent guidance for integrating structural elements like flag stands into comprehensive garden plans. Many botanical gardens and public spaces showcase creative flag stand designs worth visiting for inspiration.


