Easy Composting Tips: Expert Gardener Insights for Black Gold Success
Composting is one of the most rewarding practices any gardener can adopt. Whether you’re a seasoned green thumb or just starting your gardening journey for beginners, creating nutrient-rich compost transforms kitchen scraps and yard waste into garden gold. Expert gardeners consistently emphasize that composting doesn’t require complicated systems or specialized equipment—it simply requires understanding a few fundamental principles and committing to the process.
The beauty of composting lies in its simplicity and sustainability. By composting, you’re closing the nutrient loop in your garden while reducing landfill waste. The finished compost enriches your soil, improves water retention, and feeds your plants naturally. Many expert gardeners featured on educational platforms like Garden Answers YouTube channel emphasize that successful composting starts with understanding what goes in and maintaining proper balance. In this comprehensive guide, we’ll explore practical composting tips that experienced gardeners use to create dark, crumbly compost that makes their gardens thrive.
Understanding the Composting Basics
Before diving into advanced techniques, it’s essential to understand what composting actually is. Composting is a natural decomposition process where microorganisms, bacteria, fungi, and other organisms break down organic matter into humus-rich compost. This process mirrors what happens in nature when leaves fall to the forest floor and eventually become soil.
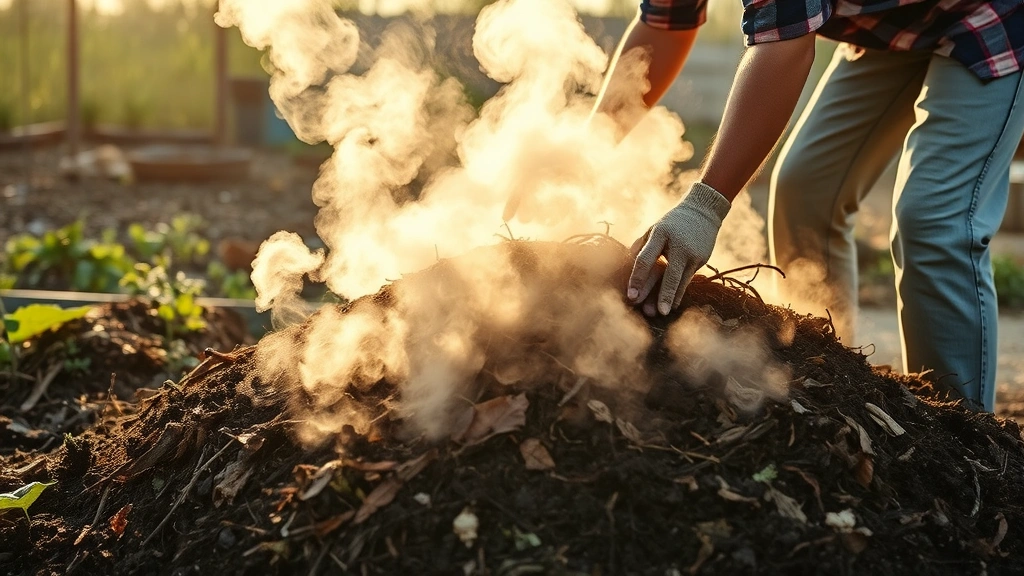
Expert gardeners recognize that successful composting requires three essential ingredients: carbon materials (browns), nitrogen materials (greens), and moisture. The microorganisms responsible for decomposition need all three elements to work efficiently. When you provide the right balance, you’ll notice your compost pile heating up—sometimes reaching temperatures of 140-160°F internally. This heat is a sign that decomposition is happening rapidly and effectively.
The timeline for composting varies based on your method and climate. Cold composting, where you simply pile materials and wait, can take 6-12 months or longer. Hot composting, where you actively manage the pile, typically produces finished compost in 4-8 weeks. Most expert gardeners recommend starting with hot composting if you’re eager to see results quickly.
Understanding your local climate is crucial. Gardeners in warmer regions can compost year-round, while those in colder climates need to adjust their strategies seasonally. The decomposition process slows significantly when temperatures drop below 50°F, which is why timing matters.
Choosing Your Composting Method
Expert gardeners emphasize that the best composting method is the one you’ll actually use consistently. Several proven approaches exist, each with advantages depending on your space, time commitment, and gardening goals.
Bin Composting: This is the most popular method for home gardeners. A compost bin contains materials, maintains heat, and protects your pile from pests. Bins range from simple DIY wooden structures to sophisticated rotating drums. Many gardeners find that a three-bin system allows them to have compost in various stages of decomposition simultaneously.
Pile Composting: For gardeners with ample space, an open pile requires no bin at all. Simply stack your materials in a designated area. While less contained than bins, piles are free and allow maximum aeration. This method works wonderfully if you’re not concerned about aesthetics.
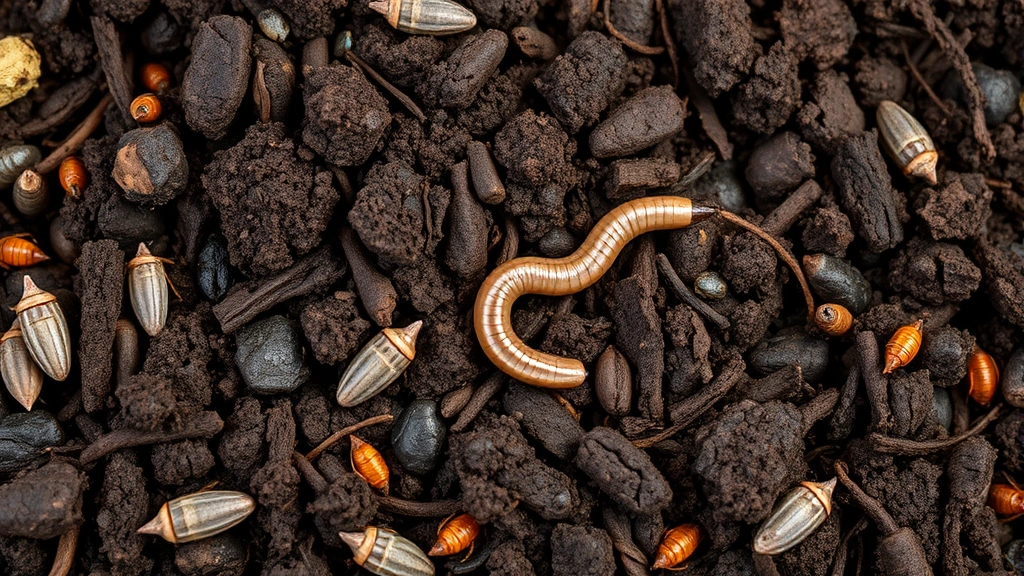
Vermicomposting: Using red wiggler worms to decompose materials is ideal for apartment dwellers or gardeners with limited space. Worm bins produce finished compost more slowly than traditional methods, but they’re compact and odor-free when managed properly.
Tumbling Composters: These rotating bins are excellent for gardeners who want faster results with minimal physical effort. The rotation aerates materials automatically, significantly speeding decomposition. They work particularly well when you’re actively preparing garden soil for new beds.
When setting up your composting system, consider your available space, local wildlife, and whether you want finished compost quickly or are willing to wait. Expert gardeners often recommend starting with a mid-sized bin—large enough to maintain proper temperatures but manageable for regular turning and maintenance.
The Green and Brown Balance
The secret to excellent compost lies in balancing nitrogen-rich greens with carbon-rich browns. This balance is so fundamental that expert gardeners constantly emphasize it as the foundation of successful composting.
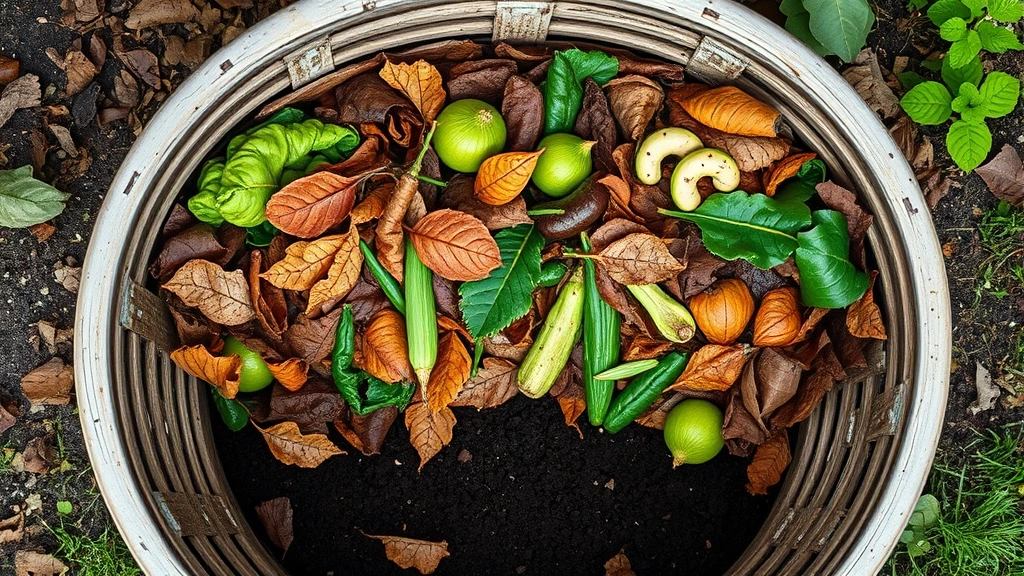
Green Materials (Nitrogen): These include fresh grass clippings, kitchen scraps (vegetable peels, coffee grounds, fruit waste), fresh leaves, plant trimmings, and manure. Greens are moisture-rich and decompose quickly. They provide the nitrogen that microorganisms need to multiply and work efficiently. However, too many greens create a slimy, anaerobic pile that smells unpleasant.
Brown Materials (Carbon): These include dried leaves, straw, shredded paper, cardboard, wood chips, and sawdust. Browns decompose slowly but provide the carbon structure that keeps your pile aerated. They also absorb excess moisture. A pile with too many browns decomposes slowly and may never heat up properly.
The ideal ratio is approximately 3 parts brown to 1 part green by volume, though expert gardeners note that this can vary. A practical approach is to add materials in layers: a few inches of brown, then a layer of green, then brown again. This creates natural aeration while mixing materials evenly.
Expert tip: Save your autumn leaves! Many gardeners make the mistake of disposing of leaves when they’re actually composting gold. Shredded leaves decompose beautifully and provide excellent carbon. Store them in bags throughout fall and winter to use as needed.
Never compost meat, dairy, oils, or diseased plants. These materials either attract pests or spread plant diseases to your garden. Similarly, avoid grass clippings treated with pesticides or herbicides.
Moisture and Aeration Secrets
Experienced composters know that moisture and oxygen are the invisible forces that make compost happen. Getting these right separates successful composters from frustrated beginners.
Moisture Management: Your compost pile should feel like a wrung-out sponge—moist but not waterlogged. If it’s too dry, decomposition slows dramatically. If it’s too wet, it becomes anaerobic and smells like rotten eggs. Expert gardeners check moisture regularly by squeezing a handful of compost. If water drips out, it’s too wet. If nothing happens, it needs water.
Seasonal moisture needs vary significantly. During wet seasons, you may need to cover your pile to prevent excess water. During dry periods, you’ll need to water actively. Many expert gardeners use soaker hoses or spray their piles during maintenance turning.
Aeration Techniques: Oxygen is essential for the aerobic decomposition that produces heat and speeds the process. Turning your pile is the most effective aeration method. Expert gardeners recommend turning every 1-2 weeks for hot composting. Each turn mixes materials, introduces oxygen, and accelerates decomposition.
For those without the time or physical ability to turn piles frequently, alternative aeration methods exist. Perforated pipes inserted vertically through your pile allow air to penetrate the center. Some gardeners use garden forks to poke holes throughout the pile without fully turning it. Even these minimal efforts significantly improve results.
The relationship between moisture and aeration is critical. A dry pile won’t decompose even with perfect aeration. A wet pile won’t get oxygen even if you turn it constantly. Balancing both is the expert’s secret to rapid, odor-free composting.
Common Composting Mistakes to Avoid
Expert gardeners have learned through experience which mistakes derail composting efforts. Understanding these pitfalls helps you avoid frustration and achieve success faster.
Mistake 1: Adding Too Many Greens: Beginners often add kitchen scraps without corresponding brown materials. This creates a slimy, smelly mess. Always add browns with your greens. The 3:1 ratio is your guide.
Mistake 2: Neglecting Pile Maintenance: Composting isn’t completely passive. Expert gardeners actively manage their piles through turning, moisture adjustment, and monitoring. Even minimal maintenance dramatically improves results.
Mistake 3: Piling Materials Too Large: Chopping or shredding materials before adding them to your pile increases surface area for microorganisms to work on, dramatically accelerating decomposition. Large branches and whole leaves decompose much more slowly.
Mistake 4: Starting Too Small: A pile needs minimum mass to generate heat. Piles smaller than 3 feet cubed often don’t heat up properly. If you don’t have that much material immediately, store browns and greens separately until you accumulate enough.
Mistake 5: Ignoring Pest Prevention: While compost attracts beneficial insects, it can also attract rats and raccoons if you include meat, dairy, or oils. Keeping your pile properly covered and avoiding problem materials prevents pest issues.
Mistake 6: Composting Diseased Plants: Unless your pile reaches consistently high temperatures (above 140°F), disease organisms may survive and spread to your garden. When in doubt, dispose of diseased plants separately.
Seasonal Composting Strategies
Expert gardeners adjust their composting practices seasonally to work with nature rather than against it. Understanding seasonal variations maximizes your composting success.
Spring Composting: Spring offers abundant green materials—fresh grass clippings, garden cleanup debris, and plant trimmings. This is ideal for building new compost piles or adding to existing ones. Balance spring’s greens with stored autumn leaves or shredded paper. Spring’s warming temperatures accelerate decomposition, making this an excellent time to start hot composting projects.
Summer Composting: Summer provides consistent warmth and abundant grass clippings, but materials dry out quickly. Expert gardeners increase watering frequency and ensure adequate brown materials to manage moisture. Summer is when you’ll see dramatic decomposition if you’ve managed your pile well. The heat accelerates the process significantly. This is also an excellent time to harvest finished compost and use it for DIY raised garden beds.
Fall Composting: Autumn brings tremendous brown material in the form of fallen leaves. Expert gardeners view fall as a gift—shred those leaves and stockpile them. Fall compost piles can decompose quickly in early autumn but slow as temperatures drop. Many gardeners start new piles in early fall to maximize warm-weather decomposition.
Winter Composting: In cold climates, decomposition slows dramatically or stops entirely. However, you can still add materials to your pile—they’ll simply wait for spring to decompose. In mild climates, winter composting continues at a reduced pace. Many expert gardeners use winter to plan spring composting projects and stockpile brown materials for spring application.
Understanding your USDA hardiness zone helps you plan composting timing. USDA Plant Hardiness Zone Map provides regional temperature data that influences decomposition rates.
Using Your Finished Compost
The ultimate goal of composting is creating finished compost to nourish your garden. Expert gardeners recognize that finished compost is distinctly different from partially decomposed material.
Recognizing Finished Compost: Finished compost is dark brown or black, crumbly, and earthy-smelling. You shouldn’t recognize individual materials—everything should be broken down into uniform, humus-rich material. It should feel like rich soil and crumble easily in your hands. This typically takes 4-8 weeks with hot composting or 6-12 months with cold composting.
Expert gardeners use finished compost in multiple ways. Incorporate it into garden beds before planting to improve soil structure and add nutrients. Mix it into potting soil for containers. Use it as mulch around established plants. Create compost tea by steeping finished compost in water, then using the nutrient-rich liquid to feed plants.
When growing garden lettuce or other vegetables, worked compost into the top 6-8 inches of soil provides excellent nutrition. The same applies when growing mint in pots—compost-enriched potting soil produces vigorous, flavorful plants.
Expert gardeners never waste finished compost. Every bit goes back into the garden, feeding plants and improving soil structure year after year. This sustainable cycle is the heart of gardening success.
Many local Master Gardener Programs offer workshops on composting techniques specific to your region. These free resources provide invaluable guidance tailored to your climate and local conditions.
FAQ
How long does composting actually take?
Timeline depends on your method. Hot composting with regular turning produces finished compost in 4-8 weeks. Cold composting takes 6-12 months or longer. Vermicomposting typically takes 3-6 months. Most expert gardeners find that hot composting is worth the effort if you want faster results.
Can I compost in winter?
Yes, but decomposition slows significantly when temperatures drop below 50°F. In cold climates, materials added in winter will simply wait for spring to decompose. Mild climates can continue composting year-round at a reduced pace. Many expert gardeners use winter to stockpile materials for spring composting.
What’s the best location for a compost pile?
Expert gardeners recommend placing compost piles in partially shaded areas that receive some sunlight. Full shade slows decomposition, while full sun can dry out materials. Ensure good drainage and easy access for turning and harvesting. Avoid placing piles directly against structures where they might cause moisture damage.
Do I need to add special compost starter or inoculant?
No. Compost starter products are unnecessary because organic materials already contain beneficial microorganisms. However, adding a shovel of finished compost or garden soil to a new pile introduces active microbes that accelerate decomposition. This is a practical tip many expert gardeners use.
Why does my compost smell bad?
Foul odors indicate anaerobic (oxygen-free) conditions, usually caused by too many greens, excessive moisture, or poor aeration. Solution: add browns, turn the pile thoroughly, and ensure proper moisture balance. After turning, the smell should improve within days as aerobic decomposition resumes.
Can I add weeds to my compost?
Add weeds only if your pile reaches sustained temperatures above 140°F, which kills weed seeds. Otherwise, you risk spreading weeds throughout your garden when you apply the finished compost. Most expert gardeners recommend disposing of seeding weeds separately or only composting weeds that haven’t gone to seed.


