How to Draw Gardens: Artist Tips & Techniques
Drawing gardens combines artistic skill with botanical knowledge, creating beautiful representations of nature’s most cultivated spaces. Whether you’re sketching a backyard vegetable patch or rendering an elaborate ornamental landscape, understanding both artistic fundamentals and horticultural elements transforms your work from simple line drawings into compelling visual narratives. This guide explores practical techniques that help artists capture the essence of gardens, from the delicate petals of blooming flowers to the architectural lines of garden structures.
Many artists find that learning to draw gardens deepens their appreciation for plant growth patterns, seasonal changes, and landscape design principles. The process requires observing how light filters through foliage, how plants interact with one another, and how garden structures create visual balance. By combining traditional drawing techniques with an understanding of plant forms and garden composition, you’ll develop a distinctive artistic voice that celebrates the beauty of cultivated spaces.
Understanding Garden Composition and Layout
Before putting pencil to paper, successful garden artists study composition principles that organize visual elements into harmonious arrangements. Think of your garden drawing as a carefully planned space where focal points, pathways, and plantings guide the viewer’s eye through the composition. Begin by sketching basic geometric shapes to establish the overall structure—rectangles for raised beds, circles for specimen trees, and curved lines for meandering paths.
Garden layouts typically follow established design principles similar to those used in actual garden planning. The rule of thirds, a foundational composition technique, divides your drawing area into nine equal sections, positioning key elements along these lines or at intersections for maximum visual impact. Consider how professional gardeners arrange plantings—tall specimens in background, medium plants in middle ground, and low-growing varieties in foreground—this same depth layering creates compelling perspective in your artwork.
Sketch the garden’s bones first: pathways, water features, and structural elements. These architectural components provide the framework upon which all other details rest. Whether drawing a formal garden with symmetrical beds or a cottage garden with organic curves, establishing this underlying structure ensures your final drawing maintains visual coherence and realistic spatial relationships.
Essential Drawing Materials for Garden Art
Quality materials significantly influence your garden drawing results. Invest in a range of pencil grades from hard (H) to soft (B), allowing you to create varied line weights and tonal values. For preliminary sketching, use light HB or 2H pencils that won’t leave heavy indentations on paper. As you develop your drawing, transition to darker grades like 2B and 4B for emphasis and shadow work.
Paper selection matters considerably when drawing gardens. Medium-weight drawing paper (90-110 lb) provides enough tooth to hold graphite while remaining smooth enough for detailed work. Watercolor paper works beautifully for mixed-media garden illustrations combining pencil, ink, and wash techniques. Keep erasers on hand—both kneaded erasers for gentle corrections and vinyl erasers for more aggressive removal.
Additional supplies enhance your garden drawing toolkit: blending stumps for smoothing graphite, rulers for architectural elements, circle templates for flower heads, and fixative spray to preserve finished work. Many artists working with colored mediums prefer colored pencils for their precision and control, particularly when rendering intricate floral details. Ink pens in various nib sizes allow you to add crisp line work over softer pencil foundations, creating dynamic visual contrast in your compositions.
Mastering Perspective and Spatial Relationships
Perspective fundamentally shapes how viewers perceive depth and dimension in your garden drawings. Linear perspective, where parallel lines converge toward vanishing points on the horizon, creates the illusion of receding space. When drawing a garden path or row of raised beds, establish one or two vanishing points depending on whether you’re using one-point or two-point perspective. This technique makes your garden feel expansive and realistic rather than flat and compressed.
Atmospheric perspective adds another dimension to garden drawings by suggesting distance through atmospheric effects. Objects farther away appear lighter, less detailed, and slightly bluer than foreground elements. When drawing a garden vista with trees receding into the background, gradually reduce detail and lighten values as elements move away from the viewer. This natural optical phenomenon, which occurs because atmospheric particles scatter light, makes distant garden features feel authentically distant.
Overlapping forms create depth without relying solely on perspective lines. When one plant partially obscures another, viewers immediately perceive spatial relationships. Draw foreground plants with complete, detailed forms, then position middle-ground plants to overlap them partially, and finally suggest background vegetation with minimal detail. This layering technique works particularly well when drawing climbing roses or vining plants that naturally cascade over structures and other plantings.
Techniques for Drawing Different Plant Types
Different plants require adapted drawing approaches based on their unique forms and characteristics. Herbaceous plants with soft stems and delicate foliage benefit from loose, flowing line work that suggests organic movement. Use curved, gestural strokes rather than rigid lines to capture the natural grace of plants like sage and other herbs swaying in gentle breezes.
Trees demand a more structured approach, beginning with a solid trunk and establishing major branch architecture before adding foliage masses. Rather than rendering every leaf individually—a tedious and visually overwhelming approach—suggest foliage using varied texture marks and tonal values. Stippling, cross-hatching, and scumbling techniques create convincing leaf clusters without excessive detail. Consider the tree’s natural growth pattern: columnar trees taper upward, spreading varieties display horizontal branch structure, and weeping forms show drooping silhouettes.
Flowering plants deserve special attention since blooms often serve as focal points in garden drawings. Begin with the overall flower form—whether spherical, daisy-like, or tubular—before adding individual petal details. Study the flower’s structure: some petals face forward, others turn sideways or backward, creating dimensional depth. Shading petals that face away from light sources and leaving highlighted areas light establishes convincing three-dimensionality. For flowering arrangements, remember that blooms at peak opening display open centers, while those just beginning to open show tight, compact forms.
Succulents and architectural plants with distinct geometric forms require precise line work and careful proportion measurement. These plants’ sculptural qualities make them excellent focal points in garden drawings. Use lighter values for highlighted surfaces and darker values for shadowed sides to emphasize their three-dimensional form. Their structured nature contrasts beautifully with softer, more organic plantings.
Capturing Light and Shadow in Garden Scenes
Light direction fundamentally shapes garden drawing success. Before beginning, establish a consistent light source—typically from the upper left in Western art tradition, though you may choose any direction. Once established, maintain this light source throughout your drawing. All shadows fall in the opposite direction from light, and shadow length depends on light angle: low-angle light creates long shadows, while overhead light creates short shadows directly beneath objects.
Cast shadows—shadows objects cast onto surfaces—add significant realism to garden drawings. A tall tree casts a long shadow across a pathway, a raised bed casts shadow onto surrounding ground, and a garden structure casts shadow on nearby plantings. These shadows should follow perspective rules, appearing foreshortened when viewed from above and lengthening as they recede into distance.
Form shadows—shadows on objects themselves—reveal three-dimensional structure. Rounded plant forms display gradual tonal transitions from light to shadow, while angular structures show more defined shadow edges. The transition zone between light and shadow, called the terminator, determines perceived form dimensionality. Soft transitions suggest rounded, organic forms, while crisp transitions suggest angular, geometric forms. When drawing areas with shade cloth or structures creating dappled light, vary your shadow values to suggest filtered light passing through foliage or fabric.
Reflected light, light bouncing from surrounding surfaces into shadow areas, prevents shadows from appearing completely black and lifeless. In gardens, light reflects from paths, nearby plants, and structures, subtly illuminating shadowed areas. Adding slight value to shadow areas using reflected light creates more sophisticated, naturalistic drawings than pure black shadows.

Adding Garden Structures and Hardscaping
Garden drawings gain complexity and interest through architectural elements: pergolas, arbors, fences, pathways, and water features. These structures require more precise drawing than organic plant forms, often benefiting from light ruler guidance for straight edges and geometric accuracy. Perspective becomes particularly important when drawing receding structures—a straight fence appears to narrow as it recedes toward a vanishing point.
Texture representation distinguishes different hardscape materials. Gravel paths benefit from scattered stippling and irregular marks suggesting individual stones. Wooden structures display grain patterns and weathering marks that add authenticity. Stone features show geometric joint lines and varied surface textures. Metal elements like arbors or trellises appear reflective with highlights and shadow patterns following surface contours.
Water features introduce reflective surfaces requiring special attention. Still water reflects surrounding elements, creating mirror images slightly distorted by water surface irregularities. Moving water in fountains or streams requires dynamic line work suggesting motion and flow. The interplay between water and surrounding plants—how water reflects light onto nearby foliage, how plants frame water features—creates compelling visual compositions that elevate your garden drawings from simple plant studies to complete landscape illustrations.
Color Theory for Garden Illustrations
When transitioning from graphite to colored mediums, understanding color theory dramatically improves garden drawing results. Complementary colors—colors opposite each other on the color wheel—create visual vibration and excitement. Purple flowers against yellow-green foliage, orange blooms against blue sky, or red plants against green foliage generate dynamic visual contrast that captures viewer attention.
Analogous color schemes, using colors adjacent on the color wheel, create harmonious, restful compositions. A garden rendered in blues, blue-greens, and greens feels calm and cohesive. Warm color schemes using yellows, oranges, and reds suggest energy and warmth, while cool schemes feel peaceful and spacious. Consider using fertilizers and amendments information when researching actual plant colors for accuracy—healthy, well-nourished plants display more vibrant coloring than nutrient-deficient specimens.
Value relationships—how light or dark colors appear—create depth and emphasis regardless of actual color. Light values advance toward viewers while dark values recede, so emphasizing foreground plants with lighter values and background elements with darker values creates spatial depth. Saturated colors appear closer than muted colors, so reserving your brightest, most saturated hues for focal point plants and softening colors in background areas enhances three-dimensional perception.
Seasonal Garden Drawing Approaches
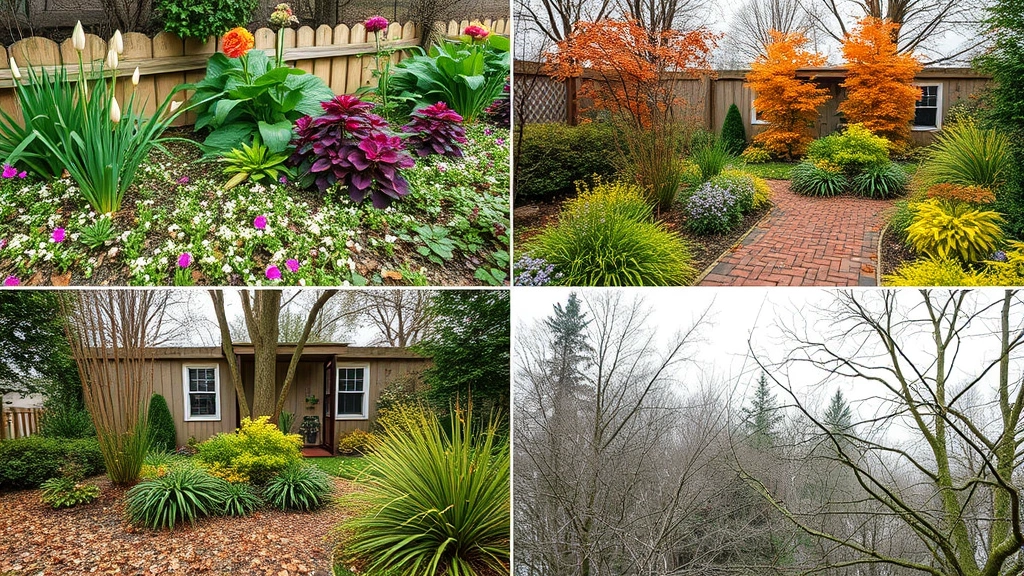
Gardens transform dramatically across seasons, offering distinct drawing opportunities and challenges. Spring gardens feature emerging growth, delicate new foliage in pale greens, and abundant flowering plants. Draw spring gardens with lighter values and softer forms to capture the season’s fresh, youthful character. Include bare branches becoming obscured by new growth and early bulb flowers pushing through soil.
Summer gardens display full, lush foliage and complex layered planting schemes. Draw with richer greens, deeper shadows, and more intricate detail. The abundance of summer growth means careful composition becomes essential—simplify complex areas using value and texture variation rather than attempting to render every leaf. Summer’s strong overhead light creates dramatic shadows that enhance visual interest.
Autumn gardens feature warm colors, seed heads, and structural forms becoming visible as foliage diminishes. Incorporate golds, oranges, reds, and browns while still maintaining green foliage on persistent plants. Draw architectural elements like trellises and raised beds with increasing prominence as plants lose leaves. Autumn light, lower and more golden than summer sun, creates longer, warmer-colored shadows.
Winter gardens present unique drawing challenges and opportunities. Bare branches reveal plant architecture typically hidden by foliage, allowing you to emphasize structural forms. Evergreen plants gain prominence, providing color contrast against gray skies and bare deciduous plants. Snow and frost add texture and value variation, while low-angle winter light creates dramatic shadows. Winter gardens often feel more spacious and structured, allowing viewers to see hardscape elements and overall garden design more clearly.
FAQ
What’s the best way to start drawing a garden if I’m a beginner?
Begin by sketching basic shapes and proportions lightly before adding details. Start with simple garden layouts using rectangles and circles to establish structure, then gradually add plants and features. Practice individual plant types separately before combining them in complex compositions. Study photographs and real gardens to understand how plants grow and interact with their environment.
How do I make my garden drawings look more realistic?
Focus on accurate proportions, consistent lighting, and detailed texture work. Study shadow and highlight placement carefully, establishing a clear light source and maintaining it throughout your drawing. Include cast shadows and reflected light rather than pure black shadow areas. Add varied textures using different mark-making techniques to suggest different plant types and materials.
Should I draw from photographs or real gardens?
Both approaches offer benefits. Drawing from real gardens helps you understand three-dimensional space and light behavior directly. Photographs provide reference material and allow you to work at your own pace. Many experienced artists combine both approaches—using photographs as primary reference while occasionally observing real gardens to verify details and understand spatial relationships.
What drawing techniques work best for complex foliage areas?
Rather than rendering individual leaves, use texture marks like stippling, cross-hatching, or scumbling to suggest foliage masses. Vary your mark direction and density to create visual interest and suggest form. Leave some areas lighter and more open while creating denser, darker areas to establish depth and dimensionality.
How can I improve my perspective when drawing garden paths and structures?
Practice establishing vanishing points and light construction lines before drawing final details. Study how parallel lines converge toward vanishing points. Draw paths and structures using these perspective guidelines, then erase construction lines once details are in place. Practice one-point perspective with a straight-on view before attempting more complex two-point perspective compositions.
What’s the most important element for garden drawing success?
Observation skills matter most. Study real gardens, notice how light behaves, observe plant growth patterns, and understand spatial relationships. The more time you spend observing gardens—whether in person or through photographs—the more convincingly you’ll render them in your drawings. Combine careful observation with consistent practice, and your garden drawings will continually improve.


