Maximize Garden Space: Expert Layout Guide
Creating an efficient garden layout is one of the most important steps toward a productive growing season. Whether you’re working with a small urban balcony, a modest backyard plot, or several acres, understanding how to organize your space strategically can dramatically increase yields and reduce maintenance time. A well-planned garden map serves as your blueprint for success, helping you visualize crop placement, companion planting relationships, and seasonal rotations before you ever break ground.
The question of how big a garden should be often comes down to personal goals, available space, and time commitment. Most beginners find that a 4×8 foot raised bed or a 100-square-foot in-ground plot provides enough variety to learn proper techniques without becoming overwhelming. However, the real magic happens when you understand your specific space’s sunlight patterns, soil conditions, and layout possibilities. This guide walks you through creating a personalized garden map that maximizes every square inch while maintaining healthy plants and sustainable practices.
Understanding Your Garden Space
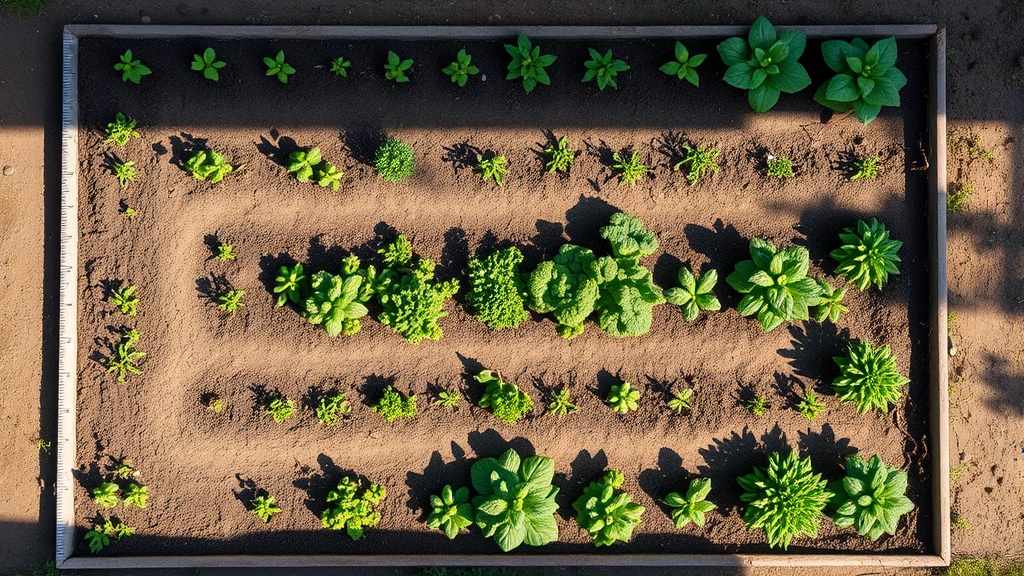
Before sketching your garden layout, you need accurate measurements and a clear understanding of what you’re working with. Grab a measuring tape and document the length and width of your garden area, noting any permanent structures like trees, fences, buildings, or utility lines. Mark the boundaries on graph paper using a consistent scale—typically one square equals one foot works well for most residential gardens.
Consider the shape of your space. Rectangular gardens are easiest to manage and allow for straight rows or raised beds. Oddly-shaped yards require creative solutions, but they often provide unique opportunities for tucking in herb garden planters in unexpected corners or building tiered growing zones. Measure any existing structures that provide windbreaks, reflected heat, or shade, as these features significantly influence what you can grow where.
Total available space matters less than usable growing space. A 2,000-square-foot property with half covered by shade provides roughly 1,000 square feet for sun-loving vegetables. A small urban gardener with 64 square feet of full sun can grow surprising quantities using vertical methods. Focus on quality sunlight access rather than raw acreage. Document your measurements in multiple formats—photographed, sketched, and written—so you have references when making planting decisions later in the season.
Assessing Sunlight and Shade Patterns
Sunlight is the single most critical factor in garden layout success. Most vegetables require 6-8 hours of direct sun daily, while leafy greens tolerate partial shade, and herbs like mint thrive with just 3-4 hours. Map your garden’s sun exposure by checking it at three times: morning (8-9 AM), midday (12-1 PM), and afternoon (4-5 PM). Note areas that receive full sun, partial sun (4-6 hours), and shade throughout the day.
Remember that sunlight patterns change seasonally. Winter sun arrives lower on the horizon and may hit areas that are shaded in summer. Conversely, deciduous trees provide filtered light in summer when their leaves are full, then allow stronger winter sun through. If you’re planning a garden in late fall or winter, take photos from the same spots every few weeks to track how sun coverage shifts. This temporal awareness prevents the frustration of planting shade-intolerant crops where they’ll eventually be shaded out.
Use these observations to create a simple sun map overlay on your garden sketch. Shade trees and structures create microclimates that you can leverage strategically. The south side of a building typically offers the warmest, sunniest location in most climates. East-facing areas get morning sun, ideal for heat-sensitive crops. West-facing zones can get intense afternoon heat—excellent for heat-loving peppers and eggplants. North-facing areas suit shade-tolerant greens and herbs.
Creating Your Garden Map
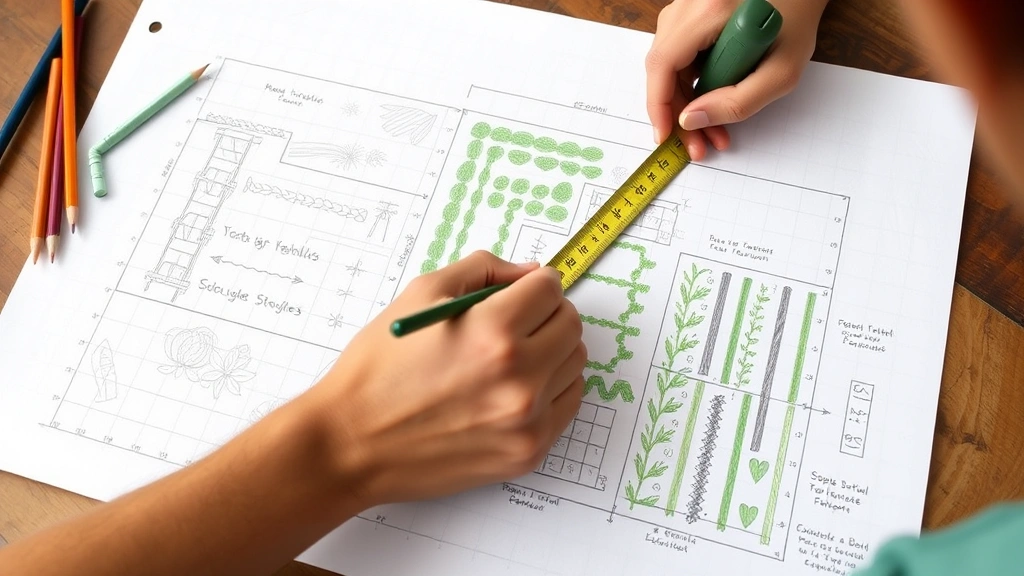
Your garden map is a working document that evolves throughout the growing season and year-to-year. Start with a base layer showing permanent features: buildings, trees, fences, utility boxes, and water sources. Add your sun exposure zones using different colors or shading patterns. Next, sketch in pathways—these are just as important as planting areas. Paths prevent soil compaction in growing zones and provide access for maintenance, harvesting, and pest monitoring.
Plan pathways to be at least 18 inches wide for comfortable walking and equipment passage. Wider pathways (2-3 feet) reduce back strain and allow two people to work comfortably. Consider how you’ll move water around your garden; garden hose repair kits keep your irrigation system functional, but proper layout prevents hose tangles and kinks. Position raised beds or garden sections to form a logical circuit you can walk for watering and harvesting.
Now add your growing zones. Decide whether you’ll use traditional rows, raised beds, containers, or a combination approach. Pallet raised garden beds offer excellent space efficiency and soil control in small areas. Rows work well in larger gardens with good machinery access. Container growing maximizes flexibility and suits patios, balconies, and spaces with poor native soil. Draw these features to scale on your map, leaving room for seasonal adjustments.
Vertical Growing Techniques
Vertical growing is the most effective way to maximize limited space. Trellises, stakes, cages, and hanging systems transform a garden’s productivity by utilizing the air space above ground. Vining crops like beans, peas, cucumbers, and melons naturally climb when provided support, reducing their footprint by 50-75% compared to sprawling ground coverage. A single 8-foot trellis might support 20-30 pounds of beans in the space that would otherwise hold just 2-3 plants.
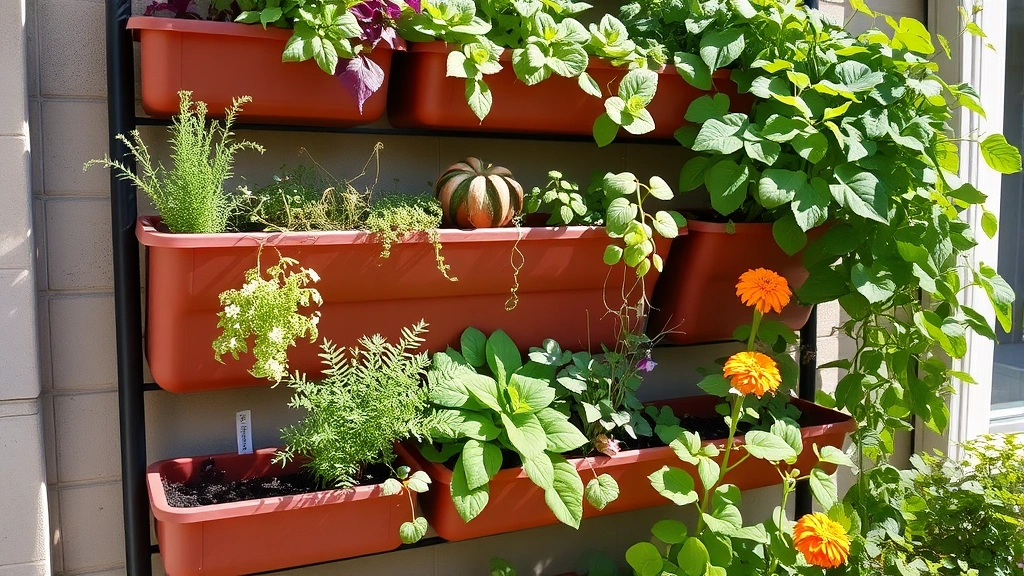
Plan vertical structures into your map from the start, considering their shadows. A north-south orientation for tall trellises prevents them from shading adjacent beds. East-west orientation works better if you want afternoon shade for heat-sensitive crops. Hanging baskets suspended from structures, pergolas, or specially designed systems grow trailing herbs, strawberries, and smaller vegetables. Wall-mounted planters transform bare fences into productive surfaces; even a single wall can accommodate 40-60 plants in tiered pockets.
Implement staggered heights in your layout to prevent excessive shading. Tall plants (6-8 feet) on the north side, medium-height crops (3-4 feet) in the middle, and low growers (12-18 inches) on the south side creates a cascading effect that maximizes sunlight penetration. This arrangement is particularly effective in smaller gardens where every inch of sun exposure matters. The vertical approach also improves air circulation, reducing disease pressure and making harvesting and maintenance more ergonomic.
Companion Planting Strategies
Strategic plant placement based on companion relationships increases productivity and pest management. Certain plant combinations enhance growth, repel pests, or improve soil health through beneficial root interactions. Your garden map should reflect these relationships, grouping compatible plants in proximity while separating antagonistic ones. Flower garden ideas often incorporate beneficial companions like marigolds and nasturtiums that attract pollinators while repelling common pests.
Tomatoes benefit from basil nearby, which improves flavor and repels flies and hornworms. Carrots and onions companion well with lettuce and spinach. Beans fix nitrogen, making them excellent neighbors for heavy-feeding crops like corn and squash. Herbs like cilantro, dill, and fennel attract beneficial insects that prey on garden pests. When mapping your garden, cluster these compatible groups together in sections, making maintenance and harvesting more efficient.
Create a legend on your map showing which crops will occupy each zone during different seasons. Indicate where you’ll plant spring greens, summer heat-lovers, and fall crops. This visual reference prevents accidental incompatible placements and helps you identify which areas will be empty at specific times, creating opportunities for succession planting or cover crops.
Seasonal Rotation Planning
Crop rotation prevents soil depletion and breaks pest and disease cycles. Group plants by family and plan a 3-4 year rotation where each family occupies different beds in sequence. Nightshades (tomatoes, peppers, eggplants), brassicas (cabbage, broccoli, kale), legumes (beans, peas), and cucurbits (squash, cucumbers, melons) should rotate through separate zones annually.
Map out your rotation plan on separate overlays or in a planting journal. Year one shows initial placement; year two shows where each crop family moves. This planning prevents the buildup of soil-borne diseases and pest populations while naturally balancing nutrient demands. Heavy feeders like tomatoes and corn follow nitrogen-fixing legumes, which restore soil fertility. Root crops like carrots and beets follow heavy feeders, utilizing remaining nutrients without demanding fresh additions.
Include cover crops in your rotation strategy. Winter cover crops like clover or rye occupy beds during dormant seasons, preventing erosion, suppressing weeds, and adding organic matter when tilled under. Mark these zones on your seasonal maps to ensure you’re maximizing productivity year-round. Rain gardens and water management features also benefit from rotation planning, as wet-season growing zones differ from dry-season layouts.
Water Management Layout
Efficient water delivery is essential for maximizing garden productivity. Position water sources—faucets, rain barrels, or irrigation system connections—centrally to minimize hose runs. Design pathways that allow easy hose movement without kinking or tangling. Group plants with similar water needs together, allowing you to create distinct irrigation zones with different watering schedules.
Heavy-watering crops like squash, cucumbers, and beans should be positioned near water sources or in areas where you can easily install drip irrigation. Drought-tolerant herbs and Mediterranean plants fit better in distant zones. Raised beds dry faster than in-ground gardens, so they may warrant more frequent watering; position them where you can monitor soil moisture easily. Container gardens need daily attention during hot weather; place them in convenient locations you pass regularly.
Design your irrigation system layout on your map before installation. Drip lines, soaker hoses, and sprinklers each have advantages depending on your space and plant types. Mark water source locations, hose routing, and planned irrigation zones. This forethought prevents expensive rework and ensures consistent moisture for optimal growth. Consider installing a simple timer system to automate watering during peak season, freeing time for other garden tasks.
Small Space Solutions
Urban gardeners and those with limited space must employ every layout strategy imaginable. Container gardens on patios, balconies, and rooftops offer surprising productivity. A 4×8-foot balcony can grow 30-40 plants using tiered containers and vertical systems. Succession planting—sowing new crops every 2-3 weeks—ensures continuous harvests from limited space. Your map should show container positions and indicate which will be replanted and when.
Intensive spacing reduces distances between plants, maximizing yields from small areas. Square-foot gardening divides beds into 16 sections (4×4 feet), with each square holding a different crop at appropriate densities. This system is ideal for beginners and space-limited gardens. Your map can use a grid overlay to show square-foot divisions, making it easy to plan specific placements and visualize succession timing.
Wall-mounted systems, hanging planters, and windowsill gardens extend growing space vertically. Trellises on south-facing walls capture maximum sun while saving ground space. Tiered shelving holds multiple containers, each with different crops. Even small spaces can produce 50-100 pounds of vegetables annually when layouts are optimized for intensity and succession. Map these vertical systems carefully to prevent shading conflicts and ensure access for maintenance.
FAQ
What size garden should a beginner start with?
Most beginners thrive with 50-100 square feet initially. This provides enough space to learn proper techniques without overwhelming you with maintenance. A 4×12-foot raised bed or 10×10-foot in-ground plot works well. You can always expand once you understand your local climate, soil conditions, and time commitments.
How do I measure my garden for mapping purposes?
Measure length and width with a tape measure, recording to the nearest foot. Use graph paper with a consistent scale (one square = one foot). Document permanent features like trees, buildings, and utilities. Take photos from multiple angles. Check sun exposure at three times daily for at least one week to create accurate sun maps.
Can I grow vegetables in partial shade?
Yes, but selectively. Leafy greens like lettuce, spinach, and kale tolerate 3-4 hours of sun. Herbs like mint, parsley, and cilantro thrive in partial shade. Root vegetables need 4-6 hours. Fruiting crops like tomatoes and peppers require 6-8+ hours. Map your sun zones and choose appropriate crops for each.
What’s the best layout for a small urban garden?
Combine vertical growing, containers, and intensive spacing. Use trellises on south-facing walls. Stack tiered containers. Employ succession planting with 2-3 week intervals. Choose high-value crops like herbs, tomatoes, and greens. A 64-square-foot space can produce 100+ pounds annually with this approach.
How often should I update my garden map?
Create a new base map each year reflecting any structural changes. Update your crop placement annually based on rotation plans. Keep seasonal notes throughout the year about what worked, what didn’t, and where improvements are needed. This evolving document becomes invaluable for long-term garden success.
Should I include pathways in my space calculations?
Absolutely. Pathways prevent soil compaction and enable access for maintenance and harvesting. Plan for at least 18 inches wide for comfortable walking. These are as important as growing zones. A 100-square-foot garden with appropriate pathways might have 60-70 square feet of actual planting space—that’s realistic and sustainable.


