How to Build a Raised Garden Bed: Complete Lowe’s DIY Tips
Building a raised garden bed transforms your outdoor space into a productive growing area, whether you’re a seasoned gardener or just starting out. Lowe’s offers an excellent selection of materials, tools, and supplies to make your DIY raised garden project straightforward and successful. A raised bed provides better drainage, warmer soil in spring, easier access for planting and harvesting, and the flexibility to grow virtually anywhere on your property—even in areas with poor native soil.
This comprehensive guide walks you through every step of building a raised garden bed using Lowe’s products and expert tips. You’ll learn about material selection, construction techniques, soil preparation, and maintenance strategies to ensure your raised bed thrives for years to come. Whether you’re planning a small herb garden or a large vegetable growing space, these instructions apply to projects of any size.
Choosing Your Raised Bed Materials at Lowe’s
Lowe’s carries multiple material options for raised garden beds, each with distinct advantages. Untreated wood, particularly cedar and redwood, remains the most popular choice among gardeners. These naturally rot-resistant woods last 10-15 years without chemical treatment, making them ideal for vegetable gardens where safety is paramount. Cedar boards have a pleasant appearance and aromatic quality while resisting insect damage better than pine.
If you’re budget-conscious, pressure-treated lumber offers durability at a lower price point. Modern pressure-treated wood uses copper-based preservatives rather than arsenic compounds, making it safer for food gardens than older versions. However, many gardeners still prefer untreated options for complete peace of mind. Lowe’s also stocks composite materials that blend wood fibers with plastic, providing excellent longevity (20+ years) without rot concerns, though at premium pricing.
For gardeners seeking metal alternatives, galvanized steel and corrugated metal beds available at Lowe’s offer industrial aesthetics while lasting decades. These materials heat up quickly in spring, which can benefit cool-season crops. Vinyl-coated metal options prevent rust while adding color options to your garden design.
Consider bed dimensions carefully. Standard Lowe’s raised bed kits come in 4×8 feet, 4×4 feet, and smaller sizes. A 4×8 foot bed accommodates most gardeners’ needs while remaining manageable for soil filling and plant maintenance. Depth matters too—aim for at least 12 inches for most vegetables, 18 inches for root crops like carrots and parsnips, and 24 inches for growing deeper-rooted plants.
Tools and Supplies You’ll Need
Before heading to Lowe’s, gather or purchase these essential tools and supplies. For construction, you’ll need a power drill or screwdriver, measuring tape, carpenter’s level, and saw (if cutting custom lengths). Lowe’s stocks all these items, and staff can often help with cutting boards to your specifications.
Fasteners are crucial—use 3-inch wood screws or galvanized nails to prevent rust staining your soil and plants. Avoid nails in corners where boards meet; screws provide superior holding power. You’ll also want landscape fabric or hardware cloth if adding a base layer for weed prevention or pest protection.
For soil preparation, acquire a shovel, wheelbarrow, garden rake, and soil testing kit. A quality garden hose reel cart helps manage watering efficiently once your bed is established. Consider adding a soil moisture meter to monitor watering needs accurately throughout the growing season.
Lowe’s carries premium soil mixes, compost, and amendments. Have these delivered if you’re building a large bed—hauling 15-20 bags of soil yourself becomes tedious quickly. Pre-mixed raised bed soil formulations at Lowe’s eliminate guesswork, combining topsoil, compost, and amendments in ideal proportions.
Selecting the Perfect Location
Location determines your raised bed’s success more than most gardeners realize. Most vegetables require 6-8 hours of direct sunlight daily. Observe your yard throughout the day before choosing your spot. Morning sun dries dew, reducing disease pressure, while afternoon shade in hot climates prevents bolting in leafy greens.
Avoid locations beneath tree canopies where root competition and shade limit growth. Don’t place raised beds directly against structures where air circulation is poor and moisture accumulates. Ensure reasonable access to water—your garden hose reel cart won’t reach everywhere, and hand-watering distant beds becomes burdensome.
Check for level ground or plan for leveling during construction. A slightly sloped location works acceptably, but avoid areas where water pools during heavy rain. South-facing locations warm fastest in spring, beneficial for heat-loving crops. North-facing beds work for shade-tolerant plants like lettuce and spinach during summer.
Consider proximity to your kitchen if growing herbs and vegetables you’ll harvest frequently. Small evergreen garden plants can border your beds, providing visual interest while protecting them from wind exposure. Verify that no underground utilities exist before digging—contact your local utility locating service if uncertain.
Step-by-Step Construction Guide
Step 1: Prepare Your Site
Mark your bed outline using string and stakes. Clear grass and weeds from the area using a shovel or sod cutter. Remove large rocks and debris. You don’t need to remove every weed—the raised bed height isolates your growing area from underlying soil issues. Level the ground as much as possible; minor variations are acceptable.
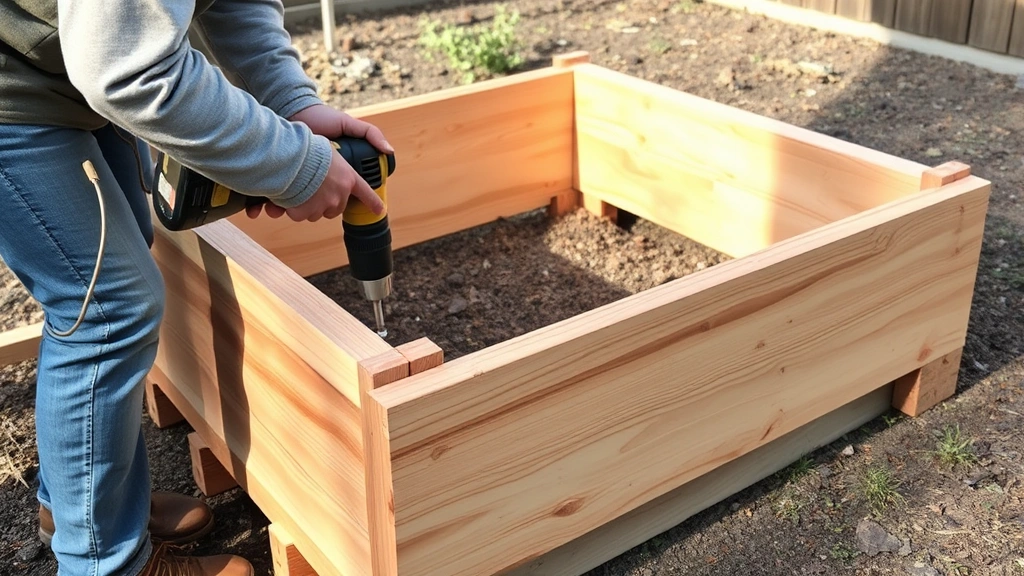
Step 2: Assemble Board Corners
If using individual boards, lay them in a rectangle on level ground. Pre-drill holes to prevent wood splitting, then drive 3-inch screws through one board into the end grain of the adjacent board. Use at least two screws per corner for structural integrity. Corner brackets available at Lowe’s reinforce connections and simplify assembly for less experienced builders.
Step 3: Position Your Frame
Carefully move your assembled frame to the prepared location. Use a carpenter’s level to check both directions, adjusting soil beneath low corners. A slightly imperfect level is acceptable; major variations cause uneven water distribution and settling issues.
Step 4: Add Optional Base Layers
If preventing weeds from below is important, line the bottom with landscape fabric or hardware cloth (for rodent protection). Secure materials to the frame interior using staples or landscape pins. This step adds cost and effort but proves worthwhile in locations with persistent weed pressure.
Step 5: Install Soil
Fill your bed with quality raised garden bed soil mixture. Lowe’s delivers bulk soil orders, a worthwhile convenience for large projects. Fill to within 2-3 inches of the top, allowing room for mulch and water retention. Water thoroughly and allow the soil to settle for a few days before planting.
Filling Your Raised Bed with Quality Soil
Soil quality directly impacts your gardening success. Rather than using native soil topped with compost, Lowe’s recommends their raised bed soil mixes that blend topsoil, compost, and perlite or coarse sand for drainage. These formulations typically contain 40-50% compost, providing nutrients and organic matter vegetables require.
For budget-conscious gardeners, create your own mix: 40% topsoil, 40% compost, and 20% coarse sand or perlite. Purchase these components separately at Lowe’s and mix in a wheelbarrow or directly in your bed. This approach costs less while giving you control over ingredients.
If growing vegetables, amend soil with balanced fertilizer before planting. A 5-5-5 or 10-10-10 formulation provides nitrogen, phosphorus, and potassium in accessible forms. Growing food for cooking recipes requires nutrient-rich soil that sustains plants throughout the season.
Conduct a soil pH test using kits available at Lowe’s. Most vegetables prefer slightly acidic soil (pH 6.0-7.0). If your pH is off, amend accordingly—sulfur lowers pH, lime raises it. Allow amendments to incorporate for 1-2 weeks before planting.
Annually refresh your raised bed soil by adding 1-2 inches of compost each spring. This maintains soil structure, feeds microorganisms, and replenishes nutrients consumed by previous crops. Over time, soil naturally compacts and decomposes, making top-ups essential for continued productivity.

Drainage and Lining Considerations
Proper drainage prevents root rot and waterlogged conditions that kill plants. Raised beds inherently drain better than in-ground gardens because soil sits above surrounding ground level. However, excessive drainage in sandy soils wastes water and nutrients.
If your native soil beneath the bed is heavy clay, consider a landscape fabric barrier to separate raised bed soil from clay layers. This prevents clay from wicking moisture upward while allowing excess water to drain slowly. Don’t seal the bottom completely—air circulation and some water movement benefit soil health.
For metal raised beds, lining the interior with landscape fabric prevents rust staining and extends bed lifespan. Lowe’s carries rust-resistant liners specifically designed for metal beds. Create small drainage holes in liners to prevent water pooling.
In areas with heavy rain, slightly mounding soil in bed centers promotes drainage toward edges. This subtle slope prevents water from accumulating in low spots where root rot develops. Monitor moisture levels with a soil moisture meter during wet periods.
Conversely, if your area experiences drought, slightly lower centers in beds to catch and retain water. Mulching raised beds with 2-3 inches of organic material (straw, shredded leaves, or wood chips) reduces evaporation significantly, critical in arid climates.
Planting and Growing Guide
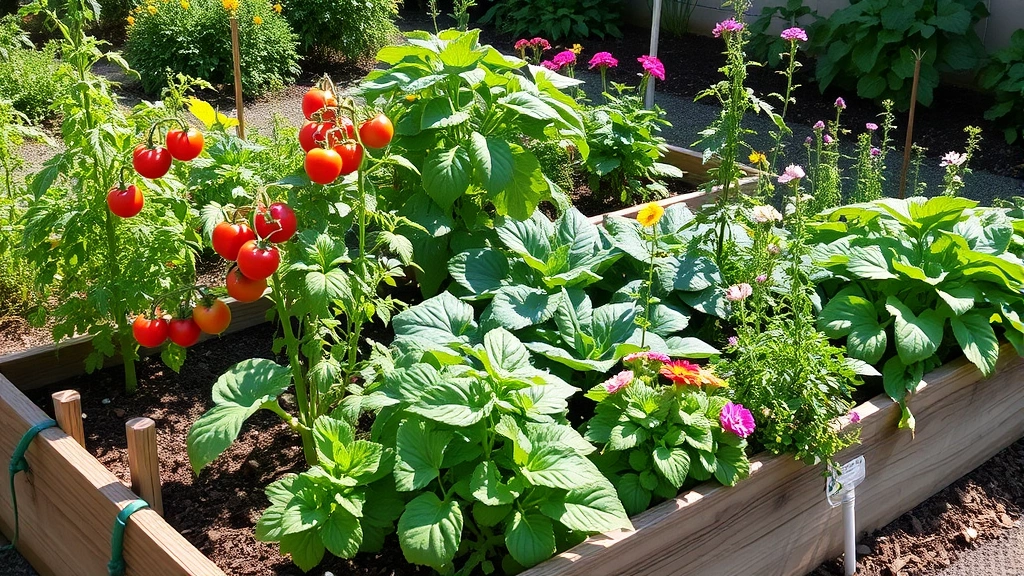
Once your raised bed is filled and settled, you’re ready to plant. The ideal planting time depends on your climate and what you’re growing. Spring planting works for cool-season crops like lettuce, peas, and broccoli. Summer is perfect for heat-lovers like tomatoes, peppers, and squash.
Space plants according to mature size recommendations on seed packets or plant labels. Raised beds allow closer spacing than traditional gardens because soil fertility is higher and air circulation is improved. A 4×8 foot bed accommodates roughly 32 plants spaced 1 foot apart, or 16 plants at 2-foot spacing.
Water newly planted beds thoroughly and maintain consistent moisture during establishment. Young plants need steady water availability to develop strong root systems. Once established, most vegetables need about 1 inch of water weekly, including rainfall.
Succession plant every 2-3 weeks for continuous harvests of lettuce, beans, and other fast-growing crops. As early spring crops finish, replant the space with summer vegetables. In fall, grow cool-season crops again for autumn and early winter harvests.
Consider growing specialty plants like ember lilies alongside vegetables for visual appeal. Ornamental plants attract pollinators and beneficial insects while adding color to your growing space.
Seasonal Maintenance Tips
Spring Maintenance
As soil warms and growth accelerates, add mulch to regulate soil temperature and conserve moisture. Install drip irrigation or soaker hoses for efficient watering. Top-dress with 1 inch of compost to provide season-long nutrition. Monitor for pests and diseases as plants emerge from dormancy.
Summer Care
Maintain consistent watering during hot months—raised beds heat up quickly, increasing evaporation. Provide shade cloth for heat-sensitive crops like lettuce during peak summer. Deadhead flowers on ornamental plants and harvest vegetables regularly to encourage continued production. Watch for spider mites, aphids, and other warm-weather pests.
Fall Preparation
Plant cool-season crops in late summer for fall and winter harvests. Remove spent plants and add debris to compost. Apply fall-applied fertilizer or compost to prepare soil for winter. In cold climates, mulch beds heavily to insulate soil and reduce frost heaving.
Winter Considerations
In mild climates, grow cold-hardy crops like kale, spinach, and garlic. In cold regions, let beds rest or use cold frames to extend the season. Use winter to plan next year’s garden, repair bed structures, and refresh soil with compost. Avoid working in frozen beds, which damages soil structure.
FAQ
What size raised bed should I build?
A 4×8 foot bed works well for most gardeners, producing substantial harvests while remaining manageable. Smaller spaces work with 2×4 or 3×6 foot beds. Depth should be at least 12 inches for vegetables, preferably 18 inches for root crops. Wider than 4 feet makes reaching the center difficult.
Can I use treated lumber in vegetable gardens?
Modern pressure-treated lumber uses copper-based preservatives considered safe for vegetable gardens. However, untreated cedar or redwood eliminate concerns entirely. Avoid old pressure-treated wood containing arsenic, identifiable by its green color.
How often should I water a raised bed?
Most vegetables need approximately 1 inch of water weekly, including rainfall. Water deeply and less frequently rather than shallow daily watering, which encourages shallow root development. Use a soil moisture meter to verify moisture levels before watering.
Can I build a raised bed on concrete?
Yes, raised beds work well on concrete patios and driveways. Ensure adequate drainage by creating a base layer of gravel before filling with soil. Concrete heats up significantly in summer, potentially warming soil excessively, so consider partial shade in hot climates.
What’s the best soil mix for raised beds?
A blend of 40% topsoil, 40% compost, and 20% perlite or coarse sand creates ideal drainage and fertility. Lowe’s pre-mixed raised bed soil formulations eliminate guesswork. Refresh annually with 1-2 inches of compost to maintain soil quality.
How do I prevent weeds in raised beds?
Line the bed bottom with landscape fabric before adding soil to block weeds from below. Mulch the surface with 2-3 inches of organic material. Hand-pull any weeds that emerge promptly, before they establish deep roots.
Can I grow perennials in raised beds?
Absolutely. Raised beds work wonderfully for perennial vegetables like asparagus and rhubarb, as well as ornamental perennials. Provide adequate depth (18+ inches) and refresh soil annually with compost to maintain productivity over many years.
What vegetables grow best in raised beds?
Most vegetables thrive in raised beds: tomatoes, peppers, squash, beans, lettuce, kale, carrots, beets, and root crops all perform excellently. Shallow-rooted herbs and leafy greens particularly benefit from the controlled environment raised beds provide.


