Elder Beans Growing Tips: Expert Guide to Cultivating This Nutritious Legume
Elder beans, also known as yard-long beans or asparagus beans, are a rewarding addition to any vegetable garden. These vigorous climbing legumes produce abundant harvests of tender, flavorful pods throughout the growing season. Whether you’re a seasoned gardener or just starting out, understanding the fundamentals of elder bean cultivation will help you achieve impressive yields and maintain healthy plants from seed to harvest.
Growing elder beans successfully requires attention to soil preparation, proper spacing, consistent watering, and timely pest management. These tropical and subtropical natives thrive in warm conditions and reward gardeners with continuous production when given the right care. This comprehensive guide covers everything you need to know to grow a garden filled with productive elder bean plants that will provide fresh vegetables for months.
Understanding Elder Beans and Their Growing Requirements
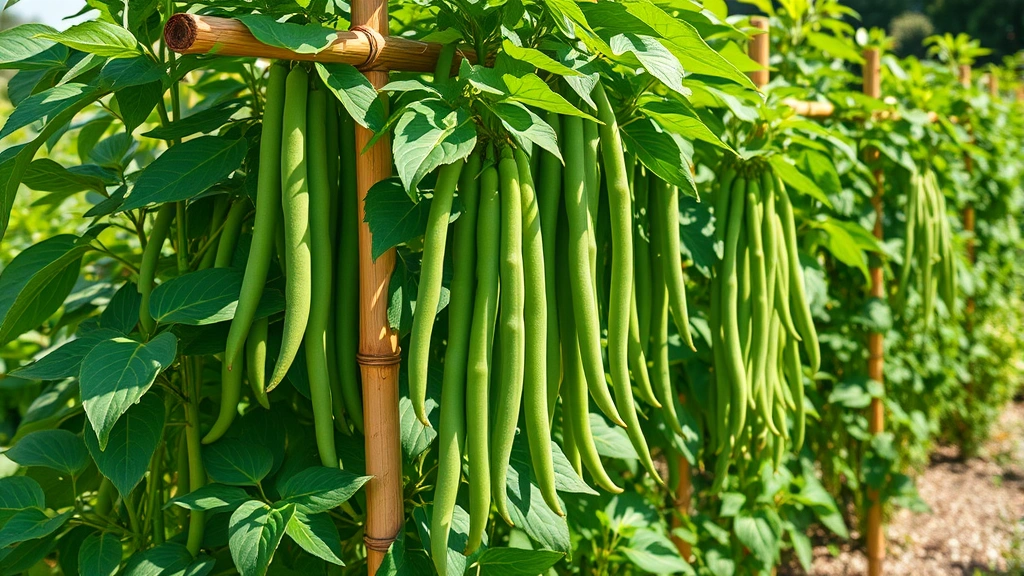
Elder beans belong to the Vigna unguiculata subspecies and are distinct from common snap beans found in temperate gardens. These legumes are native to warm climates and produce long, slender pods that can reach 12 to 18 inches in length. The plants are vigorous climbers that require sturdy support structures, typically growing 6 to 8 feet tall when given adequate trellising.
The growing season for elder beans extends much longer than traditional bean varieties. In warm climates, these plants continue producing until the first frost, offering gardeners an extended harvest window. The pods are best harvested when young and tender, before the seeds inside become too large and starchy. Young pods have a delicate flavor similar to asparagus, which explains their alternative name.
Temperature is the most critical factor in elder bean success. These plants require consistently warm conditions, with soil temperatures of at least 65°F for germination and air temperatures ideally between 70°F and 85°F for optimal growth. They are far less cold-tolerant than common beans and will not thrive in cool spring conditions. Gardeners in cooler climates should wait until late spring or early summer to plant, ensuring soil has warmed thoroughly.
Elder beans are nitrogen-fixing legumes, meaning they form symbiotic relationships with beneficial bacteria in the soil that convert atmospheric nitrogen into plant-available forms. This characteristic makes them excellent for crop rotation and helps reduce the need for synthetic fertilizers. Planting elder beans in a cottage garden setting alongside other vegetables can improve overall soil health.
Soil Preparation and Site Selection
Successful elder bean cultivation begins with proper soil preparation. These plants prefer well-draining soil rich in organic matter, with a pH between 6.0 and 7.0. Before planting, amend your garden beds with 2 to 3 inches of compost or well-rotted manure, working it into the top 8 to 10 inches of soil. This improves drainage, increases nutrient availability, and promotes beneficial microbial activity.
Site selection is equally important. Elder beans require at least 6 to 8 hours of direct sunlight daily for optimal growth and pod production. Choose a location that receives full sun and has good air circulation to minimize disease pressure. Avoid planting in areas prone to waterlogging, as elder beans are susceptible to root rot in excessively wet conditions.
Perform a soil test before planting to determine nutrient levels and pH. Most extension services offer affordable soil testing through their Cooperative Extension System, providing detailed recommendations for amendments. If your soil is deficient in phosphorus or potassium, incorporate a balanced organic fertilizer such as 5-5-5 NPK before planting.
Consider the layout of your garden carefully. Elder beans will shade areas beneath their trellis, so position them on the north side of your garden beds to avoid shading other sun-loving plants. The tall growth habit makes them ideal for creating natural screens or boundaries within your garden space. Many gardeners use elder beans as part of a fairy garden design or along property lines.

Planting Elder Beans: Timing and Technique
Timing is crucial when planting elder beans. Wait until all danger of frost has passed and soil temperatures have reached at least 65°F, ideally 70°F or warmer. In most regions, this means planting in late May through June. Planting too early in cool soil will result in seed rot and poor germination. Use a soil thermometer to verify soil temperature before sowing.
Soak elder bean seeds in room-temperature water for 4 to 6 hours before planting to accelerate germination. This softens the seed coat and helps the embryo absorb moisture more readily. Some gardeners prefer to scarify seeds lightly with sandpaper to further enhance water uptake, though soaking alone is usually sufficient.
Plant seeds directly into the garden at a depth of 1 to 1.5 inches, spacing them 4 to 6 inches apart along the base of your trellis or support structure. Water gently but thoroughly after planting. Germination typically occurs within 7 to 14 days in warm soil. Once seedlings develop their first true leaves, thin them to 6 to 8 inches apart, removing weaker plants to give stronger ones room to develop.
For an extended harvest, consider succession planting every 2 to 3 weeks throughout the warm season. This staggered approach ensures continuous pod production rather than a single peak harvest. In long-season climates with 120+ frost-free days, you can make plantings from late May through mid-July for harvest extending into autumn.
Elder beans can also be started indoors 3 to 4 weeks before the last frost date and transplanted outside once soil warms, but direct seeding is generally more successful and avoids transplant shock. The rapid growth of elder beans means they quickly establish strong root systems when planted directly in warm soil.
Watering and Fertilization Strategies
Consistent moisture is essential for elder bean success, particularly during flowering and pod development. Water deeply 1 to 2 inches per week, adjusting frequency based on rainfall and soil moisture. The goal is to maintain evenly moist (not waterlogged) soil throughout the growing season. Early morning watering reduces disease pressure by allowing foliage to dry quickly.
Mulching around your elder bean plants helps retain soil moisture, moderates soil temperature, and suppresses weeds. Apply 2 to 3 inches of organic mulch such as straw or shredded leaves, keeping it a few inches away from the plant base to prevent rot. Mulch also breaks down over time, adding organic matter to the soil.
While elder beans fix their own nitrogen, they benefit from balanced nutrition for optimal growth and production. Apply a balanced organic fertilizer (such as 5-5-5 or 10-10-10 NPK) at planting time according to soil test recommendations. Once flowering begins, switch to a lower nitrogen formula like 2-8-4 to encourage pod development rather than excessive vegetative growth.
Side-dress plants with compost every 4 to 6 weeks during the growing season. This gradual nutrient release supports continuous growth and production without the risk of over-fertilization. Avoid high-nitrogen fertilizers, which promote lush foliage at the expense of flowering and fruiting. Foliar feeding with diluted fish emulsion every 2 to 3 weeks can also boost productivity.
Monitor for signs of nutrient deficiency. Yellow lower leaves may indicate nitrogen deficiency, while purple-tinged foliage suggests phosphorus deficiency in cool conditions. Adjust your fertilization program accordingly. When growing related crops like peas in your garden, similar nutrient management principles apply.
Supporting Structures and Trellising
Elder beans are vigorous climbers that require sturdy support structures to thrive. These plants will reach 6 to 8 feet in height and produce substantial biomass, so your trellis must be robust enough to bear the weight of mature plants laden with pods. Flimsy supports will collapse under the load, damaging plants and reducing productivity.
Excellent trellis options include bamboo poles arranged in a teepee or A-frame configuration, sturdy wooden trellises, metal fencing, or cattle panels secured firmly to the ground. For large plantings, a row of bamboo poles lashed together with twine creates an attractive and functional support system. Ensure all structures are anchored securely to prevent wind damage.
Install your support structure at planting time rather than after plants have emerged, which can damage young seedlings and their roots. As seedlings grow, gently guide their tendrils toward the support structure. Most elder bean varieties will readily climb once they contact the support, but you may need to tie in the first few shoots with soft twine.
Spacing between support poles should be 12 to 18 inches for optimal air circulation and harvest access. This spacing allows you to move easily between plants for picking and maintenance. Good air circulation reduces humidity levels around the foliage, minimizing fungal disease incidence.
Some gardeners use elder beans as living screens or shade providers in garden design. Positioning them along a fence or pergola creates a natural boundary while producing food. This dual-purpose approach fits well with garden tulip garden designs where vertical elements add visual interest.
Pest and Disease Management
Elder beans are generally hardy plants but can fall prey to several common garden pests and diseases. Spider mites thrive in hot, dry conditions and cause yellowing, stippled foliage. Spray affected plants with a forceful stream of water to dislodge mites, or use insecticidal soap if infestations are severe. Maintaining consistent soil moisture helps prevent spider mite outbreaks.
Aphids congregate on new growth and can transmit viral diseases. Check plants regularly for colonies of small, soft-bodied insects clustered on stems and leaf undersides. Control light infestations with water spray or neem oil. Introduce beneficial insects like ladybugs and parasitic wasps by planting flowering companions such as alyssum, marigolds, and borage nearby.
Bean beetles and their larvae feed on foliage and can defoliate plants if left unchecked. Hand-pick beetles and egg clusters daily during peak season, dropping them into soapy water. Row covers can protect young plants before flowering, though you’ll need to remove them when flowers appear to allow pollinator access.
Fungal diseases like powdery mildew and leaf spot thrive in warm, humid conditions. Improve air circulation through proper spacing and pruning of lower foliage. Water at soil level rather than overhead to keep leaves dry. Remove affected leaves promptly and dispose of them in the trash (not compost). Sulfur dust or neem oil can treat powdery mildew if it appears.
Root rot develops in waterlogged soil, causing plants to wilt and decline despite adequate moisture. Prevention is key: ensure excellent drainage and avoid overwatering. If root rot occurs, remove affected plants and improve drainage before replanting in that location. Crop rotation is essential for disease management in elder bean cultivation.
Harvesting and Storage Tips
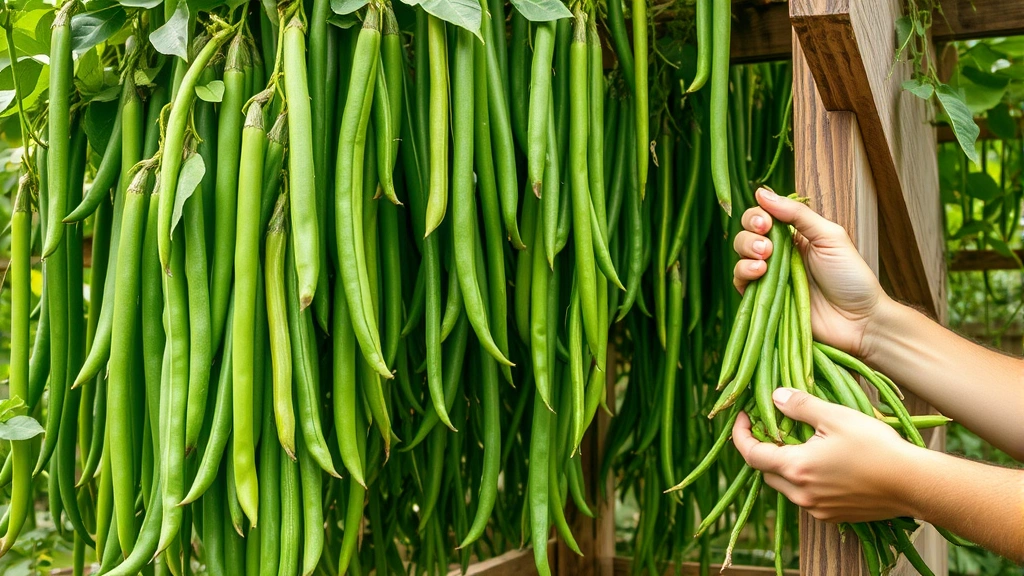
Begin harvesting when pods reach 6 to 8 inches in length, before they become tough and fibrous. Young pods snap cleanly when bent and offer the best flavor and texture. Harvest regularly every 2 to 3 days to encourage continuous flowering and production. Mature pods left on plants signal the plant to slow flowering and focus on seed development.
Harvest in the cool morning hours when pods are crisp and full of moisture. Use a gentle twisting motion or scissors to remove pods, avoiding damage to the plant and remaining developing pods. Never yank or pull roughly, as this can break branches and reduce future productivity.
Fresh elder bean pods store well in the refrigerator for up to 5 days when placed in a perforated plastic bag. For longer storage, blanch pods for 3 minutes in boiling water, cool in ice water, drain thoroughly, and freeze in airtight containers for up to 8 months. Blanching preserves color, texture, and nutritional quality during freezing.
If you allow some pods to mature fully, the seeds inside can be dried for winter use or saved for next season’s planting. Leave mature pods on the plant until they dry and brown, then harvest and shell them. Store dried seeds in a cool, dry location in an airtight container for up to 2 years.
Mature elder beans are excellent in soups, stews, and curries. The tender young pods can be stir-fried, steamed, or added raw to salads. This versatility makes elder beans valuable for both fresh and preserved cooking throughout the year. Many gardeners find that the extended harvest season makes these beans more productive than traditional snap beans.
FAQ
How long does it take for elder beans to produce pods?
Elder beans typically begin flowering 45 to 60 days after planting and produce harvestable pods about 55 to 70 days from seed. The exact timeline depends on temperature, with warmer conditions accelerating development. Consistent warmth is essential for rapid pod production.
Can I grow elder beans in containers?
Yes, elder beans grow well in large containers (minimum 5 gallons) with drainage holes. Use quality potting soil and provide sturdy trellising. Container plants require more frequent watering and feeding than in-ground plants. Choose a sunny location and water whenever the top inch of soil feels dry.
What’s the difference between elder beans and yard-long beans?
Elder beans and yard-long beans are the same species (Vigna unguiculata) with different common names. The term “yard-long” refers to their potential length, while “elder” is a regional designation. Some varieties can reach 18 inches or longer.
Do elder beans need to be inoculated with rhizobia bacteria?
While elder beans can fix nitrogen without inoculation, applying rhizobia inoculant to seeds before planting can improve nitrogen fixation, especially if beans haven’t been grown in your garden previously. This is optional but can increase productivity in nitrogen-poor soils.
What should I plant after elder beans?
Elder beans improve soil nitrogen, making them excellent predecessors for heavy-feeding crops like tomatoes, peppers, or cabbage. Avoid planting other legumes immediately after beans. When planning crop rotation, consider following beans with brassicas or nightshades in your blog garden planning.
Are there any companion plants that help elder beans grow better?
Marigolds, basil, and borage make excellent companions, attracting beneficial insects and deterring pests. Avoid planting fennel or onions near beans, as these can inhibit bean growth. Corn and squash create a traditional “three sisters” combination with beans, though elder beans require different spacing than traditional varieties.
How do I save seeds from my elder bean plants?
Allow some pods to fully mature on the plant until they dry and brown completely. Harvest pods and shell them to extract seeds. Spread seeds on a clean surface to dry for 2 to 3 weeks until they’re hard and brittle. Store in an airtight container in a cool location. Properly stored elder bean seeds remain viable for 2 to 3 years.


