DIY Stepping Stones: Complete Gardening Guru Advice for Creating Beautiful Garden Pathways
Creating your own stepping stones is one of the most rewarding DIY projects a gardener can undertake. Whether you’re designing a charming pathway through your vegetable beds, creating access routes around delicate plantings, or adding decorative elements to your outdoor space, homemade stepping stones offer both functionality and aesthetic appeal. Unlike store-bought options, DIY stepping stones allow you to customize colors, sizes, and designs to match your garden’s unique personality while keeping costs remarkably low.
The beauty of making your own garden stones stepping stones lies in the creative freedom and satisfaction that comes with crafting something with your own hands. From simple concrete pours to decorative mosaic designs, there are methods suitable for every skill level and budget. This comprehensive guide will walk you through everything you need to know to create stunning, durable stepping stones that will enhance your garden for years to come.
Why Choose DIY Stepping Stones for Your Garden
DIY stepping stones offer numerous advantages over purchasing pre-made options. First and foremost is cost savings—homemade stones can cost just a fraction of commercial alternatives, especially when you’re creating multiple pieces for an extensive pathway system. A basic concrete stepping stone costs only a few dollars in materials, whereas store-bought options often range from fifteen to fifty dollars per stone.
Beyond economics, creating your own stepping stones provides complete creative control. You can choose colors that complement your garden decor, select sizes that fit your specific spacing needs, and incorporate personal touches like embedded glass, pebbles, or plant impressions. This customization transforms functional pathways into artistic expressions of your gardening style.
Stepping stones serve critical practical purposes in any garden. They protect soil from compaction in high-traffic areas, prevent mud from tracking into your home, create safe passage during wet weather, and help organize garden layouts. When placed strategically around hydrangea bushes or through vegetable beds, they minimize damage to plants while allowing easy access for maintenance tasks.
Materials and Tools You’ll Need
The basic materials required for creating stepping stones are simple and readily available. Portland cement is the foundation—it’s affordable and creates durable stones that withstand freeze-thaw cycles and heavy foot traffic. You’ll also need sand and gravel to create the concrete mix, plus water for proper consistency. For a standard batch making four to six stepping stones, budget approximately twenty to thirty dollars.
Essential tools include mixing containers (five-gallon buckets work perfectly), a mixing tool or shovel, molds for shaping your stones, and a finishing trowel. Molds can be purchased commercially, but resourceful gardeners often repurpose materials like plastic storage containers, wooden frames, or even create custom molds from PVC pipe. The investment in proper molds pays dividends in consistency and appearance.
For decorative work, gather optional materials such as acrylic paint, glass pieces, small pebbles, tiles, or natural elements like leaves and twigs. Protective equipment including gloves, dust masks, and safety glasses is essential when handling cement and concrete dust. Having a level surface for pouring and curing is equally important—a flat patio, driveway section, or even a piece of plywood works well.
When selecting concrete mixes, consider using pre-mixed concrete bags to simplify the process, or mix from scratch using one part cement to three parts aggregate (sand and gravel). The consistency should resemble thick peanut butter—too wet and your stones won’t hold shape, too dry and they’ll crack during curing.
Preparing Your Base and Site
Proper site preparation ensures your stepping stones remain level and durable for years. Begin by assessing your pathway location and marking the intended route with stakes and string. Consider foot traffic patterns—people naturally follow the most direct routes, so plan your pathway accordingly. Evaluate drainage patterns to ensure water won’t pool around your stepping stones after rain.
Clear the pathway area of debris, weeds, and vegetation. If you’re creating pathways through planting areas, first prepare garden soil around your stones by removing compacted earth and amending with organic matter. This creates a welcoming environment for plants alongside your pathway.
The base layer is critical for stepping stone longevity. Dig out approximately two to three inches of soil along your pathway. Fill this depression with a layer of gravel or sand that provides drainage and prevents frost heaving in cold climates. This base layer allows water to escape rather than accumulating beneath your stones, which could cause cracking and shifting during winter freezes.
Level your base layer carefully using a long board and level tool. Even slight slopes can cause water pooling or unstable placement. For gardens in areas with significant freeze-thaw cycles, extend the base layer deeper—up to four inches—to provide additional frost protection. This extra effort prevents the seasonal expansion and contraction that damages poorly supported stones.
Basic Concrete Stepping Stone Method
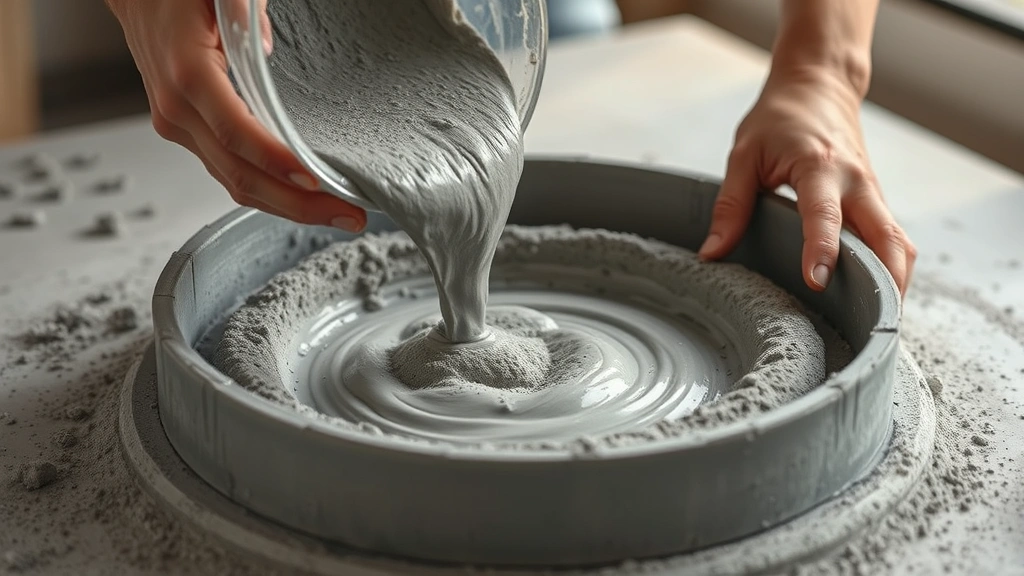
The fundamental process for creating concrete stepping stones is straightforward and suitable for beginners. Start by mixing your concrete according to package directions or your chosen ratio. Work in batches—you’ll pour faster than you might expect, and concrete has a limited working window before it begins setting.
Pour your concrete mixture into your prepared molds, filling them approximately three-quarters full. Tap the sides of your molds gently to release air bubbles and ensure the concrete settles evenly. Add concrete to fill completely, then smooth the top surface with a trowel. For a non-slip surface, roughen the top slightly with a broom before the concrete fully sets.
Allow your stepping stones to cure properly—at least forty-eight hours in moderate temperatures, though full strength develops over several weeks. Keep newly poured stones moist during curing by misting them with water and covering with plastic sheeting. This prevents rapid drying that causes cracks and ensures proper hydration of the concrete.
Once cured, carefully remove your molds. If stones stick, run a knife around edges or allow additional curing time. Store finished stones in a protected location until installation day. Freshly cured concrete remains somewhat porous and benefits from a sealing treatment before exposure to harsh weather conditions.
Decorative Design Techniques
Transform basic concrete stepping stones into artistic garden features using various decorative techniques. The simplest method involves adding color to your concrete mix using cement-based dyes available at most hardware stores. Mix dyes according to directions—they’re incredibly potent, so start with small quantities and adjust to achieve your desired shade.
Pressed designs create beautiful surface textures without requiring advanced skills. Before concrete fully sets, press leaves, flowers, or textured objects into the surface. Ferns create particularly striking impressions. Remove items carefully once the concrete has partially set but remains soft enough to hold impressions. This technique works beautifully for creating fairy garden ideas with a whimsical touch.
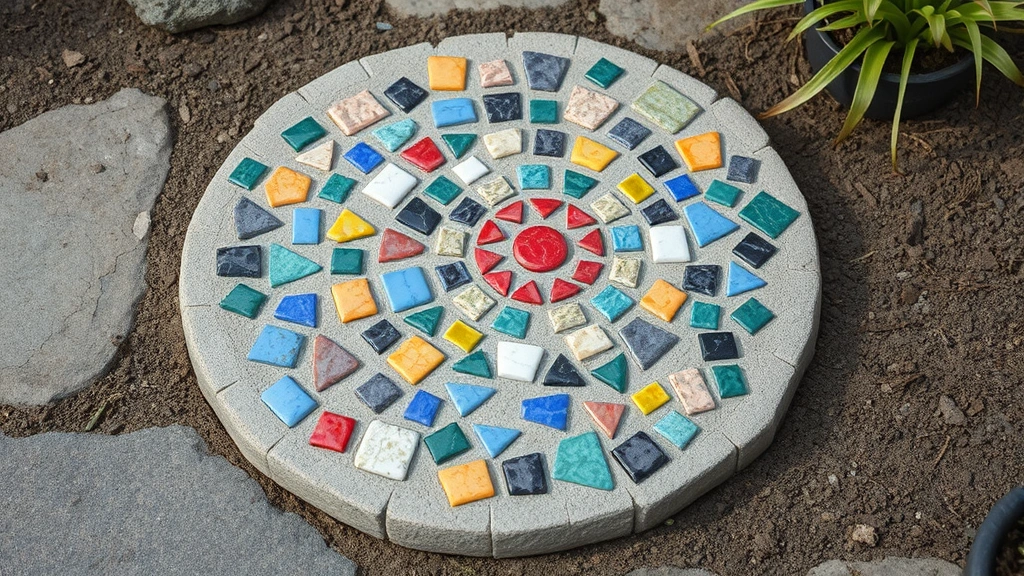
Mosaic stepping stones offer more elaborate options for artistic expression. Arrange pieces of broken tile, glass, or stone on top of your freshly poured concrete, pressing them gently into the surface. Allow concrete to cure completely before grouting between pieces if desired. This technique creates stunning focal points along garden pathways.
Embedded materials add visual interest and functionality. Press pebbles, glass marbles, or crushed stone into the concrete surface before it sets. Create patterns, borders, or random arrangements depending on your aesthetic preferences. This technique also improves traction on wet surfaces, making pathways safer during rainy seasons.
Paint and stain options allow you to add color and personality after concrete has cured. Use concrete-specific paints or stains that bond properly to the surface. Stenciled designs, hand-painted motifs, or simple solid colors can coordinate with your garden decor and overall landscape design. Seal painted surfaces to protect your artwork from weathering.
Installation and Placement Tips
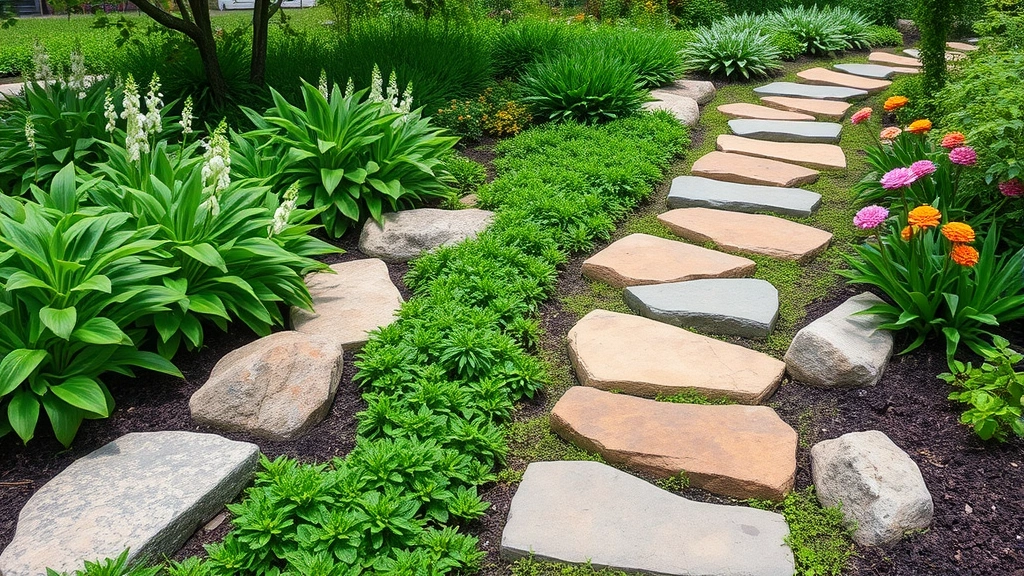
Strategic placement of stepping stones enhances both functionality and aesthetics. Space stones approximately eighteen to twenty-four inches apart—the average adult stride—allowing comfortable walking without awkward stepping patterns. Adjust spacing based on the typical users of your garden; children and elderly gardeners may prefer closer spacing for safety.
Arrange stones before final installation by laying them on your prepared base. Walk the path naturally to ensure comfortable spacing and flow. Adjust positions until the route feels intuitive and safe. Mark final positions with spray paint or chalk before beginning installation.
Set each stone firmly into your prepared base, pressing down and adjusting until level in all directions. Check with a level tool to ensure no tilting or rocking occurs. Uneven stones create tripping hazards and allow water to pool beneath them. Use sand to shim stones as needed, adding small amounts under high spots until perfect level is achieved.
Consider surrounding plantings when positioning stepping stones. Leave adequate space around plants to prevent traffic damage and allow growth expansion. Position stones to direct foot traffic away from delicate specimens or valuable plants. This protective placement strategy preserves your plantings while maintaining garden access.
Seasonal timing affects installation success. Spring and fall provide ideal conditions—temperatures moderate enough to allow proper concrete curing without extreme heat or cold. Avoid installing during rainy seasons when wet soil prevents proper base compaction, and avoid winter in cold climates where freeze-thaw cycles affect newly cured concrete.
Maintenance and Longevity
Properly installed stepping stones require minimal maintenance while providing decades of reliable service. Regular sweeping removes debris and prevents moss growth in shaded areas. During wet seasons, ensure adequate drainage around stones to prevent water accumulation.
Moss and algae growth occurs naturally on stepping stones in moist, shaded locations. Clean affected stones using a stiff brush and mild detergent solution. In persistent cases, apply a commercial moss killer designed for outdoor stone, following label directions carefully. Prevention through improved air circulation and reduced shade helps minimize regrowth.
Seal your stepping stones every two to three years to maintain appearance and protect against weathering. Concrete sealers create a protective barrier that repels moisture and prevents staining. Apply sealers according to product directions, typically involving a clean, dry surface and even application with a roller or sprayer.
Monitor for cracking or shifting, especially after harsh winters or heavy rains. Minor surface cracks don’t typically affect functionality, but significant cracks or movement may indicate base preparation issues. Address shifting stones immediately by removing and re-leveling the base layer.
Salt exposure in winter climates can degrade concrete over time. If using salt-based de-icers, apply them sparingly near stepping stones, or consider switching to less corrosive alternatives. This simple adjustment dramatically extends stone lifespan in cold-weather regions.
FAQ
How long do DIY concrete stepping stones last?
Properly made and installed concrete stepping stones typically last twenty to thirty years or longer. Quality concrete, adequate curing, proper installation, and regular maintenance significantly extend lifespan. Harsh climates with severe freeze-thaw cycles may reduce longevity, while moderate climates allow stones to last indefinitely with minimal care.
Can I make stepping stones during winter?
Winter concrete work is challenging because cold temperatures slow curing and can cause incomplete hydration. If you must pour in winter, use concrete accelerators and protect stones with blankets or plastic to maintain warmth during curing. Spring and fall remain ideal seasons for stepping stone projects.
What’s the best way to prevent stepping stones from becoming slippery?
Rough the surface with a broom before concrete fully sets, creating texture that provides traction. Alternatively, press small pebbles or aggregate into the surface before curing, or apply anti-slip coating after the stone cures. Avoid highly polished finishes in areas receiving regular moisture.
Can I use stepping stones in vegetable gardens?
Absolutely! Stepping stones are essential in vegetable gardens, protecting soil from compaction and creating pathways for harvesting and maintenance. Position stones to direct foot traffic away from planted beds, and ensure adequate spacing between stones and plants to allow growth expansion.
What should I do if my stepping stones crack?
Minor surface cracks are cosmetic and don’t affect functionality. For larger cracks, seal them with concrete filler or epoxy to prevent water infiltration. Severe structural cracks may require stone replacement. Address cracks promptly to prevent water from enlarging them through freeze-thaw cycles.
How can I remove stepping stones if I want to change my garden layout?
Use a pry bar to lift stones carefully, working from edges and gradually increasing pressure. Once removed, clear the base area and either refill with soil or install replacement stones. Concrete stones are remarkably durable—removed stones can be relocated, reused elsewhere, or repurposed as garden decor throughout your landscape.


