Building a raised garden bed is one of the most rewarding DIY projects for both beginner and experienced gardeners. Whether you’re working with limited space, poor soil conditions, or simply want better control over your growing environment, a raised garden offers practical solutions. This comprehensive guide walks you through every step of constructing a raised garden, from planning and material selection to filling and planting your first crops.
A raised garden bed elevates your plants literally and figuratively—providing better drainage, easier access, and warmer soil temperatures than traditional in-ground gardens. The beauty of this approach is its flexibility; you can customize dimensions to fit your space and skill level. Whether you’re interested in growing vegetables, herbs like mint in containers, or seasonal produce like pumpkins, a raised bed provides an ideal foundation.

Planning Your Raised Garden Project
Before breaking ground or purchasing a single board, take time to plan your raised garden thoughtfully. The location you choose significantly impacts your success. Most vegetables require 6-8 hours of direct sunlight daily, so scout your yard during different times of day to identify the sunniest spots. Consider proximity to water sources—you’ll want easy access for irrigation during dry spells.
Assess your current soil conditions by performing a simple soil test. If you’re dealing with contaminated or compacted soil, a raised bed becomes even more valuable. You can find USDA soil testing resources through your local extension office to understand your starting point.
Determine the size of your raised bed based on accessibility and space. Standard dimensions are 4 feet by 8 feet by 12 inches deep, though you can build smaller 3-foot by 6-foot beds or larger configurations. The key is ensuring you can comfortably reach the center without stepping inside—typically, anything wider than 4 feet becomes difficult to maintain.
Think about your garden’s purpose. Are you growing decorative plants and garden features, or focusing on edible crops? This determines both your material choices and how you’ll integrate the bed into your landscape design.
Choosing Materials for Construction
Material selection affects durability, aesthetics, and plant health. Here are the most popular options:
- Cedar or Redwood: These naturally rot-resistant woods are ideal for raised beds, lasting 10-15 years. They’re attractive and chemical-free, making them perfect for vegetable gardens. Cedar is more expensive but offers superior longevity compared to other softwoods.
- Composite Materials: Made from recycled plastics and wood fibers, composites resist rot and insects while requiring minimal maintenance. They’re more expensive upfront but last 20+ years.
- Galvanized Steel: Durable and sleek-looking, metal raised beds conduct heat well and last decades. Ensure any galvanized material is food-safe if growing edibles.
- Untreated Pine: Budget-friendly but shorter-lived (5-8 years), untreated pine works well for temporary installations. Avoid pressure-treated lumber, which may contain harmful chemicals.
- Recycled Pallets: Free or inexpensive, pallets can be repurposed into raised beds. Verify they haven’t contained hazardous materials before using them for edible gardens.
Avoid materials that may leach toxins into soil where you’re growing food. Always verify material safety, especially for vegetable beds. The Gardeners’ Supply Company provides comprehensive guides on material comparison.
Tools and Supplies You’ll Need
Gather these essential tools before starting your DIY raised garden bed project:
- Power drill or screwdriver
- Circular saw or hand saw
- Measuring tape and level
- Work gloves and safety glasses
- Stainless steel or galvanized screws (3-inch deck screws work well)
- Landscape fabric or cardboard (optional, for weed barrier)
- Shovel and wheelbarrow
- Rubber mallet or hammer
- Carpenter’s square for checking corners
Having everything organized before you begin prevents mid-project delays. If you don’t own a power drill, consider borrowing or renting one—it makes assembly significantly faster and easier.
Step-by-Step Construction Guide
Step 1: Prepare the Site
Clear your chosen location of grass, weeds, and debris. You don’t need to remove all soil, but eliminate perennial weeds that will compete with your plants. If the ground is severely sloped, level it as much as possible. Slight slopes are acceptable but extreme angles make watering and planting difficult.
Step 2: Cut Your Materials
For a standard 4×8 foot bed using 2×12 boards, you’ll need two 8-foot pieces and two 4-foot pieces. Use a circular saw to make clean, accurate cuts. Measure twice, cut once—this old adage prevents costly mistakes.
Step 3: Assemble the Frame
Lay out your boards in a rectangle on the prepared ground. Stand the 2×12 boards on edge. Using your carpenter’s square, ensure corners are at perfect right angles. Pre-drill holes to prevent wood splitting, then drive 3-inch screws through the end boards into the ends of the side boards. Use at least two screws per corner for structural integrity.
Step 4: Check for Square
Measure diagonally from corner to corner. Both diagonal measurements should be identical if your frame is square. Adjust if necessary before tightening all screws completely.
Step 5: Position and Level
Move your assembled frame into its final position. Use a level to check both directions. Make adjustments by adding or removing soil beneath the frame. A slightly unlevel bed is acceptable if water drains away from one corner.
Step 6: Add Optional Reinforcement
For beds larger than 4×8 feet, consider adding center support boards or metal corner brackets. This prevents bowing from soil pressure, particularly important in regions with heavy rainfall or clay soil.
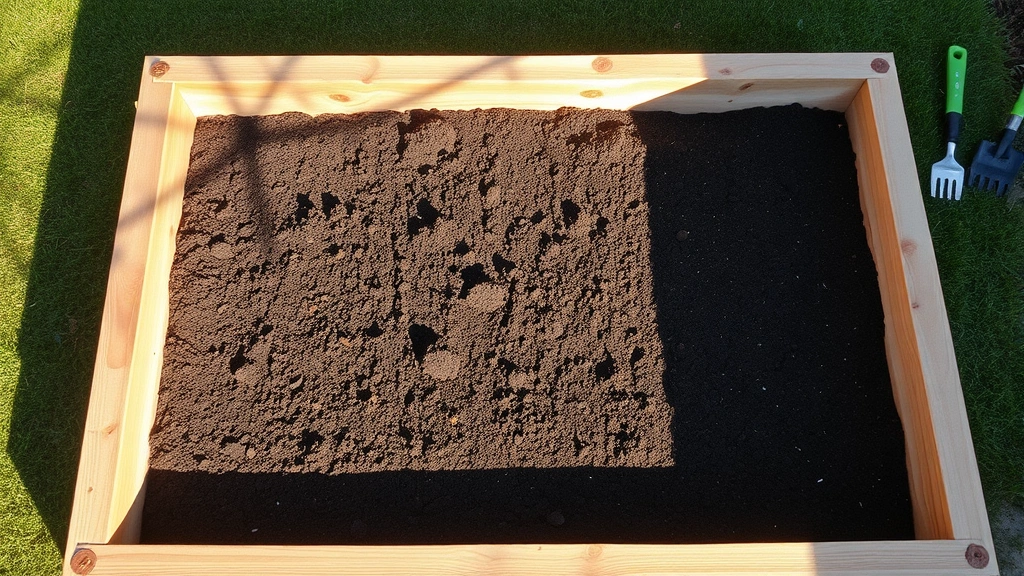
Filling Your Raised Bed
Proper soil composition is crucial for plant success. Rather than using pure topsoil, create a blend that balances drainage, water retention, and nutrients.
The Square Foot Gardening Mix: A popular formula combines equal parts compost, peat moss or coconut coir, and vermiculite. This creates excellent drainage while retaining sufficient moisture and nutrients.
The Lasagna Method: Layer cardboard or newspaper as a base (blocks weeds), followed by alternating layers of brown materials (shredded leaves, straw) and green materials (grass clippings, compost, kitchen scraps). This approach uses less purchased soil and creates rich, biologically active growing medium over time.
Budget-Friendly Approach: Fill the bottom third with coarse materials like wood chips or straw, the middle third with partially decomposed leaves or yard waste, and the top third with quality compost or topsoil. Plants won’t notice the difference, and costs drop significantly.
Fill your raised bed until soil reaches 2-3 inches from the top. Water thoroughly and let settle for a few days before planting. You’ll likely need to add more soil after settling.
Consider adding coffee grounds as you build layers—they add nitrogen and improve soil structure. Many local coffee shops give away used grounds free.
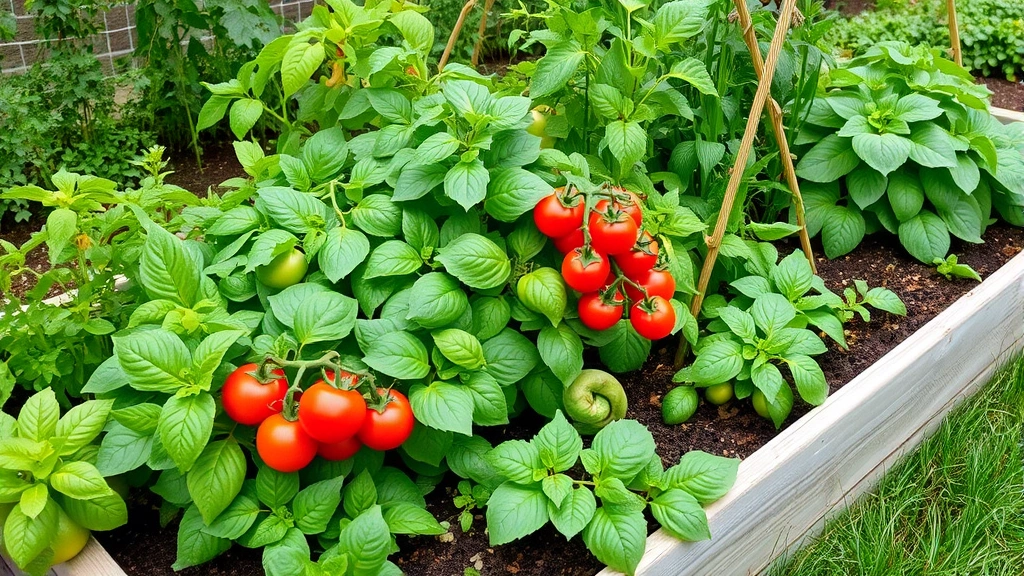
Preparing for Planting
Once your raised bed is filled and settled, you’re ready for planting. Timing depends on your climate zone and what you’re growing. Cool-season crops like lettuce, spinach, and peas can go in during early spring or fall. Warm-season crops like tomatoes, peppers, and squash wait until after the last frost date.
Before planting, amend your soil with compost or aged manure to boost fertility. Most raised beds benefit from adding 1-2 inches of quality compost annually. This replenishes nutrients removed by harvesting.
Consider installing a drip irrigation system for consistent watering. Raised beds dry out faster than in-ground gardens, especially in hot climates. Soaker hoses or drip lines save water while delivering moisture directly to plant roots.
If you’re part of a community garden, consider building raised beds to match your community’s standards, making your garden cohesive and professional-looking.
Maintenance and Long-Term Care
Raised beds require less maintenance than traditional gardens but still need attention. Monitor soil moisture—stick your finger 2 inches into soil; if it’s dry, water thoroughly. In hot weather, you may need to water daily.
Inspect your frame annually for signs of rot or damage. Cedar and composite materials resist deterioration well, but wood eventually needs replacement. Plan to refresh or rebuild your bed every 10-15 years depending on materials used.
Refresh soil annually by adding 1-2 inches of compost. This maintains soil fertility and improves structure. Over time, your raised bed becomes increasingly productive as organic matter accumulates and beneficial microorganisms establish themselves.
Rotate crops each season to prevent soil depletion and reduce disease. If you grew heavy feeders like tomatoes or squash, follow with legumes that fix nitrogen, then lighter feeders.
During winter in cold climates, consider planting cover crops like clover or winter rye. These protect soil from erosion, suppress weeds, and add organic matter when tilled in spring.
For more advanced techniques and resources, consult your local American Horticultural Society or Royal Horticultural Society for regional growing guides and master gardener programs.
FAQ
How deep should a raised garden bed be?
Most vegetables thrive in 12 inches of soil, though root vegetables like carrots and parsnips prefer 18 inches. Shallow-rooted plants like lettuce and herbs need only 6-8 inches. For general-purpose beds, 12 inches provides good balance.
Can I build a raised bed directly on grass?
Yes, though laying cardboard or landscape fabric underneath suppresses grass and weeds. Without this barrier, grass may creep up into your bed. The barrier eventually decomposes, but it buys time while your garden establishes.
What’s the best wood for raised beds?
Cedar and redwood offer the best balance of durability, safety, and aesthetics. They naturally resist rot without chemical treatments. Avoid pressure-treated lumber for vegetable gardens due to potential chemical leaching.
How often should I water a raised bed?
This depends on climate, season, and soil composition. Generally, water when the top inch of soil feels dry. In hot weather, daily watering may be necessary. Drip irrigation systems provide consistent moisture with minimal water waste.
Can I use recycled materials for raised beds?
Recycled pallets, plastic lumber, and other reclaimed materials work well, provided they haven’t contained hazardous substances. Verify pallet safety before using them for edible gardens. Composite materials made from recycled plastic are excellent alternatives.
Should I use landscape fabric in my raised bed?
Landscape fabric helps suppress weeds but can eventually degrade and become problematic. Cardboard works equally well and decomposes naturally. For best results, use thick cardboard and overlap pieces to prevent weed penetration.
What’s the ideal size for a raised garden bed?
Standard dimensions are 4 feet by 8 feet by 12 inches deep. This provides good soil volume while remaining accessible from all sides. Smaller beds (3×6 feet) work for limited spaces; larger beds may be difficult to reach the center.


