How to Grow a Garden: Sandwich Tips & Tricks for Year-Round Success
Growing a garden doesn’t require acres of land or expensive equipment—it requires knowledge, planning, and the right approach. Whether you’re a complete beginner or someone looking to expand your gardening skills, the “sandwich method” of layering garden beds offers an innovative solution for creating nutrient-rich growing spaces in minimal time. This technique, also called lasagna gardening, involves stacking organic materials in alternating layers, much like building a sandwich, to create the perfect growing medium without extensive digging or soil preparation.
The beauty of this approach lies in its simplicity and effectiveness. Rather than spending weeks or months preparing traditional garden beds, you can create a thriving garden in days. This method is perfect for beginners, those with poor existing soil, and gardeners who want to maximize their growing potential. In this comprehensive guide, we’ll explore everything you need to know about sandwich gardening, from materials and construction to planting and maintenance throughout the seasons.
Understanding the Sandwich Garden Method
The sandwich or lasagna garden method is a no-dig gardening technique that transforms organic materials into rich, dark, fertile soil over time. This approach mirrors natural soil formation processes, where decomposing materials build layers of nutrients. When you follow gardening tips for beginners, the sandwich method stands out as one of the most forgiving and rewarding techniques available.
Unlike traditional gardening that requires tilling, turning, and amending existing soil—often a laborious process—the sandwich method allows you to build upward. This is especially beneficial if your existing soil is contaminated, compacted, or simply poor quality. The layering process creates an environment where beneficial microorganisms, earthworms, and fungi thrive, naturally breaking down organic matter and converting it into plant-available nutrients.
The method works because it mimics forest floor decomposition. In nature, fallen leaves, branches, and other organic matter accumulate on the ground, gradually decomposing and enriching the soil below. By deliberately stacking these materials in your garden bed, you accelerate this natural process while creating an ideal growing environment for vegetables, herbs, and ornamental plants.
Essential Materials and Layers
Creating a successful sandwich garden requires understanding what materials to use and in what order. The basic principle involves alternating “brown” materials (carbon-rich) with “green” materials (nitrogen-rich). This balance is crucial for proper decomposition and nutrient availability.
Brown Materials (Carbon-Rich):
- Shredded leaves and leaf mold
- Straw or hay (pesticide-free)
- Shredded newspaper or cardboard
- Wood chips or sawdust
- Peat moss or coconut coir
- Aged manure
Green Materials (Nitrogen-Rich):
- Grass clippings (herbicide-free)
- Kitchen scraps (vegetable and fruit waste)
- Coffee grounds and tea bags
- Fresh manure (horse, chicken, or cow)
- Plant trimmings and garden waste
- Seaweed or kelp meal
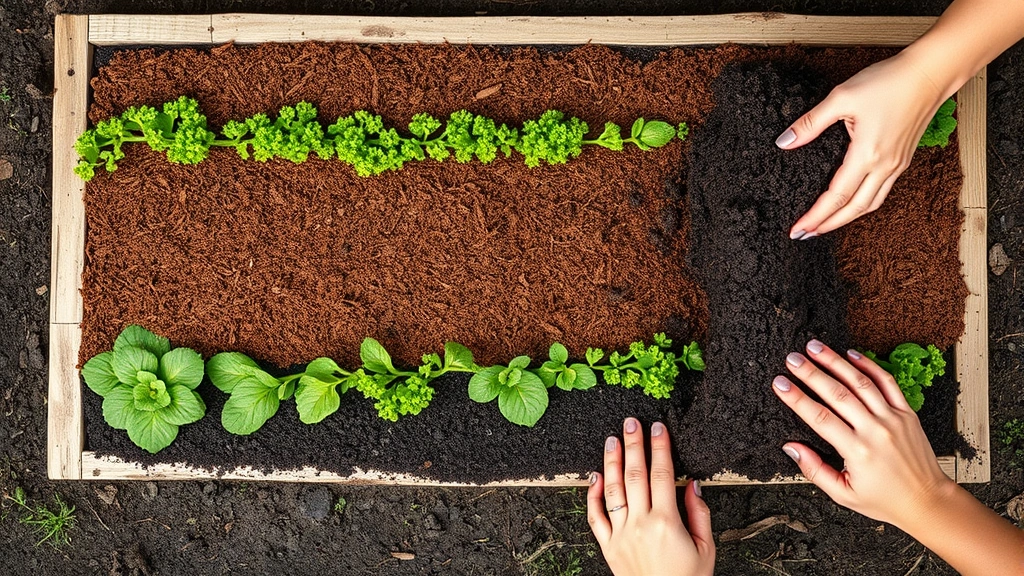
The foundation of your sandwich garden should begin with a barrier layer. Cardboard or several layers of newspaper create a weed-blocking base that eventually decomposes, improving soil structure. This prevents grass and weeds from growing up into your new garden bed. When considering pallet raised garden bed construction, this same principle applies—you want to prevent weeds from establishing themselves.
After your barrier layer, alternate between brown and green materials, with each layer approximately 4-6 inches thick. A typical sandwich garden might have 8-12 layers, depending on your available materials and desired bed height. The more layers you create, the richer your final growing medium will be.
Building Your Sandwich Garden Bed
Step-by-Step Construction Process:
- Choose Your Location: Select a spot that receives appropriate sunlight for your intended plants (6-8 hours for vegetables, 3-4 hours for shade plants). Ensure the area is relatively level to prevent water runoff and uneven settling.
- Define Your Bed Boundaries: You can use wooden frames, stone, bricks, or simply create a mounded bed without borders. If using wood, avoid treated lumber that contains harmful chemicals. Cedar and composite materials are excellent choices.
- Lay Your Foundation: Place cardboard or newspaper directly on the grass or soil. Overlap pieces by at least 6 inches to prevent weeds from finding gaps. Water this layer to help it settle and begin decomposing.
- Begin Layering: Start with a brown layer (shredded leaves or straw), approximately 4 inches thick. Then add a green layer (grass clippings or kitchen scraps), also about 4 inches. Continue alternating layers, watering each layer lightly as you go.
- Finish with Quality Soil: Top your sandwich with 2-3 inches of finished compost or high-quality garden soil. This gives your plants an immediately hospitable growing medium while the layers beneath continue decomposing.
- Water Thoroughly: Once complete, water your entire bed deeply. This initiates decomposition and helps all layers settle together.
The beauty of this construction method is its flexibility. You can build your sandwich garden in spring, summer, or fall. Spring gardens may need additional finished compost on top since decomposition hasn’t had time to progress significantly. Fall-built gardens benefit from winter decomposition, providing rich soil by spring planting time.
Best Plants for Sandwich Gardens
Sandwich gardens excel at supporting a wide variety of plants. The rich, loose, well-draining medium created by this method is ideal for root development and nutrient uptake. Here are excellent choices for different garden types:
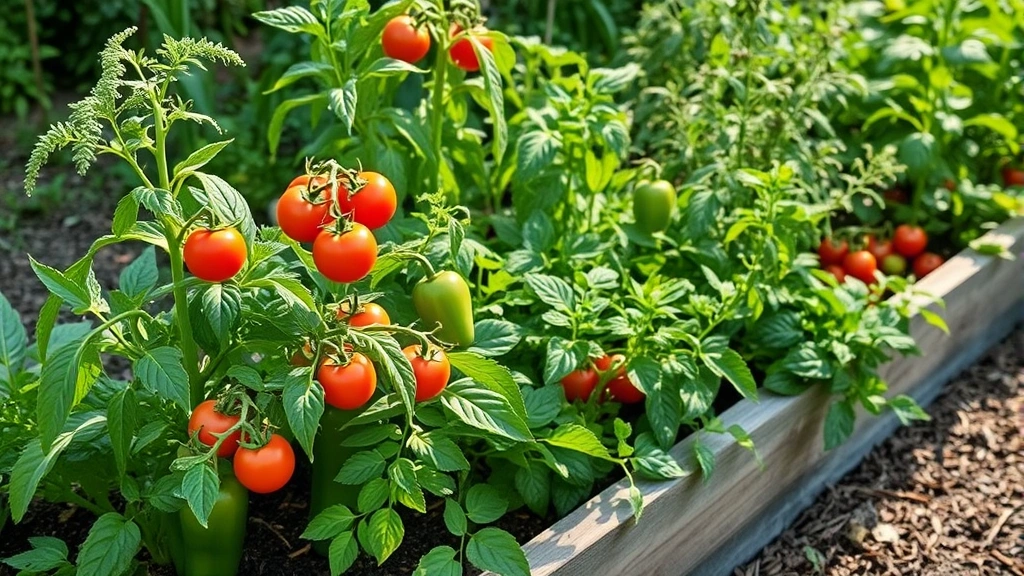
Vegetables That Thrive:
- Tomatoes and peppers
- Lettuce and leafy greens
- Carrots and beets
- Beans and peas
- Squash and cucumbers
- Onions and garlic
- Herbs (basil, parsley, cilantro)
Herbs and Flowers:
- Lavender, rosemary, and thyme
- Zinnias and marigolds
- Sunflowers and dahlias
- Nasturtiums and calendula
One advantage of sandwich gardens is their ability to support plants that typically struggle in poor soil. If you’ve had difficulty growing certain vegetables in the past, the nutrient-rich environment of a sandwich garden may be exactly what you need. Combined with proper protection from squirrels and other pests, you can create a productive and protected growing space.
The loose soil structure also means shallower-rooted plants can thrive. Lettuce, spinach, and other greens don’t need deep soil, so they’re perfect for sandwich gardens that haven’t fully decomposed. As the bed matures over seasons, you can plant deeper-rooting crops like tomatoes and root vegetables.
Seasonal Gardening Strategies
Spring Planting (March-May):
Spring is an ideal time to build and plant sandwich gardens. The warming soil and increasing daylight hours accelerate decomposition while supporting active plant growth. Plant cool-season crops like lettuce, peas, and spinach 2-3 weeks before your last frost date. These plants actually prefer the cooler spring temperatures and can be harvested before summer heat arrives.
For spring gardens, consider adding extra finished compost on top of your sandwich layers. The decomposition process is slower when temperatures are cool, so providing immediately available nutrients ensures your plants have what they need. As the season progresses and temperatures rise, decomposition accelerates, releasing additional nutrients into the growing medium.
Summer Cultivation (June-August):
Summer is when sandwich gardens truly shine. The warm temperatures accelerate decomposition while heat-loving plants like tomatoes, peppers, and squash flourish. The loose, rich soil created by your sandwich layers provides excellent drainage and aeration, crucial for preventing root diseases in hot, wet conditions.
Mulch your summer garden beds with 2-3 inches of straw or wood chips to moderate soil temperature and reduce water evaporation. This is especially important in sandwich gardens, where the decomposition process can sometimes cause the bed to settle, creating depressions that affect water distribution. Consistent mulching maintains even moisture and temperature.
Fall Establishment (September-November):
Fall is arguably the best time to build sandwich gardens. You have abundant materials (fallen leaves), cooler temperatures that reduce decomposition speed (allowing better layering), and time for the bed to mature before spring planting. Fall-built gardens benefit from winter freeze-thaw cycles that break down materials and improve soil structure.
In fall, you can plant cool-season crops like broccoli, cabbage, kale, and spinach. These plants often taste sweeter after frost exposure. By winter, your sandwich garden will have decomposed significantly, providing excellent growing conditions for early spring planting.
Winter Preparation (December-February):
Winter is a rest period for most gardens, but it’s an excellent time to plan and prepare for the coming year. If you built your sandwich garden in fall, winter decomposition continues beneath the snow or dormant surface. Add additional brown materials (fallen leaves) if available—they’ll decompose over winter.
In late winter, top-dress your sandwich beds with finished compost before spring planting. This provides immediately available nutrients as your plants emerge and grow. Test your soil in late winter to understand its nutrient profile, allowing you to make adjustments before planting.
Maintenance and Watering Tips
Sandwich gardens require minimal maintenance compared to traditional gardens, but understanding proper care ensures optimal results. The loose structure of sandwich gardens means they typically drain well, but this can sometimes mean water moves through too quickly.
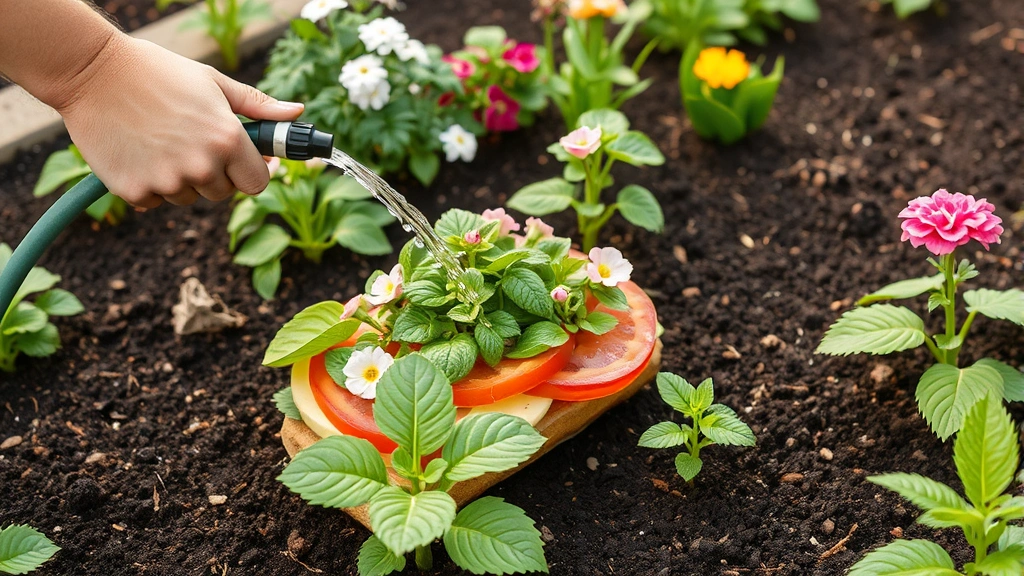
Watering Best Practices:
- Water deeply and less frequently rather than shallow daily watering
- Water early morning to reduce evaporation and disease pressure
- Use soaker hoses or drip irrigation for consistent moisture
- Mulch heavily to reduce water needs by 30-50%
- Check soil moisture 2 inches deep; water when dry at that depth
- Increase watering frequency during hot summer months
- Reduce watering in fall and winter as plants enter dormancy
Ongoing Amendments:
As your sandwich garden matures, the layers decompose and settle. This is normal and actually beneficial, as it increases nutrient availability. However, this settling means you may need to add compost or other organic amendments annually. Each spring, add 1-2 inches of finished compost to maintain soil quality and nutrient levels.
The decomposition process creates heat, which is why sandwich gardens are sometimes called “hot beds.” This warmth accelerates plant growth but also means the soil can dry out faster in summer. Mulching helps moderate this effect while also moderating temperature extremes.
Monitor your soil’s pH annually, especially if you’re growing acid-loving plants like blueberries or rhododendrons. Most vegetables prefer slightly acidic soil (pH 6.0-7.0). If your pH drifts outside this range, amendments like lime (to raise pH) or sulfur (to lower pH) can help adjust it.
Troubleshooting Common Problems
Settling and Uneven Surfaces:
As layers decompose, your sandwich garden will settle—sometimes unevenly. This is normal but can create water-pooling depressions. Address this by adding compost to low spots and maintaining consistent mulching. In severe cases, you may need to rebuild portions of the bed, but this typically isn’t necessary if you’ve used quality materials.
Pest and Disease Issues:
The rich, moist environment of sandwich gardens can sometimes attract slugs, snails, and fungal issues. Combat these by maintaining good air circulation (proper plant spacing), avoiding overhead watering, and using organic pest management strategies. Beneficial insects like yellow garden spiders naturally control many garden pests.
If you notice diseases developing, improve drainage by adjusting mulch depth and ensuring water isn’t pooling. Remove affected plant material promptly to prevent spread. In extreme cases, you may need to remove and replace the top 6 inches of soil.
Nutrient Deficiencies:
While sandwich gardens are typically nutrient-rich, certain plants or soil conditions may lead to deficiencies. Yellow leaves often indicate nitrogen deficiency; add compost or a nitrogen-rich amendment. Purple-tinged leaves suggest phosphorus deficiency; bone meal or rock phosphate can help. Stunted growth might indicate potassium deficiency; wood ash or kelp meal address this.
Weed Management:
The cardboard base layer should suppress most weeds, but some persistent perennials may penetrate. Hand-pull these promptly before they establish. Annual weeds that germinate in mulch are easily managed—pull them or allow mulch to smother them. Maintaining thick mulch (3-4 inches) significantly reduces weed germination.
If you’re interested in expanding your gardening infrastructure, consider adding a garden arbor to create vertical growing space or provide structural interest. This complements sandwich bed gardens beautifully.
FAQ
How long does a sandwich garden take to be ready for planting?
You can plant immediately in a newly constructed sandwich garden, especially if you’ve added finished compost to the top layer. However, the layers will continue decomposing and settling for 6-12 months. Fall-constructed gardens benefit from winter decomposition and are particularly rich by spring. For fastest results, build in fall and plant in spring.
Can I use diseased plant material in my sandwich garden?
No. Avoid using diseased plant material, as the decomposition process may not generate sufficient heat to kill all pathogens. Use only healthy plant material. Similarly, avoid weeds with mature seeds, as these may survive decomposition and germinate in your garden.
What’s the ideal height for a sandwich garden bed?
Most sandwich gardens work well at 12-18 inches tall. This height provides adequate material for proper layering and decomposition while remaining accessible for planting and maintenance. Taller beds (24+ inches) require more materials but offer better drainage and easier access for people with mobility concerns.
Can I build a sandwich garden in containers?
Yes! Container sandwich gardens work well for balconies, patios, and small spaces. Use the same layering principle in large containers (18+ inches deep), starting with a drainage layer, then alternating brown and green materials. Container gardens dry out faster, so consistent watering is important. This approach is perfect for growing herbs or lettuce in limited spaces.
How often should I add new layers to an established sandwich garden?
Established sandwich gardens need annual top-dressing with 1-2 inches of compost, typically in spring. You don’t need to rebuild the entire bed—just add organic matter to the top. Every 2-3 years, you might add a new layer of materials (brown and green) if you want to significantly boost decomposition and nutrient availability.
Will my sandwich garden attract rodents or other pests?
Sandwich gardens can attract rodents if you use meat, dairy, or oils in your kitchen scrap layer. Avoid these materials and stick to vegetable and fruit scraps. Properly decomposing materials don’t attract pests—only improperly managed compost does. Keep mulch 6 inches away from plant stems to prevent rodent nesting sites.
Can I use glossy or colored newspaper in my sandwich garden?
Use only black-and-white newspaper or cardboard. Glossy or colored newspaper may contain inks with heavy metals or other contaminants. Plain cardboard from packaging is excellent and decomposes readily. Avoid newspaper with color photos or advertisements.
What’s the best way to water a new sandwich garden?
Water deeply immediately after construction to initiate decomposition and help layers settle. In the first few weeks, check moisture regularly—new beds sometimes dry out faster as they settle. Once established, water based on plant needs and weather conditions, aiming for 1-1.5 inches weekly. Mulching helps maintain consistent moisture.
The sandwich garden method represents a paradigm shift in how we approach gardening. Rather than fighting poor soil conditions, you create ideal growing conditions from the ground up. This technique is perfect for beginners starting their gardening journey, experienced gardeners looking to expand, and anyone seeking a low-maintenance approach to growing food and ornamental plants.
By understanding the principles of layering, selecting appropriate materials, and timing your construction with seasonal considerations, you’ll create a garden that produces abundantly for years. The beauty of this method is that it improves with time—each season’s decomposition enriches the soil further, creating an increasingly fertile growing environment. Start small with a single sandwich bed, experience the results, and expand from there. Soon you’ll understand why gardeners worldwide are adopting this innovative approach to creating productive, beautiful garden spaces.
For more information on gardening techniques and local resources, consult your local extension service, visit Garden Organic for organic gardening guidance, explore USDA plant resources, connect with your local Master Gardener program, or visit established botanical gardens for inspiration and expert advice.


