
Build Pallet Garden Beds: DIY Expert Tips for Success
Pallet raised garden beds have become a favorite solution for gardeners seeking an affordable, sustainable, and visually appealing way to grow plants. Whether you’re working with limited space, poor soil conditions, or simply want an organized gardening setup, repurposed wooden pallets offer the perfect foundation. This comprehensive guide walks you through everything you need to know about constructing, maintaining, and maximizing your pallet garden beds.
The beauty of pallet gardening lies in its accessibility. Unlike traditional raised beds that require significant investment in lumber and materials, pallets are often free or inexpensive to obtain from local businesses, warehouses, and loading dock areas. Beyond cost savings, building with pallets reduces waste and gives new life to materials destined for landfills. With proper preparation and thoughtful design, your pallet garden bed will provide years of productive growing space while adding rustic charm to your outdoor area.
Selecting and Preparing Your Pallets
Not all pallets are created equal, and choosing the right ones is crucial for a safe, long-lasting garden bed. When sourcing pallets, look for those stamped with “HT” (heat-treated) rather than “MB” (methyl bromide), a toxic fumigant used on some export pallets. Heat-treated pallets are safe for growing edibles and ornamental plants alike. Avoid pallets that previously held chemicals, oils, or hazardous materials—check with the source about their contents before accepting them.
Inspect each pallet carefully for signs of damage, rot, or infestation. Look for soft spots in the wood, visible mold, or insect damage. Sound pallets should feel sturdy and solid when you apply pressure. Consider the pallet’s appearance too; weathered pallets with character can be charming, while pristine pallets offer a cleaner aesthetic. You’ll typically need 4-6 pallets depending on your desired bed size and configuration.
Before assembly, clean your pallets thoroughly. Use a pressure washer at medium settings to remove dirt, debris, and potential contaminants. For pallets that will hold edible vegetables in raised garden beds, consider sanding down rough surfaces to prevent splinters. Allow pallets to dry completely before proceeding—this typically takes 24-48 hours depending on weather conditions.
Tools and Materials Needed
Building a pallet garden bed requires only basic tools and materials, making this an accessible project for DIY gardeners of all skill levels. You’ll need a power drill with various bits, a circular saw or reciprocating saw for cutting, a level to ensure proper alignment, and a measuring tape for accurate dimensions. A hammer and rubber mallet are useful for tapping pieces into place, while work gloves protect your hands from splinters.
For assembly, gather galvanized or stainless steel screws (3-inch deck screws work well) rather than nails, which can loosen over time as the wood shifts. Screws provide superior holding power and allow for disassembly if needed. You’ll also want:
- Landscape fabric or hardware cloth (prevents weeds and rodents)
- Wood stain or sealant (optional, extends pallet life)
- Corner brackets or L-brackets for reinforcement
- Exterior wood screws in multiple sizes
- A straightedge or chalk line for marking cuts
- Safety glasses and a dust mask for cutting
The total cost for tools and materials typically ranges from $50-150, depending on whether you already own basic equipment. Many gardeners find that investing in quality hardware pays dividends through improved durability and ease of construction.
Building Your Pallet Garden Bed
Once your pallets are prepared and materials gathered, construction can begin. The most straightforward approach involves stacking pallets to create a rectangular bed, typically 3-4 feet wide and 6-8 feet long. Start by selecting a level location in your garden—use a level to confirm the ground is even, making adjustments with soil or sand as needed. An uneven foundation leads to water pooling and structural problems.
Position your first pallet flat on the ground. If you’re creating a taller bed, stack a second pallet directly on top, ensuring corners align. Use your level frequently to catch any tilting. Secure the pallets together using your corner brackets and screws—drill pilot holes first to prevent wood splitting. Install brackets on the inside corners for a cleaner appearance, and consider adding additional brackets along the length for extra stability.
For the bed’s interior, line the bottom with hardware cloth (1/4-inch mesh) to prevent burrowing rodents from accessing roots. This step is particularly important if your garden sits near fields, woodlands, or areas with active wildlife populations. Overlap the hardware cloth slightly and secure it with staples or screws. This barrier also helps keep rabbits out of garden spaces by preventing ground access.
Next, line the interior walls with landscape fabric, stapling it securely to prevent soil from falling through gaps between pallet boards. The landscape fabric serves dual purposes: it extends the life of the pallet wood by creating a moisture barrier, and it prevents soil from washing out during watering. Some gardeners prefer thicker cardboard for the first season, allowing it to decompose naturally while adding organic matter to the soil.
If desired, apply a food-safe wood sealant to extend your pallet bed’s lifespan. Products like linseed oil or beeswax create a protective layer without introducing harmful chemicals that might leach into soil. Allow any sealant to cure fully before filling with soil.
Soil Selection and Preparation
Filling your pallet garden bed with quality soil is essential for plant success. Unlike in-ground gardens where you work with existing soil, raised beds give you complete control over soil composition. Create a high-quality growing medium by combining:
- Topsoil: 40-50% of total volume (provides nutrients and structure)
- Compost: 30-40% of total volume (adds organic matter and beneficial microorganisms)
- Peat moss or coco coir: 20-30% of total volume (improves water retention)
For a standard 4x8x12-inch bed, you’ll need approximately 32 cubic feet of soil mix. Calculate your specific needs by multiplying length × width × depth (in feet) to determine cubic footage. When purchasing materials, buy slightly more than calculated to account for settling.
Mix these components thoroughly before adding to your bed. If purchasing bagged soil, choose products labeled for vegetable gardening or raised beds rather than potting soil, which drains too quickly for in-ground beds. Consider adding slow-release organic fertilizer according to package directions for an additional nutrient boost.
Allow your newly filled bed to settle for 1-2 weeks before planting, watering gently to help soil compact. You may notice the level drops significantly—top off with additional compost or topsoil as needed. This settling period ensures your plants won’t sink as soil continues to compress beneath them.

Planting and Maintenance
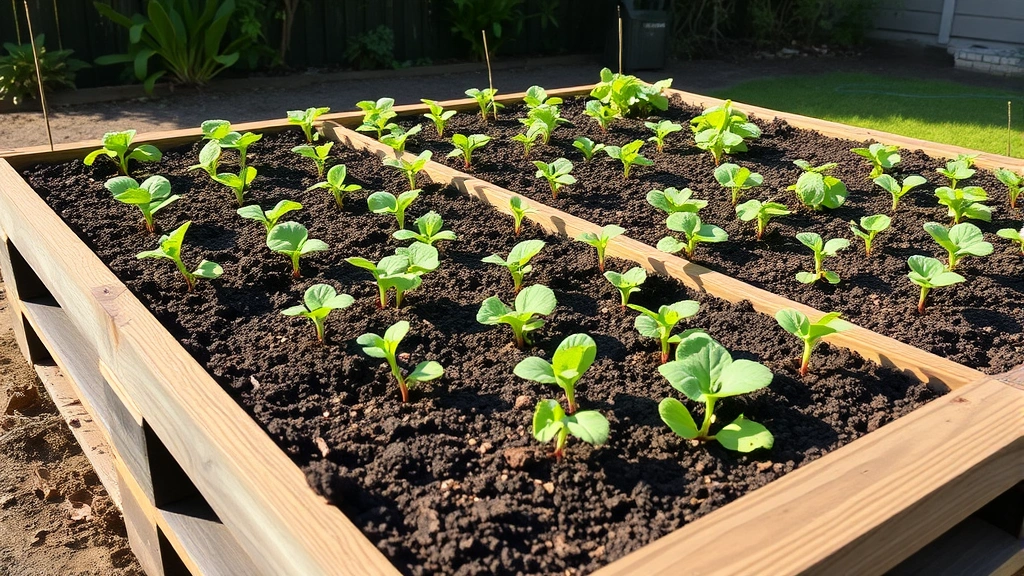
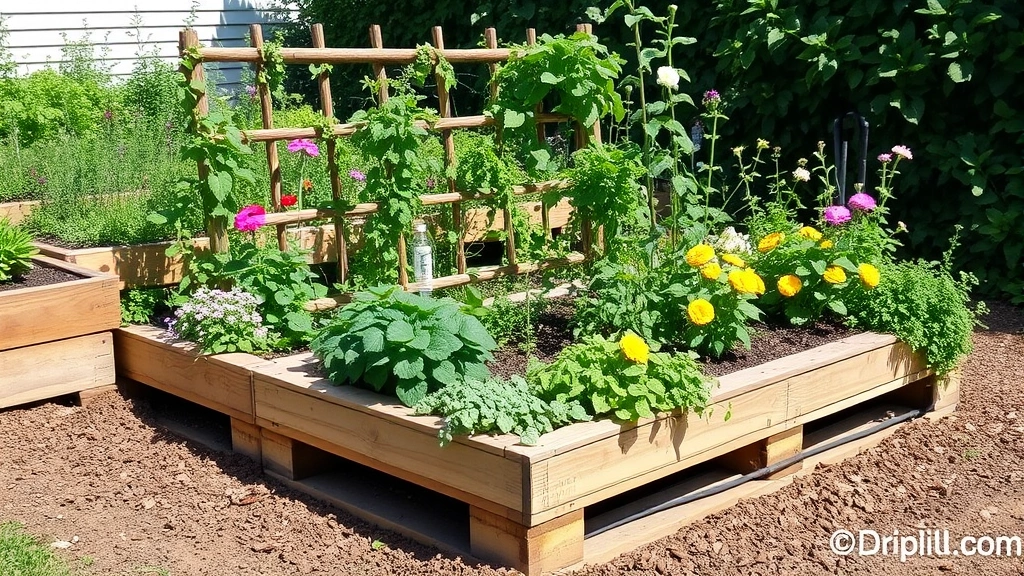
With your pallet garden bed constructed and filled with quality soil, you’re ready to plant. The beauty of raised beds lies in their versatility—you can grow virtually anything, from vegetables in raised garden beds to ornamental flowers, herbs, and even how to grow blueberries in containers using large pots positioned within your bed.
Plan your layout before planting, considering mature plant sizes, sunlight requirements, and companion planting benefits. Taller plants should be positioned on the north side of the bed to avoid shading shorter neighbors. Space plants according to their specific needs—don’t crowd them just because space is available, as overcrowding reduces air circulation and invites disease.
Water your newly planted bed thoroughly to settle soil around roots. Pallet beds typically dry faster than ground-level gardens due to increased air circulation, so monitor soil moisture carefully during the first month. Most vegetables require approximately 1-2 inches of water weekly; adjust based on rainfall and local conditions.
Maintain consistent moisture levels without waterlogging—soil should feel like a wrung-out sponge. Drip irrigation systems work beautifully with pallet beds, delivering water directly to plant roots while minimizing evaporation. Mulching the soil surface with 2-3 inches of organic mulch (straw, shredded leaves, or wood chips) helps retain moisture and regulates soil temperature.
Pest and Weed Management
Pallet raised beds offer some natural pest management advantages—the elevation reduces access for many ground-dwelling pests and makes inspection easier. However, vigilance remains important. Scout your plants regularly, checking both upper and lower leaf surfaces for pest activity and disease signs.
Common pests in vegetable gardens include aphids, spider mites, and squash bugs. Address minor infestations with organic methods: hand-picking, strong water sprays, or insecticidal soap. Reserve chemical treatments for severe cases, always following label directions carefully.
Weeds are typically fewer in raised beds since you’re using quality soil rather than soil containing persistent weed seeds. Still, some weed seeds arrive via wind or contaminated mulch. Remove weeds by hand when they’re small, pulling from the base to extract the entire root system. The landscape fabric beneath your bed prevents most perennial weeds from pushing through from below.
The hardware cloth lining also helps keep rabbits out of garden spaces by preventing ground access. Consider adding a fence around your bed for additional protection, particularly if deer or other large herbivores frequent your area.
Seasonal Care Tips
Your pallet garden bed requires different care throughout the growing season. In spring, prepare beds by working in fresh compost and checking pallet integrity. Winter weather may have caused shifting or damage—address any issues before planting.
Summer brings peak growth but also increased water demands. During hot months, water deeply and more frequently, potentially every 1-2 days depending on temperature and rainfall. Provide afternoon shade for heat-sensitive crops like lettuce during extreme heat waves. Deadhead flowers regularly to encourage continued blooming and direct energy toward fruit production in vegetable crops.
Fall is an excellent time to plant cool-season crops and refresh soil. Add 2-3 inches of compost to beds as a top dressing, working it lightly into the top few inches. This replenishes nutrients depleted by the summer growing season and improves soil structure. Consider planting a cover crop (winter rye, clover, or vetch) in unused beds to build soil health over winter.
Winter care depends on your climate. In cold regions, allow beds to lie dormant, protecting them from extreme weather. In milder climates, continue growing cool-season vegetables. Check pallets periodically for damage from ice, snow, or heavy rain. Spring brings renewal—inspect wood for rot, repair as needed, and prepare for another season of growth.
If you’re also adding garden features nearby, consider complementary elements like a garden bench for comfortable garden observation, or a garden hose reel cart for convenient watering access. These additions enhance both functionality and enjoyment of your gardening space.
FAQ
How long do pallet garden beds last?
With proper care and maintenance, untreated wooden pallet beds typically last 3-5 years before significant deterioration occurs. Applying food-safe wood sealant can extend this to 7-10 years. Hardwood pallets last longer than softwood varieties. Monitor regularly for rot, and replace damaged boards as needed to maintain structural integrity.
Can I use pallets that held food products?
Yes, pallets previously used for food storage are excellent choices, especially if they’re heat-treated. Verify they’re stamped “HT” and clean them thoroughly before use. Pallets from bakeries, produce distributors, or food manufacturers are generally safe and often readily available from local businesses.
What’s the best soil depth for a pallet bed?
Most vegetables require 8-12 inches of soil depth; root crops like carrots and parsnips benefit from 12-18 inches. Herbs and shallow-rooted plants manage well with 6-8 inches. A standard pallet height of 5.5 inches accommodates one layer; stack two pallets for deeper beds suitable for diverse plantings.
Do pallet beds need drainage holes?
Pallet bed bottoms naturally provide drainage through gaps between boards. However, this drainage can cause nutrient leaching over time. The landscape fabric lining slows water movement while still allowing excess moisture to drain, creating an optimal balance. In very rainy climates, ensure your bed sits on well-draining ground to prevent water accumulation.
Can I grow perennials in pallet beds?
Absolutely. Perennial herbs, berries, and ornamental plants thrive in pallet beds. However, plan for the bed’s eventual wood deterioration—perennials with deeper root systems may eventually contact soil beneath the bed. Refresh the soil annually with compost to maintain nutrient levels and support long-term plant health.
How do I prevent my pallet bed from rotting?
Line the interior with landscape fabric to create a moisture barrier between wood and soil. Apply food-safe wood sealant before filling. Ensure proper drainage so water doesn’t accumulate against wood surfaces. Position the bed in a well-draining location, and monitor for signs of rot or mold, addressing issues promptly.