Grow a Garden on a Cart: The Complete DIY Guide to Kitchen Cart Gardening
A kitchen cart might seem like an unlikely gardening solution, but it’s one of the most versatile and practical ways to grow fresh herbs, vegetables, and ornamental plants in limited spaces. Whether you live in an apartment, have a small balcony, or simply want to maximize your growing potential without a traditional garden bed, a mobile growing cart offers flexibility that stationary gardens cannot match. The beauty of this approach lies in its simplicity: you take an existing kitchen cart, outfit it with soil and plants, and suddenly you have a productive garden that moves wherever you need it.
This DIY guide walks you through everything you need to know to transform an ordinary kitchen cart into a thriving plant production system. From selecting the right cart to choosing appropriate plants and managing water and light, we’ll cover the practical steps that make mobile gardening successful. You’ll learn how to maintain your cart garden through the seasons, troubleshoot common problems, and maximize your harvest in a space that most people overlook as gardening real estate.
Choosing the Right Kitchen Cart for Gardening
Not every kitchen cart works equally well for gardening purposes. The ideal cart should have a sturdy frame that can support significant weight when filled with moist soil and plants. Look for carts with reinforced shelving, preferably made from stainless steel or powder-coated metal that won’t rust when exposed to water. A cart with three to four shelves gives you vertical growing space and allows you to organize plants by height and light needs.
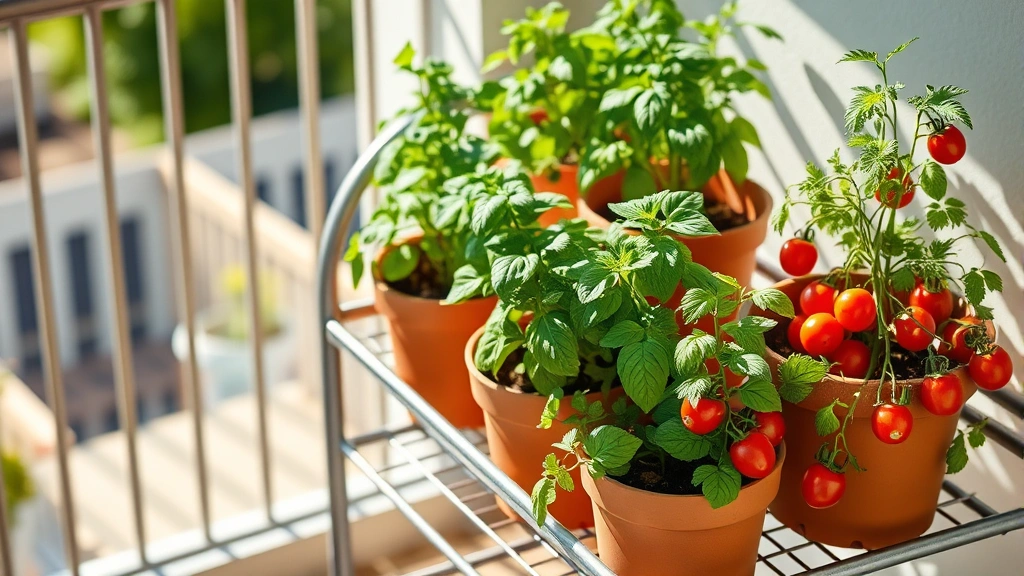
The dimensions matter considerably. A standard kitchen cart measures approximately 15-20 inches wide and 28-36 inches tall, which fits perfectly in tight spaces like balconies, patios, or even kitchen corners. The width should be sufficient to accommodate standard nursery pots without them hanging precariously over the edges. Casters are essential—choose locking wheels that prevent the cart from rolling when you’re watering or tending plants, but allow movement when you need to reposition it for optimal light exposure.
Consider the cart’s weight capacity carefully. Wet soil is heavy; a single shelf holding four large pots can weigh 40-60 pounds. Most quality kitchen carts support 100-150 pounds total, which is adequate for a well-planted garden, but verify specifications before purchasing. Avoid carts with open designs where soil and water will fall through onto the shelf below, unless you plan to use individual containers with saucers on each level.
Essential Materials and Setup
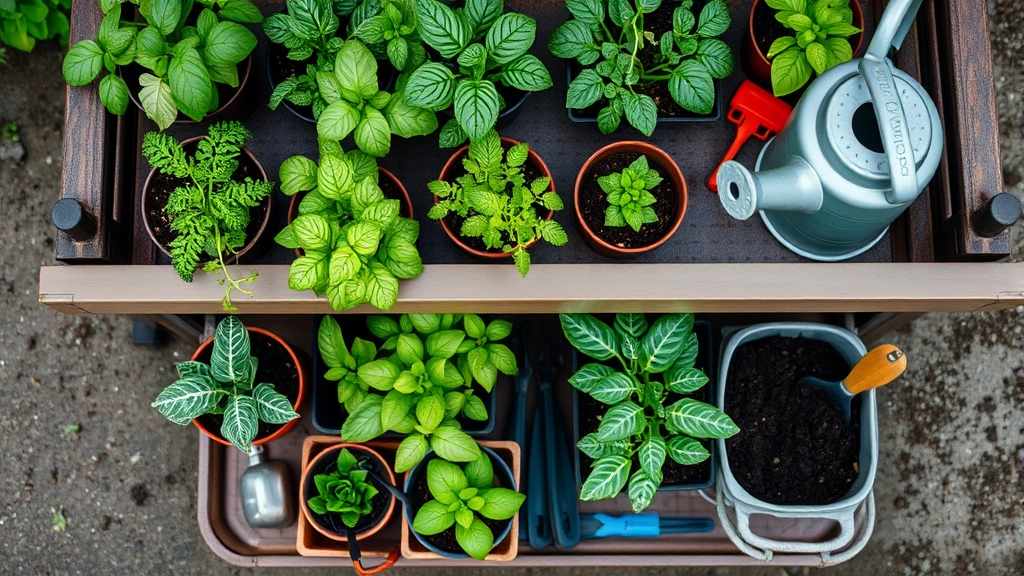
Beyond the cart itself, you’ll need several materials to prepare it for gardening. Start with a quality potting mix—not garden soil, which compacts in containers and drains poorly. A mix combining peat moss, coconut coir, and perlite provides excellent drainage and aeration. You’ll typically need 40-60 liters of potting mix for a fully planted three-shelf cart, depending on pot sizes.
Containers are your next consideration. Use pots with drainage holes—this is non-negotiable for plant health. Terracotta, plastic, and fabric pots all work; fabric pots offer superior drainage and air pruning of roots. Arrange pots so they don’t touch each other, allowing air circulation that prevents fungal diseases. Saucers or trays under each pot catch excess water and protect the cart’s shelves.
Install a waterproof barrier on each shelf before adding soil. Heavy plastic sheeting, rubber liners, or specialized shelf liners prevent moisture from saturating the cart’s structure. This is particularly important for wooden shelves or carts with fabric components. Leave the plastic slightly raised at the edges to contain water spillage while allowing drainage into collection trays.
Consider adding a small drip irrigation system or soaker hose setup. A basic battery-powered timer connected to drip lines ensures consistent watering, especially valuable during hot weather or when you’re away. This investment pays dividends in plant health and time savings.
Best Plants for Cart Gardens
The plants you choose determine your cart’s success and productivity. Herbs are the most rewarding choice for kitchen cart gardens—basil, parsley, cilantro, chives, oregano, and thyme all thrive in container conditions. These culinary staples provide immediate utility and grow quickly, giving you harvests within weeks of planting.
Leafy greens work exceptionally well in shallow containers. Lettuce, spinach, arugula, and kale don’t require deep root systems and produce continuous harvests through cut-and-come-again harvesting methods. Plant them densely; you’ll be harvesting outer leaves regularly, allowing inner leaves to mature. A single shelf can produce significant quantities of fresh greens throughout the growing season.
Compact vegetable varieties bred for containers offer surprising productivity. Cherry tomatoes, dwarf peppers, compact eggplants, and bush beans all perform well on carts. Choose varieties specifically labeled as determinate or compact; full-size varieties become unwieldy and top-heavy. Small evergreen varieties provide year-round interest and can include ornamental peppers or dwarf bay laurel for dual-purpose growing.
Strawberries are excellent cart garden candidates, especially in hanging baskets positioned on the top shelf where runners can cascade down. They produce fruit prolifically in containers and add visual interest to your setup. Microgreens and sprouts require minimal space and light, making them perfect for lower shelves or even indoor cart gardens with supplemental lighting.
Avoid plants with deep taproots like carrots and parsnips, which require deeper soil than most carts accommodate. Similarly, large perennial plants that demand significant root systems become problematic in container situations. Focus on fast-growing, productive plants that reward your care with frequent harvests.
Watering and Drainage Systems
Proper watering is the most critical factor in cart garden success. Container plants dry out faster than garden beds because soil volume is limited and exposure to air is greater. During hot weather, you may need to water daily, sometimes twice daily for small pots on upper shelves receiving intense sun exposure.
Develop a consistent watering schedule, checking soil moisture with your finger before watering. The top inch should feel dry before you water again; this prevents overwatering while ensuring plants never completely dry out. Water thoroughly until it drains from the bottom—this flushes accumulated salts and ensures even moisture distribution throughout the soil column.
Drainage is non-negotiable. Every pot must have drainage holes, and every pot must sit in a saucer or on a liner that contains excess water. This prevents the cart structure from becoming waterlogged while allowing you to observe when plants need water—the saucer will dry out between waterings. Empty saucers after 30 minutes to prevent root rot.
If you’re using a drip irrigation system, set it on a timer to deliver water early morning or late evening when evaporation is minimal. Drip systems are more efficient than overhead watering, delivering moisture directly to soil rather than wetting foliage, which promotes fungal diseases. A simple system with a battery timer costs $30-50 and pays for itself through water savings and improved plant health.
In winter or cooler months, reduce watering frequency dramatically. Many plants enter dormancy or slow growth, requiring less moisture. Overwatering in cool weather is a primary cause of root rot and plant death. Monitor soil moisture carefully and adjust your watering schedule to match seasonal conditions.
Light Requirements and Placement
Light exposure determines whether your cart garden thrives or merely survives. Most vegetables and herbs require 6-8 hours of direct sunlight daily. Position your cart where it receives morning sun if possible—this dries dew from foliage, reducing disease pressure. Afternoon shade in extremely hot climates prevents heat stress and reduces water needs, but never sacrifice total light hours for shade in mild climates.
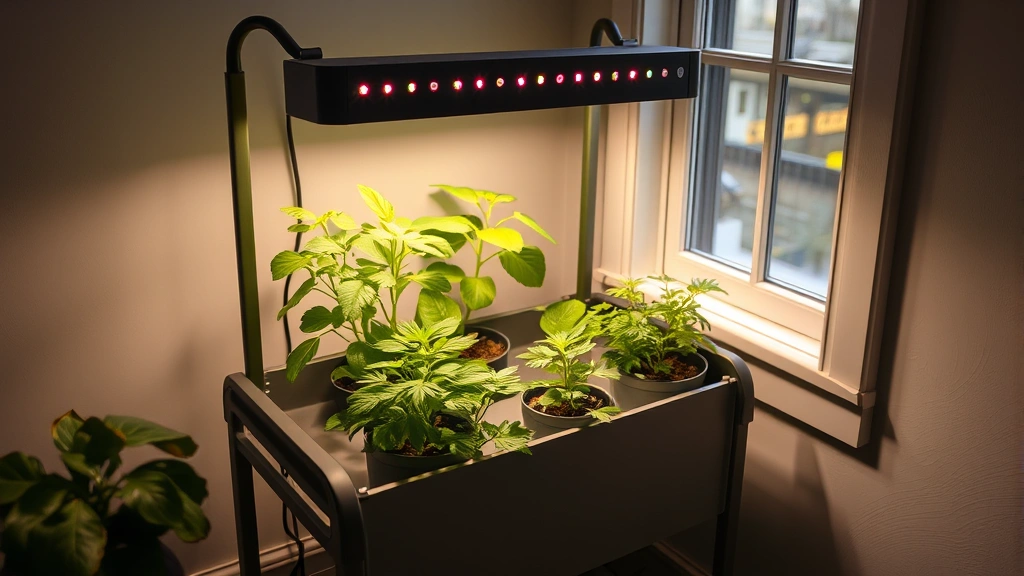
If natural light is limited, supplement with grow lights. LED grow lights are affordable, energy-efficient, and produce minimal heat. Position them 6-12 inches above plants, adjusting as plants grow. A simple setup with two LED shop lights suspended above your cart creates sufficient light for herbs and leafy greens. Set lights on a timer for 12-14 hours daily, mimicking long summer days that promote growth.
Rotate the cart periodically if it’s in a fixed location. This ensures all plants receive relatively equal light and prevents the side facing the light source from growing excessively while the opposite side becomes leggy and weak. Even a quarter-turn every few days significantly improves plant symmetry and productivity.
Watch for signs of insufficient light: pale coloring, weak stems, slow growth, and plants leaning toward the light source. These indicate your cart needs more light or repositioning. Conversely, signs of excessive light include bleached foliage or scorched leaves—move the cart slightly further from intense direct sun or provide afternoon shade cloth during peak summer heat.
Seasonal Care and Maintenance
Your cart garden’s needs change dramatically through the seasons. Spring is prime planting time; as soil warms and days lengthen, establish your primary crops. Start with cool-season crops like lettuce, spinach, and peas in early spring, then transition to warm-season plants like basil, tomatoes, and peppers after the last frost date.
Summer demands vigilant watering and monitoring. Heat accelerates soil drying and promotes rapid plant growth, requiring more frequent harvesting to prevent plants from becoming overgrown. Provide afternoon shade if temperatures exceed 85°F consistently. Monitor for spider mites and other pests that thrive in hot, dry conditions; regular misting helps deter them.
Fall offers another opportunity for cool-season crops. As temperatures moderate, plant a second round of lettuce, spinach, and leafy greens. These often taste superior to spring crops because cool temperatures promote flavor development. Herbs continue producing well into autumn.
Winter care depends on your climate. In mild regions, maintain your cart year-round, focusing on cold-hardy herbs and greens. In cold climates, move the cart to a sheltered location, reduce watering, and consider moving it indoors near a south-facing window. Many gardeners treat their cart gardens as seasonal projects, clearing them in winter and starting fresh in spring.
Regular maintenance extends your cart’s lifespan. Clean the cart annually with mild soap and water. Inspect for rust, damaged shelves, or loose casters. Replace or repair damaged components before they cause problems. At season’s end, empty all soil, compost healthy plant material, and dispose of diseased plants separately to prevent pest and disease carryover to next season.
Troubleshooting Common Problems
Even experienced gardeners encounter challenges with container gardening. Yellowing leaves often indicate nutrient deficiency—containers provide limited nutrient reserves, requiring supplemental feeding. Apply balanced liquid fertilizer every 2-3 weeks during the growing season, or use slow-release fertilizer pellets mixed into potting soil at planting time.
Pest infestations spread rapidly in the confined environment of a cart garden. Spider mites, aphids, and whiteflies thrive on stressed plants. Combat infestations early by removing affected leaves, spraying with insecticidal soap, or introducing beneficial insects like ladybugs. Isolate heavily infested plants to prevent spread to healthy specimens.
Root rot results from poor drainage or overwatering. Symptoms include wilting despite moist soil, dark mushy roots, and a sour soil smell. Prevent this by ensuring every pot has drainage holes, using well-draining potting mix, and allowing soil to dry slightly between waterings. If root rot occurs, repot affected plants into fresh soil immediately.
Leggy growth indicates insufficient light. Plants stretch toward available light, becoming weak and unproductive. Address this by repositioning the cart to receive more direct sun or installing grow lights. Pinching off growing tips encourages bushier, more compact growth.
Nutrient deficiencies manifest differently depending on which nutrient is lacking. Nitrogen deficiency causes pale, yellowing lower leaves; phosphorus deficiency produces purplish discoloration; potassium deficiency creates yellow leaf edges. Apply balanced fertilizer to address general deficiencies, or use specialized fertilizers for specific problems.
Watering inconsistency—alternating between soggy and bone-dry soil—causes blossom-end rot in tomatoes and peppers, cracked fruit, and stress-related problems. Maintain consistent moisture by checking soil regularly and watering on a predictable schedule. Mulching the soil surface with 1-2 inches of compost helps moderate moisture fluctuations.
Cold damage in spring or fall can kill tender plants overnight. Monitor weather forecasts and move your cart indoors or cover it with frost cloth when temperatures approach freezing. Many gardeners keep their carts mobile specifically to move them to protected locations during unexpected cold snaps.
Frequently Asked Questions
Can I use any kitchen cart for gardening?
While technically possible, not all kitchen carts are ideal. Choose sturdy carts with weight capacity of at least 100 pounds, non-rusting metal construction, and shelves that support significant weight. Avoid flimsy designs or carts with fabric components that won’t withstand constant moisture exposure.
How often should I fertilize my cart garden?
Most container plants benefit from fertilizing every 2-3 weeks during active growing season. Use balanced liquid fertilizer at half strength, or incorporate slow-release pellets into potting soil at planting. Reduce or eliminate fertilizing in fall and winter when plant growth slows dramatically.
What’s the best potting mix for cart gardens?
A high-quality commercial potting mix containing peat moss or coconut coir, perlite, and compost provides excellent drainage and nutrition. Avoid garden soil, which compacts in containers and drains poorly. For even better results, amend commercial mix with 10-20% compost for added nutrients and beneficial microorganisms.
Can I grow cart gardens indoors?
Absolutely. Position your cart near a bright south-facing window, or supplement natural light with LED grow lights on a timer. Indoor cart gardens work particularly well for herbs, microgreens, and leafy greens. Ensure good air circulation to prevent fungal diseases, and monitor watering carefully since indoor plants typically need less frequent watering than outdoor ones.
How do I prevent pests in a cart garden?
Start with disease-free plants and clean potting mix. Monitor plants regularly for early pest signs, removing affected leaves immediately. Maintain good air circulation, avoid overhead watering that creates humid conditions favoring pests, and isolate infested plants. Use organic pest control methods like insecticidal soap before resorting to chemical pesticides.
What’s the maximum weight I can safely put on a kitchen cart?
Most kitchen carts support 100-150 pounds total. Wet soil weighs approximately 60 pounds per cubic foot, so calculate carefully. A cart with three shelves, each holding four medium pots with moist soil, approaches maximum capacity. Verify your specific cart’s weight rating before planting.


