How to Start Harvey’s Garden: Expert Tips Inside
Harvey’s Garden represents more than just a collection of plants—it’s a philosophy of growing food and flowers with intention, care, and sustainable practices. Whether you’re inspired by the famous Harvey’s Garden featured in horticultural circles or you’re creating your own version of this productive space, starting a Harvey’s Garden requires thoughtful planning, proper site selection, and knowledge of seasonal planting. This comprehensive guide will walk you through every step of establishing your own thriving Harvey’s Garden, from initial soil preparation to harvesting your first crops.
The beauty of Harvey’s Garden lies in its versatility. It can be a small backyard plot, a series of raised beds, or even container gardens on a patio. The core principle is maximizing productivity while maintaining soil health and plant diversity. By following the expert strategies outlined in this guide, you’ll create a garden that produces abundantly throughout the growing season while building long-term soil fertility.
Understanding Harvey’s Garden Philosophy
Harvey’s Garden embodies sustainable gardening principles that have been refined over generations. At its core, this approach emphasizes crop rotation, companion planting, and building soil health naturally. Unlike conventional gardening methods that rely heavily on synthetic inputs, Harvey’s Garden focuses on working with nature to create a self-sustaining ecosystem.
The philosophy centers on several key principles. First, diversity matters—growing a wide variety of plants creates natural pest control and maximizes nutritional value. Second, soil is everything; healthy soil produces healthy plants. Third, water conservation and efficient irrigation are essential for long-term success. Finally, patience and observation are your greatest tools. Successful gardeners learn to read their plants and respond to seasonal changes.
When starting your Harvey’s Garden, understand that this isn’t a quick project. You’re investing in a system that will improve year after year. The first season establishes your foundation, the second season sees significant improvements, and by the third season, your garden reaches its full potential with rich soil, established beneficial insect populations, and optimized plant combinations.
Choosing Your Garden Location
Location determines success more than any other single factor. Your Harvey’s Garden needs sunlight, water access, and protection from extreme conditions. Most vegetables and flowers require six to eight hours of direct sunlight daily. Observe your potential garden site throughout the day, noting which areas receive full sun, partial shade, and full shade. Morning sun is particularly valuable because it dries dew and reduces fungal diseases.
Water availability is equally critical. Your garden site should be close enough to a water source for convenient irrigation, yet not in a low spot where water collects and creates drainage problems. Well-draining soil prevents root rot and fungal issues. If your site tends to be wet, consider building raised beds or using garden pots to elevate your planting area.
Consider wind exposure and frost pockets. Strong winds can damage plants and increase water loss, while frost pockets—low-lying areas where cold air settles—can damage tender plants. Ideally, choose a location with some wind protection from trees or structures, but avoid dense shade from those same barriers.
Proximity to your home matters practically. Gardens you see daily receive better attention. You’ll notice pest problems earlier, water more consistently, and harvest at peak ripeness. If your main garden location is far from your house, consider a small vertical garden or container garden near your kitchen door for herbs and frequently-used vegetables.
Soil Preparation and Testing
Excellent soil is the foundation of Harvey’s Garden success. Before planting anything, test your soil. Contact your local cooperative extension service for soil testing recommendations. A basic soil test reveals pH level, nutrient content (nitrogen, phosphorus, potassium), and organic matter percentage. This information guides your amendment strategy.
Most vegetables thrive in slightly acidic to neutral soil with a pH between 6.0 and 7.0. If your soil is too acidic, add agricultural lime. If it’s too alkaline, add sulfur. These amendments work slowly, so apply them in fall for spring planting or several months before you plant.
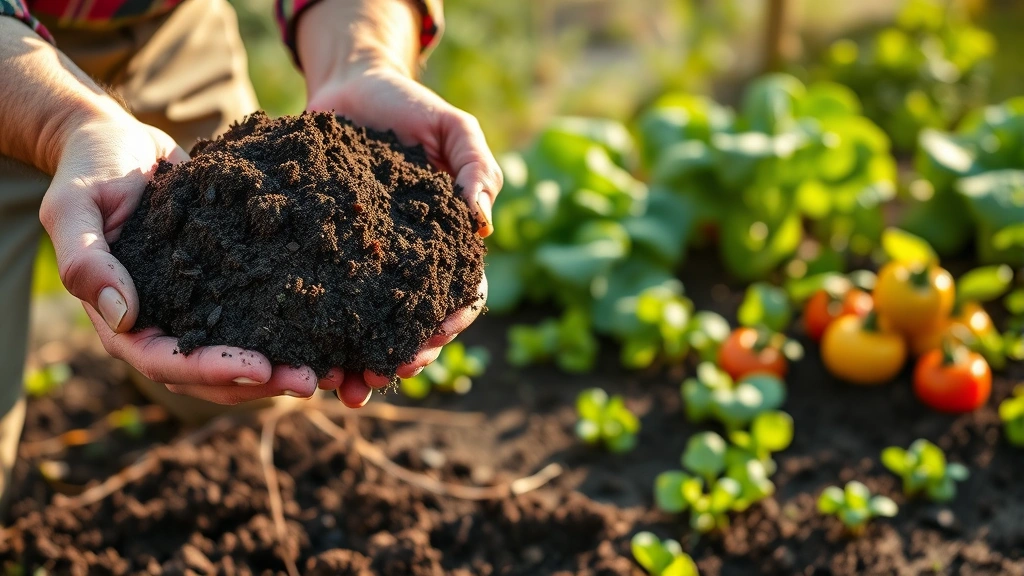
Organic matter is your secret weapon. Work 2-4 inches of compost, aged manure, or other organic material into your soil before planting. This improves drainage in clay soils, increases water-holding capacity in sandy soils, and feeds beneficial microorganisms. Continue adding organic matter annually through composting and mulching.
Create a composting system for your Harvey’s Garden. Kitchen scraps, grass clippings, and garden debris become black gold—nutrient-rich compost that transforms your soil. A three-bin system allows you to manage compost at different stages while always having finished product ready to use. Avoid composting diseased plants, weeds with seeds, or meat products.
Planning Your Garden Layout
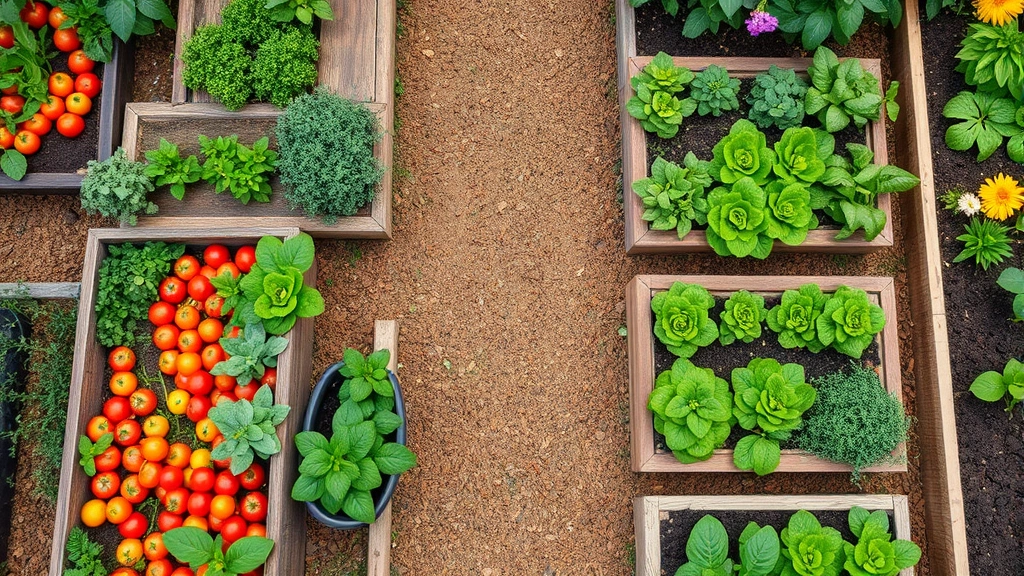
Strategic layout maximizes productivity and simplifies maintenance. Sketch your garden on paper, noting sun exposure patterns. Place tall plants on the north side where they won’t shade shorter plants. Group plants by water needs—drought-tolerant herbs together, thirsty vegetables in another section.
Implement crop rotation by dividing your garden into three or four sections. Each year, rotate plant families to different sections. This prevents soil depletion and reduces pest and disease buildup. For example, if tomatoes grew in Section A this year, plant them in Section B next year and Section C the following year.
Incorporate companion planting principles. Lettuce grows well with carrots and radishes. Basil planted near tomatoes improves flavor and repels pests. Marigolds deter harmful insects throughout the garden. Three Sisters planting—corn, beans, and squash together—maximizes space and nutrition.
Design pathways between beds for easy access. Narrow pathways (18-24 inches) work in small gardens, while main pathways should be at least 3 feet wide for wheelbarrow access. Lay landscape fabric under pathways to suppress weeds, then cover with mulch or gravel.
Consider vertical growing options like trellises, stakes, and cages. Cucumbers, beans, peas, and tomatoes grow beautifully upward, saving space and improving air circulation. This is especially valuable if you’re working with limited space or creating a vertical garden design.
Starting with Seeds vs. Seedlings
Both methods have advantages. Seeds cost less and offer more variety, but require longer growing periods and careful attention. Seedlings (transplants) cost more but provide faster results and higher success rates for beginners. Many successful Harvey’s Gardens use a combination—starting some plants from seed indoors while purchasing others as seedlings.
Start seeds indoors 6-8 weeks before your last spring frost date. Use seed-starting mix (lighter and fluffier than potting soil) in clean containers with drainage holes. Keep soil moist but not waterlogged, maintain temperatures between 65-75°F, and provide bright light (from grow lights or sunny windows) once seedlings emerge. Thin seedlings to prevent crowding and strengthen survivors.
Harden off seedlings before planting outdoors by gradually exposing them to outdoor conditions. Start with one hour of outdoor time in a sheltered location, increasing daily exposure over 7-10 days. This toughens plants and prevents transplant shock.
Direct seeding works well for easy-to-grow vegetables like beans, peas, squash, cucumbers, and carrots. Plant seeds directly in garden soil at depths specified on seed packets. Keep soil consistently moist until germination. Thin seedlings as they grow to proper spacing.
Seasonal Planting Guide
Spring Planting (After Last Frost Date): This is Harvey’s Garden’s busiest season. Plant warm-season crops like tomatoes, peppers, eggplants, squash, cucumbers, and beans. These frost-sensitive plants need soil temperatures above 60°F for germination. Wait until nighttime temperatures consistently stay above 50°F before transplanting tender seedlings.
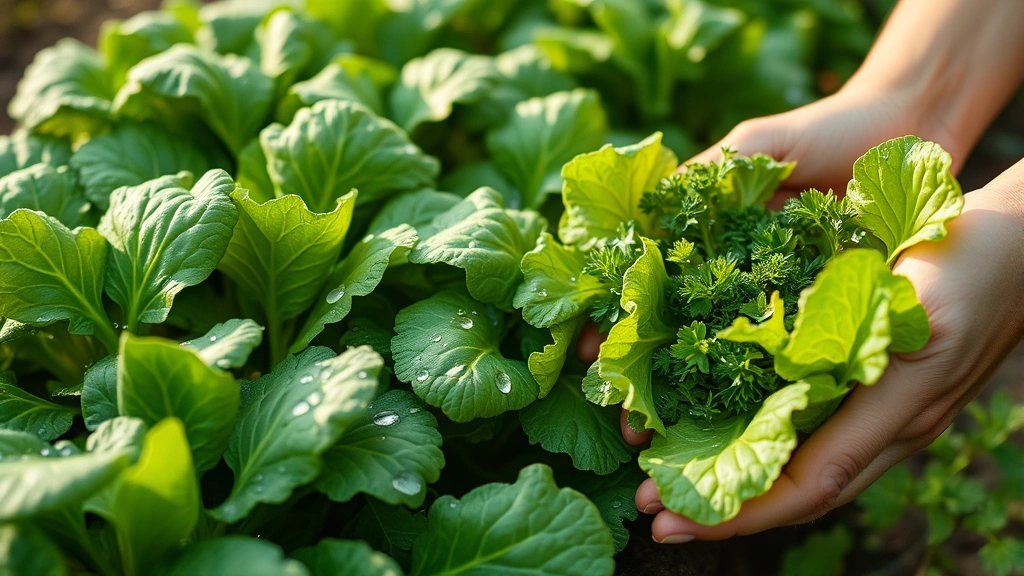
Cool-Season Crops (Spring and Fall): Lettuce, spinach, peas, broccoli, cabbage, and kale thrive in cool weather. Plant cool-season crops 4-6 weeks before your last spring frost and again 8-10 weeks before your first fall frost. These crops tolerate light frosts and actually taste better after frost exposure.
Summer Maintenance: Once spring plantings are established, focus on watering, weeding, and pest management. Continue succession planting every 2-3 weeks for continuous harvests of beans, lettuce, and other quick-maturing crops. Mulch heavily to conserve moisture and suppress weeds.
Fall Preparation: Plant fall crops in midsummer for autumn harvest. This includes cool-season vegetables and garlic (which overwinters and produces the following summer). As summer crops finish, remove plants and add them to compost. Plant cover crops like clover or winter rye in empty beds to protect and enrich soil over winter.
Winter Planning: Winter is your planning season. Review garden notes, order seeds, and sketch next year’s layout. Start seeds indoors in late winter for spring transplants. This preparation ensures Harvey’s Garden hits the ground running when spring arrives.
Watering and Maintenance Strategies
Consistent watering is essential for Harvey’s Garden success. Most vegetables need 1-2 inches weekly, including rainfall. Water deeply and less frequently rather than shallow daily watering. Deep watering encourages deep root development and drought tolerance. Water early morning when possible to reduce disease and allow foliage to dry quickly.
Drip irrigation or soaker hoses deliver water directly to soil, minimizing waste and fungal disease. These systems are more efficient than overhead sprinklers and can be automated with timers for consistency even when you’re away. Mulch with 2-3 inches of organic material to conserve moisture, moderate soil temperature, and suppress weeds.
Regular weeding prevents competition for water and nutrients. Young weeds pull easily; older weeds require more effort. Mulch reduces weeding significantly by blocking light from weed seeds. Hand-pull weeds or use a hoe, being careful not to damage nearby plants.
Fertilize appropriately throughout the season. Work garden fertilizer or compost into soil before planting. As plants grow, apply balanced fertilizer every 3-4 weeks, or use organic options like fish emulsion, seaweed extract, or compost tea. Follow package directions to avoid over-fertilizing, which produces lush foliage at the expense of fruit production.
Prune and train plants as needed. Remove lower leaves from tomatoes to improve air circulation. Pinch off basil and herb flowers to encourage bushier growth. Tie tall plants to stakes or cages for support. These simple tasks improve productivity and plant health.
Pest Management and Disease Prevention
Harvey’s Garden thrives when you work with nature rather than against it. Healthy, well-spaced plants growing in rich soil resist pests and diseases better than stressed plants. Prevention is always easier than cure.
Encourage beneficial insects by planting flowers like marigolds, zinnias, and cosmos. These attract pollinators and predatory insects that eat pests. Avoid broad-spectrum pesticides that kill beneficial insects along with pests. A few damaged leaves are acceptable—they indicate a healthy ecosystem where predators are controlling pest populations.
Scout regularly for problems. Check undersides of leaves where pests hide, look for yellowing or spots indicating disease, and note wilting plants that might need water. Early detection allows early intervention with minimal impact.
Use organic pest management strategies. Hand-pick larger pests like hornworms. Spray insecticidal soap for soft-bodied insects like aphids. Neem oil addresses many pest and fungal problems. Bacillus thuringiensis (Bt) controls caterpillars without harming other insects. These organic options are less toxic than synthetic pesticides.
Prevent diseases through proper spacing, mulching, and watering at soil level rather than overhead. Remove diseased leaves promptly. Rotate crops annually to prevent pathogen buildup. Sterilize tools between plants if you’ve been working with diseased plants.
Certain plants are naturally disease-prone in your climate. Talk with local gardeners or your master gardener program about disease-resistant varieties suited to your area. Choosing resistant varieties prevents problems before they start.
FAQ
What size should my Harvey’s Garden be?
Start small—a 4×8 foot bed or even container gardens are perfect for beginners. You can expand once you understand your local climate and personal gardening style. A smaller, well-maintained garden outproduces a larger neglected one.
Can I start a Harvey’s Garden in containers?
Absolutely. Garden pots and hanging baskets work wonderfully for vegetables, herbs, and flowers. Use quality potting soil, ensure drainage holes, and water more frequently since containers dry faster than ground beds. This approach is ideal for patios, balconies, or areas with poor native soil.
When should I harvest vegetables?
Harvest most vegetables when they’re young and tender for best flavor. Pick lettuce and greens in the morning when they’re crisp. Harvest tomatoes when fully colored but still slightly firm. Pick beans and peas regularly to encourage continued production. Early morning harvesting captures peak moisture and nutrition.
How do I know if my soil is ready for planting?
Squeeze a handful of moist soil. If it forms a tight ball that doesn’t break apart, it’s too wet. If it falls apart immediately, it’s too dry. The right consistency forms a ball that crumbles with slight pressure. Wait for proper soil conditions before tilling or planting to avoid compacting soil.
What’s the best way to start a flower garden alongside my vegetable garden?
Integrate flowers throughout your Harvey’s Garden for beauty and function. Plant marigolds, zinnias, and cosmos for pest control and pollinator attraction. Herbs like basil and oregano add culinary and ornamental value. Dedicate a section to cut flowers if desired. This mixed approach maximizes your garden space and creates an inviting environment.
How long until I see results?
You’ll harvest greens and herbs within 4-6 weeks of planting. Tomatoes and peppers produce 60-90 days after transplanting. Root vegetables take 50-80 days. By midsummer, a well-established Harvey’s Garden produces abundantly. Each year improves as soil builds and you refine your techniques.


