Spring Onion Growing Tips: Expert Advice for a Bountiful Harvest
Spring onions, also known as scallions or green onions, are one of the easiest and most rewarding vegetables to cultivate in your home garden. These slender, mild-flavored alliums thrive in cool-season conditions and can be harvested in as little as 3-4 weeks, making them perfect for gardeners seeking quick wins. Whether you’re a seasoned grower or just starting your gardening journey, understanding the fundamentals of spring onion cultivation will set you up for consistent success throughout the growing season.
The beauty of growing spring onions lies in their versatility and resilience. They adapt well to various growing conditions, from traditional garden beds to containers, and can be planted in succession for continuous harvests. With minimal space and effort required, spring onions are an excellent choice for small-space gardeners, urban farmers, and anyone looking to add fresh, homegrown flavor to their kitchen. This comprehensive guide will walk you through every step of the process, from seed selection to harvest and beyond.
Choosing the Right Spring Onion Varieties
Selecting the appropriate variety is the foundation of successful spring onion cultivation. Different cultivars offer distinct characteristics in terms of flavor intensity, bulbing tendency, and growing speed. Understanding these differences will help you choose varieties that align with your climate, preferences, and growing timeline.
Bunching varieties are the most popular choice for spring onion production. These non-bulbing types include ‘Evergreen Hardy’, ‘White Lisbon’, ‘Tokyo Long’, and ‘Parade’. Bunching varieties develop minimal bulbs and focus their energy on producing long, tender green shoots perfect for fresh eating. ‘White Lisbon’ is exceptionally cold-hardy and can tolerate light frosts, making it ideal for early spring and fall plantings. ‘Tokyo Long’ produces exceptionally long, slender stalks with mild flavor—a favorite among Asian cuisine enthusiasts.
Intermediate bulbing varieties like ‘Purplette’ and ‘Beltsville Bunching’ develop small bulbs while still producing quality greens. These work well if you want flexibility in harvesting—pick them young for green onions or leave them in the ground longer to develop small bulbs. ‘Purplette’ offers distinctive purple-tinged bulbs and adds visual interest to your garden beds.
Egyptian Walking Onions, also called tree onions, are perennial varieties that produce small bulblets at the top of the stem. These unusual plants multiply themselves and can be left in the ground for multiple seasons, making them a low-maintenance option for permanent garden spaces.
When purchasing seeds, look for reputable seed companies that provide germination rates and variety information. Fresh seeds typically have better germination rates, so check the harvest date on the packet. For spring planting, choose fast-maturing varieties that can reach harvest size before summer heat arrives.
Preparing Your Growing Space
Spring onions are remarkably adaptable but perform best in well-prepared soil. Begin by assessing your garden location—spring onions need at least 4-5 hours of direct sunlight daily, though they tolerate partial shade, especially in warmer climates. Full sun exposure encourages faster growth and stronger flavor development.
Soil preparation is crucial for optimal growth. Spring onions prefer loose, well-draining soil rich in organic matter. If you’re working with heavy clay soil, amend it generously with compost or aged manure. A raised bed garden dirt mixture provides excellent drainage and allows you to control soil composition precisely. A typical blend of 40% compost, 30% topsoil, and 30% peat moss or coconut coir creates an ideal growing medium for spring onions.
For container growing, use quality potting soil mixed with compost. Spring onions thrive in containers as shallow as 6 inches deep, making them perfect for balconies, patios, and windowsill gardens. A cinder block garden bed can be effectively used for spring onion cultivation, providing rustic charm while maintaining proper drainage.
Test your soil pH before planting. Spring onions prefer slightly acidic to neutral soil with a pH between 6.0 and 7.0. If your soil is too acidic, add lime; if too alkaline, incorporate sulfur. Work amendments into the top 6-8 inches of soil at least two weeks before planting to allow for proper integration.
Ensure adequate spacing in your beds. Spring onions can be planted densely compared to bulbing onions, but overcrowding reduces air circulation and increases disease risk. Space seeds or seedlings 2-3 inches apart in rows 6 inches apart, or use a wider spacing of 4-5 inches for larger specimens.
Planting Spring Onions: Seeds vs. Sets
You have two primary options when starting your spring onion garden: seeds and sets. Each method offers distinct advantages depending on your situation, timeline, and preferences.
Seed planting is economical and offers the widest variety selection. Direct sow seeds outdoors 2-3 weeks before your last spring frost date. Plant seeds ¼ inch deep, keeping soil consistently moist until germination occurs—typically within 7-10 days at soil temperatures between 50-70°F. Thin seedlings when they reach 2 inches tall, removing the smallest plants and using them as microgreens in salads.
For earlier harvests, start seeds indoors 4-6 weeks before your anticipated planting date. Use seed-starting mix in trays or containers, maintaining soil moisture and providing 12-14 hours of light daily. Harden off seedlings by gradually exposing them to outdoor conditions over 7-10 days before transplanting.
Onion sets—small dormant bulbs—provide the fastest route to harvest. Plant sets 2 inches apart and ½ inch deep directly into prepared soil. Sets mature 2-3 weeks faster than seeds, making them ideal when you want spring onions quickly. However, sets offer fewer variety options and cost more per plant than seeds.
Spring is the optimal planting season for spring onions in most climates. Plant in early spring as soon as soil is workable, typically 2-3 weeks before your last frost date. In mild climates, fall plantings produce excellent crops. For continuous harvests, make succession plantings every 2-3 weeks throughout spring and again in late summer for fall crops.
When transplanting seedlings or sets, handle them gently and plant at the same depth they were growing previously. Water immediately after planting and maintain consistent soil moisture for the first week to establish good root contact.
Watering and Feeding Your Plants
Consistent moisture is essential for spring onion success. These shallow-rooted plants require regular watering, especially during dry periods. Aim for 1-1.5 inches of water per week through rainfall or irrigation. Water deeply but less frequently rather than shallow daily watering, which encourages roots to grow deeper and creates more resilient plants.
Check soil moisture by inserting your finger 2 inches into the soil. If it feels dry at this depth, it’s time to water. Early morning watering reduces disease pressure by allowing foliage to dry quickly. Avoid wetting the foliage when possible, as wet leaves create conditions favorable for fungal diseases.
Spring onions are relatively light feeders compared to other vegetables, but they benefit from supplemental nutrients. Before planting, incorporate 2-3 inches of well-aged compost or aged manure into your soil. This provides slow-release nutrients throughout the growing season. If your soil is nutrient-poor, apply a balanced fertilizer (10-10-10 or 5-5-5) three weeks after planting, following package directions.
For organic growing, apply compost tea or diluted fish emulsion every 2-3 weeks. These gentle fertilizers provide nutrients without risk of burning delicate roots. Avoid high-nitrogen fertilizers, which can produce soft, weak growth susceptible to disease.
Mulching helps retain soil moisture and regulates temperature. Apply 1-2 inches of organic mulch such as straw or shredded leaves around plants, keeping mulch several inches away from the stems to prevent rot. Mulch also suppresses weeds, reducing competition for nutrients and water.
Managing Pests and Diseases
Spring onions are relatively pest-resistant, but a few issues can impact yields. The onion maggot is the most serious pest, with larvae tunneling into the bulbs and causing rot. Prevent infestations by using row covers over young plants and rotating crops—don’t plant onions in the same location for at least three years.
Thrips are tiny insects that scrape leaf tissue, creating silvery streaks and weakening plants. Spray affected plants with insecticidal soap or neem oil, following label directions. Strong water spray from the hose can also dislodge thrips populations effectively.
Aphids occasionally cluster on spring onion foliage. These soft-bodied insects are easily controlled with insecticidal soap, neem oil, or by spraying with a strong water stream. Encourage beneficial insects like ladybugs and lacewings by planting flowers nearby—they’re natural aphid predators.
Fungal diseases like downy mildew and white rot can occur in cool, wet conditions. Prevent these by ensuring good air circulation, avoiding overhead watering, and removing affected leaves promptly. If disease pressure is severe, use sulfur-based fungicides approved for organic gardening.
Damping off, a fungal disease affecting seedlings, causes stems to collapse at soil level. Prevent this by using sterile seed-starting mix, ensuring good air circulation, and avoiding overwatering. Water seedlings from below using a capillary mat or by placing containers in a tray of water.
Companion planting enhances pest management naturally. Plant spring onions near carrots, beets, and chamomile, which repel pests and attract beneficial insects. Avoid planting near beans or peas, as onions inhibit their growth.
Harvesting and Storage Tips
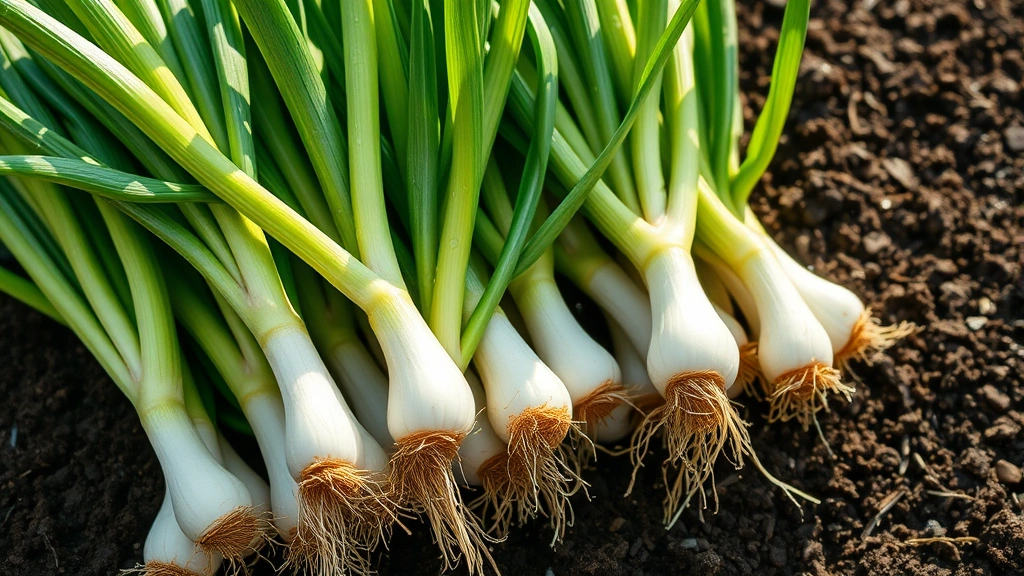
Spring onions are ready to harvest 3-4 weeks after planting seeds or 2-3 weeks after planting sets. Begin harvesting when plants reach 6-8 inches tall with pencil-thin white bases. You can harvest individual outer leaves or pull entire plants depending on your needs and desired plant maturity.
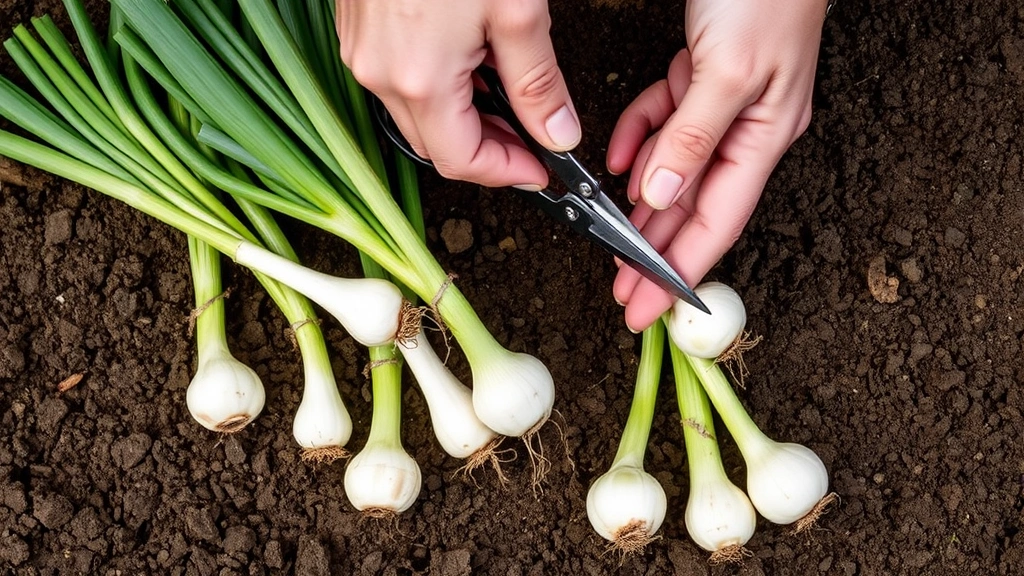
For continuous harvests throughout the season, use the “cut-and-come-again” method. Snip outer leaves with clean scissors or pruners, leaving the center growing point intact. Plants will regrow multiple times before eventually declining. This method extends harvest from a single planting by several weeks.
To pull entire plants, gently loosen soil around the base with a fork, then pull steadily. Harvest in the morning when plants are crisp and hydrated for best flavor and texture. Use fresh spring onions immediately or store them in the refrigerator’s crisper drawer for up to two weeks.
For longer storage, blanch whole spring onions in boiling water for 2-3 minutes, cool in ice water, pat dry, and freeze in airtight containers for up to three months. Alternatively, chop and freeze in ice cube trays covered with water for convenient portions in soups and stews.
Spring onions are excellent for garden salad recipes, adding mild onion flavor and nutritional value. The entire plant is edible—white bases, light green middles, and dark green tops all offer culinary value. Use tender white and light green portions for salads and mild dishes; reserve darker greens for cooking, where their flavor becomes more assertive.
Succession Planting for Year-Round Supply
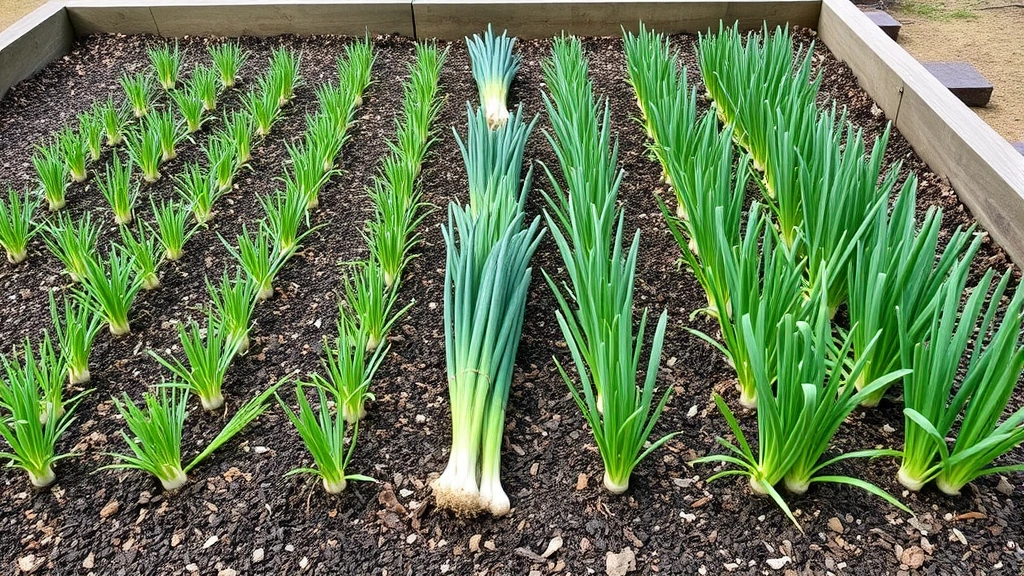
The key to enjoying homegrown spring onions throughout the growing season is succession planting—sowing new crops every 2-3 weeks. This staggered approach ensures continuous harvests from spring through fall, with each planting maturing as previous crops are consumed.
Begin your first planting 2-3 weeks before your last spring frost date. Make subsequent plantings every 2-3 weeks through late spring and early summer. In mid-summer, pause plantings as heat stress reduces germination and growth rates. Resume plantings in late summer (typically mid-August in northern regions) for fall and early winter crops.
Fall plantings are often more successful than spring plantings because cooler weather as plants mature reduces bolting risk and disease pressure. In mild climates, winter plantings can continue through the coldest months, providing fresh greens when other vegetables are scarce.
Rotate your planting locations to prevent pest and disease buildup. Use different sections of your raised bed garden dirt mixture or garden beds for each planting. This three-year rotation prevents soil-borne disease accumulation and maintains soil health.
For year-round production in cold climates, use cold frames or row covers to extend the growing season. These simple structures trap warmth and protect plants from frost, allowing harvests well into winter. In mild climates, spring onions can be grown outdoors throughout winter with minimal protection.
Container growing enables easy succession planting on patios and balconies. Plant new containers every 2-3 weeks and harvest mature containers while seedlings establish. This method maximizes your growing space and simplifies management compared to in-ground beds.
Essential tools in the garden for Spring Onion Success
Proper tools make spring onion cultivation more efficient and enjoyable. A quality hand fork or cultivator loosens soil before planting and helps remove weeds without damaging shallow roots. A sharp spade or shovel is essential for bed preparation and amending soil with compost.
Pruning shears or scissors enable clean cuts when harvesting leaves using the cut-and-come-again method. Dull tools damage plants and invite disease, so keep blades sharp and clean. A hoe helps manage weeds in larger plantings, reducing competition for nutrients and moisture.
For container growing, invest in a watering can with a fine rose attachment, allowing gentle watering without disturbing soil or young plants. A soil moisture meter removes guesswork from watering decisions, helping you maintain optimal moisture levels.
Consider adding garden ornaments to your spring onion growing space—decorative plant markers help organize succession plantings and add visual appeal to your vegetable garden. Row covers and frost cloth protect plants from pests and unexpected cold snaps.
Integrating Spring Onions into Your Garden Design
Spring onions fit beautifully into various garden styles. In a cottage garden setting, their delicate foliage adds texture and movement among flowers and herbs. Their vertical growth habit makes them excellent for small spaces—plant them in containers on sunny windowsills or balconies to maximize productivity in limited areas.
Interplant spring onions with other spring vegetables like lettuce, spinach, and peas. Their shallow root systems don’t compete with deeper-rooted vegetables, allowing efficient space utilization. The onions’ pest-repelling properties benefit neighboring plants while their quick maturity means they’re harvested before larger crops need full space.
Spring onions also work well in edible landscaping, where ornamental and productive plants intermingle. Their slender green foliage contrasts beautifully with broader-leafed vegetables like kale or chard. Plant them in drifts or clusters for visual impact while maintaining functional productivity.
FAQ
How long does it take to grow spring onions from seed?
Spring onions typically mature 60-80 days from seed, though some fast varieties reach harvest size in 45-50 days. When using sets, expect harvest in 30-40 days. The exact timeline depends on temperature, sunlight, and variety. Warmer conditions accelerate growth, while cool weather extends the timeline.
Can I grow spring onions indoors?
Yes, spring onions grow well indoors under bright light or grow lights. Provide 12-14 hours of light daily and maintain temperatures between 60-70°F. Indoor growing works year-round and is perfect for small spaces. Use shallow containers (6 inches deep) filled with potting soil, and ensure good drainage to prevent root rot.
What’s the difference between spring onions and regular onions?
Spring onions (scallions) are harvested young before significant bulb development, emphasizing tender greens and mild flavor. Regular bulbing onions are left in the ground longer to develop large storage bulbs with stronger flavor. Spring onions mature faster and offer more tender, delicate flavor suitable for fresh eating.
Why are my spring onions bolting?
Bolting (flowering) occurs when plants experience stress, typically from heat or photoperiod triggers. Spring onions bolt more readily when temperatures exceed 75°F or when day length exceeds 14 hours. Prevent bolting by planting in spring or fall for cool-season growth, providing afternoon shade in warm climates, and harvesting before plants mature fully.
Can I regrow spring onions from kitchen scraps?
Yes, spring onion roots can regrow in water or soil. Place root ends in a glass of water on a sunny windowsill, changing water every few days. New green growth emerges within days. This method produces tender greens for 2-3 harvest cycles before vigor declines. Transplant rooted sections to soil for longer-term growth.
How do I prevent onion maggots?
Use floating row covers over young plants to prevent adult flies from laying eggs. Rotate crops—don’t plant onions in the same location for three years. Remove and destroy infested plants immediately. Maintain good sanitation by removing plant debris where pupae overwinter. Till soil deeply in fall to expose pupae to predators and weather.
What’s the best fertilizer for spring onions?
Spring onions need minimal fertilization. Incorporate 2-3 inches of compost before planting for adequate nutrition. If additional feeding is needed, use balanced fertilizer (10-10-10) or organic options like compost tea and fish emulsion. Avoid high-nitrogen fertilizers that produce soft, disease-prone growth. Side-dress with compost every 3-4 weeks if desired.
Can spring onions tolerate frost?
Many spring onion varieties, particularly ‘Evergreen Hardy’ and ‘White Lisbon’, tolerate light frosts (28-32°F) without damage. Established plants survive several freezing nights. Young seedlings are more frost-sensitive. Use row covers or cold frames to protect tender plants from unexpected late frosts in spring or early frosts in fall.


