
How to Grow Ginger: Expert Gardener Tips for a Thriving Ginger Garden
Growing ginger at home transforms your kitchen garden into a productive spice source while adding exotic tropical charm to your outdoor space. Whether you’re a seasoned gardener or just starting your gardening journey as a beginner, cultivating ginger rewards patience with fragrant foliage and flavorful rhizomes perfect for cooking, tea, and natural remedies. This comprehensive guide reveals professional techniques that maximize your harvest while minimizing common mistakes.
Ginger cultivation requires understanding this plant’s tropical origins and replicating warm, humid conditions in your garden. Unlike many herbs you might grow, ginger demands specific soil composition, consistent moisture, and strategic timing. The investment of eight to ten months from planting to harvest yields substantial returns—a single rhizome produces multiple finger-like branches weighing several pounds by season’s end. By implementing these expert tips, you’ll develop the confidence to expand your herb garden beyond traditional sage into more adventurous culinary territories.
Understanding Ginger Plant Basics
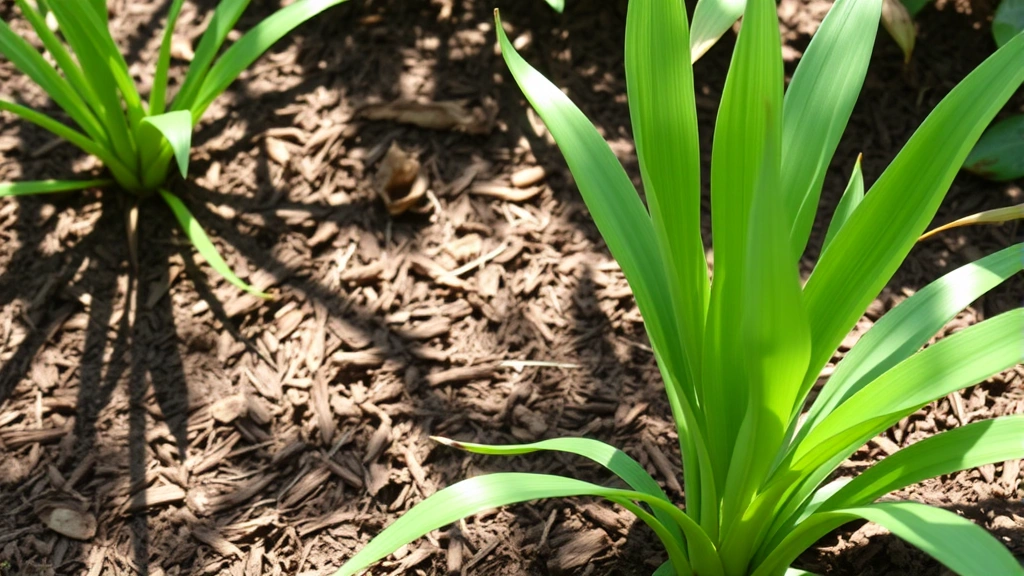
Ginger (Zingiber officinale) belongs to the Zingiberaceae family, sharing botanical kinship with cardamom and turmeric. This perennial plant produces underground rhizomes—horizontal stems packed with essential oils, gingerol compounds, and aromatic qualities. Above-ground growth appears as elegant lance-shaped leaves arranged along tall stems, reaching three to four feet in ideal conditions. The plant occasionally flowers with delicate purple, pink, or yellow blooms, though ornamental appeal takes secondary importance to rhizome development.
Understanding ginger’s growth cycle proves essential for success. The plant enters dormancy during cooler months, requiring warm temperatures between 70 and 85 degrees Fahrenheit to actively develop. Cold exposure below 50 degrees triggers dormancy and potential rot. This temperature sensitivity explains why ginger thrives in USDA hardiness zones 8-11 for year-round outdoor cultivation, though gardeners in colder regions successfully grow ginger in containers moved indoors during winter. The extended growing season—typically 8-10 months—demands patience but delivers rewards that justify the wait.
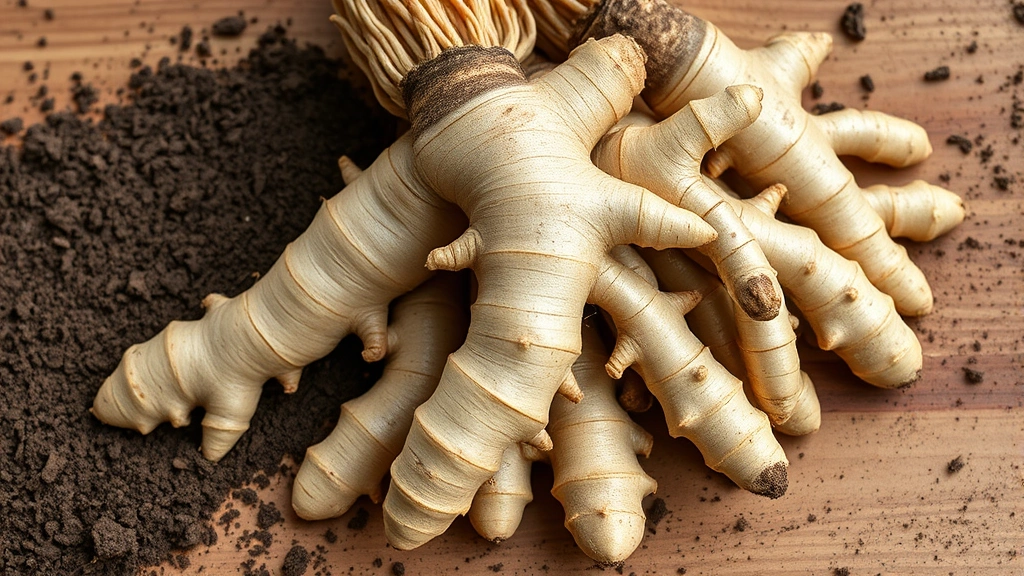
Selecting Quality Ginger Seed Rhizomes
Success begins with selecting premium seed rhizomes from reputable suppliers. Unlike true seeds, ginger propagates vegetatively from rhizome pieces containing dormant buds or “eyes.” Examine rhizomes carefully for firm texture, visible growth points, and disease-free appearance. Quality seed rhizomes should weigh at least one ounce, display multiple finger-like projections, and show no soft spots, mold, or shriveling.
Purchase certified disease-free rhizomes from USDA-certified suppliers to prevent introducing pathogens into your ginger garden. Avoid grocery store ginger, which typically receives anti-sprouting treatment preventing germination. Specialty seed companies and agricultural extension services offer superior varieties suited to home cultivation. If purchasing locally, inspect rhizomes under strong light, flexing them gently to confirm firmness. Store rhizomes in cool, dry conditions until planting, never allowing them to freeze.
Preparing Your Ginger Garden Soil
Ginger demands rich, well-draining soil with substantial organic matter content. This plant despises waterlogged conditions causing rhizome rot, yet requires consistent moisture during growth phases. The ideal soil composition combines equal parts garden soil, coconut coir or peat moss, and aged compost, creating a light, fluffy medium that drains quickly while retaining nutrients.
Conduct a soil test through your local sustainable agriculture extension office to determine pH levels and nutrient status. Ginger prefers slightly acidic soil between 6.0 and 6.5 pH. Amend heavy clay soils with generous amounts of organic material—at least three to four inches worked into the top eight inches of soil. For container cultivation, use premium potting mix combined with additional perlite or coarse sand to enhance drainage. Never reuse old potting soil that may harbor pathogens; invest in fresh medium annually.
Before planting, incorporate slow-release organic fertilizer and bone meal into prepared beds. This foundational nutrition supports early growth before active feeding begins. If growing in containers, select pots at least 12 inches deep and 18 inches wide, ensuring adequate space for rhizome expansion. Drainage holes prove absolutely critical—place containers on risers or blocks allowing water to flow freely beneath them.
Planting Ginger: Timing and Technique
Timing represents one of the most crucial success factors in your ginger garden. Plant rhizomes in spring after the last frost date when soil temperatures reach 65 degrees Fahrenheit or higher. In warm climates, plant anytime from February through April. Northern gardeners should wait until May when soil has thoroughly warmed. Planting too early in cold soil invites rot; delayed planting shortens the growing season before fall dormancy arrives.
Prepare rhizomes for planting by cutting them into sections containing at least two growth buds or eyes. Each piece should weigh approximately one ounce. Allow cut surfaces to air-dry for 24 hours before planting, reducing infection risk. This proper tool usage with sharp, sterilized knives ensures clean cuts without crushing tissues.
Plant rhizome pieces horizontally, two to three inches deep, spacing them six to eight inches apart. Position growth buds pointing upward for optimal emergence. Water thoroughly after planting, settling soil around each piece. In-ground beds should receive a two-inch mulch layer of aged compost or shredded bark, keeping soil consistently moist during establishment. Container-grown ginger needs slightly less mulch—one inch suffices—to prevent moisture accumulation near the soil surface.
Watering and Humidity Management
Consistent moisture proves essential throughout ginger’s growing season, though overwatering causes more problems than underwatering. Establish a watering schedule providing one to two inches weekly, adjusting for rainfall and humidity levels. Check soil moisture by inserting your finger two inches deep; water only when this depth feels dry to the touch. During hot summers, daily watering may become necessary in containers or sandy soils.
Ginger thrives in humid conditions mimicking tropical environments. In dry climates or during arid seasons, mist foliage lightly in early mornings to increase ambient humidity without wetting soil excessively. Group containers together to create humid microclimates, or place shallow water trays nearby for passive humidity increase. Mulching helps regulate soil moisture and temperature while moderating evaporation rates, particularly valuable in exposed garden locations.
Reduce watering frequency as fall approaches and foliage begins yellowing, signaling dormancy onset. Decrease irrigation gradually rather than abruptly stopping, allowing the plant to transition naturally. Overwatering dormant ginger invites rot, the primary cause of harvest failure. By late fall, water only occasionally, maintaining barely moist conditions until spring growth resumes.
Fertilizing for Optimal Growth
A consistent feeding program sustains vigorous ginger growth and maximizes rhizome development. Begin fertilizing six weeks after planting once new shoots emerge above soil. Use balanced organic fertilizers like fish emulsion or seaweed extract every two weeks through mid-summer. These natural options provide essential nutrients without chemical buildup and encourage beneficial soil microbiology.
Transition to higher-phosphorus fertilizers in late summer to promote rhizome expansion rather than continued foliage growth. Bone meal, rock phosphate, or balanced fertilizers with higher middle numbers support underground development. Apply fertilizer according to package directions, always watering before and after application to prevent root burn. Foliar feeding with diluted seaweed solution every three weeks provides micronutrients supporting overall plant vigor.
Avoid high-nitrogen formulas that encourage excessive leaf growth at the expense of rhizome development. The goal shifts from foliage production to underground biomass accumulation. Monitor leaf color for signs of nutrient deficiency—pale foliage suggests nitrogen needs, while purple-tinged leaves indicate phosphorus requirements. Adjust feeding accordingly, but generally maintain consistency rather than making dramatic changes mid-season.
Managing Pests and Diseases
Healthy ginger plants resist most pest pressures when grown in optimal conditions, though several issues warrant attention. Spider mites thrive in hot, dry environments, causing stippled yellow foliage. Combat infestations through regular misting and strong water sprays dislodging mites from leaf undersides. Insecticidal soap or neem oil provide organic control when populations escalate, applied according to label directions.
Leaf spot diseases caused by fungal pathogens appear as brown or yellow lesions on foliage. Improve air circulation through judicious pruning and spacing, remove affected leaves immediately, and avoid overhead watering that promotes fungal spore spread. In humid climates, preventative copper fungicide applications every two weeks during peak growing season reduce disease pressure significantly.
Rhizome rot represents the most serious threat, caused by various soil-borne pathogens. Prevention through proper drainage, appropriate watering, and disease-free seed stock proves far more effective than treatment. Never allow soil to remain waterlogged; ensure containers drain freely and in-ground beds don’t collect standing water. Rotate planting locations annually if growing in-ground, avoiding sites where ginger or related plants grew the previous year.
Scale insects occasionally infest ginger, appearing as brown bumps on stems and leaf bases. Remove them manually with a soft brush or cotton swab dipped in rubbing alcohol. Severe infestations require horticultural oil applications suffocating the insects. Monitor plants regularly for early detection, when control proves easiest and most effective.
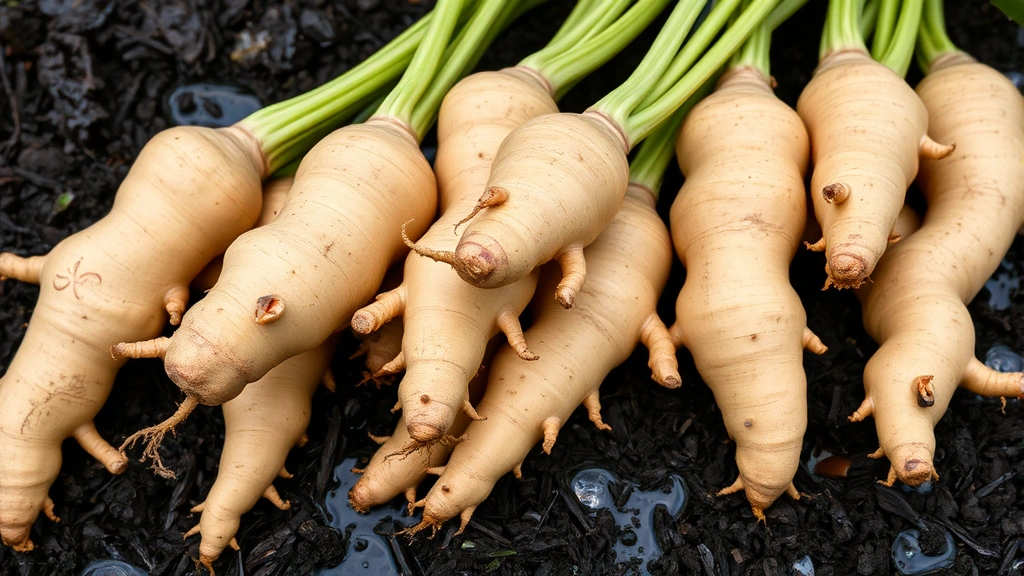
Harvesting Your Ginger Rhizomes
Patience culminates in harvest when foliage yellows and dies back naturally, typically 8-10 months after planting. This timing indicates rhizomes have reached maturity with optimal flavor and aromatic compound concentration. Early harvesting produces immature “young ginger” with thin skin and milder flavor—acceptable for some culinary applications but lacking the storage longevity of mature rhizomes.
Begin harvest by carefully digging around plants, gradually exposing rhizomes without damaging them. Use a garden fork rather than a spade, working from the plant’s perimeter inward. Gently loosen soil, then carefully lift the entire root mass. Brush away excess soil, revealing the complete rhizome structure with all its finger-like branches intact.
Harvest selectively if desiring continued production—carefully remove outer rhizome fingers while leaving the central crown and some smaller rhizomes in place. Replant these remaining pieces immediately in fresh soil, and they’ll regenerate new growth the following season. This technique extends productivity from a single planting over multiple years, though vigor gradually diminishes with successive harvests.
Cure fresh-dug rhizomes by spreading them in a warm, well-ventilated location for 5-10 days, allowing skin to dry and harden. This curing process extends storage life dramatically and develops deeper flavor complexity. Once cured, ginger stores for months in cool (50-60°F), dry conditions without refrigeration.
Storage and Preservation Methods
Properly stored ginger maintains quality for six months or longer, ensuring year-round availability. Wrap individual rhizomes loosely in paper towels, then place in breathable cloth bags or perforated containers. Store in a cool, dark location with good air circulation—avoid sealed plastic bags that trap moisture and promote rot. A basement corner, root cellar, or unheated garage provides ideal storage conditions.
Refrigeration extends storage life to approximately three weeks for unwrapped ginger, though flavor gradually diminishes. Wrap rhizomes in paper towels and place in vegetable crisper drawers for best results. Freezing works well for long-term preservation—peel and slice ginger, arrange on trays until frozen solid, then transfer to freezer bags. Frozen ginger works excellently in cooked dishes, teas, and smoothies, though thawing produces softer texture unsuitable for fresh preparations.
Preserve ginger through pickling, creating tangy condiments perfect for Asian cuisine. Slice fresh rhizomes thinly, blanch briefly, then pack into sterilized jars with vinegar, sugar, and salt. Refrigerate pickled ginger for up to six months. Alternatively, dehydrate sliced ginger in a low-temperature oven or food dehydrator, creating chewy snacks or tea ingredients lasting a year or more. Grind dried ginger into powder for convenient seasoning storage.
For medicinal tea preparation, freeze ginger juice in ice cube trays, popping cubes into hot water as needed. This method preserves fresh ginger’s therapeutic compounds while eliminating storage space concerns. Ginger tea supports digestion, reduces inflammation, and provides warming comfort during cold months.
FAQ
Can I grow ginger indoors year-round?
Yes, container-grown ginger thrives indoors under bright, indirect light and warm temperatures. Place near south or west-facing windows providing at least six hours of light daily. Maintain temperatures between 70-85°F, reducing watering during winter dormancy. Indoor cultivation requires attention to humidity—use pebble trays with water or room humidifiers maintaining 60-70% humidity levels.
How much ginger does one rhizome produce?
A single quality seed rhizome typically produces 8-16 ounces of mature ginger at harvest, with exceptional specimens yielding over a pound. Production depends on rhizome quality, growing conditions, and attention to care. Larger, healthier seed rhizomes consistently outperform smaller pieces, justifying investment in premium seed stock.
What’s the difference between young and mature ginger?
Young ginger harvested 4-6 months after planting features thin, delicate skin, mild flavor, and tender texture ideal for fresh preparations. Mature ginger harvested at 8-10 months develops thick, corky skin, intense spicy flavor, and firm texture perfect for storage and cooking. Young ginger doesn’t store well; use immediately after harvest.
Why are my ginger leaves turning yellow prematurely?
Premature yellowing indicates either overwatering causing rhizome rot, nutrient deficiency, or pest damage. Check soil moisture immediately—if soggy, reduce watering and improve drainage. Inspect leaf undersides for spider mites or scale insects. Apply balanced fertilizer if foliage appears pale. If growth seems otherwise healthy, yellowing may simply signal natural dormancy beginning earlier than expected.
Can I grow ginger from grocery store rhizomes?
Grocery store ginger rarely succeeds because commercial producers treat rhizomes with growth inhibitors preventing sprouting. Dedicated seed suppliers offer untreated rhizomes specifically selected for germination and vigor. The modest investment in quality seed stock dramatically improves success rates compared to attempting propagation from supermarket sources.
How do I prevent ginger rhizome rot?
Rot prevention centers on three practices: using well-draining soil amended with organic matter, watering consistently without waterlogging, and maintaining warm temperatures above 60°F. Never allow pots to sit in water; use containers with drainage holes placed on risers. Apply preventative copper fungicide in humid climates. Ensure adequate air circulation around plants through spacing and pruning.