
How to Care for Garden Mums: Expert Insights
Garden mums are beloved autumn staples that bring vibrant color and cheerful blooms to any landscape. These hardy perennials thrive in most climates and reward gardeners with spectacular floral displays year after year. Whether you’re a seasoned gardener or just beginning your gardening tips for beginners, understanding the fundamentals of mum care will ensure your plants flourish throughout the growing season and beyond.
Garden mums, scientifically known as Chrysanthemum morifolium, are more than just decorative additions to autumn gardens. These resilient plants offer extended bloom times, minimal pest problems, and remarkable versatility in garden design. From border plantings to small garden ideas, mums adapt beautifully to various growing conditions and spaces. With proper care and attention to their specific needs, your garden mums will produce abundant flowers that last well into fall.
This comprehensive guide covers everything you need to know about cultivating healthy, productive mum plants. We’ll explore optimal growing conditions, watering techniques, fertilization schedules, pruning methods, and seasonal maintenance strategies. By following these expert insights, you’ll develop the skills to grow stunning mums that become the highlight of your autumn garden.
Choosing the Right Mum Varieties
Selecting appropriate mum varieties is the foundation of successful cultivation. Garden mums come in numerous flower forms, colors, and bloom times, allowing you to customize your garden’s autumn palette. Understanding the differences between varieties helps you make informed purchasing decisions and plan your landscape effectively.
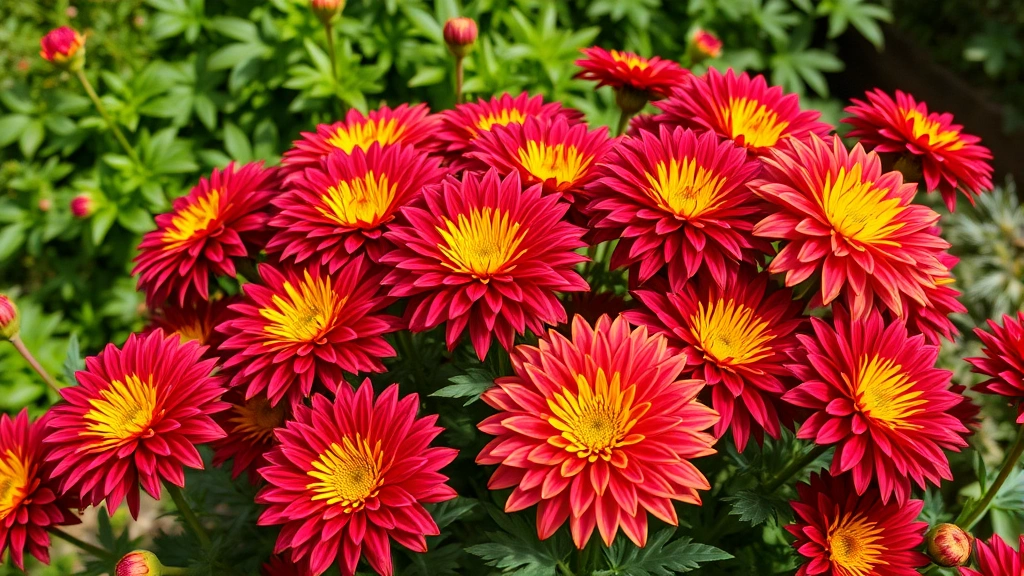
Mum flower forms include daisy-like singles, full doubles, pompoms, and anemone types. Each form offers distinct visual appeal and grows with slightly different characteristics. Single-flowered mums are typically the hardiest and most reliable bloomers, while double-flowered varieties often produce more dramatic, full-petaled blooms. Consider your climate zone when selecting varieties, as some cultivars are specifically bred for cold hardiness while others thrive in warmer regions.
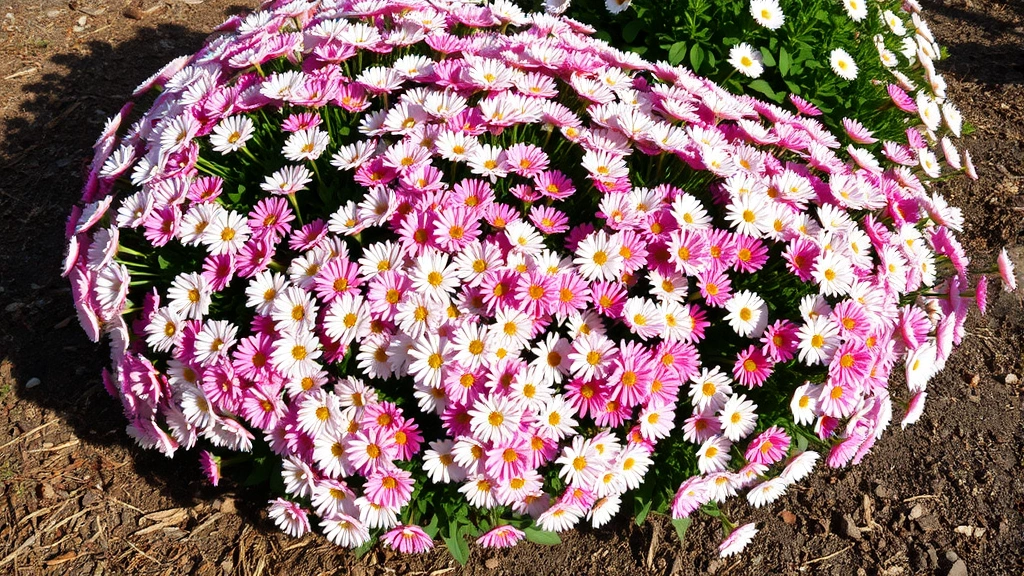
Color options span the entire spectrum: deep burgundies, soft pinks, pure whites, golden yellows, and vibrant oranges. Some varieties even feature bicolor patterns or unusual shades like green or bronze. Visit your local garden center to view plants in bloom and select colors that complement your existing landscape design. Early, mid-season, and late-blooming varieties allow you to extend your mum display from August through November.
Popular hardy garden mum varieties include ‘Sheffield Pink,’ ‘Autumn Fire,’ ‘Mammoth Daisy Red,’ and ‘Bronze Elegance.’ These proven cultivars consistently deliver reliable blooms and excellent winter survival rates. When purchasing plants, choose specimens with healthy foliage and compact growth habits, avoiding leggy or yellowing plants.
Planting Basics and Soil Preparation
Proper soil preparation and correct planting depth are critical for establishing healthy mum plants. Garden mums prefer well-draining soil rich in organic matter, with a slightly acidic to neutral pH between 6.0 and 6.5. Before planting, amend your garden beds with compost or aged manure to improve soil structure and nutrient content.
When preparing planting areas, ensure excellent drainage by creating raised beds or mounding soil slightly. Mums are susceptible to root rot in waterlogged conditions, making drainage the single most important soil characteristic. If your native soil is heavy clay, incorporate perlite or coarse sand alongside compost to improve drainage significantly.
Plant garden mums in spring or early summer, allowing sufficient time for root establishment before autumn flowering. Space plants 18 to 24 inches apart to permit adequate air circulation, which reduces fungal disease development. Dig planting holes slightly deeper than the root ball, backfill with amended soil, and water thoroughly to eliminate air pockets.
For gardeners with limited space, consider elevated garden beds that provide superior drainage and easier access for maintenance tasks. Raised beds warm more quickly in spring, promoting earlier growth and stronger plant development. This approach works exceptionally well for mums and other perennials requiring precise drainage conditions.
Mulch around plants with 2 to 3 inches of organic mulch, keeping material several inches away from plant stems to prevent rot and pest damage. Quality mulch moderates soil temperature, conserves moisture, and gradually enriches soil as it decomposes.
Watering Requirements and Moisture Management
Consistent moisture is essential for healthy mum development, but overwatering remains one of the most common cultivation mistakes. Establish a regular watering schedule that maintains evenly moist (not soggy) soil throughout the growing season. During establishment, young plants require more frequent watering until roots develop sufficiently to access deeper soil moisture.
Water deeply and less frequently rather than shallow daily watering, which encourages shallow root systems and weak plants. A quality expandable garden hose makes delivering water to multiple plants convenient and efficient. Water at soil level rather than overhead to minimize fungal disease development and reduce disease pressure on foliage.
The ideal watering frequency depends on your climate, soil type, and weather conditions. In hot, dry climates, daily watering may be necessary during peak summer months. In cooler regions with regular rainfall, supplemental watering may be needed only during extended dry periods. Use the finger test: insert your finger 2 inches into soil; if it feels dry, watering is needed.
Reduce watering frequency in fall as flowering approaches and temperatures cool. Mums entering dormancy require less water, and excessive moisture can promote root rot during winter months. However, ensure plants aren’t completely dry during this period, as established plants still need adequate moisture for blooming.
Container-grown mums require more frequent watering than in-ground plants, as potted soil dries faster. Check container soil daily during hot weather and water when the top inch becomes dry. Containers should have drainage holes to prevent water accumulation.
Sunlight Needs and Location Selection
Garden mums perform best in full sun conditions, requiring minimum six to eight hours of direct sunlight daily for optimal blooming. Plants grown in insufficient light become leggy, produce fewer flowers, and develop weaker stems. Select planting locations that receive morning sun, which dries dew and reduces fungal disease risk.
While mums tolerate partial shade, flowering decreases noticeably in shadier locations. In hot climates, afternoon shade helps prevent heat stress during peak summer months, but morning sun exposure is essential. Avoid planting near large trees that create dense shade or compete for soil moisture and nutrients.
Consider your garden’s microclimate when selecting planting sites. Areas near buildings or walls retain heat, potentially benefiting plants in cooler climates but stressing plants in very hot regions. South-facing exposures provide maximum sun but may require afternoon shade in extreme heat zones. North-facing locations typically provide insufficient light for robust blooming.
When incorporating mums into landscape designs, position them where their autumn blooms provide visual impact from primary viewing areas. Group plants by color for maximum impact, or create mixed borders combining mums with ornamental grasses and other fall bloomers. Their compatibility with perennials makes them valuable components of diverse garden schemes.
Fertilization Schedule and Nutrient Management
Proper fertilization supports vigorous growth and abundant flowering throughout the season. Begin fertilizing four to six weeks after planting with a balanced, slow-release fertilizer formulated for perennials. Use fertilizers with equal nitrogen, phosphorus, and potassium ratios (such as 10-10-10) to promote balanced plant development.
Apply fertilizer every four to six weeks from spring through mid-summer, then discontinue feeding in late summer to allow plants to transition toward flowering. Excessive nitrogen in late season stimulates vegetative growth at the expense of blooms. Follow package directions carefully, as over-fertilizing causes excessive foliage production and reduces flowering.
Organic gardeners can use compost tea, fish emulsion, or seaweed-based fertilizers that provide nutrients gradually while improving soil biology. Bone meal applied at planting time provides phosphorus for root development and flower formation. Potassium-rich kelp fertilizers enhance plant hardiness and disease resistance.
Foliar feeding with diluted liquid fertilizer applied directly to foliage provides quick nutrient availability during critical growth periods. Apply foliar sprays early morning or evening to prevent leaf burn, avoiding application during hot midday hours. This technique complements soil fertilization and helps correct nutrient deficiencies rapidly.
Soil testing before planting reveals existing nutrient levels and pH, allowing you to adjust amendments precisely. Most university cooperative extension services offer affordable soil testing that guides fertilization recommendations tailored to your specific soil conditions.
Pruning and Pinching for Fuller Plants
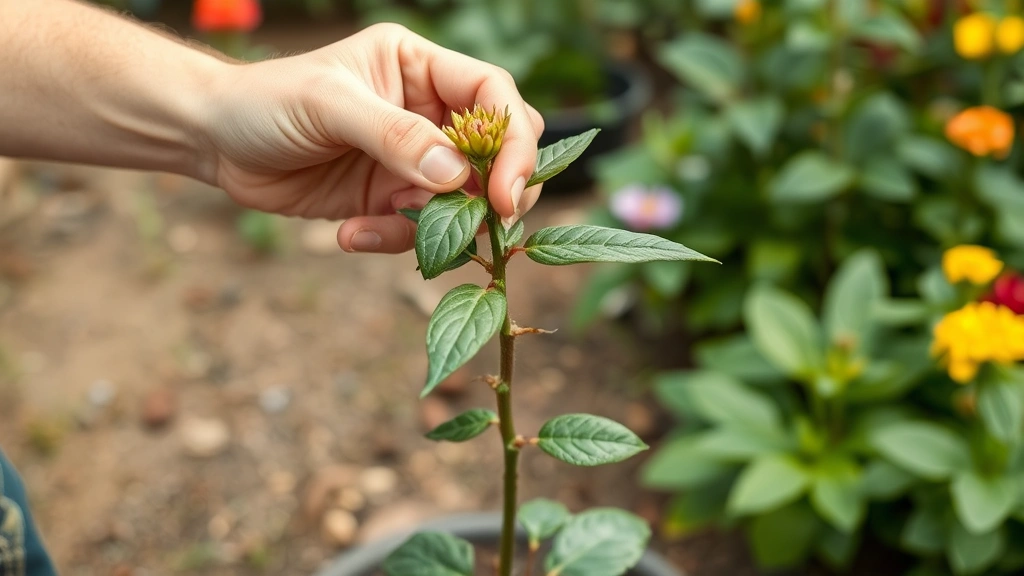
Pinching is a crucial technique that transforms tall, spindly mums into full, bushy plants with numerous flower-bearing stems. Begin pinching when plants reach 6 inches tall by removing the top 1 inch of new growth. This redirects energy to side branch development, creating branching structures that support many more flowers than unpinched plants.
Repeat pinching every three to four weeks through mid-July, stopping pinching by late July to allow sufficient time for bud formation and flowering. Each pinching removes the plant’s apical growing tip, stimulating two or more new shoots from leaf nodes below the pinch. The result is dramatically fuller plants with superior floral displays.
Use sharp pruning shears or pinch with your fingernails to remove growth tips cleanly. Avoid tearing or crushing stems, which increases disease susceptibility. Dispose of removed growth material or add to compost piles that reach adequate temperatures for pathogen destruction.
After flowering concludes, prune back dead flower stems and excess foliage in late fall. Leave 4 to 6 inches of stem stubble above ground for winter protection; excessive pruning exposes crowns to harsh winter conditions. In spring, remove any remaining dead wood and allow new growth to emerge from crowns.
Established mums benefit from division every two to three years. Dig plants in early spring as new growth emerges, separate crowns into smaller sections with shoots attached, and replant divisions in prepared soil. This rejuvenates older plants and provides propagation material for expanding your mum collection.
Pest and Disease Management
Garden mums are generally pest-resistant plants, but several pests occasionally cause damage. Spider mites, aphids, and whiteflies may appear during hot, dry conditions. Inspect foliage regularly for pest presence, catching infestations early when treatments are most effective. Spray affected plants with insecticidal soap or neem oil according to label directions.
Japanese beetles sometimes skeletonize mum foliage during summer months. Hand-pick beetles early morning when they’re sluggish, dropping them into soapy water. For severe infestations, apply appropriately labeled insecticides, always following safety directions and harvest guidelines for edible plants nearby.
Fungal diseases including powdery mildew and leaf spot occur when moisture remains on foliage or air circulation is poor. Ensure adequate spacing between plants, water at soil level rather than overhead, and prune out diseased foliage promptly. Apply sulfur-based fungicides or horticultural oils for persistent problems, beginning applications early when disease symptoms first appear.
Root rot, caused by Pythium or Phytophthora pathogens, develops in waterlogged soil conditions. Prevention through excellent drainage is far more effective than treatment. If root rot occurs, affected plants rarely recover; remove and dispose of infected plants to prevent pathogen spread.
Botrytis gray mold becomes problematic during cool, wet autumn weather. Remove infected flowers and foliage, improve air circulation by pruning lower branches, and avoid watering foliage. Copper fungicides applied preventatively reduce disease incidence when conditions favor infection.
Seasonal Care and Overwintering
Spring marks the beginning of active mum growth as temperatures warm and daylight increases. Remove winter mulch gradually as soil thaws, cut back dead winter-damaged stems, and apply fresh mulch once soil warms. Begin fertilizing as new growth emerges, and monitor soil moisture as plants establish active growth.
Summer requires consistent watering, regular pinching through mid-July, and vigilant pest monitoring. Deadhead spent flowers to encourage continuous blooming and redirect energy toward new flower production. As summer progresses, reduce nitrogen fertilization and begin transitioning plants toward flowering.
Fall brings peak mum blooming as shortening days trigger flower bud initiation. Enjoy spectacular blooms throughout autumn while maintaining regular watering and removing spent flowers. As temperatures cool, reduce watering frequency and discontinue fertilization entirely.
Winter preparation is critical for mum survival in cold climates. After several hard freezes in late fall, prune plants back to 4 to 6 inches above ground. Apply 4 to 6 inches of mulch over plant crowns for insulation, protecting dormant buds from freeze-thaw cycles. In spring, gradually remove mulch as soil thaws to prevent crown rot from excessive moisture.
In warm climates where mums remain evergreen, provide less severe winter protection but still apply mulch for insulation and moisture conservation. Cut back plants in late winter to rejuvenate growth and maintain compact forms. Container-grown mums in cold climates benefit from winter storage in unheated garages or coldframes, where they remain dormant but protected from extreme temperatures.
Spring division and transplanting rejuvenates older mum plantings. Dig established plants as new growth emerges, separate into smaller divisions, and replant in amended soil. This practice prevents overcrowding, reduces disease pressure, and maintains vigorous growth. Divisions can be shared with fellow gardeners or planted in new garden locations.
FAQ
What is the best time to plant garden mums?
Plant garden mums in spring or early summer, allowing 8-12 weeks for root establishment before autumn flowering. Spring planting provides optimal conditions for developing strong root systems that enhance winter survival. While fall-planted mums are available commercially, they have minimal time to establish before dormancy and often don’t survive winter.
How often should I water my garden mums?
Water garden mums when the top 2 inches of soil become dry, typically every 5-7 days during active growth. Frequency increases during hot, dry weather and decreases in fall as temperatures cool. Established plants require less frequent watering than newly planted specimens. Always prioritize drainage over frequent watering to prevent root rot.
Can I grow mums in containers?
Yes, mums thrive in containers filled with quality potting soil. Use containers with drainage holes and water daily during hot weather, as container soil dries faster than in-ground beds. Container-grown mums require more frequent fertilization since nutrients leach through drainage holes. In cold climates, move containers to protected locations for winter or store in unheated structures.
Why aren’t my mums flowering?
Non-flowering mums typically result from insufficient sunlight, excessive nitrogen fertilization, or inadequate pinching. Ensure plants receive minimum 6-8 hours daily sunlight. Stop fertilizing by mid-summer to redirect energy toward blooming. Pinch plants through mid-July to create branching structures supporting numerous flowers.
How do I prevent powdery mildew on mums?
Prevent powdery mildew by spacing plants adequately for air circulation, watering at soil level rather than overhead, and removing lower foliage to improve airflow. Apply sulfur-based fungicides preventatively when conditions favor disease development. Remove infected foliage promptly and avoid working with wet plants.
Should I divide my mums?
Divide mums every 2-3 years in early spring as new growth emerges. Division rejuvenates older plants, prevents overcrowding, and provides propagation material. Dig established plants, separate crowns into sections with shoots attached, and replant divisions in prepared soil at the same depth as mother plants.
Can mums survive winter outdoors?
Hardy garden mum varieties survive winter outdoors in USDA zones 3-9 with proper preparation. Apply 4-6 inches of mulch over plant crowns after several hard freezes to insulate dormant buds from freeze-thaw cycles. Spring pruning removes winter damage and stimulates new growth. Container mums require winter protection in cold climates through storage in unheated structures.
What’s the difference between garden mums and florist mums?
Garden mums are hardy perennials bred for outdoor cultivation and winter survival in most climates. Florist mums are tender varieties grown primarily for cut flowers and potted plant sales, lacking the hardiness for reliable outdoor overwintering. Garden mums produce more flowers over extended periods, while florist mums typically provide single large blooms.
How do I propagate mums from cuttings?
Propagate mums from 3-4 inch cuttings taken in spring from new growth. Remove lower leaves and insert cuttings in moist rooting medium under humid conditions. Maintain consistent moisture and provide bright indirect light until roots develop (2-3 weeks). Harden off rooted cuttings gradually before transplanting to garden soil.
What companion plants pair well with garden mums?
Mums pair beautifully with ornamental grasses, sedums, coneflowers, and black-eyed Susans. Russian sage, asters, and goldenrod extend autumn color alongside mums. Spring-blooming bulbs planted nearby provide sequential color transitions. Foliage plants like hostas and heucheras offer textural contrast to mum flowers.