Garden Cup Ideas: Creative Designs and Tips for Growing Plants in Containers
Garden cups have become an increasingly popular way for both seasoned gardeners and beginners to grow plants in compact spaces. Whether you’re cultivating herbs on a kitchen windowsill, starting seedlings for spring planting, or creating a decorative display on a patio, the humble garden cup offers endless possibilities for creative plant cultivation. These small containers provide an accessible entry point into gardening, allowing you to experiment with different plant varieties without requiring extensive outdoor space or significant financial investment.
The beauty of using garden cups lies in their versatility and affordability. From traditional terracotta to upcycled household items, there are countless ways to transform ordinary cups into thriving miniature gardens. This guide explores creative garden cup ideas, practical growing tips, and design inspiration to help you maximize your container gardening success throughout the seasons.
Understanding Garden Cup Basics
A garden cup is essentially any small container used for growing plants, typically ranging from 4 to 12 ounces in capacity. The term encompasses everything from traditional ceramic or terracotta cups to recycled coffee cups, measuring cups, and decorative vessels. The primary advantage of garden cups is their size—they’re perfect for propagating plants and starting cuttings, nurturing seedlings before transplanting, or creating permanent displays of slow-growing succulents and herbs.
Before selecting your garden cup, consider several practical factors. Size matters significantly—larger cups retain moisture longer and provide more root space for established plants. Material choice affects water retention, insulation, and aesthetic appeal. Terracotta is porous and breathable, making it excellent for plants preferring drier conditions. Plastic retains moisture longer, benefiting plants that like consistent hydration. Ceramic and glazed cups offer decorative appeal while providing moderate moisture retention.
The location where you’ll place your garden cup determines its success. Indoor cups need adequate light from windows or grow lights. Outdoor cups must withstand weather exposure and temperature fluctuations. Understanding your space’s light conditions—full sun, partial shade, or full shade—helps you select appropriate plant varieties for your garden cup setup.
Creative Garden Cup Design Ideas
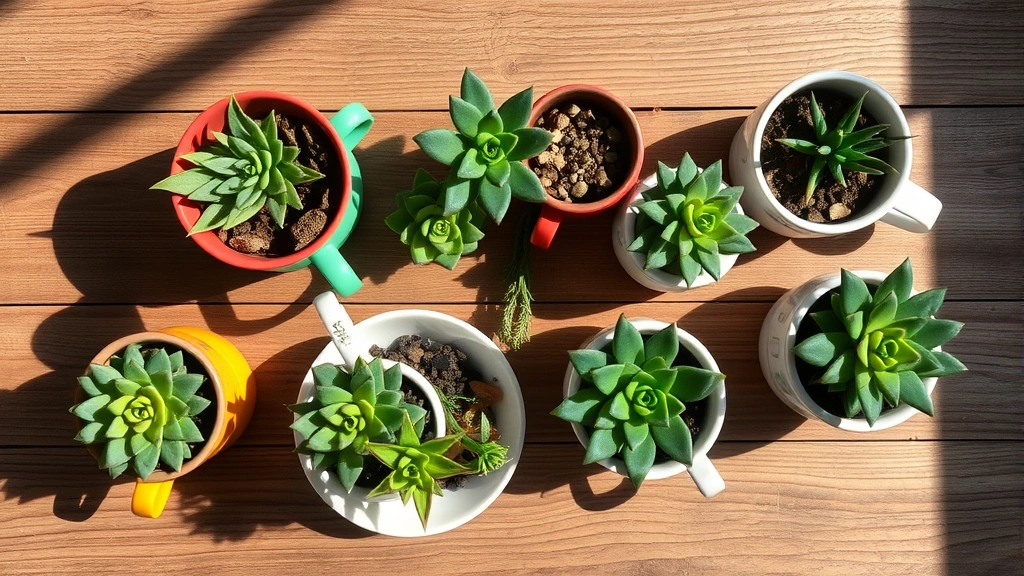
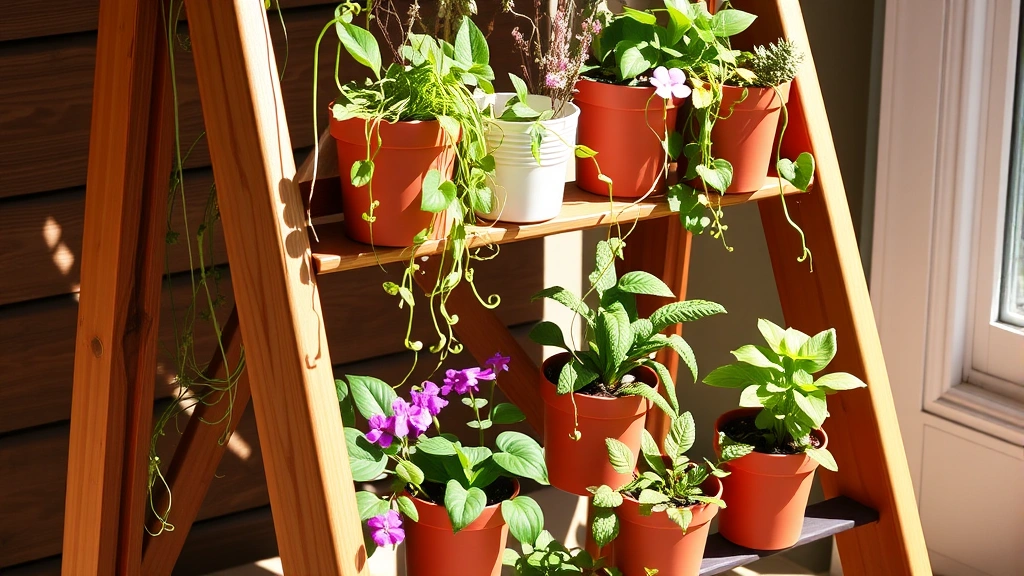
Garden cup design extends beyond simple plant containment into the realm of creative expression. One popular approach involves creating a tiered garden cup display by stacking cups at varying heights on shelves or plant stands. This vertical arrangement maximizes space while creating visual interest. You can arrange cups by color, plant type, or height progression for an aesthetically pleasing effect.
Another creative concept is the themed garden cup collection. Many gardeners dedicate specific cups to particular plant families or uses. A culinary herb garden cup collection might include basil, oregano, thyme, and parsley in matching containers. A succulent-focused arrangement showcases different species with complementary colors and textures. Themed collections create cohesive displays while making plant care routines more organized.
For those interested in gardening tips for beginners, consider the educational garden cup approach. Label each cup with the plant species, planting date, and care requirements. This serves dual purposes—helping you remember what you’ve planted while creating an attractive, informative display. Children particularly enjoy watching plant growth progress in transparent or translucent cups.
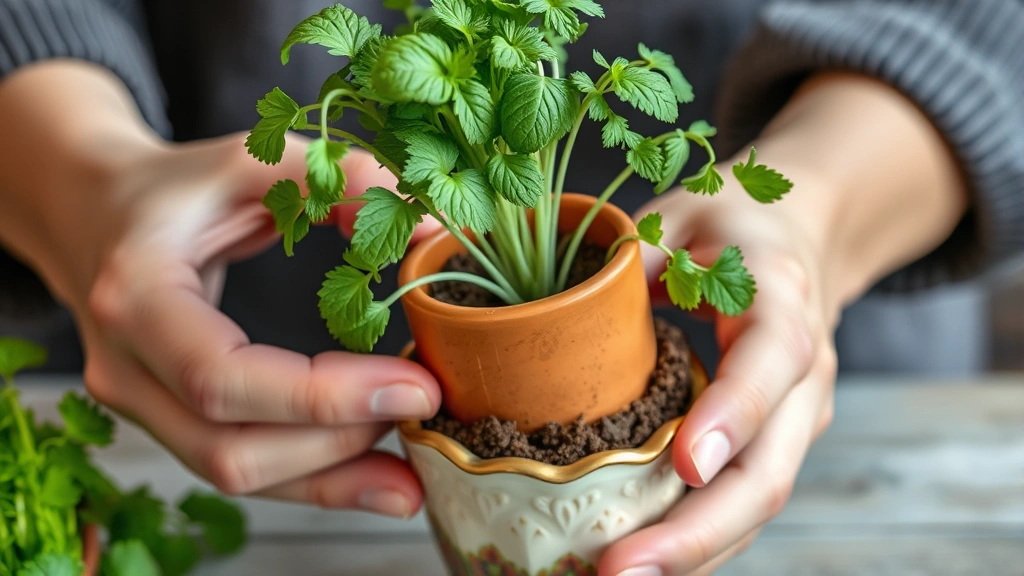
Upcycled garden cups offer both environmental benefits and unique character. Vintage teacups, mismatched coffee mugs, old measuring cups, and decorative ceramic vessels all function beautifully as plant containers. This approach adds personality to your gardening space while reducing waste. Ensure any upcycled cup has adequate drainage—you may need to carefully drill small holes in the bottom.
The miniature landscape garden cup creates a complete ecosystem in a single container. Layer soil with small rocks, add moss, plant tiny ferns or succulents, and perhaps include a small figurine or decorative element. These landscape cups become conversation pieces while requiring minimal maintenance.
Best Plants for Garden Cups
Selecting appropriate plants for your garden cups ensures better growth outcomes and reduced frustration. Succulents are the gold standard for garden cup gardening. Their drought tolerance and slow growth make them perfect for small containers. Varieties like jade plants, echeveria, sempervivum, and aloe thrive in cups with proper drainage. These plants add visual interest with diverse colors, textures, and forms.
Herbs represent another excellent garden cup category. Basil, oregano, thyme, mint, chives, and parsley all grow well in small containers. Herb garden cups offer practical benefits—fresh herbs for cooking just steps from your kitchen. Mint requires special attention as it spreads aggressively; containing it in a dedicated cup prevents it from overwhelming other plants.
Microgreens are perfect for intensive garden cup gardening. These young vegetable and herb plants grow quickly—often harvested within 2-3 weeks. Radish, mustard, broccoli, and sunflower microgreens provide nutritious additions to meals while requiring minimal space and care. Microgreen cups work excellently indoors under grow lights.
Flowering plants add color and beauty to garden cup displays. African violets bloom prolifically in small containers and prefer the consistent moisture that cups provide. Pansies and violas offer seasonal color in spring and fall. Impatiens thrive in shaded locations, brightening dim corners with their cheerful blooms. For outdoor summer color, consider petunias, marigolds, or snapdragons in larger garden cups.
Sedums and other low-growing succulents work beautifully for those seeking container growing success without extensive maintenance. These hardy plants tolerate neglect better than most houseplants, making them ideal for busy gardeners or those new to plant care.
Trailing plants like string of pearls, pothos, and creeping fig add dimension to garden cup displays. Position these in elevated locations where stems can cascade downward, creating elegant visual effects. Trailing varieties work well in tiered arrangements or hanging displays.
Drainage and Soil Considerations
Proper drainage is absolutely critical for garden cup success. Without adequate drainage, water accumulates, leading to root rot and fungal diseases. Always ensure your garden cup has drainage holes in the bottom. If using a decorative cup without holes, either carefully drill them or place a smaller draining cup inside the decorative one.
Drainage holes alone aren’t sufficient—you also need the right soil composition. Never use garden soil or potting soil meant for ground beds in small containers. Instead, invest in high-quality potting mix specifically formulated for containers. Quality potting mixes include perlite or vermiculite for drainage and aeration, peat moss or coconut coir for moisture retention, and nutrients for plant growth.
For succulents and drought-tolerant plants, use a specialized cactus or succulent potting mix. These formulations contain extra drainage materials like coarse sand or perlite. Standard potting mix retains too much moisture for succulents, increasing rot risk. If you cannot find specialty mix, amend regular potting soil with additional perlite or coarse sand—roughly one part perlite to two parts potting mix.
For moisture-loving plants like African violets and impatiens, use standard potting mix without amendments. This retains adequate moisture for these plants’ preferences. Monitor soil moisture carefully—it should feel consistently moist but not waterlogged.
Consider adding a drainage layer at the cup’s bottom before adding soil. Small pebbles, broken terracotta pieces, or activated charcoal (which also helps prevent odors) allows water to drain freely while preventing soil from compacting at the drainage holes. Use roughly one-quarter inch of drainage material in small cups.
Seasonal Garden Cup Gardening
Garden cup gardening varies significantly across seasons, offering different opportunities throughout the year. Spring is ideal for starting warm-season plants from seed. Create a miniature propagation station using garden cups under grow lights. Basil, tomato, pepper, and flower seeds germinate beautifully in small containers. Once seedlings develop true leaves, you can either transplant them to larger containers or move them to outdoor gardens.
Spring also brings opportunities for cool-season herb gardens. Plant parsley, chives, and cilantro in cups for harvest throughout spring and early summer. These herbs prefer cooler temperatures and appreciate afternoon shade in warmer climates.
Summer allows you to create colorful flowering garden cup displays. Tender annuals like impatiens, begonias, and coleus thrive in containers during warm months. Outdoor cups require more frequent watering during hot weather—check soil moisture daily. Positioning cups in areas with afternoon shade helps prevent excessive evaporation and heat stress.
Summer is also perfect for intensive gardening projects like growing microgreens indoors with supplemental lighting. The longer daylight hours support robust growth even without artificial light.
Fall brings opportunities for cool-season gardens. Plant mums, ornamental cabbage, and kale in garden cups for autumn color. Herb gardens featuring sage, thyme, and rosemary thrive in fall temperatures. Start spring-blooming bulbs in cups—store them in cool locations for winter chilling before spring display.
Winter shifts focus to indoor gardening. Houseplant garden cups bring greenery indoors during dormant seasons. Succulents, snake plants, and pothos require minimal light and water. Forcing bulbs in cups provides early spring color indoors. Microgreen production accelerates in winter, offering fresh nutrition when outdoor gardens rest.
Maintenance and Care Tips
Successful garden cup gardening requires consistent, thoughtful maintenance. Watering is the most critical aspect. Small cups dry quickly, especially in warm weather or sunny locations. Check soil moisture every 1-2 days during growing season. Water when the top half-inch of soil feels dry to your touch. Avoid overwatering—this is the primary killer of container plants.
The frequency of watering depends on multiple factors: cup material (terracotta dries faster than plastic), plant type (succulents need less water than ferns), season, and location. Develop observation skills by checking soil regularly. You’ll soon learn your specific plants’ preferences.
Fertilizing becomes necessary as plants exhaust nutrients in potting mix. Container plants cannot access ground nutrients like garden plants. Use diluted liquid fertilizer every 2-4 weeks during growing season. Follow package instructions carefully—over-fertilizing causes more problems than under-fertilizing. Organic options like fish emulsion or seaweed extract work well for container plants.
Light requirements vary by plant. Most herbs and vegetables need 6-8 hours of direct sunlight daily. Shade-loving plants like African violets and ferns prefer bright indirect light. If natural light is insufficient, supplement with grow lights positioned 6-12 inches above plants. LED grow lights consume minimal electricity while providing excellent growth support.
Pest management in garden cups differs from larger gardens. Indoor cups attract spider mites, mealybugs, and scale insects. Check plants regularly for signs of infestation. Isolate affected cups immediately. Spray affected plants with diluted neem oil or insecticidal soap every 7-10 days until pests disappear. Outdoor cups may attract slugs, snails, and aphids. Hand-picking or organic pest control methods work well for small-scale container gardening.
Repotting becomes necessary as plants outgrow their cups. Most herbs and houseplants need repotting annually. Signals that repotting is needed include roots growing through drainage holes, water running through the cup without absorbing, or stunted growth despite proper care. Move plants to containers only one size larger—jumping to much bigger pots causes waterlogging.
Regular deadheading—removing spent flowers—encourages continued blooming in flowering plants. Pinching back leggy growth promotes bushier, fuller plants. These simple maintenance tasks significantly improve garden cup plant appearance and productivity.
For those interested in displaying your garden cup blooms, harvest flowers in early morning when stems are hydrated. This extends vase life significantly.
FAQ
What size cup is best for growing plants?
The ideal size depends on plant type. Succulents thrive in 4-6 ounce cups. Herbs prefer 8-12 ounce cups for adequate root space. Larger flowering plants need 12-16 ounces minimum. Generally, bigger is better—larger cups retain moisture longer and accommodate more root development. Avoid cups smaller than 4 ounces except for very small succulents or propagation purposes.
Can I use any cup without drainage holes?
Not recommended. Drainage holes are essential for plant health. If you love a particular cup without holes, drill 2-3 small holes in the bottom using a ceramic bit (for ceramic cups) or standard drill bit (for other materials). Alternatively, place a smaller draining cup inside your decorative cup. Never use cups without any drainage provision.
How often should I water garden cups?
Water frequency varies by plant, season, and conditions. Check soil moisture every 1-2 days. Water when the top half-inch feels dry. Most plants need watering 2-3 times weekly in summer, less frequently in winter. Succulents need water only when soil is completely dry. Develop a routine of checking soil before watering rather than following a fixed schedule.
Can garden cups be used outdoors?
Absolutely. Outdoor garden cups work excellently for creating colorful displays on patios, balconies, and entryways. Choose weather-resistant materials like ceramic, glazed terracotta, or plastic. Unglazed terracotta can crack in freeze-thaw cycles—bring cups indoors in winter or choose frost-resistant varieties. Outdoor cups require more frequent watering, especially in hot weather.
What’s the best soil for garden cups?
Use quality potting mix formulated for containers. For succulents, choose cactus or succulent mix. For regular houseplants and herbs, standard potting mix works well. Never use garden soil—it compacts in containers and lacks proper drainage. Look for mixes containing perlite, peat moss or coconut coir, and nutrients. Avoid overly cheap options that compact easily.
How do I prevent root rot in small containers?
Prevent root rot by ensuring proper drainage, using appropriate soil mix, and avoiding overwatering. Ensure drainage holes exist and aren’t blocked. Use potting mix, not garden soil. Water only when soil surface feels dry. Improve air circulation around cups. If root rot occurs, remove the plant, trim away black mushy roots, repot in fresh soil, and reduce watering frequency.
Can I grow vegetables in garden cups?
Yes, many vegetables grow well in cups. Microgreens are perfect for small containers. Cherry tomatoes, peppers, and lettuce grow in larger cups (12+ ounces). Radishes, green beans, and herbs like basil and parsley thrive in standard garden cups. Choose compact vegetable varieties bred for container growing. Ensure adequate light—most vegetables need 6-8 hours of direct sunlight daily.
What’s the difference between garden cups and seed-starting cells?
Garden cups are multipurpose containers for growing plants long-term, while seed-starting cells are typically small, shallow trays designed specifically for germinating seeds before transplanting. Seed-starting cells often lack drainage and aren’t suitable for permanent plant growth. Garden cups, with proper drainage, support plants from germination through maturity.


