How to File Garden Tools: Pro Gardener Advice for Sharp, Durable Equipment
Maintaining sharp garden tools is one of the most overlooked aspects of gardening that directly impacts your productivity and plant health. A dull blade tears plant tissue instead of making clean cuts, leading to disease susceptibility and slower healing. Filing your garden tools properly extends their lifespan, improves cutting performance, and saves you money on replacements. Whether you’re working with pruning shears, hoes, spades, or axes, understanding the correct filing technique transforms your gardening experience.
Professional gardeners know that tool maintenance is as essential as watering and weeding. A sharp tool requires less force, reduces hand fatigue, and delivers precision cuts that promote plant vigor. This comprehensive guide walks you through the complete process of filing garden tools like a seasoned pro, covering everything from identifying when tools need filing to mastering the actual filing technique.

When to File Your Garden Tools
Recognizing when your tools need filing is the first step toward maintaining a sharp, efficient arsenal. The most obvious sign is resistance when cutting—if you’re forcing your pruning shears through branches or dragging your hoe through soil, filing is overdue. Perform the paper test: try cutting a piece of paper with your pruning shears. If the blade tears or crumples the paper instead of slicing cleanly, sharpening is necessary.
Visual inspection reveals dullness through reflection. Hold your tool at an angle to catch light; a sharp edge shows minimal light reflection, while a dull blade reflects light along its entire edge. Microchips and nicks in the blade indicate filing needs. Professional gardeners typically file their most-used tools every 2-4 weeks during active growing season and before seasonal storage. Tools used in sandy soil, near rocks, or for heavy-duty tasks require more frequent filing.
The condition of your soil type matters significantly. If you’re maintaining elevated garden beds with clean, amended soil, your tools stay sharp longer. However, working in rocky or clay-heavy ground dulls blades faster. Pay special attention to edging tools and shovels that contact soil constantly.
Essential Tools and Materials You’ll Need
Before beginning the filing process, gather the right equipment. You’ll need:
- Files: Flat files, round files, and triangular files in various grits (8-10 inches long for most garden tools)
- Safety gear: Heavy-duty work gloves, safety glasses, and a leather apron
- Workbench: A sturdy vice or clamping system to secure tools
- Measuring tools: Protractor or angle guide for maintaining proper blade angles
- Lubricants: Light machine oil or honing oil to prevent rust and smooth filing
- Cleaning supplies: Wire brush, cloth, and degreaser to remove soil and rust
- Sharpening stone: Medium and fine grit whetstones for finishing touches
Investing in quality files makes a substantial difference. Cheap files wear quickly and produce uneven edges. Swiss-made files and American brands with hardened steel maintain their cutting ability through numerous sharpenings. Consider a file set specifically designed for garden tool maintenance, which includes the correct angles and profiles for various blade types.
Types of Files for Different Garden Tools
Understanding which file works best for each tool prevents damage and ensures professional results. Flat files work excellently for straight-edged tools like spades, shovels, and hoes. Their rectangular profile allows you to maintain consistent angles across the entire blade edge. Round files suit curved or serrated blades found on pruning saws and certain shears. Triangular files fit into tight angles on specialized tools and work well for pruning shear blades.
File grit matters tremendously. Coarse files (6-8 grit) remove rust and heavy damage quickly but leave rough surfaces. Medium files (10-12 grit) balance material removal with edge quality. Fine files (14+ grit) create smooth, sharp edges suitable for finishing work. Most gardeners use medium-grit files for regular maintenance and reserve fine-grit files for final edge refinement.
The file’s length should match your tool size. A 10-inch file handles most standard garden tools, while smaller 6-inch files work better for pruning shears and detail work. Larger tools like mattocks or grub hoes benefit from longer 12-14 inch files that cover more blade surface per stroke.
Step-by-Step Filing Technique
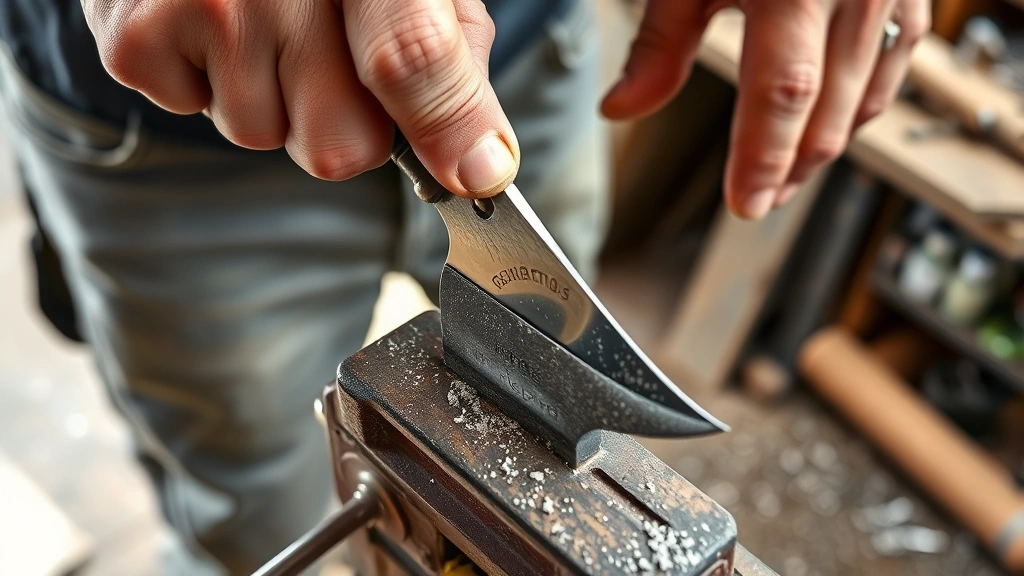
Mastering the proper filing technique ensures consistent results and tool longevity. Start by securing your tool firmly in a vice with the blade facing upward at a comfortable working height. The blade should not move during filing, as this creates uneven edges and wasted effort.
Step 1: Inspect and Clean
Use a wire brush to remove all dirt, rust, and debris from the blade. Wipe clean with a cloth and apply light machine oil if rust is present. Allow the oil to sit for a few minutes before wiping away excess.
Step 2: Establish the Angle
Most garden tool blades require 30-45 degree angles, depending on their purpose. Hoes and shovels typically use 30-35 degrees, while pruning tools need 15-25 degrees for precision cutting. Use a protractor or angle guide to set your file at the correct angle relative to the blade. This angle remains consistent throughout the filing process.
Step 3: File with Proper Pressure
Hold the file with both hands, positioning it at your predetermined angle. Apply steady, moderate pressure as you push the file forward along the blade edge. Let the file do the work—excessive pressure creates uneven edges and dulls your file faster. Use long, smooth strokes rather than short, jabbing motions.
Step 4: Maintain Consistent Strokes
File in one direction only, lifting the file at the end of each stroke rather than dragging it backward. This prevents dulling the file and creates uniform scratches that guide your next passes. Count your strokes—typically 10-15 passes per section creates a properly sharpened edge without over-filing.
Step 5: Check Your Progress
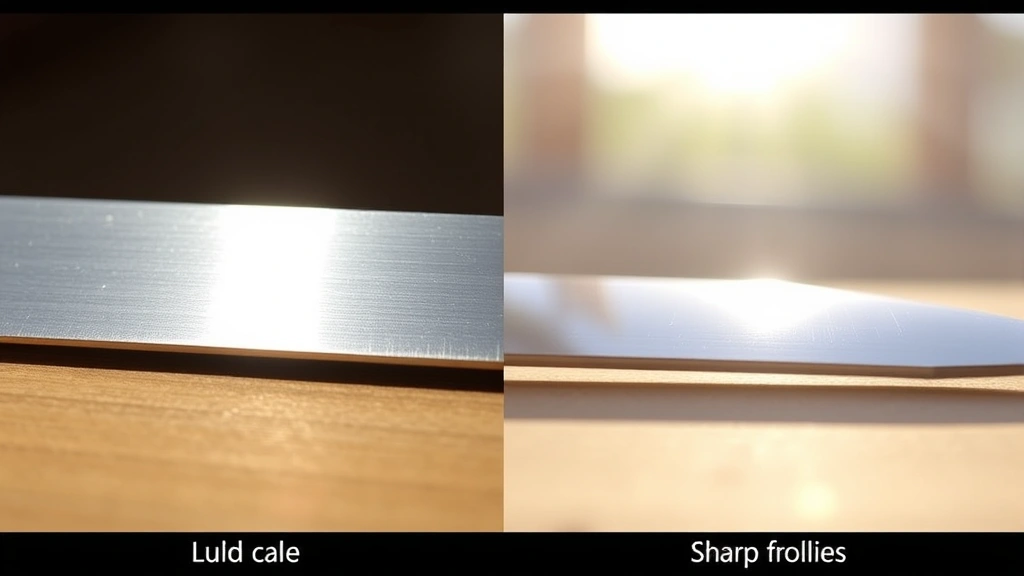
After several strokes, examine the blade edge. You should see a thin, bright line of new metal along the entire edge. If some sections lack this shine, concentrate additional filing on those areas. This ensures even sharpness across the entire blade.
Step 6: Finish with a Whetstone
Once filing is complete, use a fine-grit whetstone to smooth the edge and remove any file marks. Wet the whetstone and use gentle circular motions at your original blade angle. This final step creates a polished, razor-sharp edge ready for garden work.
Filing Specific Garden Tools
Pruning Shears and Secateurs
Pruning shears require careful attention due to their small, precise blades. Secure the tool with the cutting blade facing upward. File only the beveled edge (typically 15-20 degrees), never the flat back side. Make 5-10 gentle strokes per blade, checking frequently to avoid over-sharpening. The bypass blade cuts against a flat anvil, so only the blade needs sharpening. If your shears have serrated edges, use a round file to maintain the serration pattern while restoring sharpness.
Hoes and Cultivators
These flat-bladed tools benefit from 30-35 degree angles. File the bottom edge (the working surface) exclusively, maintaining the angle consistently across the entire width. Make 10-15 strokes per section, working from one end to the other. The top edge can remain flat—filing it creates unnecessary work and weakens the tool. Pay special attention to corners and points on cultivator tines.
Spades and Shovels
The cutting edge of spades and shovels requires a 30-35 degree angle. File only the front-facing edge where soil makes contact. Use long strokes that cover the entire blade width. Most gardeners file every 4-6 weeks during heavy use. The sides of the blade should remain untouched to maintain structural integrity.
Axes and Hatchets
These tools demand respect and careful technique. File at 25-30 degrees on both sides of the wedge-shaped blade. Make equal numbers of strokes on each side to maintain balance and prevent the tool from pulling to one side during use. Unbalanced axes are dangerous and inefficient. Use a medium-grit file and finish with a fine-grit stone.
Pruning Saws
Saw teeth require specialized knowledge, and many gardeners prefer professional sharpening services for these tools. However, if you’re maintaining a vegetable garden with frequent pruning needs, learning basic saw maintenance is valuable. Use a round file slightly smaller than the gullet (space between teeth) and file each tooth individually at the appropriate angle, typically 45-60 degrees depending on the saw type.
Safety Considerations When Filing
Filing sharp objects demands careful attention to safety. Always wear heavy-duty work gloves to protect your hands from the sharp blade and file. Safety glasses prevent metal particles from entering your eyes. A leather apron protects your torso from accidental contact with the blade.
Secure your tool firmly in a vice before starting. Never hold a tool in your hand while filing—slips cause serious injuries. Keep your workspace clean and well-lit, removing distractions. File away from your body, never toward yourself or others. Keep the file handle in good condition; replace wooden handles that are cracked or splintered, as they can break during use.
Wash your hands thoroughly after filing to remove metal particles and oils. File dust, while seemingly harmless, can irritate skin and eyes. Store your files properly in a tool roll or case to prevent damage and accidental contact with sharp edges.
Maintenance Schedule for Year-Round Sharpness
Developing a filing schedule ensures your tools remain sharp without over-maintenance. Weekly inspection during growing season takes just minutes—test cutting with pruning shears and visually check blade condition. Bi-weekly filing of frequently used tools like hoes and pruning shears maintains peak performance. Monthly filing of secondary tools like shovels and cultivators keeps them ready. Seasonal deep maintenance before and after heavy-use periods addresses accumulated wear.
Fall, before storing tools for winter, is an ideal time for comprehensive sharpening and rust prevention. Clean all tools thoroughly, file any dull edges, apply protective oil, and store in a dry location. Spring maintenance prepares tools for intensive growing season use. Summer maintenance during lighter activity keeps tools ready for occasional tasks.
If you maintain specialty gardens like a cactus garden requiring less frequent pruning, adjust your schedule accordingly. Similarly, rain garden maintenance might involve different tools with unique sharpening needs. Consider your specific gardening style when planning maintenance frequency.
Keep a maintenance log noting when you filed each tool and any issues encountered. This record helps identify tools that dull quickly, indicating potential quality problems or excessive wear. Over time, you’ll develop intuition about your tools’ needs and can adjust your schedule for optimal performance.
FAQ
How often should I file my garden tools?
Frequently used tools like hoes and pruning shears benefit from filing every 2-4 weeks during growing season. Less frequently used tools can go 4-8 weeks. Inspect tools weekly and file as needed rather than following a rigid schedule.
Can I use a regular metal file for garden tools?
While possible, dedicated garden tool files work better. They’re designed for the specific angles and profiles of garden equipment. Regular metal files often lack the proper grit and geometry for optimal results.
What’s the correct blade angle for filing?
Most garden tools use 30-35 degree angles. Pruning tools require 15-25 degrees for precision. Always maintain consistency—an uneven angle creates an uneven, ineffective edge.
Should I file both sides of the blade?
Most garden tools only need filing on the working edge. Filing both sides weakens the tool and wastes effort. Exceptions include axes and hatchets, which require balanced filing on both sides of the wedge.
How do I know when to replace a tool instead of filing it?
If a blade is chipped, cracked, or severely pitted beyond filing repair, replacement is necessary. If filing removes excessive material without achieving sharpness, the tool’s metal may be compromised. Generally, tools lasting 5-10 years with regular maintenance represent good value.
Can I file my tools if they’re rusty?
Yes, but remove rust first with a wire brush or steel wool. Light rust won’t affect filing, but heavy rust should be treated. Apply light machine oil to prevent rust during storage between filings.
What’s the difference between filing and honing?
Filing removes material to reshape the edge and restore sharpness after dulling or damage. Honing uses whetstones to refine and maintain an already-sharp edge. Filing is maintenance; honing is fine-tuning.
Is professional sharpening better than DIY filing?
Professional services excel for complex tools like pruning saws or tools requiring special equipment. For basic garden tools, DIY filing with proper technique produces excellent results at minimal cost. Many gardeners use both approaches—filing regularly themselves and having professionals service specialized tools annually.
How do I store filed tools to maintain sharpness?
Store tools in a dry location, preferably hanging to prevent blade contact with other tools. Apply light oil to prevent rust and protect the sharp edge. Keep sheaths or covers on blades for safety and protection.
What should I do if I file unevenly?
Continue filing the duller sections with additional strokes until the entire edge shows uniform brightness. This might require 5-10 extra passes on problem areas. Patience ensures even, effective sharpness across the entire blade.


