Build a Cinder Block Garden Bed: Complete DIY Guide
Creating a raised garden bed from cinder blocks is one of the most affordable and practical solutions for gardeners looking to expand their growing space. Whether you’re working with limited ground space, poor soil conditions, or simply want a defined planting area, cinder blocks offer durability, accessibility, and straightforward installation. This versatile building material has become a staple in vegetable gardens, flower beds, and landscape designs across the country.
Unlike traditional wooden raised beds that require regular maintenance and eventual replacement, cinder block garden beds can last for decades with minimal upkeep. They’re readily available at any home improvement store, require no special tools or expertise to assemble, and can be customized to fit any garden layout. Whether you’re a complete beginner or an experienced gardener, this guide will walk you through every step of building your own cinder block garden bed.
Why Choose Cinder Blocks for Garden Beds
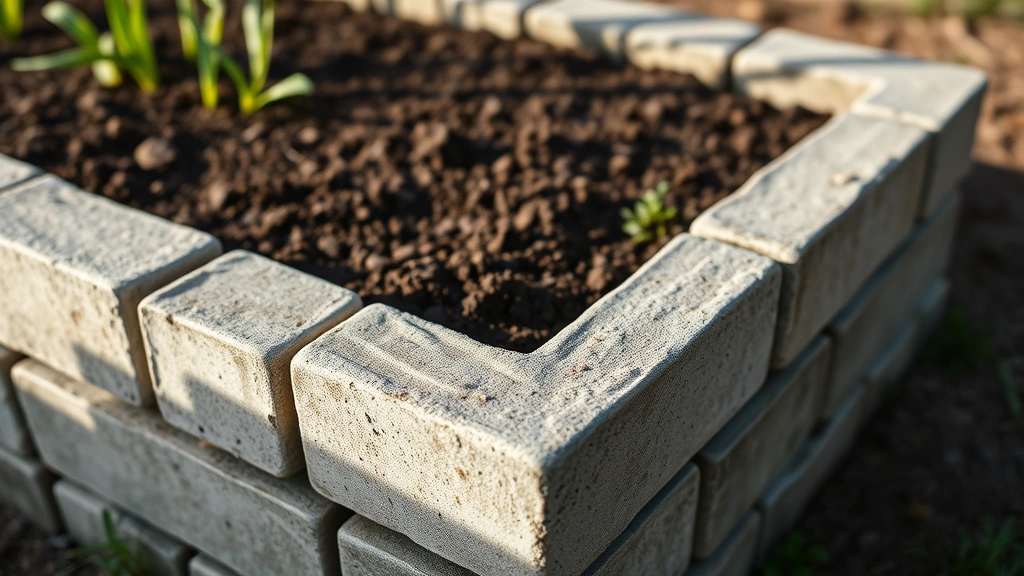
Cinder blocks present numerous advantages for gardeners of all skill levels. Their hollow centers create excellent drainage while the solid structure prevents soil from spreading into surrounding areas. Each standard cinder block measures 8 by 16 inches, making mathematical planning straightforward for your desired bed dimensions. A single block weighs approximately 40 pounds, which is manageable for most people while remaining sturdy enough to withstand years of weather exposure.
The cost-effectiveness of cinder blocks cannot be overstated. A single block typically costs between $1.50 and $3, depending on your location and supplier. This means you can construct a 4-by-8-foot bed for under $30 in materials alone. Compare this to composite raised bed kits that often exceed $200, and the savings become immediately apparent. Additionally, cinder blocks require zero maintenance—no staining, sealing, or replacement like wooden frames demand.
Another compelling reason gardeners choose cinder blocks is their ability to start a flower garden in problem areas. Heavy clay soil, contaminated ground, or uneven terrain all become non-issues when you build above the native soil. The contained environment also makes it easier to control soil composition, moisture levels, and nutrient content—critical factors for growing healthy plants.
Materials and Tools You’ll Need
Before you begin construction, gather all necessary materials. For a standard 4-by-8-foot bed, you’ll need 18 cinder blocks (nine blocks per long side, accounting for corner overlaps). If you prefer a different size, simply measure your desired length and width, divide by 16 inches, and add one additional block for each dimension to account for corners.
Essential Materials:
- Cinder blocks (quantity depends on bed dimensions)
- Landscape fabric or cardboard (optional but recommended)
- Soil mix (see soil preparation section for calculations)
- Gardening soil, compost, and peat moss or coconut coir
- Wood scraps or corner posts (optional for added stability)
- Gravel or sand for leveling
Tools Required:
- Shovel and spade
- Level (4-foot recommended)
- Measuring tape
- Work gloves
- Safety glasses
- Wheelbarrow for soil transport
While cinder blocks don’t require mortar or fasteners for basic construction, some gardeners prefer adding corner reinforcement using wooden posts or metal L-brackets for extra stability, especially in areas with heavy rainfall or frost heave concerns.
Preparing Your Garden Site
Proper site preparation ensures your cinder block garden bed remains level and functional for years. Begin by selecting a location that receives adequate sunlight for your intended plants. Most vegetables require six to eight hours of direct sunlight daily, while shade-tolerant plants need minimum three to four hours.
Once you’ve chosen your location, clear the area of grass, weeds, and debris. Use a shovel to remove sod if present—this material can be composted separately. Mark out your bed dimensions using string and stakes, extending 6 inches beyond where the blocks will sit. This extra space accommodates any settling and provides room for landscaping fabric if desired.
Check your site’s level using a 4-foot level placed across the area. Mark high and low spots. For slightly uneven terrain (less than 2 inches variation), you can use sand to create a level base. For more significant slopes, remove soil from high areas and fill low spots until relatively level. This step prevents water from pooling in one corner or blocks from settling unevenly over time.
Consider soil composition beneath your bed. If you’re building over existing lawn, lay down cardboard or landscape fabric to suppress grass growth and prevent weeds from invading your bed from below. Overlap pieces by at least 6 inches and secure with landscape pins or soil weight. This barrier also slows decomposition and prevents roots from penetrating upward into your premium garden soil.
Building Your Cinder Block Garden Bed
With your site prepared and materials gathered, you’re ready to construct the actual bed frame. Start at one corner and position your first cinder block with the open cells facing up. This orientation allows water drainage and can accommodate individual plants if desired. Ensure the block sits firmly on your prepared base.
Continue placing blocks in a straight line along your first long side. Use your measuring tape to verify spacing and your level to check that blocks remain level both lengthwise and across their width. Adjust with sand as needed before moving to the next block. Work methodically—rushing this step leads to wobbly beds that settle unevenly.
At the end of your first side, position a corner block perpendicular to create a 90-degree angle. Continue around your desired rectangle, ensuring all corners are square using the 3-4-5 triangle method: measure 3 feet along one side and 4 feet along the adjacent side; the diagonal should measure 5 feet if your corner is perfectly square.
For added stability, particularly in freeze-thaw climates, you can insert wooden 4×4 posts into the corner cells or place blocks in a staggered pattern where top-layer blocks rest in the recesses of bottom blocks. Some gardeners prefer single-layer construction for easier access, while others stack two layers for deeper planting and more dramatic landscaping impact. Standard single-layer beds provide 8 inches of depth, adequate for most vegetables and flowers.
Once your perimeter is complete, step back and verify that all blocks are level and the overall structure appears square. Make any final adjustments before adding soil, as correcting problems after filling becomes significantly more difficult.
Filling and Preparing Soil
The soil you use directly impacts your garden’s success. Rather than filling your entire bed with expensive potting soil, create a layering system that maximizes nutrient content while managing costs. This approach also improves drainage and prevents compaction over time.
Start with a 2-3 inch base layer of coarse gravel or sand. This foundation promotes drainage and prevents water from pooling at the bottom. Next, add a 3-4 inch layer of cardboard pieces if you didn’t already line the bottom—this serves as a decomposing weed barrier while improving soil structure as it breaks down.
The remaining depth should be filled with a high-quality soil mixture. A proven recipe combines 40% garden soil, 40% compost, and 20% peat moss or coconut coir. This blend balances drainage, nutrient retention, and aeration. Calculate your volume needs by multiplying length × width × desired depth (in feet), then dividing by 27 to get cubic yards. For a 4-by-8-foot bed filled to 8 inches, you’ll need approximately 2 cubic yards of soil mix.
Purchase pre-mixed garden soil from reputable suppliers, or blend your own components. Quality compost is essential—look for dark, crumbly material that smells earthy and contains no plastic, glass, or treated wood. Many municipalities offer finished compost at reasonable prices, and some provide it free to residents. Peat moss alternatives like coconut coir offer similar benefits with less environmental impact.
Fill your bed gradually, adding soil in layers and watering lightly between additions. This settles the soil and prevents air pockets. Stop about 2 inches from the block tops to allow room for mulch. Let your bed sit for several days before planting to allow final settling.
When you’re ready to grow garden lettuce or other cool-season crops, ensure your soil is well-prepared and rich in organic matter. The cinder block structure provides excellent drainage that prevents the waterlogging these crops dislike.
Planting in Your New Bed
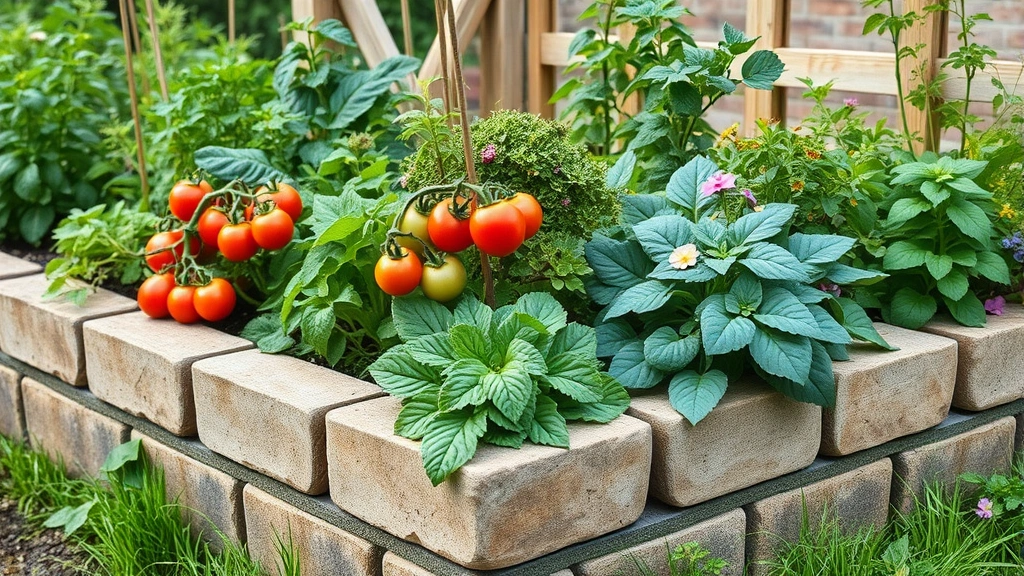
Your cinder block garden bed is now ready for plants. The improved soil environment and controlled growing space make this an ideal setup for nearly any plant type. Whether you’re interested in easy to grow vegetables for beginners or specialty crops, your new bed provides optimal conditions.
Plan your planting layout before inserting any plants. Consider mature sizes—what appears spacious when plants are small can become overcrowded as they grow. Tall plants like tomatoes and beans should be positioned on the north side of the bed to avoid shading shorter plants. Succession plant fast-growing crops like lettuce and radishes every two weeks for continuous harvests.
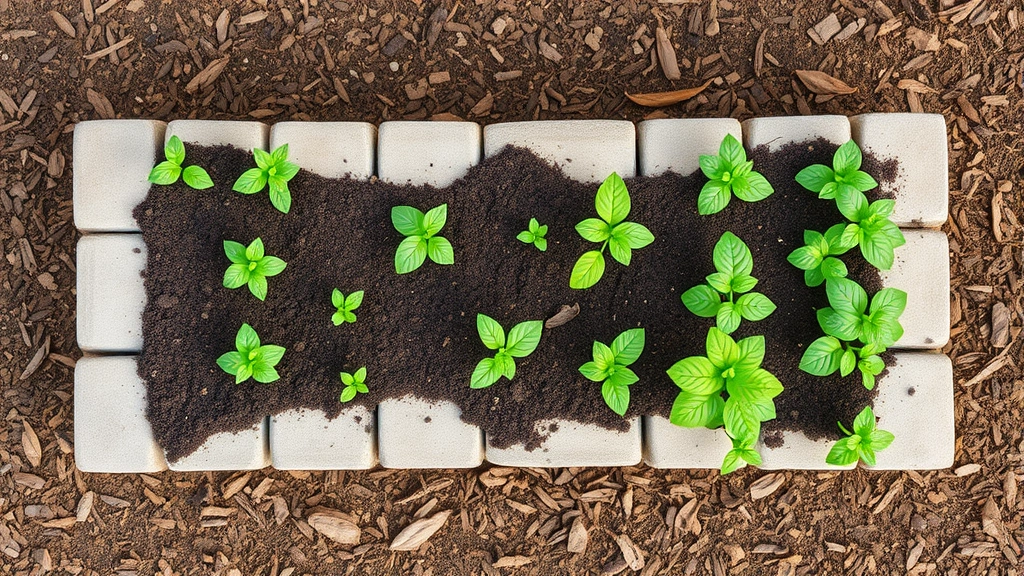
The open-cell design of cinder blocks presents unique planting opportunities. You can fill individual cells with soil and plant trailing succulents, herbs, or small flowers directly into the block faces. This vertical gardening technique maximizes production in limited space and creates striking visual interest. Herbs like thyme, oregano, and sedum thrive in block-cell conditions.
If you’re incorporating structures like garden arch trellis systems, install these before final planting to avoid root disturbance. Trellises provide essential support for vining crops and improve air circulation, reducing disease pressure.
Water newly planted beds thoroughly and maintain consistent moisture during the establishment period. Cinder block beds heat up faster than ground-level gardens, so they may require more frequent watering during hot weather. Apply mulch around plants to regulate soil temperature and reduce moisture loss.
Maintenance and Longevity
One of the primary advantages of cinder block garden beds is their minimal maintenance requirements. Unlike wooden frames that rot, warp, and require regular treatment, cinder blocks essentially maintain themselves indefinitely. Concrete blocks can withstand decades of weather exposure with no deterioration.
Annually, refresh your soil by adding 1-2 inches of compost to replace nutrients consumed by plants and account for settling. This top-dressing gradually integrates with existing soil, continuously improving structure and fertility. Over five to ten years, your original soil mix completely transforms into rich, dark, biologically active growing medium.
Monitor blocks for any damage or shifting. Frost heave in cold climates can occasionally displace blocks upward during winter. Spring inspection usually reveals if this occurred, and you can simply reset blocks to their proper position. In areas with significant frost, slightly sloping blocks outward (a 1-inch drop per 8 feet) encourages water drainage away from the bed and minimizes heave issues.
Weeds may emerge from compost or seeds blown into your bed. Hand-pull them regularly when soil is moist, removing entire roots to prevent regrowth. Mulch application significantly reduces weed pressure. Two to three inches of wood chips, straw, or shredded leaves suppress weed germination while improving soil as they decompose.
Consider incorporating gardening with native plants strategies into your cinder block beds. Native plants adapted to your region require less water, fertilizer, and pest management, reducing overall maintenance demands while supporting local ecosystems.
Seasonal cleanup involves removing spent plants in fall and adding a thick layer of compost or aged manure. This enriches soil during winter months while protecting microorganisms that improve soil structure. Come spring, your bed is refreshed and ready for new planting.
If you ever want to expand your gardening efforts, additional cinder block beds integrate seamlessly with your existing structure. Many gardeners start with a single bed and gradually build a complete garden system tailored to their specific needs and available space.
FAQ
Are cinder blocks safe for vegetable gardens?
Yes, standard concrete cinder blocks are safe for vegetable and edible gardens. The concrete material doesn’t leach harmful substances into soil at levels that would affect food crops. However, avoid blocks with paint or treatment chemicals. If concerned about any potential leaching, line the interior of your bed with landscape fabric as a precautionary measure.
How deep should a cinder block garden bed be?
A single layer of cinder blocks (8 inches) works for most vegetables, herbs, and flowers. Root vegetables like carrots and beets prefer 10-12 inches, achievable with stacked blocks. Shallow-rooted plants like lettuce and radishes thrive in 6-8 inches of soil.
Can I use cinder blocks on slopes?
Yes, but you’ll need to level the site first or build a terraced system with blocks stepping down the slope. Ensure the lowest blocks are fully supported and the bed doesn’t shift downhill during heavy rain or freeze-thaw cycles.
What’s the best soil for cinder block beds?
A blend of 40% garden soil, 40% compost, and 20% peat moss or coconut coir provides excellent drainage and nutrients. Adjust ratios based on your specific plants—vegetable gardens benefit from higher compost percentages.
How long do cinder block garden beds last?
Properly constructed cinder block beds last 30-40 years or longer. Concrete blocks don’t rot or decompose like wood, making them an excellent long-term investment for permanent garden structures.
Can I paint cinder blocks?
Yes, concrete paint or masonry paint adheres well to cinder blocks and allows personalization. Use food-safe paint if growing edibles, though standard exterior paint poses minimal risk. Paint also helps blocks last longer by protecting against moisture penetration.
Should I use landscape fabric in cinder block beds?
Landscape fabric beneath your bed prevents grass and weeds from growing upward into your premium soil. It’s optional but highly recommended, especially if building over lawn areas. Cardboard serves the same purpose at minimal cost.


