Growing chili peppers transforms your garden into a vibrant, productive space bursting with heat and flavor. Whether you’re cultivating mild bell peppers or fiery scotch bonnets, chili peppers reward gardeners with abundant harvests and culinary satisfaction. This comprehensive guide shares expert strategies for establishing a thriving chili garden from seed to harvest.
Chili peppers thrive in warm climates and demand specific growing conditions to reach their full potential. Understanding these requirements—from soil composition to sunlight exposure—ensures you’ll cultivate healthy plants loaded with peppers. With proper planning and consistent care, even novice gardeners can achieve impressive yields.
Choosing the Right Chili Pepper Varieties
Selecting appropriate varieties forms the foundation of a successful chili garden. Different cultivars offer varying heat levels, flavor profiles, and growing requirements. Beginners should consider reliable producers like Jalapeño, Serrano, and Anaheim peppers, which tolerate diverse conditions and deliver consistent crops.
For those seeking intense heat, Thai Bird’s Eye, Habanero, and Carolina Reaper peppers provide extreme spiciness alongside distinctive flavors. Sweet varieties like Bell peppers and Poblanos offer milder options perfect for culinary applications. Assess your climate zone, available space, and heat tolerance when making selections. Container gardening works exceptionally well for peppers, allowing flexibility similar to growing cucumbers in pots.
Research days-to-maturity for each variety to ensure adequate growing season in your region. Long-season varieties require starting indoors 8-10 weeks before your last frost date. Shorter-season cultivars can sometimes be direct-seeded outdoors in warm climates. Purchasing seeds from reputable suppliers like the Seed Savers Exchange guarantees quality genetics and disease-free stock.
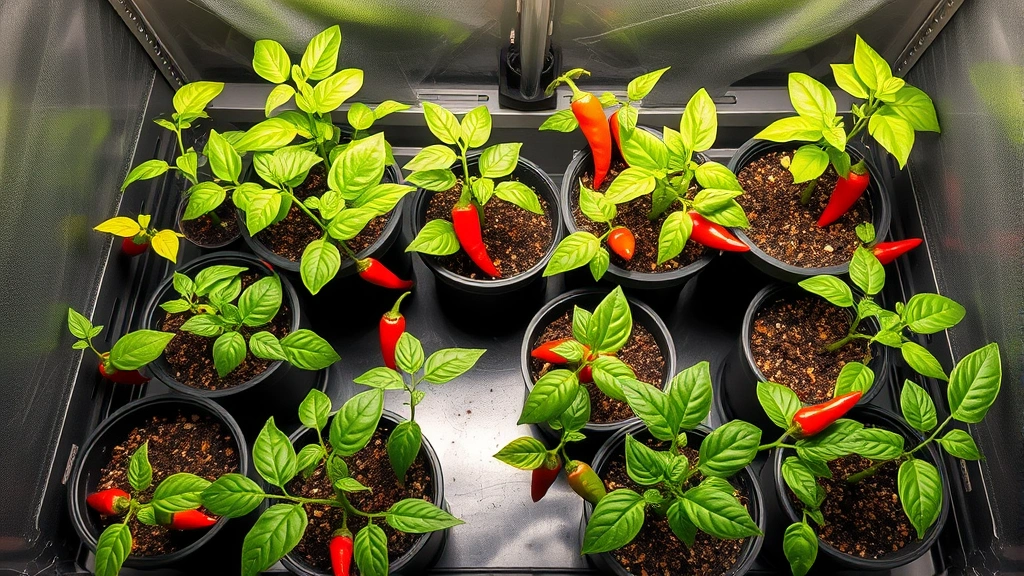
Starting Seeds Indoors
Initiating chili pepper seeds indoors provides crucial advantages for northern gardeners with shorter growing seasons. Begin seeding 8-10 weeks before your anticipated transplant date. Fill seed trays with sterile seed-starting mix, moisten thoroughly, and plant seeds approximately ¼ inch deep.
Maintain soil temperatures between 75-85°F for optimal germination, which typically occurs within 7-14 days. Use heating mats beneath seed trays to ensure consistent warmth. Once seedlings emerge, provide 14-16 hours of bright light daily using grow lights positioned 2-3 inches above plants. Rotate trays regularly to prevent leggy growth.
Water seedlings carefully from below using a tray system, avoiding overhead watering that encourages fungal diseases. Maintain humidity around 60-70% using clear plastic domes or humidity trays. As seedlings develop true leaves, gradually acclimate them to lower humidity and slightly cooler temperatures (70-75°F).
Fertilize seedlings with diluted liquid fertilizer every 2-3 weeks once they’ve developed true leaves. Prepare a consistent coffee grounds amendment schedule for eventual transplanting, as peppers benefit from the potassium and nitrogen these additions provide.
Soil Preparation and Container Selection
Chili peppers demand well-draining soil rich in organic matter with slightly acidic pH between 6.0-6.8. Amend garden beds with 3-4 inches of compost, aged manure, or peat moss before planting. Create raised beds in areas with poor drainage, ensuring water moves freely through the soil profile.
Container cultivation offers excellent control over soil composition and environmental factors. Select containers with minimum 5-gallon capacity for standard varieties; larger varieties benefit from 10-gallon containers. Ensure adequate drainage holes to prevent waterlogging. Use premium potting soil blended with compost rather than garden soil, which compacts in containers.
For optimal results, incorporate balanced slow-release fertilizer into planting soil. Add perlite or coarse sand (20% by volume) to enhance drainage and prevent root rot. Mulching around plants with 2-3 inches of organic material conserves moisture and moderates soil temperature fluctuations. This practice becomes especially valuable in regions where you’re also maintaining a shade garden requiring temperature regulation.
Test soil annually using extension service kits to monitor nutrient levels and pH. Most pepper plants thrive in slightly acidic conditions; lime or sulfur amendments can adjust pH as needed. Rotate planting locations yearly to reduce pest and disease populations naturally.
Planting and Transplanting Guidelines
Transplant seedlings outdoors once soil temperatures consistently reach 60°F and all frost danger passes. Harden off seedlings gradually by exposing them to outdoor conditions for increasing durations over 7-10 days. This acclimation prevents transplant shock and strengthens stems.
Space plants 18-24 inches apart in garden beds or containers, allowing adequate air circulation. Position plants where they receive minimum 6-8 hours of direct sunlight daily; 8-10 hours proves ideal. Afternoon shade in extremely hot climates (above 95°F) prevents sunscald and stress.
Dig planting holes slightly deeper than seedling root balls. Transplant peppers at the same depth they occupied in seed trays—unlike tomatoes, they don’t benefit from deeper planting. Firm soil gently around plants and water thoroughly after transplanting. Support young plants with small stakes if wind exposure threatens.
Monitor transplants carefully during establishment phases. Wilting indicates insufficient water or excessive heat stress. Maintain consistent soil moisture without waterlogging. Most transplants establish within 2-3 weeks and begin vigorous growth.
Essential garden tools for transplanting include hand forks, dibbers, and quality gloves. Proper equipment prevents root damage and ensures successful establishment. Invest in durable tools that withstand repeated use throughout growing seasons.
Watering and Humidity Management
Consistent moisture management separates successful chili gardens from struggling operations. Peppers require steady water supply without waterlogging. Maintain soil moisture equivalent to a wrung-out sponge—moist but not soggy. Provide approximately 1-1.5 inches of water weekly through rainfall or irrigation.
Water deeply and less frequently rather than shallow daily watering, which encourages shallow root development. Morning watering allows foliage to dry, reducing disease risk. Drip irrigation or soaker hoses deliver water directly to root zones, minimizing foliar wetness that promotes fungal infections.
Container plants require more frequent watering than in-ground peppers. Check soil moisture daily during hot periods; containers may need water every 1-2 days. Water until drainage appears at container bottoms, ensuring thorough soil saturation.
Maintain humidity around 50-70% for optimal growth. In arid climates, grouping containers together increases ambient humidity. Misting foliage during morning hours provides temporary relief during extreme heat while allowing leaves to dry before evening. Avoid evening misting, which creates conditions favoring powdery mildew and other fungal diseases.
Mulching around plants conserves soil moisture and moderates temperature fluctuations. Apply 2-3 inches of wood chips, straw, or shredded leaves, keeping mulch 2 inches away from stems to prevent rot. Organic mulch gradually decomposes, enriching soil structure.
Fertilizing Your Chili Garden
Peppers are moderate feeders requiring balanced nutrition throughout growing seasons. Begin with nutrient-rich potting soil or compost-amended garden beds. Side-dress established plants with compost every 4-6 weeks, or apply balanced liquid fertilizer (10-10-10 or similar) every 2-3 weeks during active growth.
Transition to higher-phosphorus formulations (5-10-10) once flowering begins, promoting fruit development. Calcium supplementation prevents blossom-end rot, a common disorder affecting pepper fruits. Apply crushed eggshell mulch or calcium nitrate fertilizer monthly.
Incorporate coffee grounds amendment into regular feeding schedules, as these byproducts supply nitrogen and potassium while improving soil structure. Compost coffee grounds thoroughly before application to avoid nitrogen depletion during decomposition. Aim for 1-2 inches of composted coffee grounds monthly around established plants.
Foliar feeding with diluted liquid fertilizer addresses nutrient deficiencies rapidly. Spray foliage early morning or late evening, avoiding midday application that causes leaf burn. Kelp extract and fish emulsion provide micronutrients alongside macronutrients.
Monitor plants for nutrient deficiency symptoms: yellowing leaves indicate nitrogen deficiency; purple discoloration suggests phosphorus insufficiency; interveinal chlorosis points to magnesium deficiency. Adjust fertilization accordingly. Avoid excess nitrogen, which promotes leafy growth at the expense of flower and fruit production.
Pest and Disease Control
Chili peppers face numerous pest pressures including spider mites, aphids, whiteflies, and thrips. Inspect plants weekly, checking leaf undersides where pests congregate. Early detection enables intervention before populations explode. Spray affected foliage with strong water streams to dislodge soft-bodied insects.
Introduce beneficial insects like ladybugs and parasitic wasps through companion planting. Marigolds, basil, and cilantro attract predatory insects while repelling some pests. Neem oil and insecticidal soap effectively control soft-bodied insects without harming beneficial organisms. Apply in early morning or evening, repeating every 7-10 days as needed.
Fungal diseases including powdery mildew, anthracnose, and phytophthora blight threaten pepper plants in humid conditions. Ensure adequate air circulation through proper spacing and pruning. Remove affected leaves promptly. Sulfur dust or copper fungicides prevent disease spread; apply preventatively in high-humidity environments.
Bacterial spot disease causes dark lesions on leaves and fruits. No cure exists once infection occurs; prevention through resistant varieties and sanitation practices proves essential. Sterilize pruning tools between plants and avoid overhead watering. Remove and destroy severely affected plants.
Viral diseases including pepper weevil and tobacco mosaic virus cause irreversible damage. Prevent virus spread through aphid management and avoiding contamination from infected plants. Plant resistant varieties where available. Remove infected plants entirely to protect adjacent specimens.
Harvesting and Storage
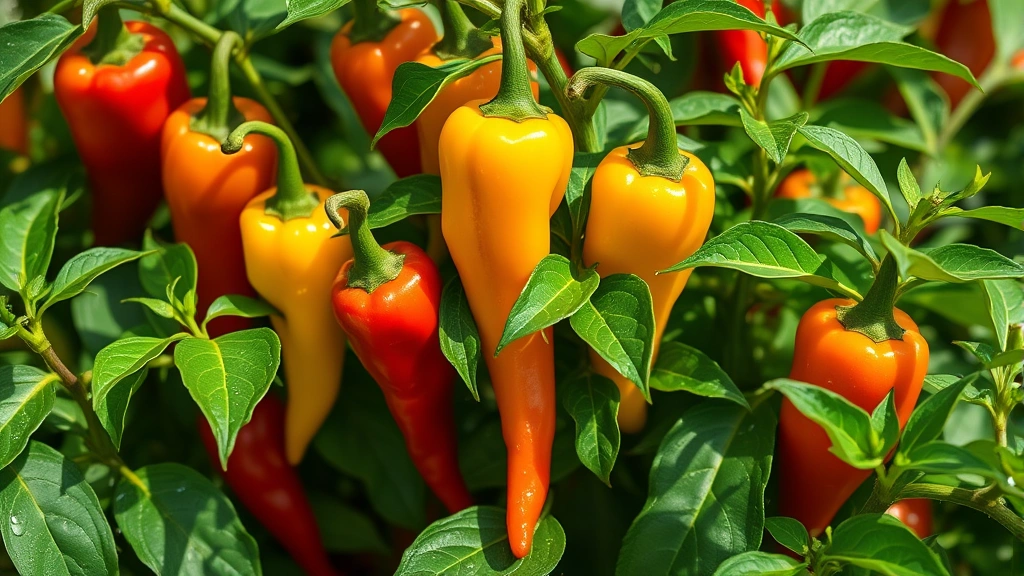
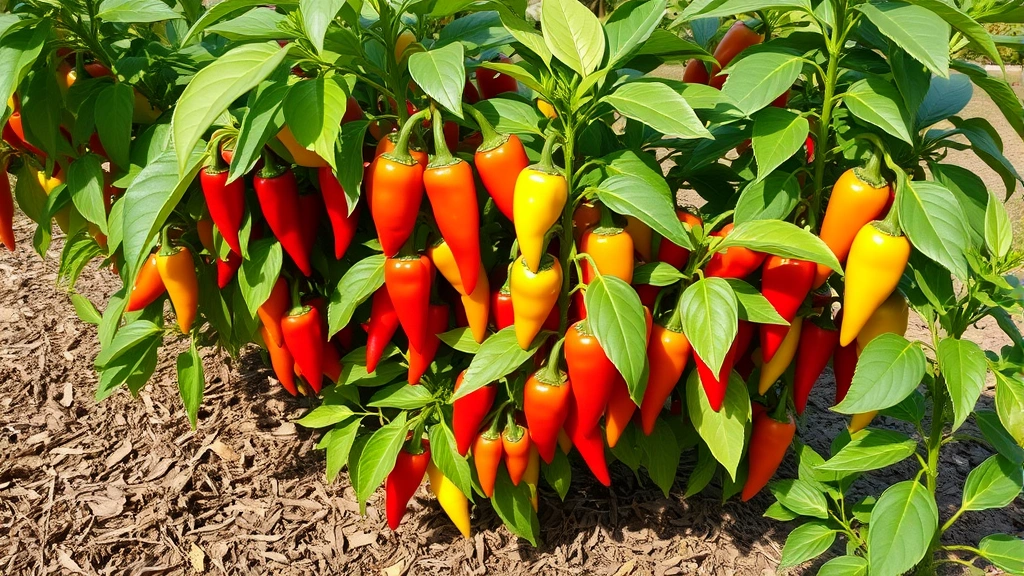
Pepper harvest timing depends on desired maturity. Green peppers picked at immature stages offer different flavor profiles than fully ripened fruits. Allow peppers to develop color—red, yellow, orange, or purple depending on variety—for maximum sweetness and nutritional content. Most varieties require 60-90 days from transplanting to first harvest.
Harvest peppers by cutting stems with sharp pruners rather than pulling, which risks plant damage. Wear gloves when handling hot peppers to protect skin. Pick peppers regularly to encourage continued fruit production; leaving mature fruits on plants signals the plant to slow flowering.
Store fresh peppers in refrigerator crisper drawers for 2-3 weeks. Freeze whole peppers after blanching briefly, or dice and freeze in ice cube trays for convenient portioning. Dry peppers in dehydrators at 135°F for 12-24 hours, creating shelf-stable ingredients. Ferment peppers into hot sauces following tested recipes for food safety.
Make your chili garden visually stunning by incorporating garden decorations that complement productive plantings. Colorful peppers provide natural visual interest while serving practical purposes. Consider cut flower garden principles when designing spaces that integrate aesthetic and productive elements.
Preserve seeds from exceptional plants for future seasons. Allow peppers to fully mature and dry on plants. Extract seeds, rinse, dry completely (2-3 weeks), and store in cool, dry conditions. Seed viability lasts 2-4 years under proper storage.
FAQ
When should I start chili pepper seeds indoors?
Begin seeds indoors 8-10 weeks before your last expected frost date. This timing ensures transplants reach appropriate size for outdoor conditions when temperatures stabilize. In most regions, late February through March provides ideal starting windows.
Can chili peppers grow in containers year-round?
Yes, container cultivation enables year-round growing in controlled environments. Move containers indoors during winter in cold climates, placing them under grow lights. Maintain temperatures above 60°F and provide 12-14 hours daily light. Indoor plants produce smaller yields but extend harvests significantly.
How much sunlight do chili peppers require?
Peppers thrive with 6-8 hours minimum direct sunlight; 8-10 hours produces optimal results. In extremely hot climates exceeding 95°F, afternoon shade prevents stress and sunscald. Insufficient light reduces flowering and fruiting; supplement with grow lights if natural sun proves inadequate.
Why are my pepper plants flowering but not producing fruit?
Inconsistent watering, temperature fluctuations, or insufficient pollination cause flower drop. Maintain steady soil moisture and temperatures between 70-85°F. Encourage pollinator visits through flowering companion plants, or hand-pollinate using small brushes. Excess nitrogen also promotes foliage over fruit; adjust fertilization toward phosphorus-rich formulations.
What causes blossom-end rot on peppers?
Calcium deficiency combined with inconsistent watering creates dark, sunken spots on pepper bottoms. Maintain even soil moisture and apply calcium supplements monthly. Crushed eggshells, gypsum, or calcium nitrate address deficiency effectively. Improve drainage to prevent water stress that exacerbates the condition.
How long do chili pepper plants produce?
Healthy pepper plants produce continuously for 6-8 months in ideal conditions. In short-season climates, plants produce for single growing seasons. Perennial varieties can survive multiple years in frost-free regions, producing progressively larger harvests yearly.
Can I grow chili peppers from grocery store peppers?
Grocery peppers rarely produce viable seeds due to hybridization and commercial processing. Seed-saving requires open-pollinated or heirloom varieties. Purchase seeds from reputable suppliers like the Heirloom Seeds company for reliable genetics.


