Burning Bush Care: Expert Gardening Tips for Vibrant Fall Color
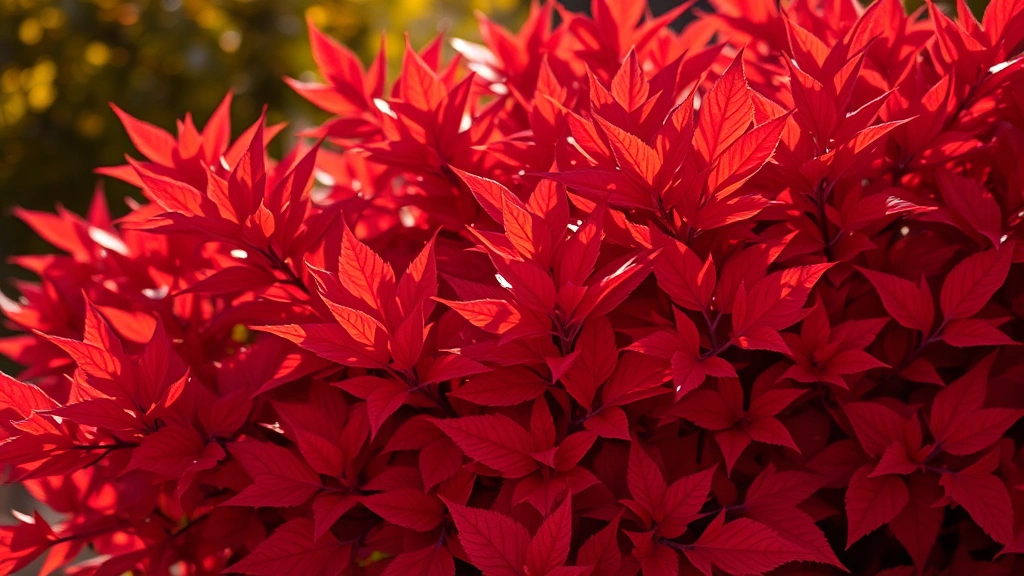
The burning bush, scientifically known as Euonymus alatus, is a deciduous shrub prized by gardeners for its spectacular crimson foliage that ignites landscapes each autumn. This ornamental plant transforms from subtle green to brilliant red, creating a stunning focal point in any garden design. Whether you’re a seasoned gardener or just beginning your horticultural journey, understanding the specific care requirements of burning bush plants will help you cultivate healthy, vibrant specimens that deliver year-round visual interest.
Growing a burning bush successfully requires attention to several key factors: proper sunlight exposure, well-draining soil conditions, strategic watering practices, and appropriate pruning techniques. Many gardeners wonder if they can incorporate burning bushes into container gardening setups or integrate them into raised bed designs. This comprehensive guide covers everything you need to know to maintain thriving burning bush plants throughout the growing season and beyond.
Understanding Burning Bush Basics
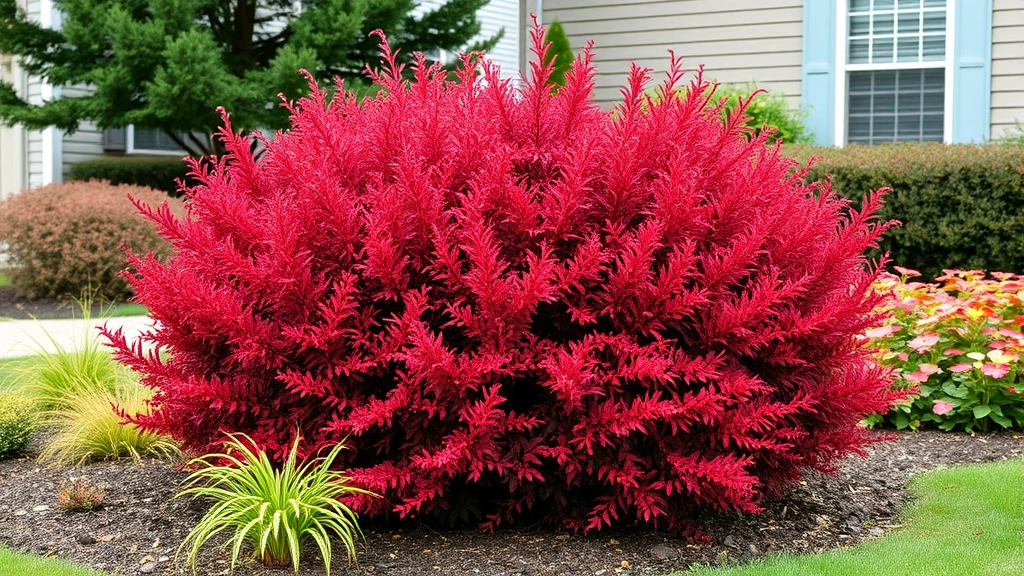
Burning bush plants are native to northeastern Asia and have become beloved ornamental shrubs throughout North America and Europe. These deciduous woody plants typically reach heights between 6 to 15 feet, depending on variety and growing conditions, making them suitable for various landscape applications. The most distinctive feature is the brilliant crimson-red fall foliage, which persists longer than many other ornamental plants, sometimes remaining vibrant into December in temperate zones.
The common name “burning bush” derives from the intense red coloration that emerges as temperatures cool in autumn. Unlike the biblical burning bush, this plant doesn’t actually burn—rather, the foliage undergoes a dramatic color transformation triggered by shorter daylight hours and dropping temperatures. The shrub also produces small reddish fruits enclosed in papery pink wings, adding another layer of visual interest to the landscape.
When planning your garden layout, consider whether burning bushes fit your overall design aesthetic. These shrubs work beautifully as specimen plants, foundation plantings, hedges, or screens. Many gardeners incorporate them into small garden designs because they provide maximum impact without requiring excessive space. The burgundy stems visible in winter also contribute to seasonal garden interest when foliage has dropped.
Ideal Growing Conditions and Sunlight Requirements
Burning bush plants thrive in full sun to partial shade environments, though maximum fall color development occurs with at least six hours of direct sunlight daily. In regions with intense afternoon heat, afternoon shade provides beneficial relief, particularly in USDA hardiness zones 8 and 9 where summer temperatures frequently exceed 90°F. The relationship between sunlight exposure and color intensity is significant—plants receiving adequate sun develop richer, more vibrant red autumn foliage compared to shade-grown specimens.
Temperature tolerance is another strength of burning bush varieties. These hardy shrubs perform well in USDA hardiness zones 4 through 9, withstanding winter temperatures as low as -30°F. This cold hardiness makes burning bushes excellent choices for northern gardens where many ornamental shrubs struggle. However, in zone 9 and warmer regions, afternoon shade becomes increasingly important to prevent heat stress and maintain plant vigor during scorching summers.
Wind exposure should factor into your planting decisions. While burning bushes tolerate moderate wind, extremely exposed locations may cause foliage scorch or branch damage. If your garden experiences strong prevailing winds, consider planting burning bushes where they receive some protection from taller trees or structures. This positioning maintains plant health while still allowing sufficient light penetration for optimal growth and fall color development.
Soil Preparation and Drainage Essentials
Well-draining soil is absolutely critical for burning bush success. These plants develop root rot in waterlogged conditions, making proper soil preparation essential before planting. Ideal soil should be neutral to slightly acidic, with a pH range between 5.5 and 7.0. If your native soil tends toward alkalinity, amending with sulfur or peat moss can help achieve optimal pH levels.
Texture matters significantly when preparing planting sites. Burning bushes prefer loamy soil with good structure that allows water drainage while retaining adequate moisture during dry periods. If you’re working with heavy clay soil, incorporate 3 to 4 inches of compost or aged bark mulch into the top 12 inches of soil before planting. This amendment improves drainage and prevents the waterlogging conditions that stress these plants.
When digging planting holes, make them approximately three times wider than the root ball and equally deep. This extra width allows roots to establish easily in amended soil. Mix removed soil with compost in a 50-50 ratio before backfilling around the root ball. Proper planting depth is crucial—the top of the root ball should sit level with the surrounding grade, never deeper, as this promotes healthy root development and prevents collar rot.
Watering Schedule and Moisture Management
Newly planted burning bushes require consistent moisture during their first growing season while roots establish in surrounding soil. Water young plants deeply twice weekly during the first month after planting, then transition to weekly watering during the remainder of the growing season, assuming no rainfall. As plants mature and develop extensive root systems, they become quite drought-tolerant, requiring supplemental watering only during extended dry periods.
Established burning bushes need approximately 1 inch of water weekly from rainfall or irrigation combined. During particularly hot, dry summers, increase watering frequency to maintain soil moisture at depths of 6 to 8 inches where active roots reside. The best approach involves deep, infrequent watering rather than shallow daily sprinkling, which encourages deeper root development and greater drought tolerance over time.
Early morning watering proves most effective, delivering moisture directly to soil rather than foliage, thereby reducing fungal disease risk. Drip irrigation systems or soaker hoses work wonderfully for burning bushes, delivering consistent moisture while minimizing water waste. If you’re using container growing methods, container plants require more frequent watering than in-ground specimens since potted soil dries faster.
Fertilizing Your Burning Bush Plants
Burning bushes are moderate feeders that don’t require heavy fertilization to thrive. In fact, excessive nitrogen promotes lush foliage growth at the expense of the intense fall color development that makes these plants valuable. A single annual application of balanced fertilizer in early spring provides sufficient nutrients for healthy growth throughout the season.
Apply a 10-10-10 or 5-10-5 slow-release fertilizer according to package directions in early spring as new growth emerges. Alternatively, a 2 to 3-inch layer of compost spread around the plant base in spring provides gradual nutrient release while improving soil structure. Avoid fertilizing after mid-summer, as late-season nitrogen applications delay dormancy and reduce fall color intensity.
Micronutrient deficiencies occasionally occur in alkaline soils, manifesting as yellowing leaves with green veins. If this chlorosis appears, apply a chelated iron product according to label directions. Regular mulching with 2 to 3 inches of organic material maintains consistent soil moisture and temperature while gradually improving soil fertility as the mulch decomposes, reducing fertilizer requirements over time.
Pruning Techniques for Optimal Shape
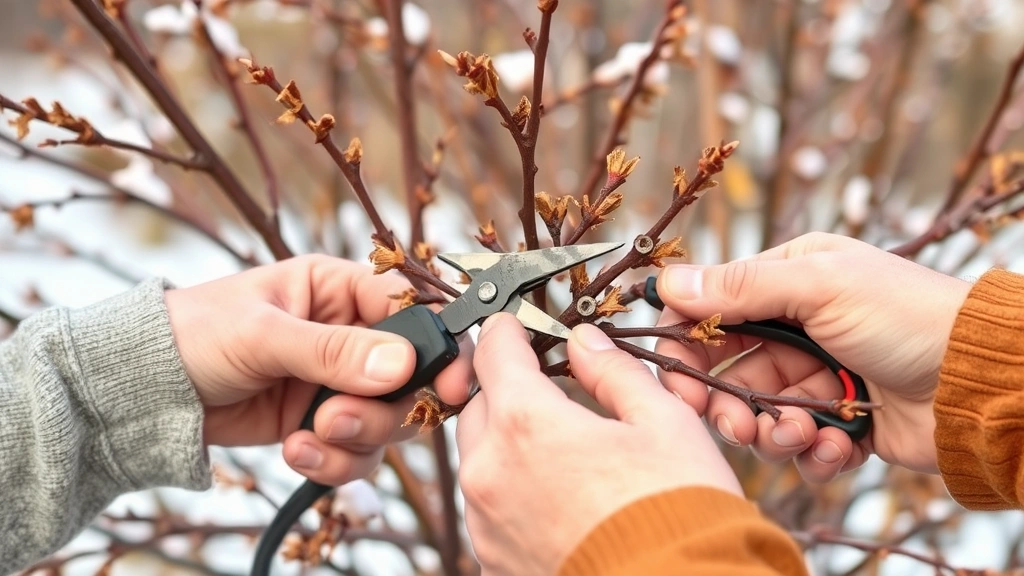
Burning bushes respond well to pruning and can be shaped into various forms depending on your landscape goals. Light pruning maintains natural form while removing dead wood and improving air circulation. Perform major pruning in late winter before new growth emerges, typically in February or March depending on your region. This timing allows plants to produce vigorous new growth throughout the spring and summer.
For specimen plants, selective pruning of crossing or crowded branches creates an open, naturally attractive form. Remove any dead wood immediately, cutting back to healthy tissue. If your burning bush has become overgrown, you can perform rejuvenation pruning by cutting the entire plant back to 12 inches above ground level in late winter. This severe pruning stimulates vigorous new growth, though the plant won’t reach full size again until the following year.
Creating hedges from burning bushes involves more intensive pruning. Shear hedges lightly in late spring and again in mid-summer, removing no more than one-third of new growth at any time. This regular trimming maintains compact form and encourages dense branching. Avoid pruning after early September, as late-season pruning can stimulate tender new growth susceptible to frost damage in colder regions.
Common Pests and Disease Prevention
Burning bushes are remarkably pest-resistant, though a few insects occasionally cause problems. Scale insects and spider mites represent the most common pests, particularly on plants stressed by drought or poor growing conditions. Regular monitoring allows early detection and intervention before populations reach damaging levels. Infested plants respond well to horticultural oil sprays applied according to label directions.
Powdery mildew occasionally affects burning bushes, particularly in humid regions with poor air circulation. This fungal disease appears as white coating on leaves and can reduce plant vigor. Improve air circulation through selective pruning, avoid overhead watering, and apply fungicide sprays if necessary. Ensuring adequate sunlight exposure and maintaining proper soil moisture significantly reduces mildew incidence.
Root rot remains the most serious disease threat, occurring exclusively in poorly drained soil. Prevention focuses on proper site selection and soil preparation rather than treatment. If root rot develops, there’s no cure—affected plants must be removed and destroyed. Never replant burning bushes in the same location without completely replacing the soil, as fungal spores persist for years.
Seasonal Care Throughout the Year
Spring care begins with removing winter mulch as soil warms and new growth emerges. Inspect plants for winter damage, pruning away any dead branches. Apply balanced fertilizer and refresh mulch layer as needed. Watch for emerging pests and diseases, addressing problems promptly before they escalate. Spring is ideal for planting new burning bushes, as they establish well before summer heat arrives.
Summer maintenance focuses on consistent watering during dry periods and monitoring for pest or disease issues. Prune only to remove dead wood or crossing branches during summer, avoiding heavy pruning that stimulates tender new growth. Mulch maintains soil moisture and moderates root temperature during hot months. In regions with intense summer heat, afternoon shade becomes increasingly valuable.
Autumn is when burning bushes truly shine, displaying brilliant red foliage that justifies their name. Fall color intensity depends on cool nights and sunny days during September and October. Most regions experience peak color in late October through early November. As temperatures drop, reduce watering as plants prepare for dormancy. Avoid fertilizing in fall, as this delays dormancy and reduces color intensity.
Winter care in cold regions involves minimal activity. The burgundy-red stems provide garden interest after leaves drop. Prune off any branches damaged by heavy snow. In late winter, apply dormant oil spray if scale insects troubled your plants the previous year. Mulch protects roots in zones 4 and 5 where winter temperatures plunge below -20°F. As soil warms in late winter, you can begin major pruning before spring growth emerges.
FAQ
Can I grow burning bush in containers?
Yes, dwarf burning bush varieties perform well in containers, though they require more frequent watering than in-ground plants. Use high-quality potting mix with excellent drainage and select containers at least 18 to 24 inches in diameter. Container-grown plants may not achieve the same mature size as landscape specimens and require winter protection in zones colder than 6.
Why isn’t my burning bush turning red in fall?
Insufficient sunlight is the most common cause of poor fall color. Ensure your plant receives at least six hours of direct sun daily. Additionally, excessive nitrogen fertilizer promotes green foliage at the expense of red pigment development. Avoid late-season fertilization and reduce nitrogen applications. Cold nights and sunny days also trigger color development, so weather patterns influence color intensity.
How often should I prune burning bush?
Light pruning to remove dead wood can occur anytime. Major pruning happens in late winter before growth resumes. If you’re maintaining a hedge, prune lightly in late spring and mid-summer. Avoid heavy pruning after early September, as this stimulates tender new growth vulnerable to frost damage. Most established plants need only occasional pruning to maintain attractive form.
Is burning bush invasive?
Yes, burning bush is considered invasive in many eastern and midwestern states because it spreads readily from bird-dispersed seeds. Check your state’s invasive species list before planting. Many regions now recommend native alternatives like serviceberry, chokeberry, or native viburnums that provide similar fall color without invasion concerns. Contact your local State Horticultural Society for regional recommendations.
What’s the difference between burning bush and winged euonymus?
These are the same plant—burning bush is the common name and Euonymus alatus is the scientific name. “Winged euonymus” refers to the distinctive corky wings running along the stems. Some nurseries market dwarf varieties as “burning bush” or “dwarf burning bush,” which typically reach 3 to 6 feet rather than the 10 to 15 feet of standard varieties.
How do I overwinter container-grown burning bush?
In zones 6 and colder, move containers to an unheated garage or shed where temperatures stay above -10°F. Reduce watering significantly—the soil should barely remain moist, not wet. Alternatively, bury the entire pot in garden soil and mulch heavily. In spring, gradually acclimate the plant to outdoor conditions by moving it to a sheltered location for a week before returning it to its permanent spot.


