Starting a New Garden? Expert Advice Inside!
Beginning a new garden is one of the most rewarding decisions you can make, whether you’re dreaming of fresh vegetables on your dinner table, vibrant flowers attracting pollinators, or a peaceful retreat from daily stress. The prospect of creating a thriving garden space can feel overwhelming at first, but with proper planning and foundational knowledge, you’ll be well on your way to growing success. This comprehensive guide walks you through every essential step, from site selection to planting your first seeds, ensuring your new garden flourishes from day one.
The journey from bare ground to a productive garden doesn’t require years of experience or expensive equipment. What matters most is understanding your environment, preparing your soil correctly, and choosing plants suited to your climate and conditions. Whether you’re working with a sunny backyard, a shaded corner, container space on a balcony, or planning to build a raised garden bed, the principles remain consistent. By following expert guidance and adapting recommendations to your unique situation, you’ll create a garden that brings joy and abundance.
Assess Your Garden Site and Sunlight
The foundation of any successful new garden begins with careful site assessment. Spend time observing your potential garden location throughout different times of day and across several days if possible. Notice where sunlight falls, how long direct rays illuminate the area, and which sections remain shaded. Most vegetables and flowering plants require between six and eight hours of direct sunlight daily, though some plants tolerate partial shade beautifully.
Walk around your property noting existing trees, structures, and landscape features that create shade patterns. Pay attention to how shade changes seasonally—areas shaded in summer by leafy trees might receive full sun in spring and fall. Consider water drainage patterns by observing where water flows after rain or watering. Poor drainage leads to waterlogged roots and fungal diseases, while areas that dry too quickly may stress plants during hot periods. Document the microclimates in your yard: south-facing walls radiate heat, north-facing areas stay cooler, and low spots collect cold air. Understanding these variations helps you position plants strategically for optimal growing conditions.
Also evaluate your access to water sources. A convenient spigot nearby makes regular watering manageable, especially during establishment phases. Consider proximity to utilities—call before digging to locate underground lines. Check local regulations regarding garden placement, fence setbacks, and any homeowner association restrictions. These preliminary observations take minimal time but prevent costly mistakes and ensure you choose an ideal location for your new garden.
[IMAGE_1]
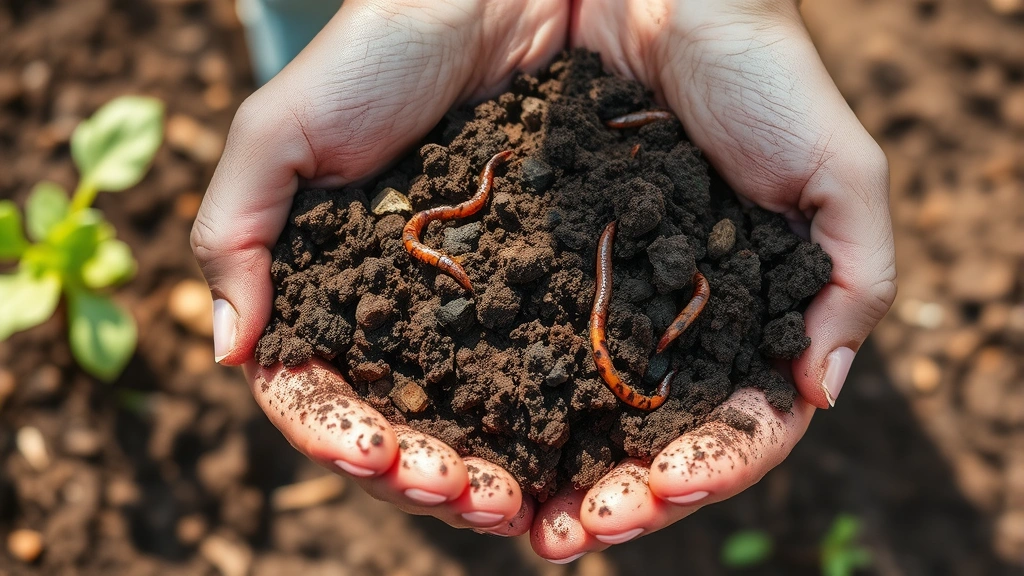
Understand Your Soil Foundation
Healthy soil is the lifeblood of a thriving garden. Before planting anything, understand what you’re working with by getting a soil test. Most universities and extension services offer affordable soil testing that reveals pH levels, nutrient content, organic matter percentage, and texture composition. This scientific baseline guides your soil amendment strategy far better than guessing.
If testing isn’t immediately available, perform a simple texture test by taking a handful of moist soil and squeezing it. Sandy soil won’t hold together, clay soil forms a tight ball, and loamy soil—the ideal texture—holds together loosely. Most plants thrive in loamy soil with balanced sand, silt, and clay proportions. When you prepare garden soil for a thriving garden, you’re essentially building a structure that holds moisture and nutrients while allowing adequate drainage and root penetration.
Incorporate organic matter generously—aim for three to four inches of compost, aged manure, leaf mold, or other organic amendments worked into the top eight to twelve inches of existing soil. Organic matter improves both clay and sandy soils: it helps clay drain better while helping sandy soil retain moisture and nutrients. This amendment process enriches your soil ecosystem with beneficial microorganisms that break down organic matter into plant-available nutrients. Start this process in fall if planting in spring, giving materials time to decompose and integrate with existing soil. Even if you’re beginning in spring, amending immediately still provides benefits throughout the growing season.
Choose the Right Garden Type
Different garden types suit different situations, preferences, and physical capabilities. The most common option for new gardeners is in-ground gardening, where plants grow directly in amended native soil. This traditional approach works well when you have healthy soil and adequate space. In-ground gardens integrate beautifully with landscapes and require minimal construction.
Raised garden beds offer significant advantages for new gardeners, particularly those with poor native soil, limited mobility, or pest pressure from burrowing animals. When you build a raised garden bed, you create a contained growing space where you control soil composition completely. Raised beds warm faster in spring, drain better, and reduce bending strain. They also look intentional and organized, which appeals to many gardeners. Cedar, composite materials, or galvanized steel work well for construction; avoid pressure-treated wood that may leach harmful chemicals.
Container gardening provides flexibility for renters, those with space limitations, or anyone wanting to try gardening with minimal commitment. Containers work on patios, balconies, decks, and even sunny windowsills. Choose containers with drainage holes and size them appropriately—larger containers retain moisture better and provide more root space. Container gardening demands more frequent watering than ground beds since soil dries faster in exposed pots.
Vertical gardening maximizes production in small spaces by training plants upward on trellises, stakes, or wall-mounted systems. This approach works wonderfully for vining crops and helps improve air circulation around foliage. Combination gardens mixing two or three types often provide the most flexibility and appeal.

Select Plants for Your Climate
Choosing plants suited to your climate zone and local conditions dramatically increases your success rate. Check your USDA hardiness zone using the USDA Plant Hardiness Zone Map, which helps you select perennials that survive your winter temperatures. However, hardiness zones represent just one factor—you also need to consider your growing season length, summer heat intensity, humidity levels, and typical rainfall patterns.
New gardeners often succeed best by starting with forgiving plants that tolerate minor mistakes. Easy vegetables include tomatoes, zucchini, beans, peas, and growing garden lettuce, which produces harvests quickly and builds confidence. Consider growing an herb garden alongside vegetables—culinary herbs like basil, parsley, and chives flourish in most climates and provide immediate kitchen value.
For flowers, marigolds, zinnias, sunflowers, and cosmos are nearly impossible to fail with, offering reliable blooms and attracting beneficial insects. Native plants adapted to your region require less water, fertilizer, and pest management once established. Research plants native to your area through local extension services or native plant societies.
Check days-to-maturity information when selecting vegetable varieties. If your growing season is short, choose quick-maturing varieties rather than long-season types that won’t reach harvest before frost. Read seed packets and plant descriptions carefully, noting light requirements, spacing needs, and water preferences. This information guides your plant selection process and prevents purchasing unsuitable varieties.
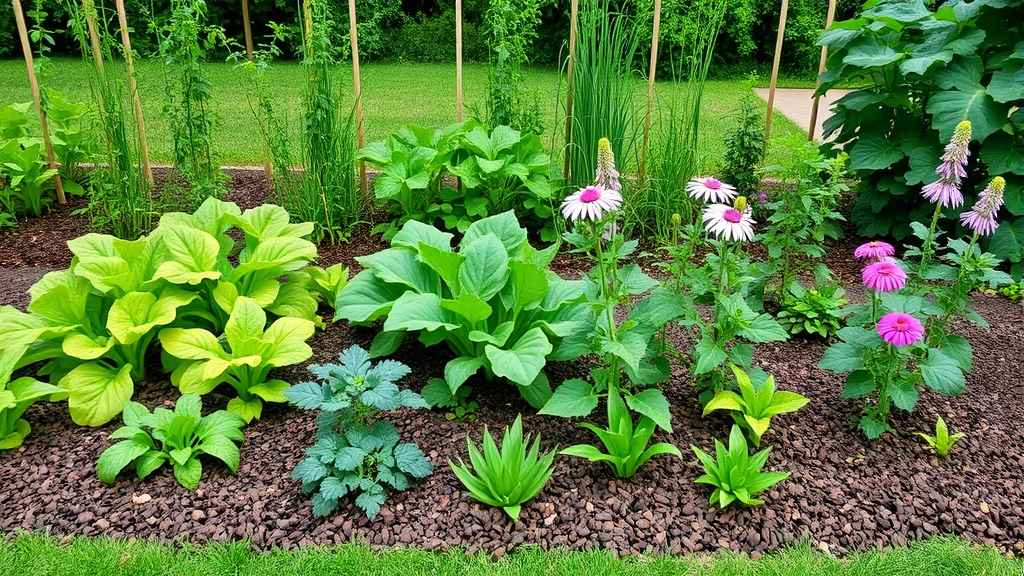
Plan Your Garden Layout
Thoughtful layout planning prevents crowding, ensures adequate light distribution, and facilitates maintenance and harvesting. Sketch your garden space to scale on paper, marking permanent features like trees, structures, and shade patterns. Indicate sun exposure zones and drainage patterns you’ve observed.
Position tall plants on the north side of your garden so they don’t shade shorter plants throughout the day. Consider companion planting relationships where certain plant combinations enhance growth, repel pests, or improve soil health. For example, marigolds planted near vegetables deter many insects, while nitrogen-fixing legumes improve soil for subsequent crops.
Plan adequate spacing between plants by checking mature sizes rather than assuming current seedling size. Crowded plants compete for light, water, and nutrients while creating humid conditions favoring disease. Include pathways for easy access and maintenance. In vegetable gardens, arrange crops by water needs—group thirsty plants together for efficient watering, and place drought-tolerant plants separately.
Consider succession planting if you want continuous harvests. Plant lettuce every two weeks rather than all at once to enjoy steady production rather than one overwhelming harvest. Plan for season extension using season extenders, cold frames, or row covers to expand your growing window.
Gather Essential Tools and Supplies
You don’t need an overwhelming array of tools to start a new garden successfully. Essential hand tools include a spade or shovel for digging and turning soil, a hand fork or cultivator for loosening soil and removing weeds, a trowel for planting and small tasks, and a rake for leveling beds. Quality hand tools cost more initially but last decades with proper care.
Invest in a good watering system—either a soaker hose for beds or a quality watering can for containers. Soaker hoses deliver water directly to soil, reducing evaporation and fungal issues from wet foliage. Add gloves protecting your hands, a pruner for deadheading and harvesting, and a garden hose of adequate length to reach all growing areas.
Gather soil amendments: compost, aged manure, peat moss or coconut coir, and perlite or coarse sand for improving drainage. Obtain organic fertilizers suited to your plants—vegetable gardens benefit from balanced formulations, while flowering plants often prefer lower nitrogen ratios. Purchase seeds or transplants from reputable sources, and consider having stakes, trellises, or cages available before planting.
Prepare Your Garden Space
Begin preparation by removing existing vegetation, rocks, and debris from your garden area. For in-ground gardens, you can remove sod by hand or rent a sod cutter for large areas. Alternatively, lay cardboard or newspaper over the area to smother grass and weeds, then add soil on top—this “lasagna gardening” method requires more time but involves less physical labor.
Once cleared, loosen existing soil to eight to twelve inches deep using a spade or tiller. This aeration improves drainage and root penetration. While loosening, remove rocks, roots, and debris. Incorporate your prepared amendments, mixing thoroughly until the texture appears uniform. If starting raised beds, assemble them first, then fill with quality soil mixture—typically a blend of topsoil, compost, and other amendments.
Rake the prepared surface smooth, breaking up clods and creating a level planting bed. Water the prepared area several days before planting; this settles soil and allows you to identify remaining low spots needing additional soil. If planting seeds directly, ensure fine, crumbly soil texture at the surface for good seed-to-soil contact.
For container gardens, fill pots with quality potting mix rather than garden soil, which compacts in containers and drains poorly. Potting mixes are specifically formulated with proper drainage and aeration for container growing.
Plant Your Garden
Timing matters significantly when planting your new garden. Check your local frost dates through your cooperative extension service—plant tender annuals and warm-season crops after your last spring frost date. Cool-season crops like lettuce, peas, and broccoli tolerate light frosts and can be planted earlier in spring or in late summer for fall harvest.
Follow gardening tips for beginners regarding planting depth and spacing. Generally, seeds are planted at depths equal to their diameter—tiny lettuce seeds barely press into soil, while larger bean seeds go deeper. Transplants are positioned at the same depth they grew in their containers, with tomatoes being an exception—they can be planted deeper to develop additional roots.
Water newly planted areas gently but thoroughly, settling soil around roots and providing moisture for germination or transplant establishment. Maintain consistent moisture during the first few weeks as plants establish. Once established, most plants need one to two inches of water weekly, delivered through rainfall or irrigation.
Apply mulch around plants after soil warms and plants establish—two to three inches of organic mulch moderates soil temperature, suppresses weeds, and conserves moisture. Keep mulch a few inches away from plant stems to prevent rot and discourage pests.
Expect your new garden to improve significantly in year two as soil organisms multiply and organic matter integrates fully. Don’t be discouraged by first-year challenges; gardening is a continuous learning process where each season brings experience and success.
FAQ
How much space do I need to start a new garden?
You can start successfully with surprisingly little space. A single raised bed measuring four by eight feet produces substantial vegetables for a small family. Container gardens on a balcony or patio work wonderfully. Even a sunny windowsill accommodates herbs. Start small and expand as your confidence grows—it’s easier to manage a small, productive garden than struggle with an overwhelming large space.
What’s the best time to start a new garden?
Spring is ideal for most regions, giving plants the full growing season to establish. However, fall works beautifully in warm climates for cool-season crops. You can prepare soil in fall for spring planting, or even start indoors with seeds in late winter before outdoor planting season. The best time is whenever you’re ready to begin—starting beats waiting for perfect conditions.
Can I garden if I don’t have full sun?
Absolutely. Many plants thrive in partial shade, including leafy greens, herbs like mint and parsley, and shade-tolerant flowers such as hostas, ferns, and astilbes. While vegetable production typically decreases in shade, you can still grow substantial harvests with four to six hours of sunlight daily.
How do I know if my soil is healthy?
Healthy soil crumbles easily, smells earthy, contains visible organic matter, and supports active earthworm and microbial populations. If you dig a handful and it’s hard clay or blows away as dust, amendment is needed. Soil testing through your extension service provides definitive answers about nutrient levels and pH.
What should I do if my plants aren’t thriving?
Check the basics first: adequate light, consistent moisture, proper spacing, and appropriate fertilizer for your plant type. Identify any pests or diseases through careful inspection. Consult your local cooperative extension service—they provide free or low-cost plant diagnosis and treatment recommendations specific to your region.


