How to Start an Indoor Herb Garden: Expert Tips for Year-Round Fresh Herbs
Growing an indoor herb garden transforms your kitchen into a fresh, aromatic oasis while providing convenient access to culinary staples whenever you need them. Whether you’re a seasoned gardener looking to extend your growing season or a complete beginner eager to cultivate herbs on a windowsill, this comprehensive guide will walk you through every step of creating a thriving indoor herb garden. From selecting the right containers to mastering watering techniques, you’ll discover practical strategies that professional gardeners use to maintain lush, productive herb collections indoors.
An indoor herb garden offers remarkable advantages: no weather limitations, minimal pest problems, and the satisfaction of harvesting fresh basil, parsley, cilantro, and mint year-round. Unlike outdoor gardening, indoor cultivation requires attention to specific environmental factors like light, humidity, and air circulation. The good news is that with the right setup and knowledge, even apartment dwellers with limited space can successfully grow dozens of herb varieties indoors.
Essential Equipment and Containers
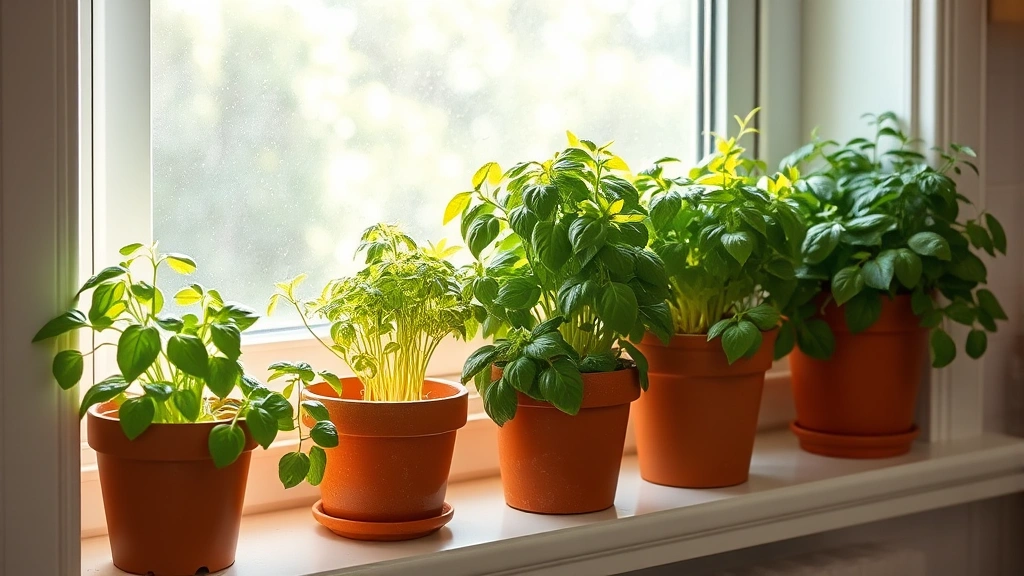
Selecting appropriate containers is foundational to your indoor herb garden’s success. Unlike outdoor gardening where soil volume can be more forgiving, indoor herbs require precisely-sized containers that balance moisture retention with proper drainage. Standard options include terracotta pots (excellent for breathability but dry quickly), ceramic containers (aesthetically pleasing with moderate drainage), and plastic pots (lightweight and moisture-retentive). Most culinary herbs thrive in containers 6-8 inches in diameter, though larger herbs like rosemary appreciate 10-12 inch pots.
Drainage holes are absolutely non-negotiable. Without them, excess water accumulates, leading to root rot and fungal diseases that quickly destroy your herbs. Place saucers or trays beneath containers to catch drainage water, protecting your furniture and floors. When starting your gardening journey as a beginner, invest in quality containers rather than repurposing household items that lack drainage.
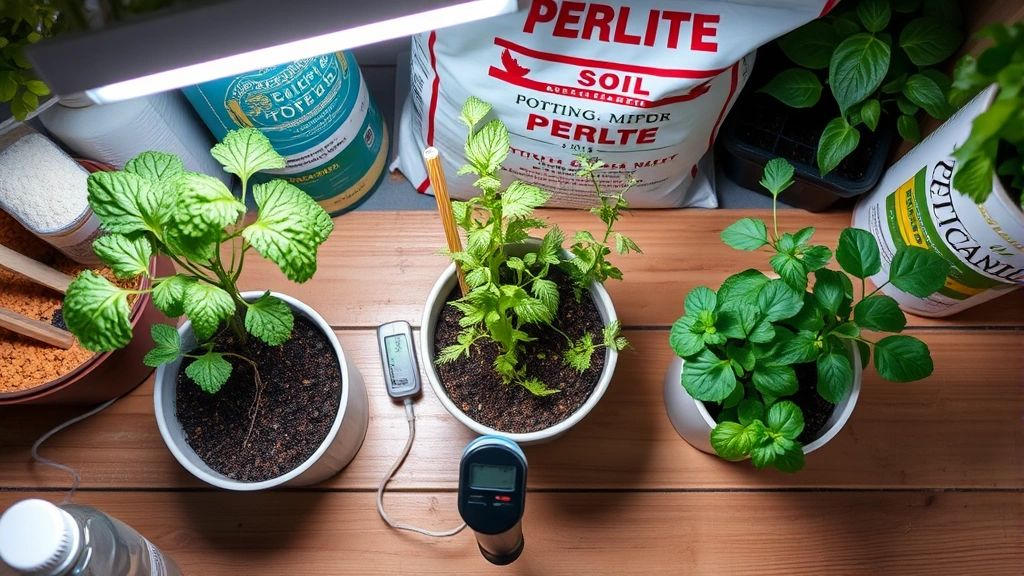
Additional equipment enhances your success rate significantly. A spray bottle maintains humidity around foliage, a small watering can with a narrow spout delivers precise moisture, and a moisture meter eliminates guesswork about watering frequency. Consider purchasing a grow light system if your home lacks bright natural light sources. These affordable LED systems provide the intense illumination herbs require without generating excessive heat.

Choosing the Right Herbs for Indoors
Not all herbs adapt equally well to indoor conditions. Mediterranean herbs like basil, oregano, and thyme tolerate lower humidity and adapt readily to artificial light. These sun-loving varieties are ideal starting points for indoor gardeners. Parsley, cilantro, and chives also perform exceptionally well indoors, producing abundant foliage for months with minimal fussing. Mint varieties are practically unkillable indoors and actually benefit from container cultivation since their aggressive growth habits won’t overtake garden beds.
Some herbs demand more finesse. Rosemary requires excellent drainage, bright light, and careful watering. Dill and fennel grow tall and sometimes struggle with indoor light limitations. Lavender prefers drier conditions than most indoor environments provide naturally. As you gain confidence, experiment with these challenging varieties, but start with forgiving herbs that reward effort generously.
When beginning your herb garden, select varieties you actually use in cooking. Fresh basil enhances pasta dishes, cilantro elevates salsas, and oregano improves countless Mediterranean recipes. This practical approach ensures your indoor garden serves a purpose while maintaining your motivation through the growing season. Consider grouping herbs by water and light requirements to simplify management.
Lighting Requirements and Solutions
Indoor herbs require significantly more light than most houseplants—typically 12-16 hours daily of bright, direct illumination. South-facing windowsills provide ideal natural light in Northern Hemisphere locations, offering intense afternoon sun that herbs crave. East-facing windows supply gentler morning light, while west-facing positions deliver hot afternoon rays that sometimes stress young plants. North-facing windows rarely provide sufficient light for robust herb growth.
If your home lacks appropriately-positioned windows, supplemental lighting becomes essential. LED grow lights have revolutionized indoor herb cultivation, offering energy efficiency and spectrum optimization without heat concerns. Position full-spectrum LED panels 6-12 inches above foliage, operating them for 14-16 hours daily using a timer. This consistency replaces natural light variation, promoting steady growth regardless of season or weather patterns.
Fluorescent shop lights represent a budget-friendly alternative, though they’re less efficient than modern LEDs. Position them similarly close to foliage, ensuring light reaches all leaf surfaces. Insufficient lighting produces weak, leggy growth with sparse foliage—a clear signal to increase light intensity or duration. Rotating containers regularly ensures even light distribution when relying on windowsill placement.
Soil Selection and Preparation
Indoor herbs thrive in light, well-draining soil that retains modest moisture without becoming waterlogged. Standard potting soil works adequately, though mixing it with perlite or coarse sand improves drainage. The ideal indoor herb soil contains 60% quality potting soil, 20% perlite, and 20% coconut coir, creating a balanced medium that drains quickly while maintaining slight moisture retention.
Avoid garden soil or topsoil for indoor containers—these dense materials compact over time, restricting root development and water penetration. When you’re ready to prepare soil for gardening, remember that indoor conditions differ dramatically from outdoor environments. Indoor soil remains undisturbed by weather and natural organisms, so the medium’s initial composition matters more than it does in traditional gardens.
Before filling containers, ensure they’re clean and have adequate drainage holes. Fill containers to within one inch of the rim, creating space for water without overflow. Gently firm soil without compacting it excessively—roots need access to air spaces throughout the medium. If you’re propagating herbs from cuttings, use a lighter propagation medium: equal parts perlite and coconut coir promotes rapid root development without moisture-related rot.
Watering and Humidity Management
Proper watering represents the single most common challenge for indoor herb gardeners. Overwatering kills more herbs than any other factor, yet inconsistent moisture creates stress that invites pests and diseases. The golden rule: water when the top inch of soil feels dry to your touch. This approach prevents both extremes while accommodating natural variation in your home’s humidity and temperature.
Water thoroughly until it drains from the bottom, then empty saucers after 15 minutes to prevent water from reabsorbing into soil. This process ensures complete soil saturation while preventing root submersion. Morning watering works best, allowing foliage to dry quickly if moisture splashes on leaves. Evening watering leaves wet foliage overnight, creating conditions favorable for fungal diseases.
Indoor air tends toward dryness, particularly during winter when heating systems operate continuously. Most culinary herbs appreciate humidity levels between 40-60%, though they’re more forgiving than tropical plants. Increase humidity by misting foliage with water, grouping containers together to create a localized humid microclimate, or placing containers on pebble trays filled with water (ensure pots don’t touch water directly). A small humidifier near your herb collection provides consistent humidity without daily effort.
Temperature and Air Circulation
Herbs prefer consistent temperatures between 60-75°F, mimicking the moderate conditions many originated from. Avoid placing containers near heating vents, cold windows, or doors where temperature fluctuates dramatically. Consistent warmth encourages steady growth, while temperature swings stress plants and reduce productivity.
Air circulation prevents fungal diseases and strengthens stems, promoting stocky growth rather than weak, leggy plants. A small oscillating fan positioned to create gentle air movement without directly blasting herbs provides ideal circulation. Operate the fan for 2-4 hours daily, creating the subtle breeze herbs experience outdoors. This simple practice significantly reduces disease incidence while strengthening plant structure.
Keep herbs away from ripening fruits and vegetables that produce ethylene gas, which accelerates aging and leaf drop. Separate your indoor herb garden from kitchen fruit bowls or ripening banana bunches. Similarly, avoid placing herbs near natural gas appliances, which produce ethylene as a combustion byproduct.
Fertilizing Your Indoor Herbs
Indoor herbs growing in containers deplete nutrient reserves faster than garden soil replenishes them naturally. Regular fertilization maintains productivity and vigor. Use balanced, water-soluble fertilizers (10-10-10 or similar ratios) diluted to half strength, applied every 2-3 weeks during active growing seasons (spring and summer). Reduce fertilizing to monthly intervals during fall and winter when growth naturally slows.
Organic options like diluted fish emulsion or seaweed extract provide nutrients while supporting beneficial microorganisms. These gentler fertilizers are particularly suitable for herbs you’ll harvest regularly for consumption. Avoid high-nitrogen fertilizers that promote leafy growth at the expense of flavor—culinary herbs develop richer tastes with moderate nutrition.
Watch for signs of nutrient deficiency: yellowing lower leaves suggest nitrogen insufficiency, while purple-tinged foliage indicates phosphorus depletion. Pale, stunted growth signals general malnutrition. Most deficiencies resolve quickly with appropriate fertilizing, though sometimes repotting into fresh soil proves necessary if soil has become exhausted.
Harvesting and Maintenance
Begin harvesting when herbs develop 6-8 true leaves, encouraging bushier growth through regular pruning. Pinch off top growth regularly rather than harvesting from the base, promoting branching and fuller plants. Most culinary herbs tolerate aggressive harvesting—the more you pick, the more vigorously they typically produce.
Harvest in the morning after dew dries but before intense light stresses foliage. Use clean, sharp scissors to cut stems just above leaf nodes where new growth emerges. This technique stimulates branching rather than creating bare, woody stems. Never harvest more than one-third of a plant’s foliage at once, leaving sufficient leaf area for continued photosynthesis and growth.
Monitor regularly for common indoor pests like spider mites, mealybugs, and aphids. These pests thrive in the warm, stable indoor environment. Inspect foliage weekly, checking both upper and lower leaf surfaces. Early detection and treatment with insecticidal soap or neem oil prevents infestations from becoming problematic. Isolate affected plants immediately to prevent pest spread to other containers.
Refresh potting soil annually or when growth slows despite appropriate care. Gently remove herbs from containers, loosen root balls, and repot into fresh soil with the plant at the same depth. Spring represents the ideal repotting season, coinciding with increased light and warmth that support recovery from transplanting stress.
FAQ
How much light do indoor herbs really need?
Most culinary herbs require 12-16 hours of bright light daily—more than typical indoor lighting provides. South-facing windowsills often suffice during spring and summer, but supplemental grow lights ensure consistent growth year-round. Position lights 6-12 inches above foliage and operate them on a timer for consistent daily exposure.
Can I grow herbs in water without soil?
Hydroponic herb growing works well with proper nutrient solutions and aeration. However, soil-based cultivation is simpler for beginners and requires less equipment. If interested in propagating herbs hydroponically, start with simple water propagation for cuttings before advancing to full hydroponic systems.
Why are my indoor herb leaves turning yellow?
Yellowing leaves typically indicate overwatering, nutrient deficiency, or insufficient light. Check soil moisture first—if soggy, reduce watering frequency. Ensure adequate lighting and fertilize if foliage appears generally pale. Occasionally, natural older leaves yellow and drop; this is normal if new growth appears healthy.
How long do indoor herbs live?
Most culinary herbs remain productive for 6-12 months indoors before declining. Regular harvesting extends productivity, while neglected plants become woody and less productive. Many gardeners treat basil, cilantro, and parsley as seasonal crops, replanting fresh specimens every 4-6 months for consistent, vigorous harvests.
Can I grow the same herbs outdoors after starting indoors?
Absolutely! Indoor-grown herbs transition outdoors successfully, though they require hardening off—gradually exposing them to outdoor conditions over 7-10 days. Start with dappled shade and protected locations, progressively increasing light and wind exposure. This transition prevents sunburn and stress from sudden environmental changes.
What’s the best container size for indoor herbs?
Most culinary herbs thrive in 6-8 inch diameter containers. Larger herbs like rosemary appreciate 10-12 inch pots. Avoid oversized containers that retain excessive moisture; choose containers just large enough to accommodate root systems comfortably. As plants grow, you can transition them to slightly larger containers if needed.


