Garden Igloo Setup? Pro Tips for Best Results
A garden igloo is one of the most innovative ways to extend your growing season and protect plants during harsh winter conditions. These transparent dome structures create a microclimate that captures solar heat while shielding your garden from frost, snow, and damaging winds. Whether you’re a seasoned gardener looking to grow year-round or someone interested in protecting tender perennials, understanding how to properly set up and maintain a garden igloo can transform your gardening experience.
The beauty of a garden igloo lies in its simplicity and effectiveness. Unlike traditional greenhouses or cold frames, igloos are affordable, portable, and remarkably easy to assemble. They work by trapping warm air during the day and releasing it slowly at night, creating a protective bubble around your most valuable plants. In this comprehensive guide, we’ll explore everything you need to know about selecting, installing, and optimizing your garden igloo for maximum growing success throughout the year.
Understanding Garden Igloos and How They Work
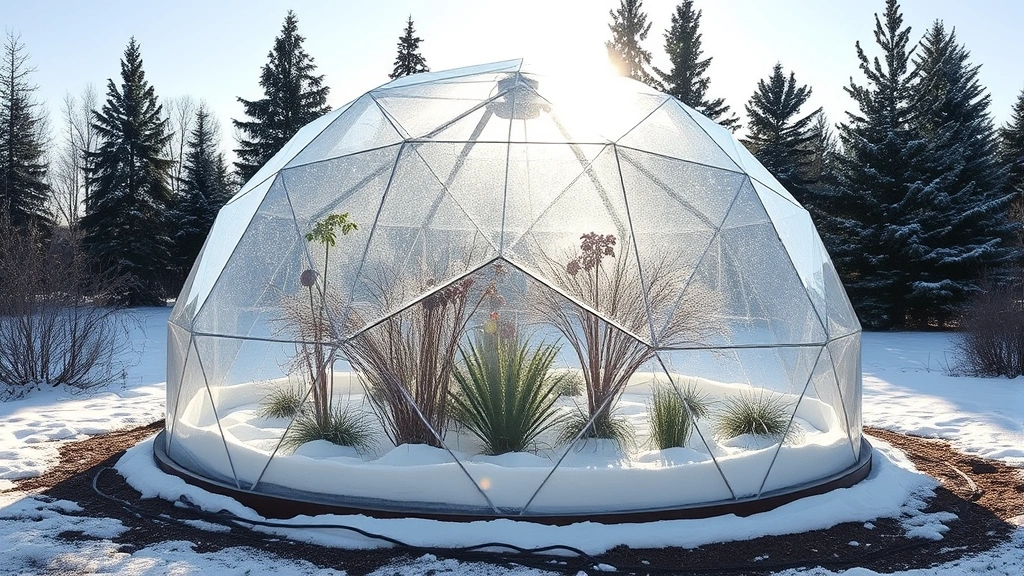
Garden igloos are geodesic dome structures made from transparent polycarbonate or PVC plastic panels. The dome shape is engineered for maximum structural integrity while allowing sunlight to penetrate from multiple angles. This design is far superior to traditional rectangular structures because it distributes wind pressure more evenly and captures more solar radiation throughout the day.
The fundamental principle behind garden igloos is the greenhouse effect. Sunlight passes through the transparent panels and warms the soil and plants inside. This heat is then trapped by the plastic covering, preventing it from escaping into the atmosphere. The result is a warm, protected environment that can be 10-20 degrees Fahrenheit warmer than the outside air, even without supplemental heating. This temperature differential is crucial for protecting frost-sensitive plants and extending growing seasons in cold climates.
Different igloo models vary in size, ranging from small 6-foot structures that cover a single garden bed to larger 12-15 foot models that can accommodate multiple growing areas. The size you choose depends on your available space, the number of plants you want to protect, and your budget. Smaller models are perfect for protecting prized specimens or extending the season for vegetables, while larger igloos can function almost like a mini greenhouse.
Choosing the Right Location for Your Setup
Location is absolutely critical to garden igloo success. Choose a spot that receives at least 6-8 hours of direct sunlight daily, preferably facing south or southeast. This orientation maximizes solar gain during winter months when the sun’s angle is lower in the sky. If you’re in the Southern Hemisphere, south-facing placement is still preferred, but adjusted for your local solar patterns.
Assess your site for adequate drainage. Never place an igloo in a low-lying area where water accumulates during rain or snowmelt. Poor drainage can lead to waterlogged soil, root rot, and fungal diseases. If your ideal location has drainage issues, consider building up a raised bed or installing drainage tiles before setting up your structure.
Wind exposure matters significantly. While igloos are structurally sound, placing yours in an extremely windy location can reduce internal temperatures and stress the frame. If your garden is exposed, consider installing a windbreak using hedges or fencing on the north and west sides. You might also explore garden arch trellis structures nearby that can provide wind protection while adding aesthetic appeal.
Proximity to water sources is practical. You’ll be watering plants inside the igloo regularly, so choose a location reasonably close to your outdoor faucet. Proximity to your main house is also beneficial for monitoring plants and making adjustments, especially during critical winter periods.
Consider the long-term aesthetic impact on your outdoor space. While igloos are attractive structures, think about sightlines from your home and patios. Some gardeners prefer placing them in dedicated growing areas away from main views, while others showcase them as garden features. If you enjoy exploring unique garden designs, visit Lurie Garden for inspiration on integrating structures into comprehensive garden plans.
Installation and Assembly Best Practices
Most garden igloos arrive as flat-pack kits requiring assembly. Start by reading instructions thoroughly before beginning. Lay out all components in an organized manner and verify that all parts are present. Missing pieces are rare, but identifying issues before assembly saves frustration.
Choose a calm, dry day for assembly. Wind can be frustrating when connecting panels, and wet conditions make the structure slippery. If possible, assemble with a helper—many steps are much easier with two people. Wear gloves to protect your hands from sharp edges on plastic panels.
Begin by assembling the base frame or foundation according to instructions. Many igloos use aluminum or steel frames that anchor into the ground. Ensure the base is level using a spirit level. Even slight slopes can cause panels to misalign and create gaps where heat escapes. If your ground is uneven, level it by removing high spots and filling low areas before assembly.
As you attach panels, work methodically and don’t overtighten fasteners. Plastic can crack if over-torqued, and metal frames can warp. Hand-tighten first, then use tools to snug connections firmly but not excessively. Some igloos use flexible connectors that allow slight movement—this is intentional and helps the structure withstand wind and temperature fluctuations.
Once the dome is assembled, check all seams and connections for gaps. Small gaps are normal, but large ones where wind can whistle through should be sealed with weatherstripping or silicone caulk. Don’t seal everything completely—you need some air circulation to prevent excessive humidity and fungal issues.
Install doors and ventilation panels last. These are crucial components that require careful alignment. Test opening and closing several times before considering assembly complete. Doors should seal snugly but open smoothly without binding.
Temperature Management and Ventilation
Temperature control inside a garden igloo is both automatic and manageable. During sunny days, internal temperatures can rise rapidly—sometimes exceeding 85°F even when outdoor temperatures are below freezing. This is actually beneficial for plant growth, but excessive heat can damage sensitive seedlings or cause premature bolting in cool-season crops.
Ventilation is your primary temperature management tool. Most igloos include roof vents or doors designed to open automatically using solar-powered or mechanical openers. These devices open vents when internal temperatures exceed a set threshold (typically 68-72°F), allowing hot air to escape. As temperatures cool, the vents close automatically. This passive system requires no electricity and operates reliably throughout the growing season.
If your igloo doesn’t include automatic vents, manually prop open doors or windows during warm days and close them before evening. This simple practice prevents overheating while allowing you to monitor internal conditions. On extremely cold nights, you might close vents entirely to trap all available heat.
Humidity management is critical. The enclosed environment of an igloo can become quite humid, especially if you’re watering plants regularly. High humidity promotes fungal diseases like powdery mildew and damping off. Ensure adequate air circulation by keeping vents open when temperatures allow. On humid days, increase ventilation even if external temperatures are cool.
For winter protection in extremely cold climates, consider supplemental heating. Small electric heaters or heat lamps can maintain minimum temperatures necessary for tender plants. However, most gardeners find that igloos provide sufficient passive heating for hardy vegetables and cold-tolerant perennials. If you’re protecting tropical specimens, supplemental heat becomes essential.
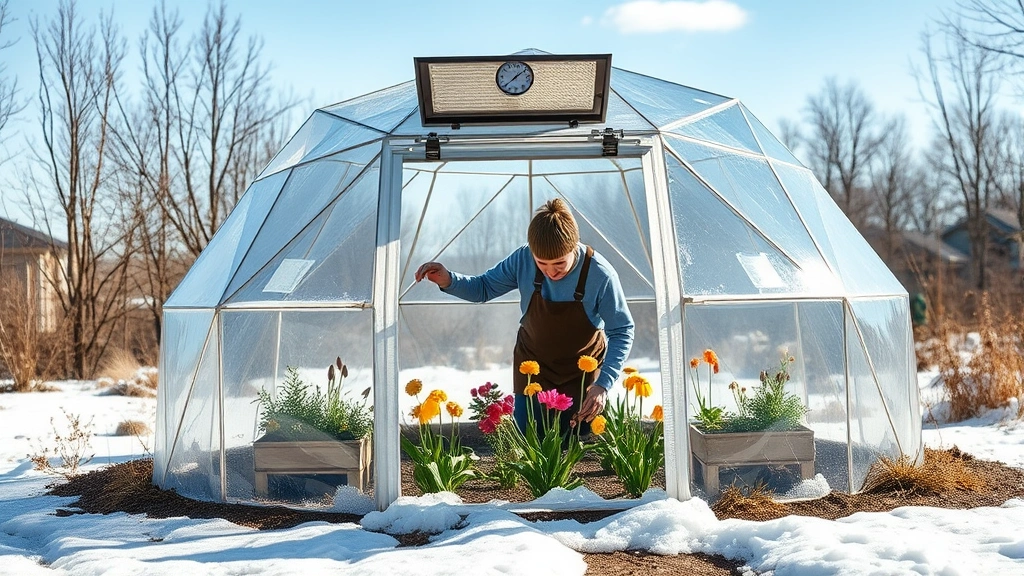
Monitor internal temperatures using a min/max thermometer. These inexpensive devices record the highest and lowest temperatures reached, helping you understand your microclimate and make informed decisions about ventilation and heating needs.
Plant Selection and Spacing Inside Your Igloo
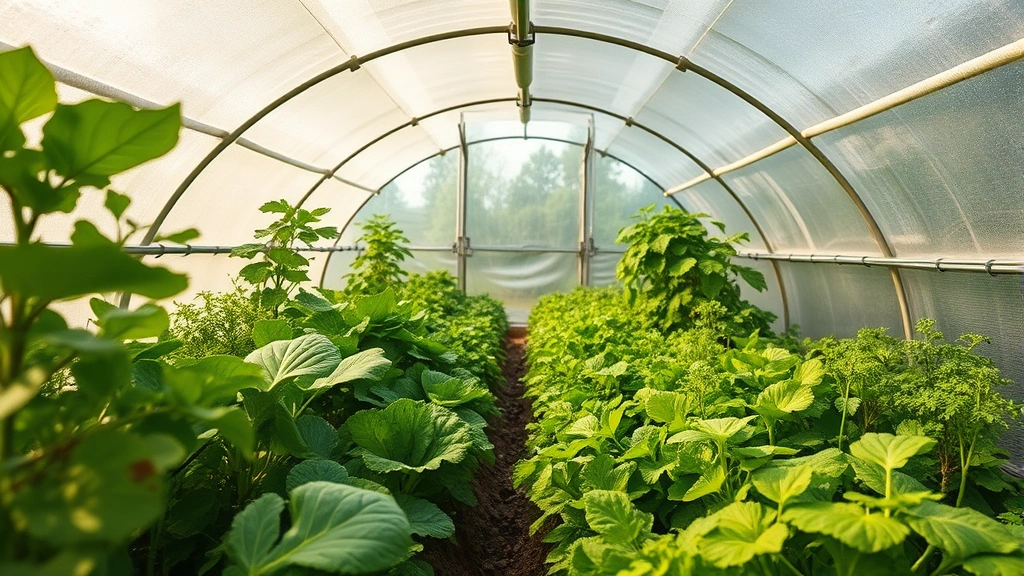
The plants you choose for your garden igloo depend on your goals and climate. Winter vegetables like kale, spinach, lettuce, and arugula thrive in igloo conditions. These cold-hardy crops actually taste better after frost exposure, and igloos extend their harvest window by months. Cool-season crops require minimal heat and prefer the cooler conditions typical of igloos in winter months.
Tender perennials like fuchsia, geraniums, and begonias can overwinter safely in igloos, emerging ready to plant out when frost danger passes. Tropical plants and tender annuals that normally wouldn’t survive winter in cold climates can be overwintered under protection. This is particularly valuable if you’ve invested in specimen plants.
Spring seedlings benefit enormously from igloo protection. Starting seeds indoors and then moving them to the igloo creates a perfect hardening-off environment. The controlled conditions prevent leggy growth while protecting young plants from unexpected late frosts.
Spacing plants appropriately maximizes air circulation and reduces disease pressure. Avoid overcrowding—allow at least 6 inches between plant foliage in all directions. Vertical growing using trellises and supports helps utilize limited space efficiently. Consider the mature size of plants rather than spacing based on current size.
Succession planting works beautifully in igloos. As you harvest cool-season crops, replant that space with more seeds. A single 6-foot igloo can produce multiple harvests of greens throughout winter, providing fresh vegetables when outdoor gardening is impossible. This continuous production approach maximizes your investment in the structure.
Seasonal Adjustments and Maintenance
Your garden igloo requires different management approaches throughout the year. In spring, focus on ventilation as outdoor temperatures warm. Increase vent opening gradually to prevent shocking plants with sudden temperature changes. Monitor for early pest issues—protected environments can attract insects, so inspect plants regularly and address problems early.
Summer management in igloos varies by climate. In cool regions, igloos can be removed or doors left permanently open, converting the space into a simple shade structure. In hot climates, summer heat can become problematic. Some gardeners use shade cloth over the exterior to reduce solar gain, or they grow shade-tolerant plants like lettuce under the igloo in summer.
Fall is when igloos truly shine. As outdoor temperatures drop, close vents gradually and begin protecting plants. This is the ideal time to move tender perennials and overwintering plants into the igloo. Fall is also perfect for planting cool-season vegetables that will mature under igloo protection throughout winter.
Winter maintenance focuses on protecting the structure and managing the environment. Remove snow accumulation promptly—while igloo frames are strong, heavy snow loads can stress the structure and reduce light transmission. Use a soft brush or broom to gently clear snow, avoiding scratching panels. Never use sharp implements that can puncture the plastic covering.
Monitor the covering for damage throughout the year. Small cracks can be sealed with clear silicone caulk, but large tears require panel replacement. Most manufacturers sell replacement panels separately, making repairs affordable and straightforward. Inspect seals and weatherstripping annually, replacing as needed to maintain insulation efficiency.
Clean the exterior panels 2-3 times yearly to maximize light transmission. Use soft cloths and mild soap with water—harsh chemicals can damage plastic coatings. Inside, remove dead plant material regularly to prevent pest and disease buildup. Sterilize tools between plants, especially when moving between different growing areas.
Common Problems and Solutions
Excessive condensation is the most common igloo problem. Water droplets form on interior surfaces, potentially dripping onto plants and promoting fungal growth. Increase ventilation to reduce humidity. Ensure water is reaching only the soil, not the foliage. On cold mornings, open vents briefly to allow warm, moist air to escape. This simple practice dramatically reduces condensation issues.
Pest infestations can escalate quickly in protected environments. Whiteflies, spider mites, and aphids reproduce rapidly in warm, humid conditions. Inspect plants carefully before moving them into the igloo. Use organic pest control methods like insecticidal soap or neem oil at first sign of infestation. Introduce beneficial insects like ladybugs for biological control. The enclosed environment actually makes pest management easier than outdoor gardening—populations can’t immigrate from outside.
Damping off disease causes seedlings to collapse at the soil line. This fungal problem thrives in wet, humid conditions. Prevent it by using sterile seed-starting mix, ensuring excellent drainage, and maintaining good air circulation. Water seedlings in morning so foliage dries quickly. If damping off occurs, remove affected plants immediately and increase ventilation.
Leggy seedlings result from insufficient light. While igloos transmit light well, winter days are short and light angles are low. Supplement with grow lights positioned 6-12 inches above seedlings for 14-16 hours daily. LED grow lights are energy-efficient and produce minimal heat. This supplemental lighting dramatically improves seedling quality and ensures stocky, healthy plants.
Cracked or cloudy panels reduce light transmission and insulation value. Minor cloudiness is cosmetic and doesn’t significantly impact performance. Cracks larger than an inch should be repaired promptly. Use clear silicone caulk for small cracks or order replacement panels for larger damage. Some polycarbonate panels yellow over time—this is normal and doesn’t substantially affect function, though new panels transmit more light.
Structural stress from wind or snow usually indicates improper installation or site selection. Ensure the frame is level and properly anchored. Check that all fasteners remain tight—vibration from wind can loosen bolts over time. If structural issues persist, consult the manufacturer about reinforcement options or consider relocating the igloo to a more sheltered location.
Temperature swings between day and night can stress plants. While some fluctuation is normal and beneficial, extreme swings (60°F+ difference) indicate ventilation problems or insufficient thermal mass. Add water-filled containers inside to absorb daytime heat and release it slowly at night. These thermal batteries moderate temperature swings and improve growing conditions.
FAQ
What size garden igloo should I buy?
Choose based on your available space and growing goals. Six-foot models cover a single garden bed and suit small spaces. Eight-foot models accommodate multiple plantings. Larger 12-15 foot structures function almost like mini-greenhouses. Consider your budget and how much you want to grow. Start smaller if uncertain—you can always add additional igloos later.
Can I leave my garden igloo up year-round?
Yes, most igloos are designed for year-round installation. Some gardeners remove them during summer in hot climates, but they can remain in place. Year-round installation provides protection during unexpected cold snaps and allows continuous growing. Just ensure proper maintenance of the structure and panels.
Do garden igloos need electricity?
Most don’t require electricity. Automatic vent openers use solar power or mechanical temperature sensors. However, supplemental heating for extremely cold climates and grow lights for seedlings may require electricity. Plan for outlet access if you anticipate needing these additions.
How long do garden igloo covers last?
Quality polycarbonate panels typically last 10-15 years with proper care. Cheaper plastic covers may degrade within 3-5 years. UV protection in the plastic slows degradation. Regular cleaning and prompt repair of damage extend panel lifespan significantly. Budget for eventual replacement as part of long-term garden planning.
Can I grow tomatoes in a garden igloo?
Yes, but focus on cool-season varieties and early spring/fall harvests. Summer tomatoes struggle in igloos due to excessive heat unless you provide shade and ventilation. Fall tomatoes that mature under igloo protection often develop excellent flavor. Cherry and determinate varieties work better than large beefsteak types in confined spaces.
What’s the best way to water plants inside an igloo?
Water at soil level in early morning to minimize humidity. Drip irrigation or soaker hoses deliver water efficiently while keeping foliage dry. Avoid overhead watering that promotes fungal diseases. Check soil moisture regularly—enclosed environments can have variable drainage. In winter, water less frequently as plants require less moisture and evaporation is minimal.
How do I prevent overheating on sunny winter days?
Install automatic vent openers that open when temperatures exceed your set threshold. Manually prop open doors on sunny days. Use shade cloth on the exterior during warm periods. Position plants away from areas receiving direct midday sun. These strategies combined prevent damaging heat buildup while maintaining overall warmth.
Is a garden igloo better than a traditional cold frame?
Igloos offer better light transmission, superior insulation, and more usable space than cold frames. Their dome shape distributes wind loads more effectively. However, cold frames are less expensive and more portable. Choose based on your budget, space, and long-term growing plans. Many gardeners use both—cold frames for quick season extension and igloos for serious winter growing.


