Fix Your Garden Hose? DIY Expert Advice
A leaking or damaged garden hose can quickly turn watering day into a frustrating experience. Whether you’re dealing with a small pinhole leak, a burst section, or a broken connector, knowing how to repair your garden hose can save you money and extend its lifespan significantly. Most hose repairs are straightforward DIY projects that require minimal tools and expertise, making them perfect for gardeners of all skill levels.
Garden hoses are essential tools for maintaining healthy plants, watering lawns, and filling water features. When problems arise, you don’t necessarily need to replace the entire hose. With the right techniques and materials, you can restore your hose to working condition and get back to tending your garden. This comprehensive guide walks you through every repair scenario you might encounter, from identifying damage to executing professional-quality fixes.
Identifying Garden Hose Damage
Before you can fix your garden hose, you need to identify exactly what’s wrong with it. Different types of damage require different repair approaches, and understanding the problem is the first step toward a successful solution. Take time to inspect your hose thoroughly, looking for visible signs of wear, damage, or deterioration.
The most common issue gardeners face is small leaks that develop along the hose length. These typically appear as steady drips or small sprays when water is running through the hose. You can locate these leaks by running your hands along the wet hose or by observing where water escapes when the hose is pressurized. Pinhole leaks are particularly common in older hoses or those exposed to prolonged UV radiation and extreme temperatures.
Burst sections represent more severe damage, where the hose material has completely failed and separated. This usually occurs due to freezing damage, excessive pressure, or physical punctures from sharp objects. You’ll notice significant water loss and often audible spraying when the hose is turned on. Burst hoses typically require a more substantial repair involving hose clamps and patch kits, or section replacement.
Connector problems are another frequent issue affecting garden hoses. Leaks may occur at the connection points where the hose attaches to your spigot or sprinkler. These leaks often result from worn washers, damaged threads, or corroded fittings. Additionally, hoses can develop cracks near the base of connectors due to repeated bending or pressure stress at these vulnerable junction points.
Examine your hose for kinks and permanent bends that restrict water flow. While these aren’t technically leaks, they significantly reduce your hose’s functionality. Some kinks can be straightened through careful heating and manipulation, though severely kinked sections may need replacement. Also check for discoloration, brittleness, or chalky surface texture, which indicate UV damage and material degradation.
Essential Tools and Materials
Having the right supplies on hand makes garden hose repair quick and efficient. Most of these items are inexpensive and worth keeping in your gardening toolkit for future use. A well-stocked repair kit ensures you’re prepared for any hose emergency that arises during the growing season.
Start with a quality garden hose repair kit, which typically includes hose clamps, patch material, and adhesive. These kits are available at any hardware or garden center and cost between fifteen and thirty dollars. The patch material usually consists of rubber or vinyl that bonds to the hose with provided adhesive, creating a waterproof seal around damaged areas.
You’ll need hose clamps in various sizes to secure patches and connectors. Stainless steel clamps resist corrosion better than standard metal versions, making them ideal for outdoor gardening applications. Keep clamps ranging from one-half inch to one inch in diameter to accommodate different hose sizes and repair scenarios.
A sharp utility knife or hose cutter helps you make clean cuts when replacing damaged sections. Hose cutters are specifically designed for this purpose and create perfectly straight edges that seal properly with connectors. If using a utility knife, ensure the blade is sharp and you cut slowly and deliberately to avoid crushing the hose material.
Connector replacements and end fittings are essential supplies for fixing attachment points. Purchase universal hose connectors that match your hose diameter, typically three-quarter inch for standard residential hoses. Keep replacement washers in your toolkit, as worn washers are the most common cause of connector leaks and are the cheapest fix available.
Additional helpful items include waterproof tape, thread seal tape, a hose repair splice kit, and a wrench for tightening fittings. Teflon tape (also called plumber’s tape) wraps around threaded connections to create watertight seals. A small adjustable wrench helps you tighten connector fittings without over-tightening, which can damage the hose material.
Fixing Small Leaks and Pinhole Damage
Small leaks and pinhole damage represent the most common garden hose problems and are the easiest to repair. These minor issues typically develop gradually, and addressing them quickly prevents water waste and maintains consistent water pressure for your gardening tasks.
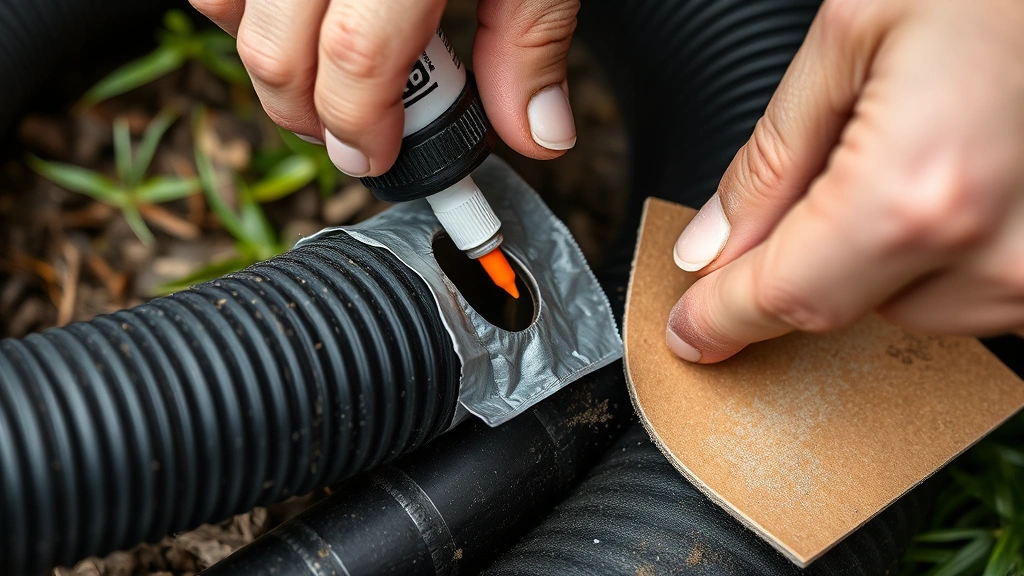
To repair a pinhole leak, first locate the exact spot and mark it with a permanent marker or tape. Turn off the water and allow the hose to dry completely. The repair patch won’t adhere properly to wet or damp surfaces, so patience at this stage is crucial. You can speed drying by wiping the area with a clean cloth or leaving the hose in direct sunlight for an hour.
Once the hose is dry, follow your repair kit instructions carefully. Most kits require roughening the area around the hole with sandpaper to improve adhesion. Gently sand in circular motions for thirty seconds, then wipe away dust with a dry cloth. Apply the adhesive according to kit directions, usually spreading a thin, even layer around the damaged area.
Press the patch firmly over the hole, holding it in place for the time specified in your kit instructions, typically two to three minutes. Some patches require additional reinforcement from waterproof tape wrapped around the hose. This extra layer of protection significantly increases the repair’s longevity, especially for frequently-used hoses or those exposed to intense sun.
Allow the adhesive to cure fully before using the hose again. Most products require four to six hours of curing time, though some modern formulations work faster. Resist the temptation to test the repair early, as incomplete curing will compromise the seal. After curing, turn on the water slowly and check for leaks before resuming normal watering activities.
For multiple small leaks along the same hose, consider whether repair makes economic sense. If you’re patching more than two or three leaks, the hose material may be degrading overall, and replacement might be more cost-effective long-term. However, one or two small repairs can extend a hose’s useful life by several seasons.
Repairing Burst Hoses
Burst hoses present more challenging repair scenarios but are still fixable with the right approach. These more severe failures typically occur when frozen water expands inside the hose or when excessive pressure overwhelms the hose material. Burst damage requires either patching with reinforced sleeves or replacing the damaged section entirely.
For burst sections longer than one inch, hose section replacement offers the most reliable permanent solution. Measure the damaged area and add one inch on each side to determine how much hose to remove. Mark your cut lines clearly with tape or marker, then use a sharp hose cutter or utility knife to remove the damaged section with clean, perpendicular cuts.
Insert a universal hose splice fitting into the cut ends, sliding the hose firmly onto both ends of the connector. Secure each end with stainless steel hose clamps positioned just beyond the hose end to prevent slipping. Tighten the clamps firmly but not excessively, using a screwdriver or wrench to snug them until resistance is felt.
Test the connection under full water pressure, checking for leaks at both clamp points. If leaks appear, tighten the clamps incrementally until the leak stops. Most properly installed splice connections perform reliably for years, though they represent a slight weak point in the hose. Some gardeners prefer replacing the entire hose rather than creating a splice, depending on the hose age and condition.
For smaller burst areas, you can apply reinforced patch sleeves designed specifically for this purpose. These sleeves wrap around the hose and are secured with clamps on both sides of the damage. The sleeve method works well for burst damage up to two inches long and costs less than section replacement. However, the repair is slightly more visible than a seamless splice connection.
Burst damage near connectors requires special attention, as the hose material is typically weaker in these areas. If the burst occurs within two inches of a connector, replacement of both the connector and adjacent hose section is recommended. This ensures the repair sits on undamaged hose material where clamps can grip effectively.
Replacing Connectors and Ends
Connector failures are among the easiest hose problems to fix and require minimal tools or expertise. Leaking connections often result from worn washers, damaged threads, or corrosion at the fitting points. Fortunately, these components are inexpensive and quick to replace, restoring your hose to full functionality.
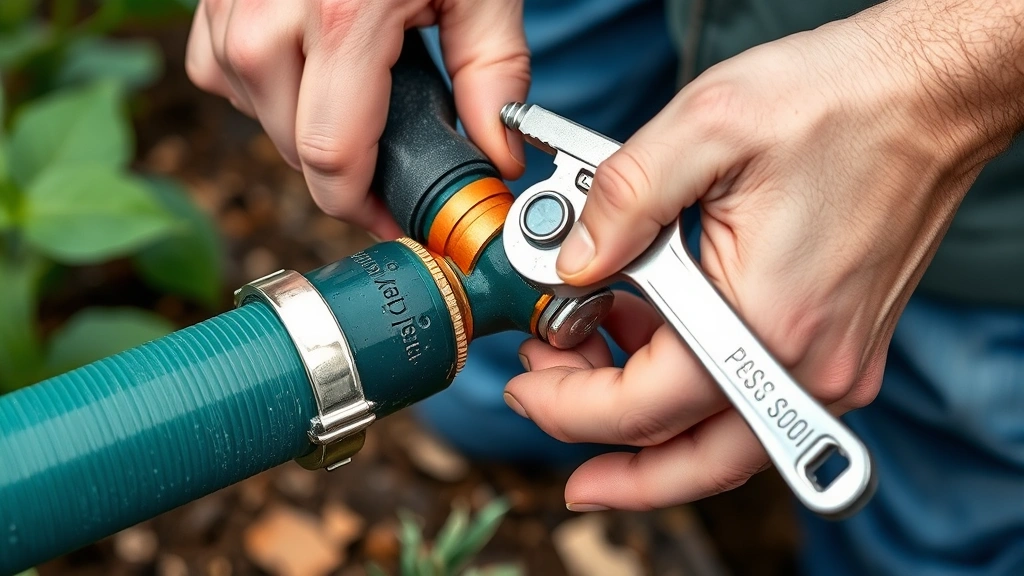
To replace a leaking connector, first turn off the water and allow the hose to depressurize. Use an adjustable wrench to loosen the connector fitting by turning counterclockwise. Some connectors unscrew by hand once you’ve broken the initial seal, making the wrench unnecessary. Carefully separate the hose from the old connector.
Examine the hose end for damage, cracks, or deformation. If the hose end appears damaged or crushed, you may need to trim away damaged material before installing a new connector. Use a sharp hose cutter to remove one-quarter to one-half inch from the hose end, creating a fresh surface for the new fitting.
Install the new connector by sliding the hose firmly onto the fitting until it stops. Insert a new washer if your connector design uses one, ensuring it sits properly in the connector body. Hand-tighten the connector, then use your wrench to snug it firmly. Avoid over-tightening, which can crack the connector or damage the hose material.
When preparing your garden for the season, check all hose connectors for leaks and wear. Replacing worn connectors before they fail prevents water waste and pressure loss. Keep spare connectors in multiple sizes to handle any hose in your gardening arsenal.
Thread seal tape provides additional protection at connector points, creating watertight seals on threaded connections. Wrap the tape clockwise around male threads three to four times before connecting, filling any small gaps that might allow water to escape. This simple step significantly improves connection reliability, especially on older fittings or those exposed to temperature fluctuations.
Prevention and Maintenance Tips
Preventing hose damage is far more effective than repeatedly repairing the same problems. Proper storage, careful handling, and regular maintenance practices significantly extend your hose’s lifespan and reduce the likelihood of failure during critical watering periods.
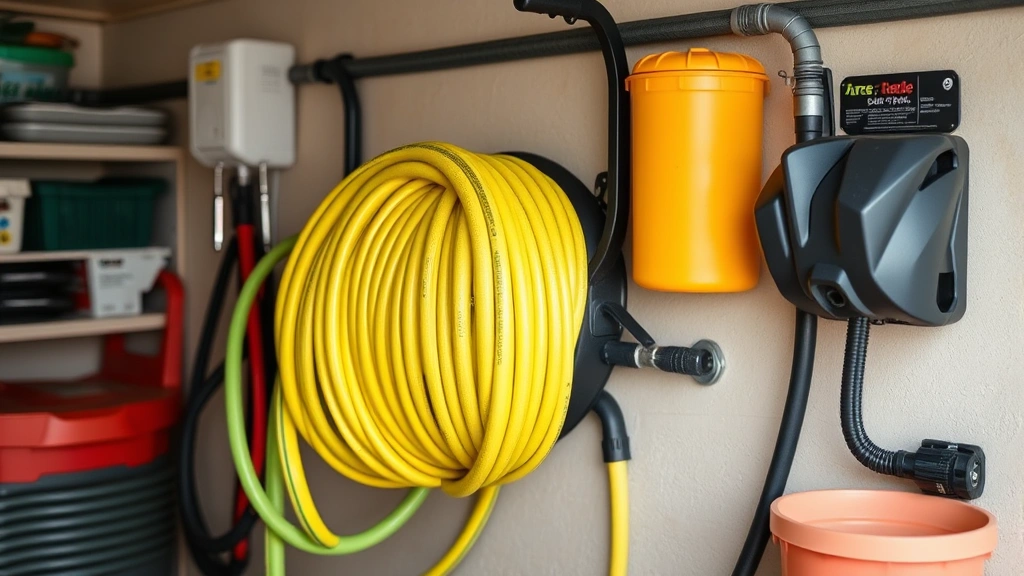
Store your hose properly when not in use, ideally coiled loosely on a hose reel rather than kinked on the ground. Tight kinks create stress points where the hose material weakens and eventually fails. Hose reels keep your hose organized, protected, and ready for quick deployment. Choose a reel with smooth winding mechanisms that won’t pinch or crush the hose.
During winter months, drain your hose completely before storing it for the season. Water left inside the hose freezes and expands, causing burst damage that’s impossible to repair. Disconnect the hose from your spigot and hang it vertically to allow complete drainage. Store it in a cool location away from direct sunlight, which degrades rubber and vinyl materials over time.
Protect your hose from UV damage by storing it indoors or under cover when not in use. Prolonged sun exposure causes the outer material to become brittle and chalky, making the hose prone to cracking and leaking. If you must store your hose outdoors, use a hose storage box or cover to shield it from direct sunlight.
Inspect your hose regularly throughout the growing season, checking for small leaks before they become major problems. A few minutes of inspection every two weeks catches developing issues early when repairs are simple and inexpensive. Pay special attention to connector points, where most leaks originate, and the areas under heavy use.
Avoid dragging your hose across rough surfaces, sharp edges, or hot pavement. Always carry your hose by the connector or reel it up carefully to prevent punctures and abrasion damage. When moving the hose around your garden, gently guide it around obstacles rather than forcing it through tight spaces where it might catch or tear.
Maintain consistent water pressure in your system, as excessive pressure damages hoses prematurely. If your water pressure exceeds eighty pounds per square inch, install a pressure regulator to protect your hose and other watering equipment. Check your local water pressure by consulting your water utility or using an inexpensive pressure gauge.
When preparing raised garden beds or establishing new garden areas, plan your hose routing to minimize bending and stress. Lay hoses along garden edges where they won’t be repeatedly stepped on or driven over. Consider installing permanent drip irrigation systems for areas requiring frequent watering, reducing reliance on traditional hoses.
Clean your hose periodically by flushing it with clean water to remove sediment and mineral deposits. These accumulations can clog spray nozzles and create pressure imbalances that stress the hose material. At season’s end, run water through your hose for several minutes to clear any debris before storage.
Quality hoses cost more initially but resist damage better and last considerably longer than budget options. Premium hoses feature reinforced material, superior connector fittings, and better UV protection. If you use your hose frequently or have had recurring problems with cheaper hoses, investing in a quality product pays dividends over several seasons.
Consider your specific gardening needs when selecting replacement hoses. Soaker hoses work better than traditional hoses for flower gardens and plant beds, reducing water waste and delivering moisture directly to roots. Flat hoses take up less storage space than traditional round hoses, making them ideal for small gardens or patios. Expandable hoses stretch when pressurized and compress when empty, offering convenient storage and portability.
FAQ
How long does a garden hose typically last?
Quality garden hoses typically last five to seven years with proper maintenance, though some premium hoses can last ten years or longer. Budget hoses may fail within two to three years, especially if exposed to harsh weather or improper storage. Regular inspection and prompt repairs significantly extend any hose’s lifespan.
Can I repair a hose that’s completely burst in the middle?
Yes, burst sections can be repaired using splice fittings and hose clamps or by replacing the damaged section entirely. For burst areas longer than one inch, section replacement offers the most reliable solution. Smaller burst damage can be patched with reinforced sleeves and clamps, though the repair is less permanent than a splice.
What’s the best way to store a garden hose over winter?
Drain your hose completely and store it coiled loosely on a hose reel in a cool, protected location away from direct sunlight. Never store a hose where it might freeze while containing water, as ice expansion causes burst damage. Indoor storage in a garage or shed is ideal for protecting hoses from harsh winter conditions.
Why does my new hose have leaks at the connectors?
New hoses sometimes have leaking connectors due to loose fittings or missing washers. Tighten the connector firmly using a wrench, and if leaking continues, check that the washer is properly seated. If the problem persists, the connector may be defective, and you should exchange it for a replacement.
Is it better to repair or replace a damaged garden hose?
For hoses with one or two small leaks, repair is usually cost-effective and extends the hose’s life several more years. If your hose has multiple leaks, is very old, or requires frequent repairs, replacement is more economical. Consider the hose age, quality, and frequency of repairs when making this decision.
How can I prevent my hose from kinking?
Store your hose coiled loosely on a reel rather than kinked on the ground. When using the hose, gently guide it around obstacles and avoid sharp bends. Some hose designs resist kinking better than others, so consider purchasing a kink-resistant hose if you frequently experience this problem.
What’s the difference between a splice fitting and a patch repair?
Splice fittings are used for burst sections and create a strong connection between two hose pieces by inserting a connector into both ends. Patch repairs cover small holes or pinhole leaks using adhesive-backed rubber or vinyl material. Splice fittings are more permanent for major damage, while patches work better for minor leaks.


