How to Make Raised Garden Beds: Expert DIY Guide
Raised garden beds are one of the most transformative additions you can make to your gardening space. Whether you’re working with poor soil, limited square footage, or simply want better control over your growing environment, these elevated structures offer practical solutions that yield impressive results. Building your own raised garden beds is more achievable than you might think, and the process requires minimal carpentry experience.
The beauty of raised beds lies in their versatility and accessibility. They warm up faster in spring, drain better than in-ground gardens, and provide excellent ergonomic benefits by reducing bending and strain on your back. Most gardeners find that their raised beds produce more abundantly than traditional gardens, thanks to superior soil quality and easier maintenance. This comprehensive guide walks you through every step of the process, from planning and material selection to filling and planting your first crops.
Choosing Your Location and Size
Location is paramount when building raised garden beds. Spend time observing your yard throughout a full day to identify areas receiving six to eight hours of direct sunlight. Most vegetables require this minimum amount of light to thrive. If you’re planning a shade garden with leafy greens and herbs, four to six hours of filtered sunlight works well.
Consider proximity to water sources and your home. Beds located near outdoor faucets reduce the time spent hauling water during dry periods. Accessibility matters too—you’ll spend more time tending beds that are conveniently located. Avoid placing beds directly under large trees, where root competition and excessive shade will frustrate your efforts.
Standard raised bed dimensions are 4 feet by 8 feet by 12 inches deep, though many gardeners prefer 4 feet by 4 feet beds for easier reach to the center without stepping inside. Deeper beds, typically 18 to 24 inches, accommodate root vegetables like carrots, parsnips, and potatoes more effectively. For most vegetables, 12 inches of soil depth suffices. Calculate the square footage you’ll need based on your gardening goals—most home gardeners find that 64 to 128 square feet of bed space produces substantial yields.
Selecting Materials for Your Beds
Wood remains the most popular choice for raised bed construction. Cedar and redwood naturally resist decay and won’t require chemical treatment, making them food-safe options. These premium woods cost more but last 10 to 15 years. Untreated pine boards cost less but typically last 5 to 7 years before rotting. Avoid pressure-treated wood containing harmful chemicals, particularly for vegetable gardens.
Composite materials and recycled plastic lumber offer longevity without maintenance, though they cost significantly more upfront. Galvanized metal and corrugated steel create modern-looking beds that last decades. Some gardeners repurpose materials like old pallets or logs, though durability varies considerably.
For a standard 4×8 bed with 12-inch depth, you’ll need eight linear feet of boards, typically two 8-foot boards and two 4-foot boards. Thickness matters—2-inch boards provide better structural integrity than 1-inch boards, especially for larger beds. When selecting garden tools and materials, quality investments pay dividends through extended use and better results.
Fastening materials deserve attention too. Galvanized or stainless steel screws resist rust better than regular nails, and screws hold joints more securely. Plan on using 3-inch exterior-grade screws at each corner—typically three screws per joint for stability. Avoid nails when possible, as they loosen over time as wood settles.
Essential Tools and Preparation
Before beginning construction, gather the following tools: a power drill with bits, a circular saw or handsaw, a carpenter’s square, a level, a tape measure, and work gloves. A miter saw makes precise cuts easier, though a circular saw works adequately. A rubber mallet helps drive boards into alignment during assembly.
Prepare your site by removing grass, weeds, and debris from the area where your bed will sit. Use a spade or sod cutter to strip away the top layer of vegetation. While not absolutely necessary, removing sod prevents perennial weeds from pushing up through your new bed and reduces competition for nutrients. If your site is relatively level, minimal grading is needed. For sloped sites, you may need to level the ground or build beds at different heights on each side.
Check that your building area is free of underground utilities before digging. Call your local utility locating service (811 in the United States) to mark gas lines, electrical lines, and water pipes. This simple step prevents dangerous and costly accidents.
Building the Frame Step-by-Step
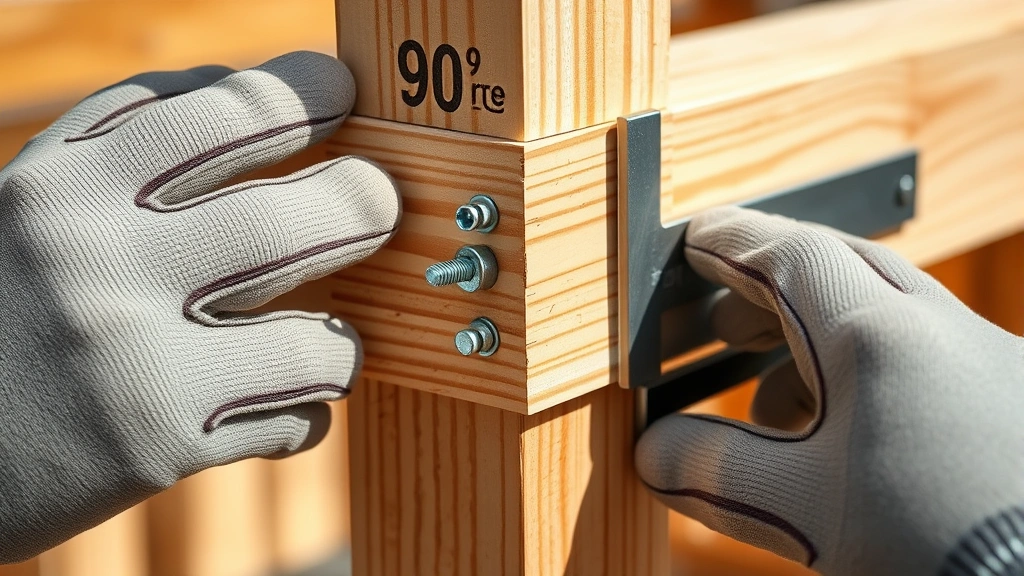
Begin by cutting your boards to length if they’re not pre-cut. For a 4×8 bed, you’ll have two 8-foot pieces and two 4-foot pieces. Lay all pieces on a flat surface and arrange them in a rectangle. Attach the corners using your drill and screws, driving three screws through the end of each board into the side board at a slight angle for maximum holding power.
Before tightening all fasteners completely, use your carpenter’s square to verify that corners form 90-degree angles. Adjust as needed, then fully tighten all screws. Check the frame for levelness using your level across multiple points. Small adjustments at this stage prevent problems later.
For beds larger than 4×8 feet, add internal support boards running lengthwise down the middle. This prevents bowing of the long sides, which occurs as soil weight builds. These support boards should be securely fastened to both end boards.
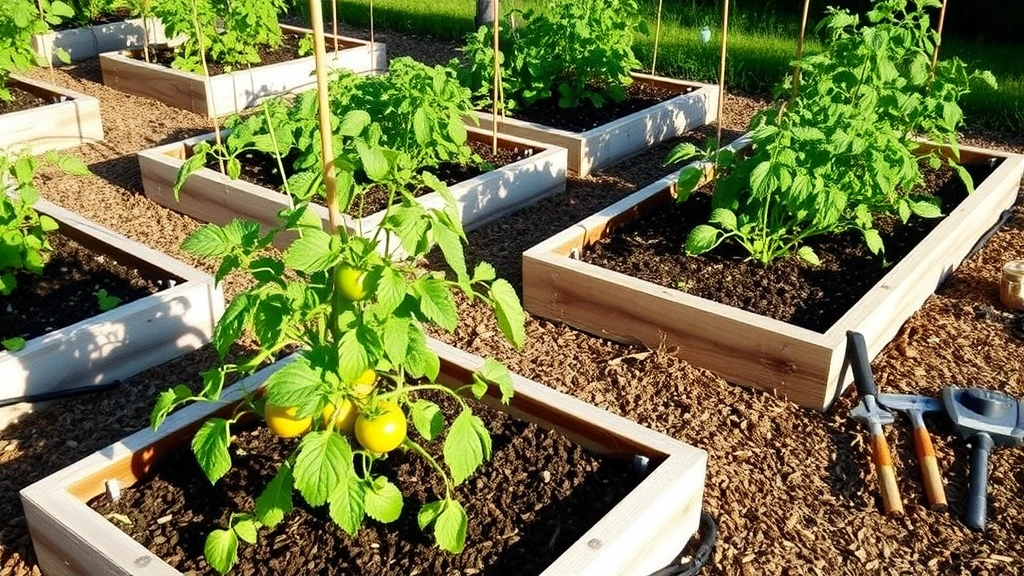
If building multiple beds, consider spacing them 2 to 3 feet apart to allow comfortable access and room for wheelbarrows and tools. Align beds in rows for a neat, organized appearance that maximizes your growing space.
Preparing the Foundation
Position your completed frame in its final location. Verify once more that it’s level, making minor adjustments by adding or removing soil beneath the frame. Some gardeners install landscape fabric on the ground beneath beds to suppress weeds, though this isn’t essential if your site preparation was thorough.
If you’re concerned about burrowing pests like gophers or moles, install hardware cloth (1/4-inch mesh) on the bottom before filling. Fold the edges up slightly along the inside perimeter to prevent rodents from burrowing around the sides. This extra step adds cost and labor but provides peace of mind in problem areas.
For beds built on concrete or hardscape, ensure adequate drainage by drilling holes in the bottom boards or installing the frame slightly above the surface to allow water to escape. Poor drainage in these situations leads to waterlogged soil and root rot.
Filling Your Raised Beds
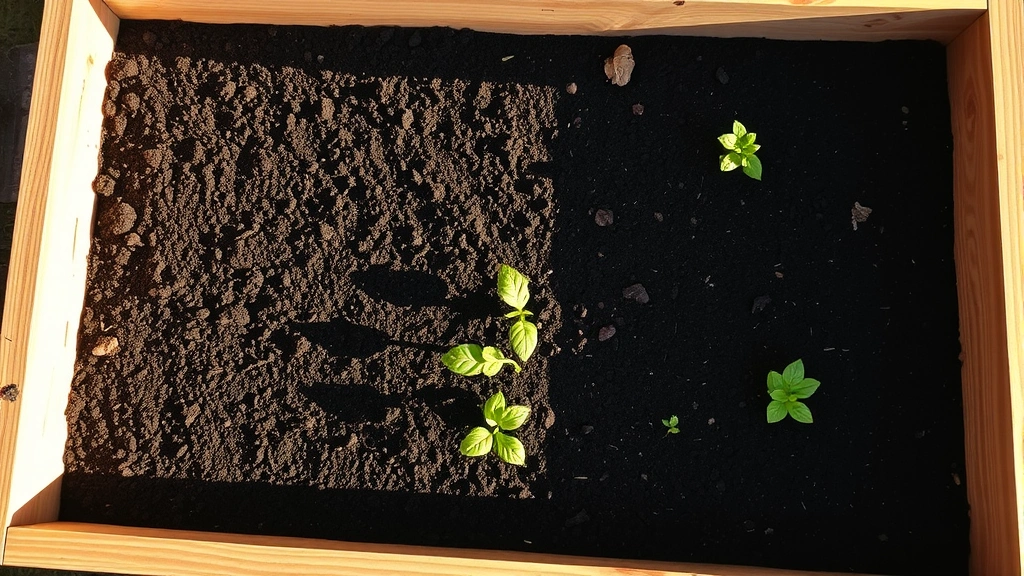
Filling your beds properly is crucial for success. The best soil for a garden bed combines topsoil, compost, and other organic materials. A popular recipe uses 40% topsoil, 40% compost, and 20% peat moss or coconut coir, though ratios can be adjusted based on availability and cost.
For a 4x8x12-inch bed, you’ll need approximately 32 cubic feet of soil mix. Most soil suppliers sell by the cubic yard (27 cubic feet), so you’ll need roughly 1.2 cubic yards. Ordering slightly more accounts for settling.
Begin by adding a 2-inch layer of coarse compost or aged manure to the bottom. This layer improves drainage and provides slow-release nutrients. Layer your soil mix on top, mixing the components together as you fill rather than adding them in distinct layers. This creates a more uniform growing medium. Water the bed gently as you fill to help soil settle and eliminate air pockets.
The soil will settle over the first few weeks, dropping 1 to 3 inches depending on the materials used and moisture content. Plan on adding more soil before planting if needed. Avoid stepping inside the bed during this settling period, as compacting the soil undoes your careful preparation.
Adding Finishing Touches
Once your bed is filled and settled, add a 2 to 3-inch layer of mulch to the surface. Straw, shredded leaves, or wood chips conserve moisture, regulate soil temperature, and suppress weeds. Avoid mulching directly against plant stems to prevent rot and pest problems.
Install drip irrigation or soaker hoses before planting for convenient, efficient watering. These systems deliver water directly to the root zone, reducing waste and disease problems common with overhead watering. Drip systems are particularly valuable during hot summers when daily watering becomes necessary.
Consider adding trellises or supports for climbing vegetables like tomatoes, peas, and cucumbers. Installing these structures when building the bed is easier than adding them later. A sturdy trellis system extends your growing space vertically and improves air circulation.
If you’re interested in unique gardening approaches, explore fairy garden ideas to add whimsical elements to your vegetable beds. Many gardeners combine practical vegetable production with decorative touches that enhance their outdoor spaces.
Maintaining Your Raised Beds
Raised beds require less maintenance than traditional gardens, but regular care extends their productivity. Top-dress beds annually with 1 to 2 inches of compost to replenish organic matter and nutrients. This practice improves soil structure and supports beneficial microbial activity.
Monitor wood condition annually, particularly if you’re using cedar or redwood. While these woods resist decay better than pine, they eventually weather. Some gardeners apply food-safe wood stain to extend the life of wooden beds. Never use toxic wood preservatives on vegetable garden beds.
Rotate your crops each season to prevent soil depletion and reduce pest and disease pressure. Heavy feeders like tomatoes and corn should follow nitrogen-fixing legumes like beans and peas. Root vegetables work well after leaf crops. This rotation system maintains soil health and improves long-term productivity.
Seasonal adjustments matter too. In spring, add fresh compost before planting warm-season crops. Fall gardens benefit from planting cover crops like clover or winter rye that improve soil when tilled in during spring. Summer mulching becomes critical in hot climates to keep roots cool and conserve water.
If you’re growing specialty crops, research specific requirements for success. Our guide on how to grow pumpkin plants provides detailed instructions for these space-hungry vegetables that perform exceptionally well in raised beds with proper planning.
FAQ
How deep do raised garden beds need to be?
Depth depends on what you’re growing. Most vegetables thrive in 12 inches of soil, but root vegetables like potatoes, carrots, and parsnips benefit from 18 to 24 inches. Shallow-rooted herbs and lettuce manage well in 8 to 10 inches. Consider the deepest-rooted crops you plan to grow and build accordingly.
Can I use treated wood for vegetable gardens?
Modern pressure-treated wood is considered safe for vegetable gardens by most extension services, as it no longer contains arsenic. However, many gardeners prefer untreated cedar or redwood for peace of mind. If cost is a concern, untreated pine works fine for 5 to 7 years, then can be replaced.
How often should I water raised beds?
Raised beds typically need water more frequently than in-ground gardens because they drain faster and warm up more quickly. During growing season, most beds need 1 to 2 inches of water weekly, delivered through soaker hoses or drip irrigation. Hot climates may require daily watering. Check soil moisture 2 to 3 inches deep before watering.
What’s the best soil mix for raised beds?
A blend of 40% topsoil, 40% compost, and 20% peat moss or coconut coir creates excellent growing medium. Some gardeners adjust ratios based on local availability. The key is ensuring good drainage while maintaining adequate organic matter for nutrients and water retention.
Can I build raised beds on top of grass?
Yes, though removing the grass first prevents weeds from growing up through your bed. If you skip this step, lay landscape fabric on the ground before filling to suppress grass growth. The sod underneath eventually decomposes and adds organic matter to your soil.
How many raised beds do I need?
This depends on your gardening goals and household size. Most families find that 64 to 128 square feet of bed space (one to two 4×8 beds, or four to eight 4×4 beds) produces substantial yields for home consumption. Start with less space and expand as you gain confidence and determine your actual needs.


