Choose the Right Garden Tractor Battery: Pro Advice
A reliable garden tractor battery is the heart of your landscaping operation, powering everything from your mower’s ignition to essential electrical components. Whether you’re maintaining a sprawling estate or managing a mid-sized residential property, selecting the correct battery can mean the difference between seamless seasonal work and frustrating breakdowns during critical growing periods. This comprehensive guide walks you through the technical specifications, maintenance strategies, and selection criteria that professional groundskeepers and serious gardeners use to keep their equipment running year-round.
Garden tractors demand more from their batteries than typical vehicles because they operate in variable conditions—from early spring frost to summer heat, often sitting idle for weeks between uses. Understanding your tractor’s power requirements, battery chemistry, and climate considerations ensures you invest in a unit that delivers consistent performance when you need it most. We’ll explore everything from cold cranking amps to terminal types, helping you make an informed decision that protects your equipment and maximizes your gardening productivity.
Understanding Garden Tractor Battery Basics
A garden tractor battery serves multiple critical functions beyond simply starting your engine. It powers the starter motor, provides electrical energy for the ignition system, and supports auxiliary lights and controls that modern equipment increasingly relies upon. Unlike automotive batteries that receive constant charging during highway driving, garden tractor batteries experience irregular usage patterns—sometimes sitting dormant for weeks during winter or between seasonal projects.
The fundamental principle behind any battery is the chemical reaction that generates electrical current. Inside your battery, lead plates immersed in sulfuric acid solution create electron flow that powers your tractor’s electrical systems. When the alternator runs, it replenishes this energy. However, when your tractor sits idle or operates at low RPM, the charging system may not fully recharge the battery, leading to gradual capacity loss over time.
Most garden tractors use 12-volt batteries, though some larger commercial models may use 24-volt systems. The 12-volt standard has become nearly universal because it provides sufficient power for engine starting while remaining safe for residential equipment. Understanding whether your tractor uses a single 12V battery or dual 12V batteries in series is your first critical step in selection.
Battery Types and Chemistry
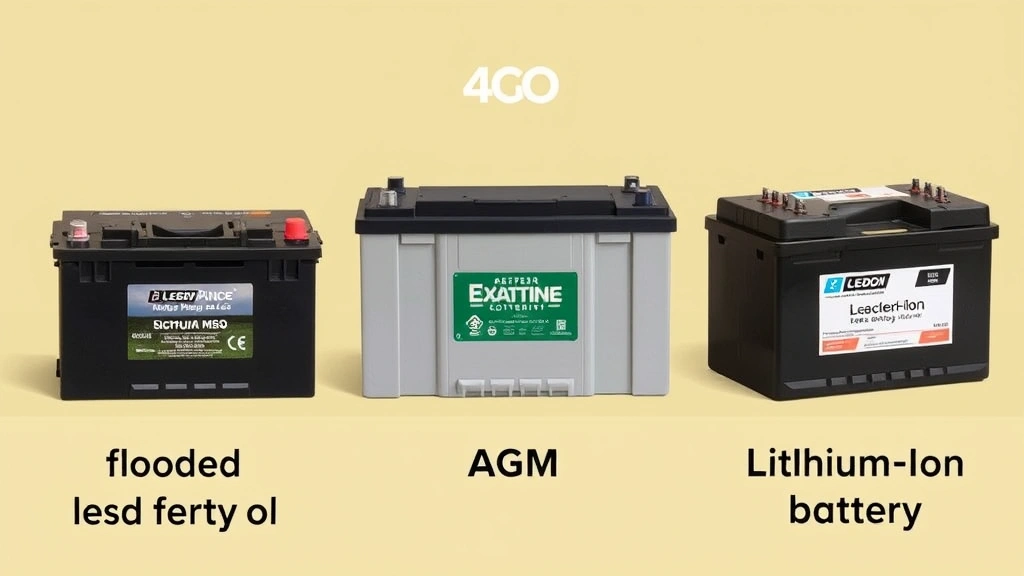
Three primary battery chemistries dominate the garden equipment market: lead-acid (flooded), absorbed glass mat (AGM), and lithium-ion. Each offers distinct advantages depending on your climate, usage patterns, and budget considerations.
Lead-Acid Batteries represent the traditional choice and remain the most affordable option. These flooded-cell batteries contain liquid electrolyte and require periodic maintenance, including water level checks. They perform adequately in moderate climates and tolerate occasional overcharging from older charging systems. However, they’re sensitive to cold weather and may struggle to crank engines in temperatures below freezing. Lead-acid batteries also discharge relatively quickly when sitting idle, making them less suitable if you store your tractor for extended winter periods.
Absorbed Glass Mat (AGM) Batteries eliminate the need for water maintenance by absorbing the electrolyte into fiberglass mats. AGM batteries charge faster, hold their charge longer during storage, and perform significantly better in cold weather conditions. They’re also more vibration-resistant, making them ideal for rough terrain operation. The trade-off is higher initial cost—typically 50-100% more than comparable lead-acid units. For serious gardeners and professional landscapers, AGM batteries often represent superior long-term value despite upfront expense.
Lithium-Ion Batteries represent the newest technology and are becoming increasingly available for garden equipment. These batteries offer exceptional cold-weather performance, extreme charge retention during storage, and superior cycle life. However, they come at premium prices and require compatible charging systems. Some older garden tractors cannot properly charge lithium batteries, so compatibility verification is essential before purchasing.
Key Specifications Explained
Reading a battery specification sheet requires understanding several technical terms that directly impact performance in your specific situation.
Cold Cranking Amps (CCA) measures how much current a battery can deliver for 30 seconds at 0°F while maintaining at least 7.2 volts. This specification is crucial if you live in cold climates or operate your tractor in winter conditions. Higher CCA ratings ensure reliable engine starting even when temperatures drop. For garden tractors, 300-400 CCA typically suffices, though northern gardeners should consider 500+ CCA ratings for winter reliability.
Cranking Amps (CA) is similar to CCA but measured at 32°F rather than 0°F. This specification is less critical for most gardeners but provides useful context when comparing batteries intended for moderate climates.
Amp-Hour (Ah) Capacity indicates how much charge the battery can store and deliver. A battery rated at 50 Ah can theoretically deliver 5 amps for 10 hours, or 1 amp for 50 hours. Higher Ah capacity means longer runtime for electrical accessories and better reserve power if your alternator undercharges. Most garden tractor batteries range from 30-60 Ah.
Reserve Capacity (RC) measures how many minutes a fully charged battery can supply 25 amps before dropping below 10.5 volts. This specification directly relates to how long your tractor will run if the alternator fails. Reserve capacity of 90-120 minutes is standard for garden tractors.
Sizing Your Battery Correctly
Selecting the wrong size battery—either oversized or undersized—creates problems ranging from poor performance to equipment damage. Your tractor’s manufacturer specifies exact battery requirements, typically found on the battery hold-down bracket or in the owner’s manual.
Never assume that a larger battery is automatically better. Oversized batteries can strain your charging system, leading to premature alternator failure. The alternator is designed to charge a specific battery capacity; exceeding this creates excessive voltage regulation demands. Conversely, undersized batteries cannot store sufficient charge to reliably start your engine, particularly in cold conditions or after extended storage.
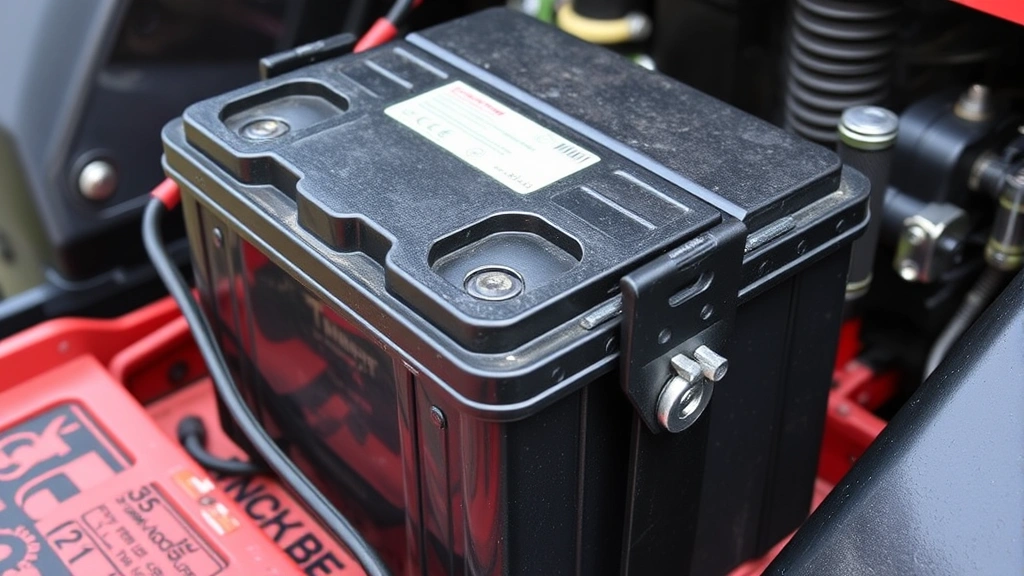
The physical dimensions matter equally. Garden tractor battery compartments have specific space constraints. A battery that’s too large won’t fit, and forcing it can damage terminal connections or crack the case. Most tractors use Group U1, Group 24, or Group 27 battery sizes. These designations standardize dimensions and terminal locations, ensuring proper fit and secure connection.
When replacing an old battery, use it as your reference guide. Note the group size, voltage (usually 12V), and approximate Ah capacity. If your tractor frequently struggles to start or you’re upgrading from lead-acid to AGM technology, consult your owner’s manual or contact the manufacturer to confirm that your charging system can accommodate the new battery type.
Installation and Terminal Connections
Proper installation prevents electrical fires, equipment damage, and personal injury. Follow these essential steps whenever installing a garden tractor battery.
First, disconnect the negative terminal from your old battery using an appropriately sized wrench. This critical safety step prevents accidental short circuits. Then remove the positive terminal connection. Always work negative-first, positive-second when disconnecting; reverse this order when connecting new batteries.
Inspect the battery hold-down bracket and compartment for corrosion or damage. Clean corroded surfaces with a wire brush and baking soda solution. Ensure the bracket is structurally sound—a loose battery can shift during operation, damaging terminal connections or cracking the case.
Position your new battery in the compartment, ensuring it sits level and secure. Install the hold-down bracket firmly but don’t overtighten, which can crack the battery case. Connect the positive terminal first, then the negative terminal. This reversed connection order (opposite from disconnection) ensures that any accidental wrench contact won’t create a short circuit through the vehicle frame.
Check that both terminals are clean and make solid contact. Corroded or loose connections dramatically reduce charging efficiency and can prevent engine starting. If terminals show green or white corrosion, clean them with a wire brush before final connection.
After installation, run your tractor briefly to confirm the charging system is functioning. Your alternator should maintain battery voltage between 13.5-14.5 volts during operation. Voltages below 13 volts indicate charging system problems requiring professional service.
Seasonal Maintenance Tips
Your battery’s performance fluctuates with seasonal temperature changes, requiring adjusted maintenance strategies throughout the year.
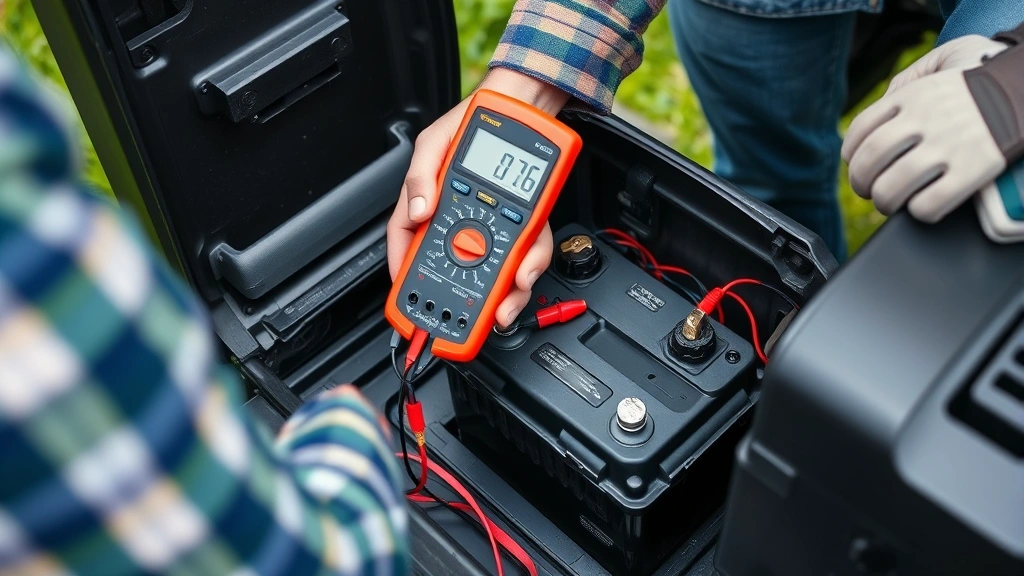
Spring Preparation begins after winter storage. Inspect the battery for cracks, leaks, or corrosion. Test its voltage with a multimeter—a healthy battery should read 12.6 volts or higher when the tractor isn’t running. If voltage drops below 12.4 volts, your battery needs charging before you attempt engine starting. This preparation prevents strain on the starter motor and ensures reliable performance for the entire growing season.
Summer Operation presents unique challenges because heat accelerates battery chemical reactions and increases evaporation in flooded lead-acid cells. Check water levels monthly in traditional batteries, topping them with distilled water if necessary. Keep the battery compartment clean and ensure adequate ventilation to prevent heat buildup. Consider installing a battery thermal wrap if you operate in consistently hot climates.
Fall Maintenance should focus on battery health assessment before winter storage. Run a load test to confirm the battery can handle cold-weather starting demands. If your battery struggles with starting or won’t hold charge, replace it before winter arrives. Installing a smart battery charger before storage maintains optimal charge levels throughout dormant months, preventing the sulfation that occurs when batteries sit partially discharged.
Winter Storage requires special attention, particularly if you live in cold climates. A fully charged battery resists freezing better than a discharged one, so ensure your battery reaches 100% charge before storage. Consider removing the battery entirely and storing it indoors in a climate-controlled location, using a trickle charger to maintain charge. This approach extends battery life significantly compared to outdoor storage.
Extending Battery Life
With proper care, a quality garden tractor battery typically lasts 3-5 years. Several practices can push that lifespan toward 6+ years.
Minimize Parasitic Drain by disconnecting the negative terminal if you’re storing your tractor for more than two weeks. Some tractors have electrical components that draw small amounts of current even when the engine is off. This parasitic drain slowly depletes your battery, causing sulfation that reduces capacity. A simple negative terminal disconnect eliminates this problem without affecting your tractor’s function.
Avoid Deep Discharges by operating your tractor regularly during the season. Batteries designed for garden equipment perform best with frequent, shallow discharge cycles. If you use your tractor only once monthly, consider using a smart charger to maintain charge between uses.
Keep Terminals Clean using a mixture of baking soda and water applied with an old toothbrush. Corrosion at terminal connections creates resistance that forces your alternator to work harder, reducing charging efficiency. Monthly terminal inspection prevents corrosion buildup and maintains optimal electrical contact.
Check Water Levels in flooded lead-acid batteries monthly during the growing season. Distilled water is essential—tap water contains minerals that damage battery chemistry. Never use anything except distilled water, and fill cells only to the bottom of the fill tube, not above it.
Maintain Proper Charging by ensuring your alternator functions correctly. Overcharging damages batteries as quickly as undercharging. If your charging system voltage consistently exceeds 14.8 volts or falls below 13 volts, have the alternator tested by a professional mechanic.
Troubleshooting Common Issues
Understanding common battery problems helps you diagnose issues before they strand you during critical gardening season.
Slow Cranking despite a fully charged battery usually indicates internal battery failure or corroded terminal connections. First, clean all terminals thoroughly. If slow cranking persists, the battery likely has internal cell damage and requires replacement. Cold weather exacerbates this symptom—a battery that cranks adequately in summer may fail completely in winter.
No Cranking Response means either your battery is completely discharged or there’s an open circuit preventing current flow. Test the battery voltage with a multimeter. If it reads above 12 volts but the starter won’t engage, check all terminal connections and battery cables for corrosion or loose connections. If voltage is below 12 volts, charge the battery fully before attempting to start.
Battery Won’t Hold Charge indicates either a faulty battery or a charging system problem. Use a multimeter to check voltage while the tractor is running—it should be 13.5-14.5 volts. If voltage is lower, your alternator isn’t charging properly and requires professional service. If alternator output is correct but the battery still won’t hold charge, the battery has internal failure and needs replacement.
Corrosion Around Terminals appears as white, blue-green, or gray crusty deposits. This corrosion prevents proper electrical contact and should be cleaned immediately. Mix baking soda with water to create a paste, apply it to corroded terminals, and scrub with an old toothbrush. Rinse thoroughly with clean water and dry completely. Persistent corrosion may indicate overcharging—have your charging system tested if corrosion returns within weeks of cleaning.
Swollen or Cracked Battery Case indicates internal failure and represents a safety hazard. Replace the battery immediately. Never attempt to repair a damaged battery case, as it may leak caustic sulfuric acid. Dispose of the old battery properly through a recycling program or retailer that accepts batteries.
For professional guidance on charging system diagnosis, consult resources like the Cooperative Extension System, which provides equipment maintenance guidance through local offices. Many extension services offer diagnostic clinics where professionals can test your battery and charging system for minimal cost.
When selecting replacement batteries, consider purchasing from authorized dealers who understand garden equipment requirements. These retailers can verify compatibility and often provide installation services. Many also offer battery recycling programs for your old unit, ensuring environmental responsibility.
Working with your tractor’s electrical system becomes much simpler when you understand battery fundamentals. Whether you maintain a vertical garden operation or manage traditional landscape beds, a properly functioning battery enables consistent equipment performance throughout the growing season. The investment in quality batteries and preventive maintenance pays dividends through reliable starts, extended equipment life, and worry-free seasonal gardening.
Remember that your charging system and battery work together as an integrated unit. Even the finest battery cannot compensate for a failing alternator, and the best charging system cannot overcome internal battery failure. Regular inspection of both components ensures your garden tractor remains ready whenever you need it, whether you’re preparing spring beds or clearing fall debris. Taking time to understand these systems transforms battery selection from a frustrating chore into a straightforward process that protects your equipment investment.
FAQ
What’s the difference between CCA and CA ratings?
Cold Cranking Amps (CCA) measures battery performance at 0°F, while Cranking Amps (CA) measures performance at 32°F. CCA is more relevant for cold climates, as it indicates how reliably your battery will start your tractor during winter. If you live in regions where temperatures frequently drop below freezing, prioritize CCA ratings when selecting a battery.
Can I use a car battery in my garden tractor?
Generally, no. Car batteries are designed for frequent, consistent charging during highway driving and may not suit garden tractor usage patterns. Additionally, car batteries often use different terminal configurations and physical dimensions that won’t fit properly in tractor compartments. Always use batteries specifically rated for your tractor model to ensure compatibility and safe operation.
How often should I check my garden tractor battery?
Inspect your battery monthly during the growing season and before storage. Check for physical damage, corrosion at terminals, and proper hold-down bracket security. For flooded lead-acid batteries, verify water levels monthly. These brief inspections prevent many common problems and extend battery lifespan significantly.
Is an AGM battery worth the extra cost?
For most serious gardeners and professional landscapers, yes. AGM batteries hold charge longer during storage, perform better in cold weather, require no maintenance, and typically last longer than lead-acid alternatives. While upfront cost is higher, the extended lifespan and improved reliability often make AGM batteries the better value over 5-7 years of ownership.
What should I do if my battery won’t hold a charge?
First, verify that your charging system is functioning properly by testing voltage while the tractor runs—it should read 13.5-14.5 volts. If charging system voltage is correct, your battery likely has internal failure and requires replacement. If charging voltage is low or absent, have your alternator professionally tested before replacing the battery.
Can I store my garden tractor with the battery connected?
For storage periods longer than two weeks, disconnect the negative terminal to prevent parasitic drain that can damage the battery. Alternatively, use a smart trickle charger to maintain optimal charge levels throughout storage. Never leave a battery in a discharged state during winter storage, as freezing can cause permanent damage.


