How to Start a Crystal Garden: Expert Advice for Growing Stunning Mineral Formations
A crystal garden is one of the most enchanting and educational gardening projects you can undertake, combining science, creativity, and natural beauty in a single display. Unlike traditional gardening where you cultivate living plants, a crystal garden allows you to grow spectacular geometric formations right in your home using simple household materials and basic chemistry. These mesmerizing gardens create stunning visual displays while teaching valuable lessons about crystallization, mineral growth, and molecular structures.
Whether you’re a seasoned gardener looking to explore a new hobby or a beginner seeking a fun indoor project, starting a crystal garden requires minimal space, investment, and maintenance compared to conventional gardening tips for beginners. The process is straightforward enough for children to enjoy while remaining fascinating for adults. Crystal gardens work year-round regardless of weather conditions, making them perfect for apartment dwellers or those in climates unsuitable for outdoor gardening.
What Is a Crystal Garden?
A crystal garden is a controlled environment where you grow salt crystals or other mineral crystals through a process called supersaturation. This involves dissolving a salt solution in hot water and allowing it to cool gradually, during which crystals form and develop. The crystals grow over several days, creating beautiful geometric shapes and patterns that resemble a magical underground landscape.
Crystal gardens differ fundamentally from traditional plant gardening because they don’t involve living organisms. Instead, they showcase the principles of chemistry and physics in action. The process is deterministic yet unpredictable—while you know crystals will form, the exact shapes, colors, and patterns depend on numerous variables including temperature, humidity, solution concentration, and impurities present in your materials.
These gardens have educational value for all ages, making them popular in schools and homes. They demonstrate supersaturation, nucleation, and crystal lattice formation—concepts fundamental to chemistry and geology. Additionally, they provide aesthetic appeal; many people display finished crystal gardens as decorative pieces that remain stable for months or even years when kept in dry conditions.
Materials You’ll Need
Starting a crystal garden requires surprisingly few materials, most of which you likely have at home. Here’s what you’ll need to gather:
- Salt or other crystallizing agents: Table salt is most common, though you can experiment with borax, epsom salt, or rock salt for different results
- Hot water: Boiling or near-boiling water is essential for dissolving your chosen salt thoroughly
- Container: A shallow dish, glass bowl, or ceramic plate works well; avoid plastic as hot water may warp it
- Spoon or stirring rod: For mixing your solution thoroughly
- Optional dyes: Food coloring or liquid watercolors create colorful crystals
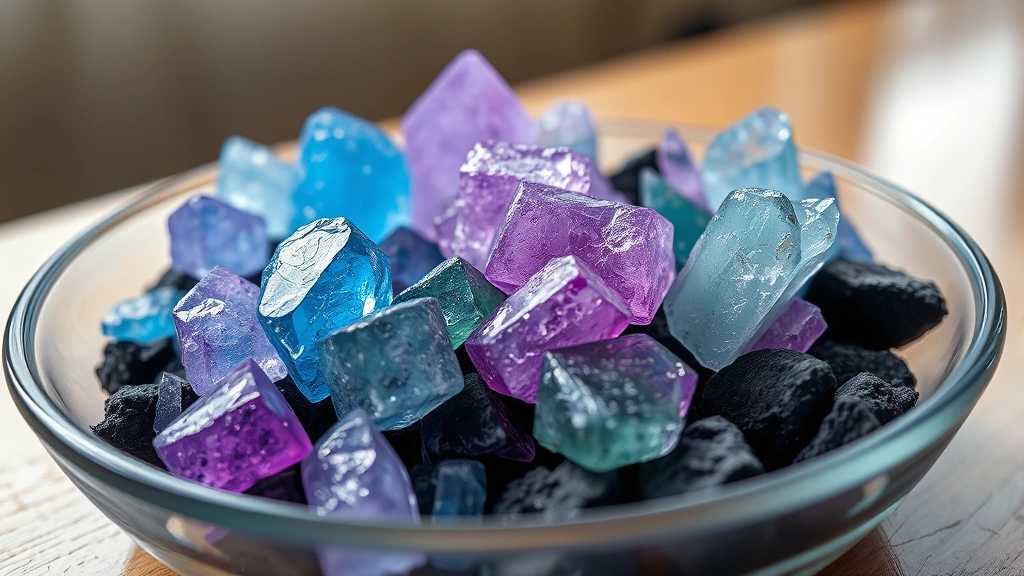
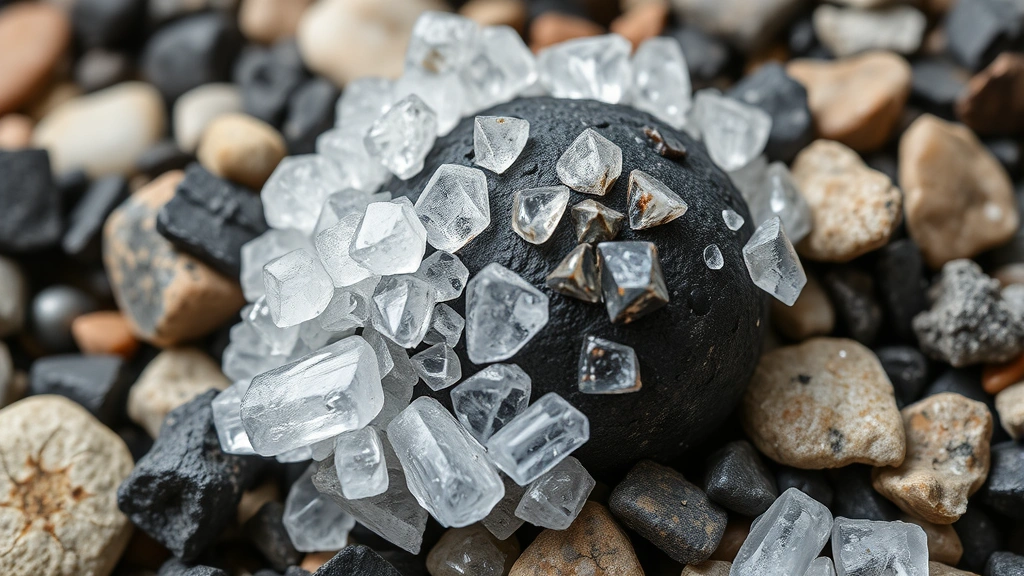
- Optional decorative items: Small rocks, pebbles, or pieces of charcoal serve as nucleation points and add visual interest
- Measuring spoons: For precise ratios
- Newspaper or paper towels: To protect your work surface from spills
If you’re interested in growing edible gardens alongside your crystal garden, you might explore easy to grow vegetables for beginners to maintain multiple gardening interests. However, crystal gardens are purely decorative and not for consumption.
Step-by-Step Growing Instructions
Creating your first crystal garden is a straightforward process when you follow these detailed steps carefully. The entire project takes less than an hour of active work, though the growing phase lasts several days.
Step 1: Prepare Your Workspace
Cover your work surface with newspaper or paper towels to protect it from potential spills. This is especially important if you’re using food coloring or working over furniture or carpeting. Gather all your materials within arm’s reach so you’re not scrambling during the hot water phase.
Step 2: Create Your Crystal Base
If using decorative items, arrange small pieces of charcoal, pebbles, or rocks in your container. These serve as nucleation sites where crystals will preferentially form, creating a more visually interesting garden. You can arrange them in patterns or scattered randomly—both approaches yield beautiful results. Leave adequate space around each piece for crystals to develop.
Step 3: Prepare Your Salt Solution
Measure three parts salt to one part water by volume. For example, use three tablespoons of salt with one tablespoon of water. Pour the water into a heat-safe container and bring it to a boil or heat it until steaming. Gradually add salt while stirring constantly. The solution should become saturated, meaning no more salt will dissolve even with continued stirring. You may see some undissolved salt remaining at the bottom—this is normal and acceptable.
Step 4: Add Color (Optional)
If you want colored crystals, add a few drops of food coloring or liquid watercolor to your hot salt solution. Stir thoroughly to distribute the color evenly. Keep in mind that the final crystal color may differ slightly from the liquid color due to concentration effects.
Step 5: Pour and Position
Carefully pour the hot salt solution over your arranged base materials in the container. Work slowly to avoid splashing. The solution should cover your base items but doesn’t need to fill the entire container. Pour directly onto the rocks and charcoal pieces to ensure good contact between the solution and nucleation sites.
Step 6: Begin the Growing Phase
Place your container in a location where it won’t be disturbed—a shelf, windowsill, or table works perfectly. Avoid direct sunlight and heat sources, as these accelerate water evaporation and can result in smaller crystals. The ideal temperature is between 65-75°F (18-24°C). Leave the container undisturbed for 24-48 hours while crystals form.
Step 7: Monitor Progress
You’ll notice crystals beginning to form within the first few hours. They’ll continue growing and becoming more pronounced over the next 24-48 hours. The longer you wait, the larger your crystals become, but growth slows significantly after 48 hours as the solution becomes depleted.
Understanding Crystal Formation
The magic behind crystal gardens lies in understanding the chemistry of crystallization. When you dissolve salt in hot water, you create a solution where salt molecules are evenly dispersed throughout the liquid. As this solution cools, it becomes supersaturated—containing more dissolved salt than would normally be possible at that temperature.
This unstable state drives the system toward equilibrium. Salt molecules begin clustering together, forming solid crystals. This process is called nucleation, and it preferentially occurs on surfaces like your charcoal or rocks, which provide templates for crystal growth. As more molecules join the growing crystal structure, they align according to the salt’s natural lattice pattern, creating geometric shapes.
Different salts produce different crystal shapes. Table salt (sodium chloride) typically forms cubic or rectangular crystals. Epsom salt creates needle-like formations. Borax produces larger, more dramatic crystals. Each salt’s crystal structure reflects its molecular arrangement, making the geometry fundamentally determined by chemistry.
Temperature plays a crucial role in crystal size and quality. Slow cooling produces larger, more well-formed crystals, while rapid cooling creates many small crystals. This is why you should avoid placing your container near heat sources or in direct sunlight. Humidity also affects crystallization; very dry environments accelerate water evaporation, sometimes producing smaller crystals, while humid conditions slow evaporation and allow larger crystals to develop.
Maintenance and Care Tips
Once your crystal garden reaches its desired appearance, proper care ensures it remains beautiful for weeks or months. Crystal gardens are remarkably durable compared to living plants, requiring no watering, fertilizing, or special feeding.
Environmental Control
Store your finished crystal garden in a cool, dry location away from direct sunlight. Excessive heat and humidity can cause crystals to dissolve or become sticky. A closed display case or shelf in a climate-controlled room is ideal. If you live in a very humid climate, consider placing your crystal garden in a sealed glass container to minimize moisture exposure.
Handling and Display
Treat your crystal garden gently. While crystals are relatively hard, they’re also brittle and can break if bumped or dropped. Display it on a stable surface away from high-traffic areas where it might be accidentally knocked over. Keep it out of reach of small children or pets who might try to touch or taste the crystals.
Cleaning and Preservation
Avoid washing your crystal garden with water, as this can dissolve the crystals. If dust accumulates, gently brush it away with a soft, dry brush or cloth. Never use water-based cleaners or solvents on your display. The crystals will naturally remain intact indefinitely in dry conditions.
Troubleshooting Common Issues
Even with careful preparation, crystal gardens sometimes don’t develop as expected. Here are common problems and solutions:
Slow or No Crystal Growth
If crystals aren’t forming after 24 hours, your solution may not be sufficiently saturated. Reheat the mixture gently and add more salt, stirring until fully dissolved. Alternatively, the temperature might be too warm; move your container to a cooler location. Sometimes crystals need 48-72 hours to become visible.
Many Tiny Crystals Instead of Large Ones
This typically indicates rapid cooling or very dry conditions. Slow the cooling process by keeping your container in a consistently cool location away from drafts and heat sources. Cover the container loosely with a cloth to moderate evaporation rates.
Sticky or Wet Crystals
Humidity is causing hygroscopic salt to absorb moisture from the air. Move your garden to a drier location, or place it in a sealed container with a small amount of uncooked rice or silica gel to absorb excess moisture.
Crystals Dissolving Over Time
High humidity or exposure to water is causing dissolution. Ensure your container is completely dry and stored in a humidity-controlled environment. Consider placing your display in a sealed glass dome or case.
Uneven Crystal Distribution
Crystals may form more heavily on some base materials than others due to slight temperature variations or solution concentration differences. This is normal and actually adds to the natural, organic appearance of your garden.
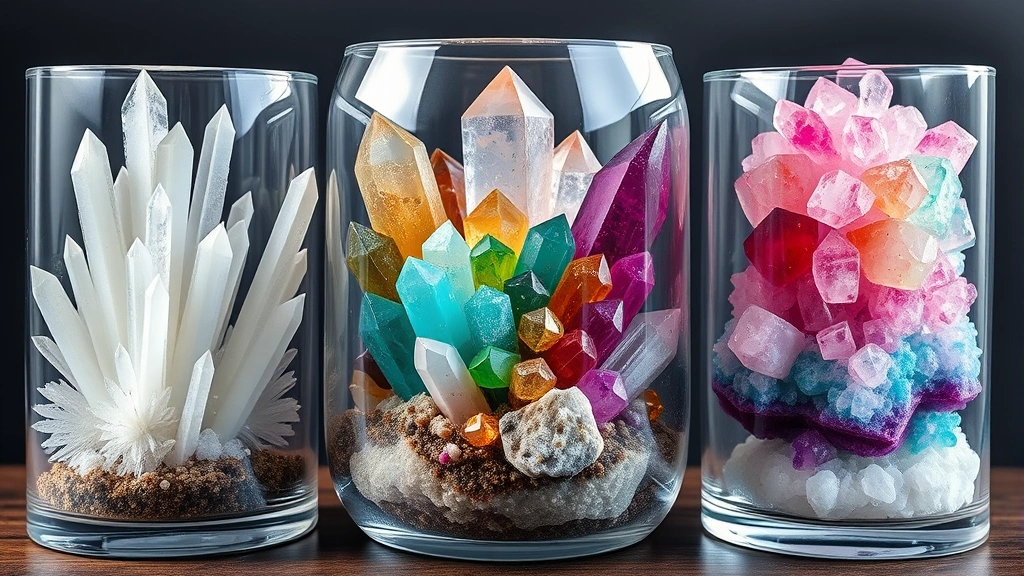
Creative Variations and Designs
Once you’ve mastered basic crystal gardening, experiment with variations to create unique displays. These creative approaches keep the hobby fresh and allow artistic expression alongside scientific exploration.
Multi-Colored Crystal Gardens
Create sections with different colored solutions in the same container. Use dividers or fill separate containers placed close together. Different colors create striking visual contrasts and allow you to explore how various dyes interact with different salt types.
Layered Crystal Gardens
Pour solutions of different concentrations or temperatures sequentially, creating distinct layers where each crystallizes independently. This produces complex, stratified structures that showcase crystallization at different rates.
Shaped Containers
Use unconventional containers like seashells, ceramic molds, or hollowed stones as your growing medium. The container’s shape influences how crystals distribute, creating unique formations that follow the container’s contours.
Embedded Elements
Incorporate non-toxic decorative items like small pieces of wood, bone, or ceramic into your crystal base. Crystals will grow around and over these elements, creating fascinating composite structures. Ensure any materials you use are heat-safe and won’t dissolve in your salt solution.
Terrarium Hybrids
Combine crystal gardens with dried botanicals, sand, or small succulents that have been dried and sealed. This creates a hybrid display that merges crystal formations with traditional decorative elements. Just keep the crystal and plant sections separate to avoid moisture issues.
If you’re interested in expanding your gardening portfolio, consider complementary projects like coffee grounds in garden for composting, or explore best garden hose options if you plan to maintain outdoor gardens alongside your indoor crystal projects. For those considering permanent garden installations, galvanized steel raised garden bed solutions provide excellent durability.
Additional protection strategies are available through resources like USDA APHIS for understanding plant-related environmental factors, or the Southern Gardening Society for broader horticultural knowledge. For crystallography specifics, the United States Geological Survey provides excellent mineral and crystal information. Master gardeners through your local Cooperative Extension Service can answer specific questions about crystal garden chemistry and display, while the New York Botanical Garden offers educational resources on mineral formations and natural crystalline structures.
FAQ
How long do crystal gardens last?
Crystal gardens can remain stable and beautiful for several months to years when kept in dry, cool conditions. Crystals won’t continue growing after the initial 48-72 hours, but they won’t dissolve either unless exposed to moisture or humidity. Proper storage is the key to longevity.
Are crystal gardens safe for children?
Crystal gardens are generally safe for supervised children, though some precautions apply. Never allow children to taste or ingest crystals, as salt consumption in large quantities is harmful. The hot water used in preparation requires adult supervision. Once crystals form and cool, the project becomes safer, though handling should remain gentle to avoid breaking delicate formations.
Can you regrow crystals in the same container?
Yes, you can create new crystal gardens in previously used containers. Simply clean out old crystals and solution, dry the container thoroughly, and start fresh with new materials and solution. Each growing cycle produces unique formations regardless of previous attempts.
What’s the best salt for crystal gardening?
Table salt (sodium chloride) is most common and produces reliable results. Epsom salt creates dramatic needle-like formations. Borax produces larger, more spectacular crystals but requires careful handling due to toxicity concerns—wash hands thoroughly after working with borax and keep it away from children and pets. Rock salt works but often produces smaller crystals due to impurities.
Why are my crystals not very large?
Size depends on several factors: solution concentration, cooling speed, temperature consistency, and humidity. Ensure your solution is fully saturated, cool your container slowly in a consistent environment, and maintain moderate humidity levels. Larger crystals typically require 48-72 hours to develop fully.
Can crystal gardens be displayed outdoors?
Outdoor display is not recommended for crystal gardens. Exposure to rain, temperature fluctuations, and humidity will dissolve or damage crystals. Keep your garden indoors in a protected environment for optimal preservation and longevity.


