Create a Minecraft Garden? Pro Builder Tips for Virtual and Real-World Growing
Whether you’re a Minecraft enthusiast looking to build the perfect virtual garden or a real gardener seeking inspiration from blocky pixel aesthetics, creating a Minecraft garden offers unique challenges and rewards. This guide bridges the gap between digital creativity and horticultural principles, helping you design stunning garden spaces in-game while drawing parallels to actual gardening practices that make real gardens thrive.
Building a Minecraft garden isn’t just about placing random blocks—it requires planning, design principles, and understanding how different plant blocks interact with their environment. From crop arrangement to decorative landscaping, we’ll explore everything you need to know to create gardens that are both visually impressive and functionally optimized for your gameplay needs.
Understanding Minecraft Garden Basics
A Minecraft garden serves multiple purposes in your gameplay experience. Beyond providing essential food sources through crops like wheat, carrots, and potatoes, gardens contribute significantly to your world’s aesthetic appeal. Understanding the fundamental mechanics of how plants grow in Minecraft is crucial before you start building.
All crops in Minecraft require certain conditions to thrive. Light is essential—crops need a light level of at least 9 to grow, which means positioning your garden in sunlit areas or using artificial lighting systems. Water proximity is equally critical; crops grow faster when hydrated by nearby water blocks. Unlike real gardening where you might consult gardening tips for beginners, Minecraft gardening follows precise, predictable rules.
The most common crops include wheat, which requires farmland and water; carrots and potatoes, which drop from zombies initially but can be cultivated; and beetroot, offering both food and dye. Each crop has different growth stages, typically progressing through 8 stages before becoming harvestable. Melons and pumpkins grow differently, spreading horizontally from their stems onto adjacent blocks.
Crop Planning and Layout Design
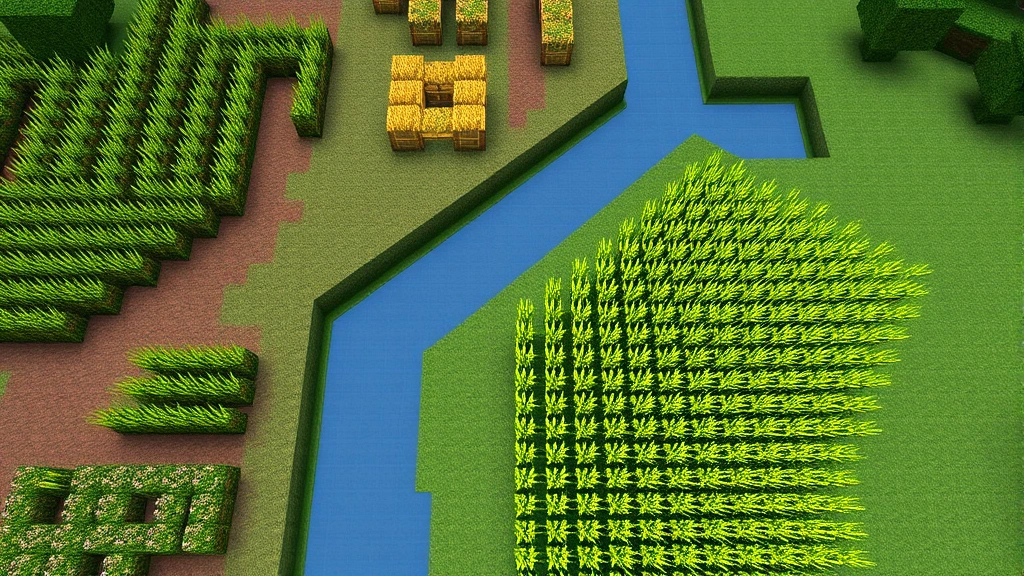
Effective Minecraft garden design starts with strategic planning. Before placing a single block, sketch out your garden layout considering water access, sunlight exposure, and harvesting efficiency. The most popular layout is the grid pattern, where crops are arranged in rows with water channels running perpendicular to them.
For optimal growth speed, position water every 4 blocks in each direction, as water hydrates farmland up to 4 blocks horizontally and vertically. This creates an efficient checkerboard-like pattern where water blocks are strategically placed to maximize coverage. A 9×9 square with a water block in the center hydrates all surrounding farmland perfectly, making it an ideal building unit for larger gardens.
Consider dedicating separate sections for different crop types. Grouping similar crops together simplifies harvesting and makes your garden visually coherent. Create pathways between sections using varied block types—wooden slabs, stone bricks, or path blocks work excellently. These pathways serve practical purposes, preventing accidental trampling of crops while adding visual interest to your garden structure.
When planning crop arrangements similar to growing peas, think about height variation. Wheat reaches 1 block tall at maturity, while sugarcane and bamboo grow taller. Melons and pumpkins sprawl horizontally. Mixing these heights creates visual depth and prevents your garden from appearing monotonous.
Incorporate companion planting concepts even in Minecraft. While game mechanics don’t provide actual benefits like real-world companion planting, grouping crops aesthetically based on their appearance creates harmonious designs. Sweet berry bushes pair nicely with flowering plants like flowers and nether wart, creating naturally balanced compositions.
Water Systems and Irrigation
Water management is fundamental to Minecraft garden success. Unlike indoor herb gardens where you control moisture carefully, Minecraft water blocks hydrate all adjacent farmland automatically and infinitely. Understanding water mechanics allows you to design efficient irrigation systems.
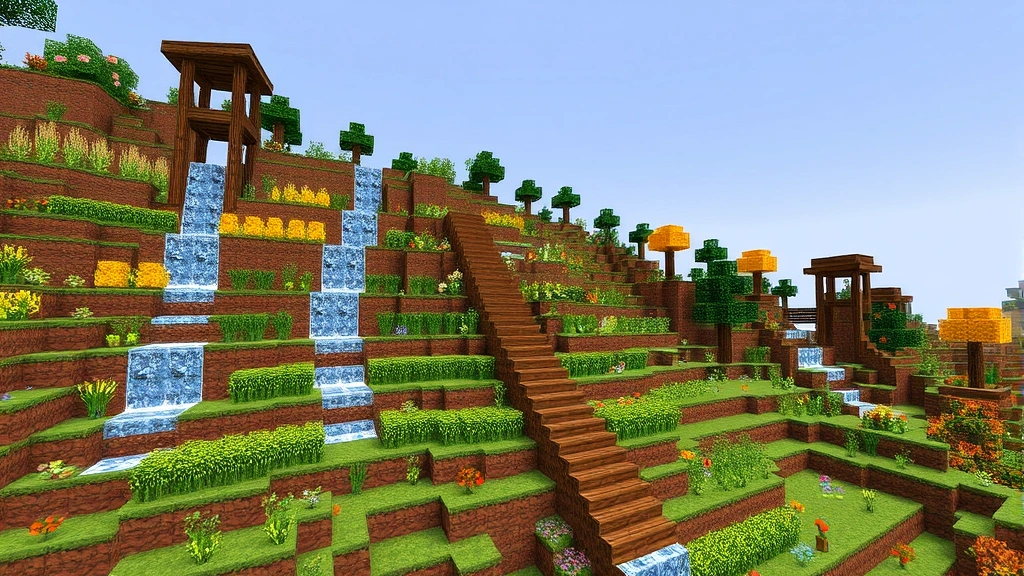
The simplest approach uses flowing water channels. Dig trenches every 4 blocks and let water flow through them, hydrating the surrounding farmland. Water flowing downhill works excellently for sloped gardens, creating cascading irrigation systems that look visually stunning while functioning perfectly. Construct channels using stairs or slabs to direct water flow precisely where needed.
For more advanced designs, implement water elevators using soul sand and magma blocks, pumping water uphill to create multi-level gardens. These systems require more resources and technical knowledge but enable spectacular tiered garden designs. Kelp and bubble columns can also redirect water, offering creative solutions for complex terrain.
Consider your garden’s water source carefully. Positioning your garden near a natural water body like a river or ocean simplifies water access. For desert or sky gardens, create artificial water sources using buckets or by channeling water from distant locations. Some builders create decorative fountains that serve dual purposes—aesthetics and crop hydration.
Implement overflow prevention systems to avoid flooding your garden during rain. Slabs, stairs, and partial blocks can cap water channels while still allowing hydration. This prevents water from spreading uncontrollably and damaging your carefully planned layout.
Decorative Elements and Landscaping
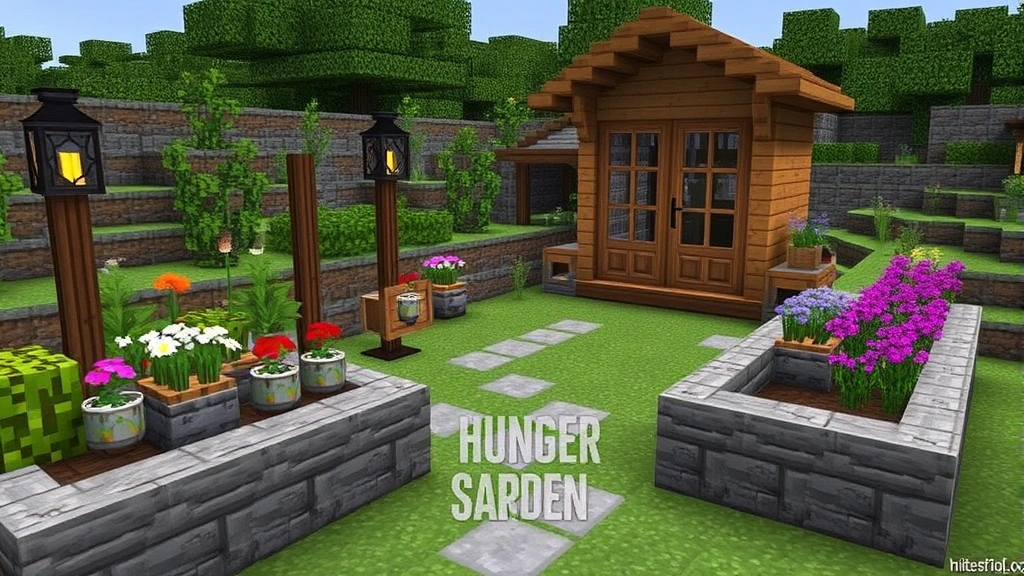
A truly impressive Minecraft garden combines functionality with beauty. Add decorative elements that enhance the garden’s appeal without interfering with crop growth. Fences, gates, and walls create defined boundaries and add structure. Use different wood types for varied aesthetics—oak, spruce, birch, and dark oak each provide distinct visual characteristics.
Incorporate seating areas using stairs and slabs arranged as benches. These gathering spaces make your garden feel purposeful and inviting. Add lighting using lanterns, candles, or soul lanterns positioned on posts or hanging from chains. Lighting serves practical purposes—preventing mob spawning—while creating ambiance during nighttime gameplay.
Consider building garden sheds or greenhouses to store tools and seeds. These structures frame your garden beautifully while providing functional storage. Use glass panes and glass blocks to create transparent walls that showcase interior details while maintaining visibility of your crops.
Create garden arches using wood or stone materials as entrance features. Archways mark transitions between different garden sections and add architectural interest. Vining plants like sweet berry bushes or nether wart can climb these structures, creating living decorations.
Add pathways using varied materials—gravel, path blocks, stone brick, or wood planks. Curved pathways feel more organic than straight lines, mimicking natural garden design principles. Incorporate stepping stones across water channels, creating practical crossing points that look intentional rather than purely functional.
Building Your Garden Structure
Before placing farmland, prepare your terrain properly. Level the ground or create intentional slopes for visual interest. Build retaining walls using stone or wood to define garden beds and prevent soil erosion (in-game and aesthetically). These walls provide structure and allow for creative multi-level gardens.
Create raised beds using wood blocks, stone brick, or copper blocks arranged in rectangles. Fill these beds with farmland and plant your crops. Raised beds offer several advantages: they’re easier to harvest from, look more organized, and allow you to build over multiple levels. This technique lets you maximize your garden’s productivity in limited spaces.
When protecting your garden from unwanted visitors, remember that mobs can’t trample farmland but can destroy crops. Build fences around your garden to keep animals out. For player-protected servers, consider aesthetic barriers like hedges made from leaves or bushes rather than purely functional walls. Some builders use techniques to keep pests out, and similar defensive strategies apply to Minecraft gardens with hostile mob prevention.
Implement drainage systems if building in wet biomes. Use slabs and stairs to create channels that prevent water accumulation while maintaining farmland hydration. This prevents your garden from becoming a swamp while keeping crops properly moisturized.
Build composters and composter systems to recycle plant waste into bonemeal, which accelerates crop growth. Place composters near your garden for convenient access to growth acceleration materials. This creates a sustainable in-game gardening cycle.
Seasonal Garden Themes
Minecraft’s lack of actual seasons doesn’t prevent you from creating seasonal-themed gardens. Design spring gardens with vibrant flowers, pastel-colored blocks, and flowering crops. Use white, pink, and light blue blocks alongside natural greenery for fresh aesthetics.
Summer gardens burst with color and abundance. Incorporate bright flowers, full-grown crops, and warm-toned wood blocks. Add decorative elements like beach umbrellas made from wool and slabs, or colorful banners representing festival flags.
Autumn gardens feature warm tones—oranges, reds, and browns. Use copper blocks in their oxidized states, dark oak wood, and decorative pumpkins (beyond functional crops). Create leaf piles using colored concrete and wool to simulate fallen foliage.
Winter gardens utilize snow, ice, and cool-toned blocks. Create snow-covered garden beds and icy pathways. Use white and light gray blocks extensively. Incorporate evergreen elements with dark green blocks and trees to suggest life persisting through winter.
Advanced Garden Automation
Once you master basic gardening, explore automated systems using redstone. Automatic harvesters use pistons and observers to detect fully-grown crops and break them automatically, with hoppers collecting drops. These systems require significant redstone knowledge but eliminate manual harvesting.
Create bonemeal dispensers that automatically apply growth acceleration to crops using redstone clocks. These circuits cycle through your crops, accelerating growth and reducing time to harvest. While more complex than manual gardening, automation systems free you to focus on other projects.
Implement sorting systems that separate different crop types automatically. Crops drop as items when harvested; hoppers and redstone comparators can sort these items into separate storage containers based on type. This keeps your inventory organized and creates impressive-looking storage areas.
Build item sorters that organize all harvested crops into dedicated storage areas. These systems use redstone repeaters, comparators, and droppers to route items efficiently. While complex, they create satisfying automated farming operations that feel like genuine agricultural infrastructure.
Use proper preparation and tools equivalent—in Minecraft, prepare with appropriate enchanted tools and systems before automating. Efficiency V shovels clear farmland quickly, while Silk Touch tools preserve specific blocks you want to keep intact.
FAQ
What’s the fastest way to grow crops in Minecraft?
Using bonemeal on fully-planted farmland accelerates growth instantly. Bonemeal can advance crops through multiple growth stages at once. Composters convert plant waste into bonemeal, creating a sustainable growth acceleration system. Alternatively, positioning crops in bright sunlight with nearby water sources ensures optimal natural growth speed.
Can I grow crops without water in Minecraft?
No, crops require water within 4 blocks to hydrate farmland and grow. Without water, farmland reverts to dirt and crops won’t progress through growth stages. Water is absolutely essential for any functional garden.
What’s the best crop for beginners?
Wheat is ideal for beginners—it’s easy to obtain seeds, grows relatively quickly, and provides reliable food. Carrots and potatoes drop from zombies, so you can collect them early-game. Once you have seeds, planting is straightforward and requires only farmland and water.
How do I prevent mobs from ruining my garden?
Build fences around your garden perimeter. Mobs can’t trample farmland but can destroy growing crops, so fencing keeps them out entirely. Ensure your garden is well-lit to prevent mob spawning in dark corners. Light level 8 or higher prevents hostile mobs from appearing.
Can I build gardens in the Nether?
Regular crops won’t grow in the Nether due to light level limitations and biome restrictions. However, nether wart grows exclusively in the Nether, requiring soul sand and light. You can create dedicated nether wart gardens in the Nether using similar design principles adapted for that dimension.
What blocks work best for garden pathways?
Path blocks, gravel, stone brick, wooden planks, and slabs all work excellently. Mix different materials for visual variety. Avoid farmland on pathways to prevent accidental trampling. Stairs and slabs create interesting elevation changes and visual texture.
How large should my garden be?
Garden size depends on your needs and available space. A 16×16 garden produces substantial food supplies. Smaller 8×8 gardens work for casual play. Larger 32×32 or bigger gardens create impressive visual statements but require more maintenance. Start smaller and expand as needed.


