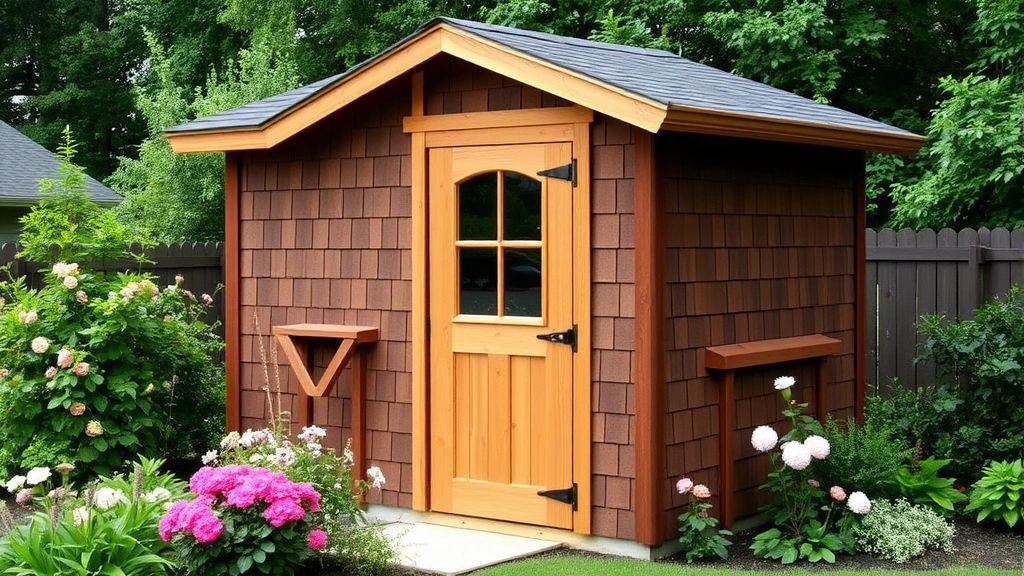
Build a 16×10 Garden Shed? DIY Expert Tips for Success
A 16×10 garden shed provides the perfect balance of storage space and footprint for most residential properties. Whether you’re storing tools, creating a potting station, or establishing a workspace for your gardening projects, this size offers 160 square feet of usable space—enough for serious gardeners without overwhelming your yard. Building your own 16×10 garden shed is an achievable DIY project that can save thousands compared to purchasing pre-built structures.
This comprehensive guide walks you through every phase of construction, from site preparation and foundation work through framing, roofing, and finishing touches. You’ll learn practical tips from experienced builders and gardeners who have successfully completed similar projects. With proper planning, the right tools, and attention to detail, you can create a functional, durable shed that serves your gardening needs for decades.
Before diving into construction, understand that building a shed of this size may require permits depending on your local regulations. Check with your city or county building department about setback requirements, height restrictions, and whether you need inspections at various stages. Taking time upfront to handle permits properly prevents costly issues down the road.
Site Preparation and Foundation
Selecting the right location for your 16×10 garden shed determines its longevity and usability. Choose a level, well-drained area that receives adequate light but offers some shade protection from intense afternoon sun. Avoid low spots where water collects during heavy rain, as moisture is the enemy of wood structures and stored equipment. Most gardeners prefer positioning sheds near their main garden beds for convenient access to tools.
Before breaking ground, mark out the exact 16×10 footprint using string and stakes. Verify corners are square by measuring diagonals—both should equal approximately 18.87 feet. Clear the area of grass, weeds, and debris. Remove topsoil if necessary to create a level base. This preparation work prevents future settling issues and ensures your walls remain plumb.
For the foundation, you have several options. A concrete slab provides excellent drainage and durability but requires more initial work. Concrete piers (post holes with concrete footings) offer good drainage with less labor. Gravel with landscape fabric works for budget-conscious builders but requires more maintenance. For a 16×10 structure, concrete piers spaced 4 feet apart are ideal. Dig holes 3-4 feet deep, below your frost line, set pressure-treated 6×6 posts in concrete, and ensure they’re level.
The foundation determines whether your shed stays square and level for years. Don’t rush this phase. Invest in a quality level and check frequently. Uneven foundations lead to door and window alignment problems that compound over time.
Materials and Tools You’ll Need
Building a 16×10 shed requires substantial materials. You’ll need approximately 2,000 board feet of framing lumber (2x4s and 2x6s), 1,200 square feet of roofing material, 320 linear feet of wall sheathing, and hardware including nails, screws, hinges, and brackets. Pressure-treated lumber resists rot and insect damage—essential for longevity. Budget $3,000-$5,000 for materials depending on your finish level and local prices.
Essential tools include:
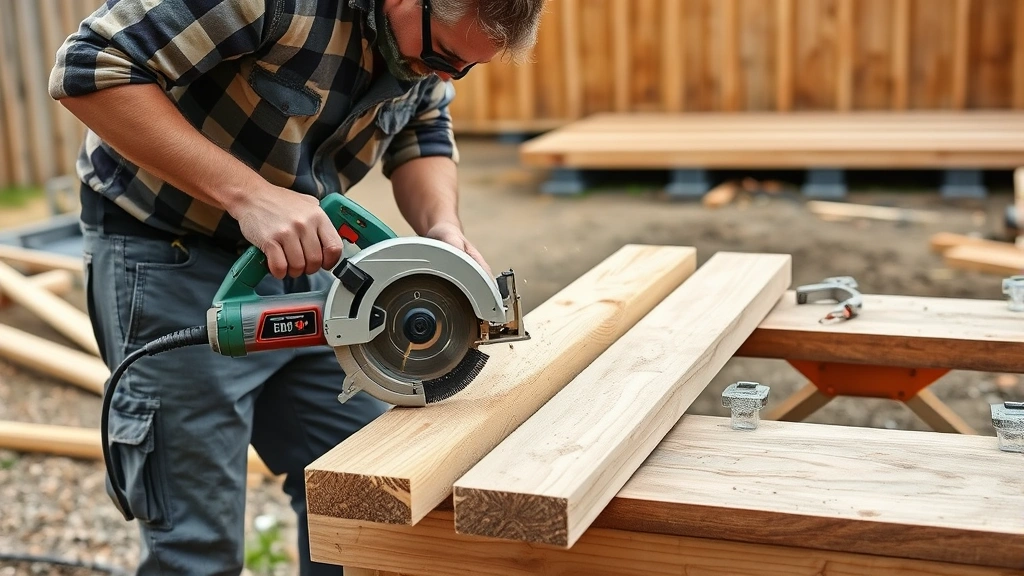
- Power tools: Circular saw, miter saw, drill-driver, nail gun (pneumatic or battery), reciprocating saw
- Hand tools: Hammer, screwdrivers, adjustable wrench, socket set, utility knife, measuring tape (25-foot minimum)
- Leveling tools: 4-foot level, laser level, speed square, framing square
- Safety equipment: Work gloves, safety glasses, dust mask, hearing protection, work boots
- Scaffolding: Ladder or scaffolding for roof work
Rent expensive equipment like nail guns, compressors, and roofing equipment rather than purchasing. This saves money for first-time builders. Borrow tools from friends or local tool libraries when possible. Having quality tools makes the project safer and more enjoyable.
Framing the Structure
Once your foundation is solid and level, begin framing. Start with the band board—a pressure-treated 2×6 that sits on your foundation piers and forms the perimeter. For a 16×10 shed, you’ll need four band boards: two at 16 feet and two at 10 feet. Attach them with lag bolts into the foundation posts, ensuring corners are perfectly square.
Next, construct the wall frames. Use 2×4 studs spaced 16 inches on center for adequate strength. Standard shed height is 8 feet at the eaves, rising to 10-12 feet at the peak for roof pitch. Lay out your walls on the ground, cut all pieces, assemble with 3-inch nails or 2.5-inch screws, then raise them into position. This method is safer and more accurate than building walls in place.
Proper framing for a 16×10 shed includes:
- Bottom plate attached to band board with rim joist
- Vertical studs every 16 inches
- Top plates doubled for strength
- Headers above doors and windows
- Corner bracing for lateral stability
- Roof rafters with proper pitch (4:12 or 6:12 recommended)
Wall sheathing comes next. Plywood or oriented strand board (OSB) provides structural rigidity and weather protection. Use 1/2-inch material minimum. Install it with nails or screws spaced 8 inches apart around edges and 12 inches in the field. Sheathing also serves as a nailing base for siding and roofing materials.
Don’t skimp on framing materials or techniques. A properly framed 16×10 shed withstands wind, snow load, and time. Inspect framing before covering with sheathing—fixing problems now prevents expensive repairs later.
Roofing and Weatherproofing
The roof protects everything inside your shed, making this the most critical component. After rafters are installed and sheathed, install underlayment—synthetic or felt material that prevents water infiltration. Nail or staple it horizontally, overlapping each row by 4-6 inches, starting at the bottom and working up.
For roofing material, asphalt shingles offer the best value for most gardeners. Three-tab shingles cost less but last 15-20 years. Architectural shingles cost more but last 25-30 years and look more attractive. Install drip edge along eaves and rakes first, then apply shingles according to manufacturer instructions. Proper nailing (four nails per shingle, 5/8 inch from the top) ensures longevity.
Flashing at the peak prevents water from entering where roof sections meet. Install roof flashing before shingles at this critical junction. Many shed leaks originate from improper flashing, so take time to get this right.
After roofing, install gutters and downspouts to direct water away from the foundation. This simple step prevents water damage and extends your shed’s life significantly. Gutters should slope 1/4 inch per 10 feet toward downspouts. Direct downspouts at least 4 feet away from the foundation.
For siding, pressure-treated lumber, vinyl, or metal all work well. Wood siding (1×6 or 1×8 boards) looks attractive and is repairable but requires periodic maintenance. Vinyl and metal require less maintenance. Install siding horizontally with slight overlap, starting at the bottom and working up. Leave 1/2-inch gaps at corners for caulking.
Caulk and paint exterior wood surfaces. Use exterior-grade caulk at all joints and gaps. Quality exterior paint protects wood from UV damage and moisture. Paint every 3-5 years to maintain protection. This investment in weatherproofing prevents costly water damage inside your shed.
Doors, Windows, and Ventilation
A standard 36-inch single door works for most 16×10 sheds, positioned conveniently for your workflow. Double doors (two 36-inch doors) provide better access for larger equipment or when storing pumpkin plants and harvest equipment. Frame the door opening with proper header support to prevent sagging.
Install a threshold to shed water away from the shed interior. Add weatherstripping around the door to seal gaps. A small entry step (4-6 inches high) keeps water from flowing directly inside. Some gardeners add a small covered porch area to protect the door from direct rain.
Windows provide natural light and ventilation. Position windows on opposite walls to create cross-ventilation, reducing heat buildup during warm months. Even small windows (12×24 inches) significantly improve usability. Install them high on walls to maximize interior wall space. Add weatherstripping around windows and use caulk to seal gaps.
Ventilation prevents moisture accumulation, which causes mold, mildew, and wood rot. Install soffit vents near the top of walls and a ridge vent along the roof peak. These create passive air circulation without electric fans. For sheds in humid climates, consider a small battery-powered fan to improve air movement. Adequate ventilation is especially important if you’re using your shed as a potting station or for raised bed gardening supply storage.
Finishing the Interior
Interior finishing depends on your shed’s purpose. If storing only tools and equipment, basic framing is sufficient. If creating a workspace for growing mint in pots or potting plants, consider interior sheathing.
Insulation isn’t necessary for tool storage but improves comfort if you’re spending extended time inside. Fiberglass batts (3.5 inches) between studs provide R-12 insulation. Vapor barriers prevent moisture accumulation. Install insulation before interior wall covering.
Interior wall covering options include:
- Plywood: Affordable, durable, good for pegboard mounting
- Drywall: Cleaner appearance, requires finishing (taping, mudding, painting)
- Beadboard: Attractive, adds character, easier than drywall finishing
- Open framing: Simplest option, allows direct mounting on studs
Flooring options range from concrete (excellent for moisture management) to wood (warmer but requires protection from moisture). Many gardeners use concrete for the main floor with a wood platform in one corner for a potting bench or workspace. Ensure flooring slopes slightly toward the door for water drainage.
Lighting improves usability. Run electrical service (if permitted) with outlets for tools and lighting. Solar-powered lights work well for sheds without electrical service. LED fixtures use minimal power and last years. Position lights to illuminate work areas and reduce shadows.
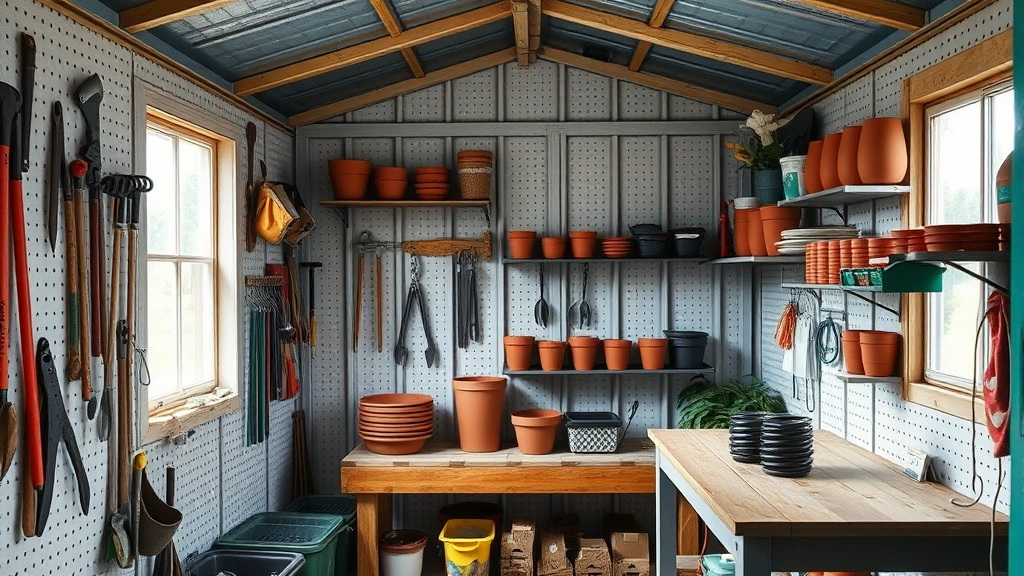
Storage Organization for Gardeners
A 16×10 shed provides 160 square feet of storage—substantial space if organized properly. Vertical storage maximizes this space. Install pegboard or slatwall on interior walls for hanging tools. Hooks, baskets, and magnetic strips keep frequently used items visible and accessible.
Shelving maximizes vertical space. Heavy-duty shelves (2×10 boards on brackets) hold seed starting supplies, fertilizers, and pots. Store heavier items lower, lighter items higher. A pegboard wall dedicated to hand tools keeps your shed organized and prevents lost tools.
Create zones for different activities. Designate one area for tool storage, another for supplies, and a third for a potting bench. This organization improves efficiency and makes finding items quick. Label shelves and containers for easy identification.
Consider these storage solutions specific to gardeners:
- Hanging tool racks for shovels, rakes, and hoes
- Plastic storage bins for seeds, labels, and small supplies (clearly labeled)
- Shelving for pots, trays, and soil bags
- Hooks for hoses and rope
- A dedicated potting bench with under-shelf storage
- Climate-controlled cabinet for temperature-sensitive items
- Pegboard wall for hand tools and pruners
If you’re storing supplies for vertical garden projects or maintaining equipment for gardening with native plants, the 16×10 size offers flexibility. Organize vertically to keep floor space clear for moving around and working.
Maintenance and Longevity
A well-built 16×10 shed lasts 20-30 years with proper maintenance. Annual inspections catch small problems before they become expensive repairs. Check the roof for missing or damaged shingles. Inspect walls for cracks, peeling paint, or water damage. Look under the eaves for bird nests or insect damage.
Maintain your shed with these practices:
- Roof: Inspect annually, clean gutters twice yearly, replace damaged shingles promptly
- Exterior: Repaint wood siding every 3-5 years, caulk gaps as needed, maintain weatherstripping
- Foundation: Keep gutters and downspouts clear to prevent water pooling, ensure drainage remains clear
- Interior: Ensure ventilation prevents moisture buildup, wipe up spills immediately, check for pest activity
- Door and windows: Replace weatherstripping when worn, maintain hinges and locks, ensure doors close properly
Address water damage immediately. Small leaks become major problems quickly. If you notice soft spots, discoloration, or mold, investigate and repair the source. Moisture-related damage is the most common reason sheds fail prematurely.
For garden hose storage and equipment protection, proper ventilation prevents rust and degradation. Keep the interior dry by monitoring humidity levels and improving air circulation if needed.
Winterization depends on your climate. In cold regions, ensure drainage is clear before freeze-thaw cycles begin. In humid climates, run a dehumidifier during wet seasons. In all regions, keep gutters clear and ensure water drains away from the foundation.
FAQ
Do I need a permit to build a 16×10 shed?
Most jurisdictions require permits for structures over a certain size (often 100-200 square feet). Your 160-square-foot shed likely requires a permit. Check local regulations before building. Permits ensure your shed meets safety codes and doesn’t create liability issues. They also protect your property value and insurance coverage.
What’s the best foundation for a 16×10 shed?
Concrete piers provide the best balance of durability, drainage, and cost for most situations. Dig below the frost line, set pressure-treated posts in concrete, and ensure they’re level. A concrete slab works well in dry climates but offers less drainage. Gravel with landscape fabric is budget-friendly but requires more maintenance.
How long does it take to build a 16×10 shed?
Most DIY builders complete a 16×10 shed in 4-8 weeks working weekends. Time varies based on experience, weather, and finish level. Foundation work takes 1-2 weeks, framing 2-3 weeks, roofing 1 week, siding and finishing 2-3 weeks. Breaking the project into phases prevents burnout and allows for weather delays.
What’s the most important part of shed construction?
The roof and weatherproofing are most critical. Water damage destroys wood structures from the inside out. Proper roofing, flashing, gutters, and siding protect everything inside. Don’t cut corners on weatherproofing—it’s the best investment you can make in your shed’s longevity.
Can I build a 16×10 shed alone?
You can, but having a helper makes the project safer and easier. Raising walls, installing roof trusses, and roofing are much simpler with a second person. Even if you’re experienced, safety improves with a helper. Recruit a friend or hire help for the most physically demanding phases.
What should I store in my shed?
Gardening tools, equipment, seeds, soil, fertilizer, pots, and supplies are ideal. Store heavy items low and light items high. Keep hazardous materials (pesticides, gasoline) safely contained and away from children and pets. Ensure proper ventilation if storing fuel or chemicals. Don’t store live plants unless you’ve added heat and light sources.
How do I prevent rodents and insects from entering my shed?
Seal all gaps and cracks with caulk or weather stripping. Install door thresholds and keep doors closed. Store food items (seeds, fertilizer) in sealed containers. Maintain cleanliness and remove spilled materials promptly. Use traps rather than poisons if needed. Proper ventilation helps prevent moisture that attracts insects.


