Queen Bee’s Guide to Growing a Lush Garden
Every gardener dreams of cultivating a thriving, vibrant garden that bursts with color, flavor, and life. Like a queen bee orchestrating her hive with precision and care, you too can become the commanding force behind a lush garden oasis. Whether you’re tending to your first seedling or expanding an established plot, this comprehensive guide will equip you with the knowledge and strategies needed to grow a garden that rivals nature’s finest creations.
Growing a garden requires more than just planting seeds and hoping for the best. It demands understanding soil composition, seasonal timing, pest management, and plant-specific care requirements. When you take charge of your garden like a queen bee manages her colony—with intentional planning, consistent attention, and adaptive strategies—you’ll witness remarkable transformations in your outdoor space.
Assessing Your Garden Space and Climate
Before you dive into planting, take time to evaluate your garden’s unique conditions. Observe how sunlight moves across your space throughout the day. Most vegetables and flowering plants require 6-8 hours of direct sunlight daily, though some shade-tolerant plants thrive with less. Understanding your USDA hardiness zone helps you select plants suited to your region’s temperature extremes and growing season length.
Examine your soil drainage by digging a hole, filling it with water, and observing how quickly it drains. Well-draining soil is essential for most plants, preventing root rot and fungal issues. If water pools in your garden, you may need to create raised garden beds or improve drainage through soil amendments. Consider proximity to water sources, shade from trees or structures, and wind exposure—all factors that influence plant selection and care strategies.
Document your findings in a garden journal. Sketch your space, noting sun exposure patterns, existing trees, structures, and problem areas. This reference tool becomes invaluable when planning where to position plants for optimal growth. As you begin to start your green journey, this foundational assessment prevents costly mistakes and sets you up for gardening success.
Preparing Your Soil for Success
Soil is the foundation of a thriving garden. Queen bee gardeners understand that investing time in soil preparation pays dividends throughout the growing season. Begin by testing your soil’s pH, nutrient levels, and organic matter content. Most extension services offer affordable soil testing through local universities. Your results will guide amendments needed to create an ideal growing medium.
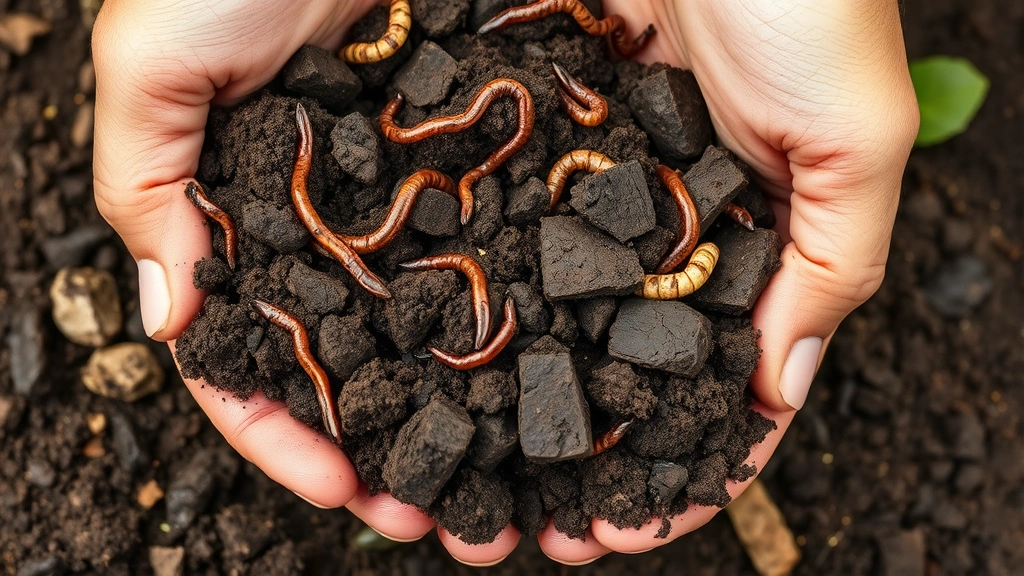
Incorporate 2-4 inches of compost or aged manure into your beds before planting. This organic matter improves soil structure, increases water retention, and provides slow-release nutrients. If your soil is heavy clay, add perlite or coarse sand to improve drainage. For sandy soils that drain too quickly, additional compost helps retain moisture and nutrients.
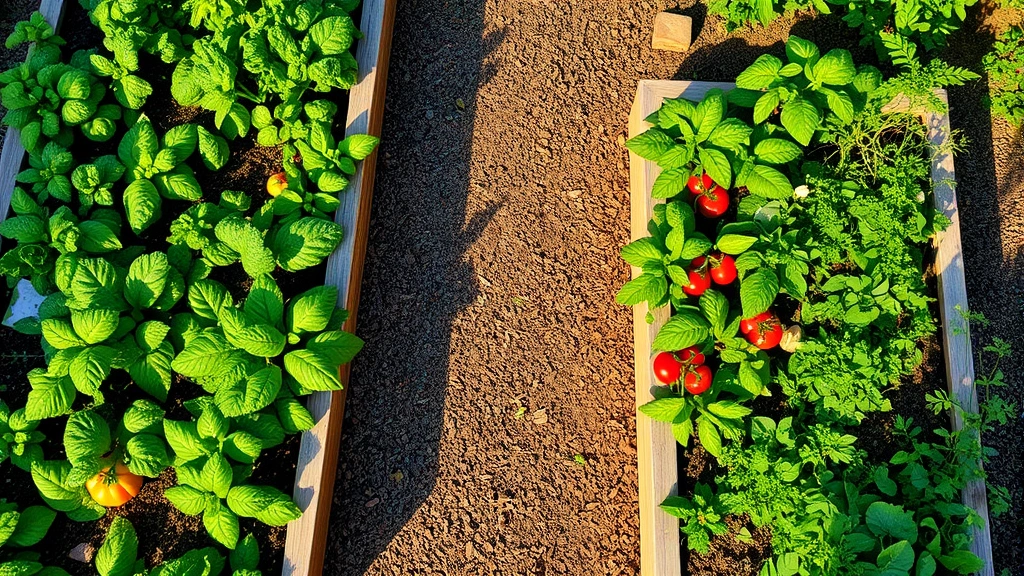
Consider building garden beds and trellises to create defined growing areas with controlled soil composition. Raised beds offer superior drainage, warmer soil in spring, and easier access for planting and maintenance. Fill them with a quality soil mixture: 40% topsoil, 40% compost, and 20% perlite or coconut coir for optimal plant growth.
Mulching is your secret weapon for maintaining soil health. Apply 2-3 inches of organic mulch around plants to regulate soil temperature, suppress weeds, retain moisture, and gradually break down into beneficial organic matter. Use straw, shredded leaves, or wood chips depending on your plants and aesthetic preferences.
Selecting the Right Plants
The queen bee of gardeners chooses plants strategically, considering climate compatibility, space requirements, and personal goals. Are you growing vegetables for culinary purposes, flowers for aesthetic beauty, or a combination? Beginners often succeed with resilient, forgiving plants like tomatoes, zucchini, basil, marigolds, and zinnias.
When growing pumpkin plants, select varieties suited to your growing season length. Smaller varieties mature faster than giant pumpkins, making them ideal for shorter seasons. Similarly, growing peas in your garden requires choosing between spring and fall varieties depending on your climate—cool-season crops that struggle in summer heat.
Create diversity in your garden by grouping plants by water and nutrient needs. This practice, called companion planting, optimizes space and can improve pest management. Tall plants like corn or sunflowers provide shade for heat-sensitive crops. Herbs like basil and marigolds naturally deter certain pests. Legumes like peas add nitrogen to soil, benefiting neighboring plants.
Succession planting extends your harvest. Rather than planting all lettuce seeds simultaneously, plant new seeds every two weeks for continuous harvests. This strategy prevents overwhelming abundance followed by complete scarcity, providing steady supplies throughout the season.
Planting and Spacing Techniques
Proper spacing prevents disease, reduces pest pressure, and ensures each plant receives adequate light, water, and nutrients. Crowded plants compete for resources and create humid conditions favoring fungal infections. Follow seed packet or plant label spacing recommendations—they’re based on mature plant size.
When planting from seed, create furrows at depths specified on the packet. Bury seeds at 2-3 times their diameter depth. Pat soil gently and water carefully to avoid displacing seeds. Thin seedlings once they develop true leaves, removing weaker plants to leave proper spacing for survivors.
Transplants should be hardened off—gradually acclimated to outdoor conditions—before planting. Start with 1-2 hours of outdoor exposure daily, gradually increasing over 7-10 days. This prevents transplant shock and stress. Plant transplants at the same depth they were growing in containers, except tomatoes, which can be planted deeper to develop stronger root systems.
When propagating plants, whether from cuttings, seeds, or division, maintain consistent moisture and appropriate light levels. Propagation allows you to multiply favorite plants affordably, creating a more abundant garden year after year.
Watering and Nutrient Management
Water management separates thriving gardens from struggling ones. Most plants need 1-2 inches of water weekly, applied deeply and less frequently rather than shallow, frequent sprinklings. Deep watering encourages strong root development. Water early morning to minimize disease pressure and allow foliage to dry quickly.
Use drip irrigation or soaker hoses to deliver water directly to soil, reducing evaporation and keeping leaves dry. If hand-watering, water the base of plants rather than overhead. Mulching reduces watering frequency by regulating soil moisture and temperature.
Nutrient management requires understanding the NPK ratio (nitrogen, phosphorus, potassium) on fertilizer labels. Nitrogen promotes leafy growth, phosphorus supports flowering and fruiting, and potassium strengthens overall plant health. Compost and aged manure provide balanced nutrition slowly. For faster results, use balanced fertilizers like 10-10-10 or vegetable-specific formulas.
Organic gardeners rely on compost, fish emulsion, seaweed extract, and bone meal. Conventional gardeners might use synthetic fertilizers. Both approaches work; choose based on your values and garden goals. Apply fertilizers according to product directions—too much can burn plants and contaminate groundwater.
Foliar feeding (spraying diluted fertilizer on leaves) provides quick nutrient boosts when plants show deficiency symptoms. This technique works well mid-season when plants are actively growing and producing.
Pest and Disease Control
Healthy plants resist pests and diseases better than stressed ones. A queen bee gardener prioritizes plant health through proper spacing, watering, and nutrition—preventive measures far more effective than treatments. Monitor plants regularly for early pest detection when populations are small and manageable.
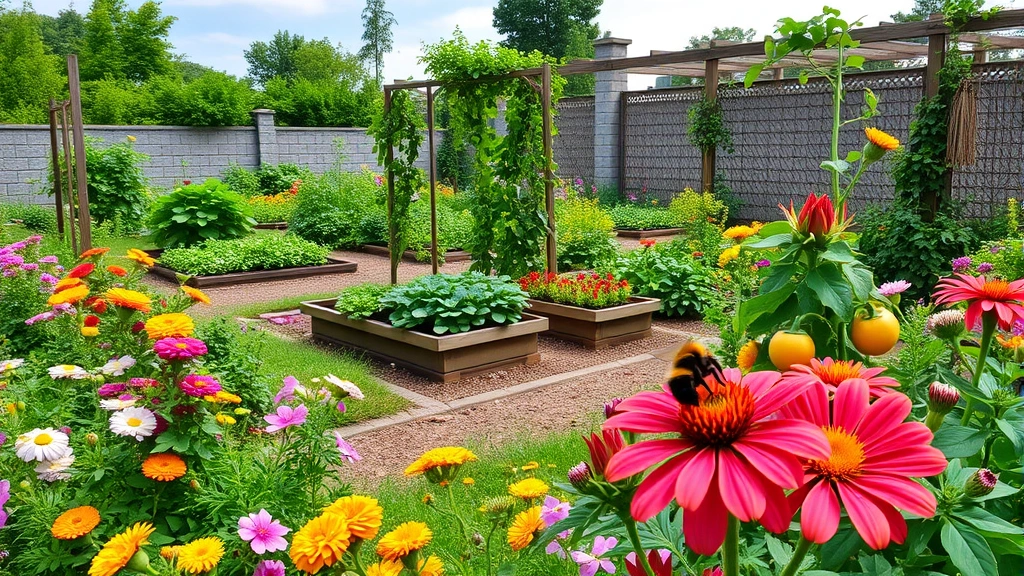
Encourage beneficial insects like ladybugs, lacewings, and parasitic wasps that prey on garden pests. Plant flowers like alyssum, yarrow, and dill to attract these allies. Avoid broad-spectrum pesticides that kill beneficial insects along with pests.
Physical removal works for larger pests. Hand-pick hornworms, beetles, and slugs, dropping them into soapy water. Row covers protect young plants from flying insects. Netting prevents birds from damaging berries.
Organic pest management includes neem oil for soft-bodied insects, insecticidal soap for aphids and mites, and Bacillus thuringiensis (Bt) for caterpillars. Sulfur controls powdery mildew and some mites. Copper fungicides prevent early blight on tomatoes. Always follow label directions and harvest intervals.
Disease prevention through good air circulation, proper spacing, and avoiding overhead watering reduces fungal infections. Remove affected leaves promptly. Rotate crops yearly to prevent soil-borne diseases from building up. Sanitize garden tools between plants using a 10% bleach solution to prevent spreading pathogens.
Seasonal Garden Care
Each season brings unique opportunities and challenges. Spring is for soil preparation, seed starting indoors, and planting cool-season crops. Summer demands consistent watering, pest monitoring, and succession planting. Fall is ideal for planting perennials and cool-season vegetables. Winter offers planning time and maintenance of garden infrastructure.
Spring cleaning includes removing winter debris, cutting back dormant perennials, and dividing overcrowded plants. This is prime time for growing peas and other cool-season crops before summer heat arrives. Start warm-season plants indoors 6-8 weeks before your last frost date.
Summer requires vigilance with watering, especially during heat waves. Mulch heavily to conserve moisture. Deadhead spent flowers to encourage continued blooming. Prune sprawling plants to maintain shape and improve air circulation.
Fall is perfect for planting garlic, cover crops, and establishing new perennials. Reduce watering as temperatures cool and growth slows. Begin cleanup of spent annuals and vegetables, composting healthy plant material and disposing of diseased plants.
Winter is when gardens rest. Use this time to review the past season, plan improvements, order seeds, maintain tools, and add compost to beds for spring. In mild climates, winter gardening extends the season with cold-hardy crops.
Tools and Infrastructure
Quality tools make gardening more enjoyable and efficient. Essential tools include a garden hoe for weeding and soil preparation, spade for digging, trowel for planting, pruners for cutting, and rake for cleanup. Invest in well-made tools that feel comfortable in your hands—you’ll use them frequently.
Infrastructure investments pay long-term dividends. Raised garden beds and trellises improve accessibility and allow vertical growing, maximizing space. Compost bins keep organic waste organized and accelerate decomposition. Rain barrels capture free water for dry periods. Cold frames extend seasons for temperature-sensitive plants.
Pathways prevent soil compaction and provide safe access. Mulched or gravel paths separate beds while suppressing weeds. Permanent pathways reduce maintenance compared to temporary arrangements.
Fencing protects gardens from wildlife damage. Deer require 6-8 foot barriers, while rabbits need 2-3 feet with underground extensions. Row covers protect against insects and provide frost protection for young plants.
Consider irrigation systems matching your garden’s size and complexity. Simple soaker hoses work for small gardens, while large spaces benefit from drip irrigation with timers. Mulch significantly reduces irrigation needs regardless of system type.
FAQ
What is the best time to start a garden?
Spring is ideal for most gardeners, allowing time to prepare soil and plant after frost danger passes. Fall is excellent for cool-season crops and establishing perennials. Year-round gardening is possible in mild climates with season-appropriate plant selection.
How often should I water my garden?
Most gardens need 1-2 inches of water weekly from rainfall or irrigation. Water deeply and less frequently rather than shallow, frequent sprinklings. Check soil moisture 2-3 inches deep; water when dry at that depth. Mulching reduces watering frequency significantly.
Can I grow a garden without compost?
Yes, though compost dramatically improves soil and plant performance. Alternative amendments include aged manure, leaf mold, peat moss, or coconut coir. Balanced fertilizers can supplement nutrient needs when compost isn’t available, though results typically aren’t as robust.
What should I do about garden pests?
Prevention through plant health, proper spacing, and encouraging beneficial insects is most effective. Monitor regularly for early detection. Hand-pick larger pests, use row covers for protection, and apply organic treatments only when necessary following label directions.
How do I know if my soil is healthy?
Healthy soil is dark, crumbly, and rich-smelling, containing visible organic matter and active organisms. It drains well without being soggy and supports vigorous plant growth. Soil testing through USDA NIFA provides detailed nutrient and pH information guiding amendments.
Is it better to grow from seeds or transplants?
Both have advantages. Seeds are economical and offer more variety but require longer time and controlled conditions. Transplants mature faster and reduce early-season challenges but cost more. Many gardeners use both strategies—starting some plants from seed indoors while purchasing others as transplants.
How can I extend my growing season?
Cold frames, row covers, and cloches protect plants from frost. Starting seeds indoors before the last frost date advances spring planting. Fall planting of cool-season crops extends harvest into winter. In mild climates, succession planting provides continuous production year-round.


