Garden Hose Repair Kit: DIY Fixes That Work!
A leaking or damaged garden hose can quickly turn watering day into a frustrating mess. Whether you’re starting a flower garden or maintaining established beds, a reliable water delivery system is essential. Rather than replacing an entire hose at the first sign of trouble, a well-stocked garden hose repair kit empowers you to fix common problems in minutes. This guide walks you through everything you need to know about selecting, assembling, and using a repair kit to keep your garden watered and thriving.
Garden hoses endure constant stress from UV exposure, temperature fluctuations, punctures, and wear at connection points. Most homeowners discover hose damage mid-season when they need water most. Having a repair kit on hand means you can address leaks immediately, saving money and preventing water waste. With the right tools and knowledge, even beginners can execute professional-quality repairs that last an entire growing season.
What’s Inside a Garden Hose Repair Kit
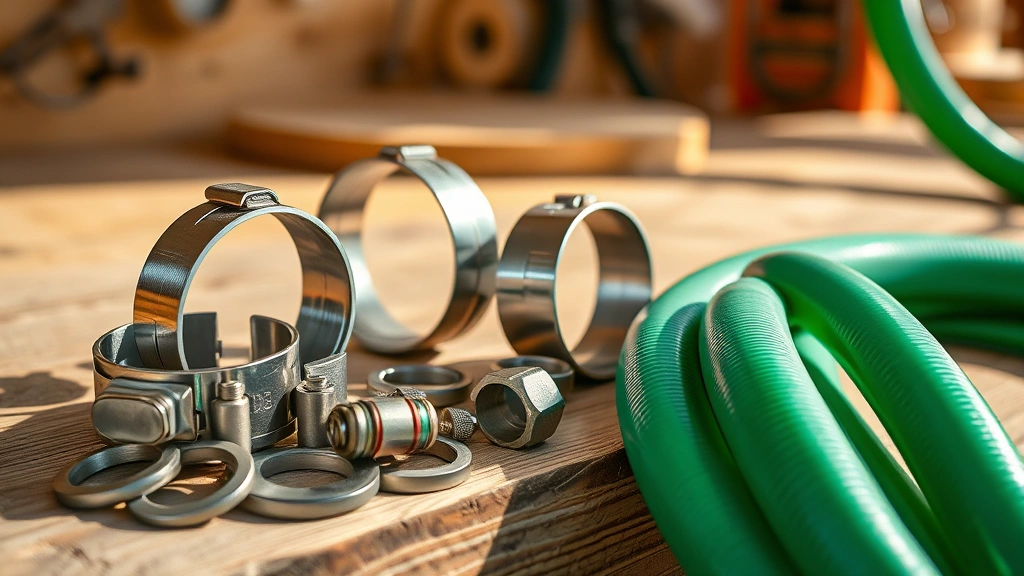
A comprehensive garden hose repair kit typically contains several essential components designed to address the most common failure points. Understanding what each piece does helps you choose the right kit for your needs and use it effectively.
Hose Clamps: These are the workhorses of any repair kit. Available in stainless steel or plastic, clamps compress the hose material around a connector or patch, creating a watertight seal. Most kits include multiple sizes ranging from half-inch to one-inch diameters. Stainless steel clamps offer superior durability and corrosion resistance, making them ideal for permanent repairs.
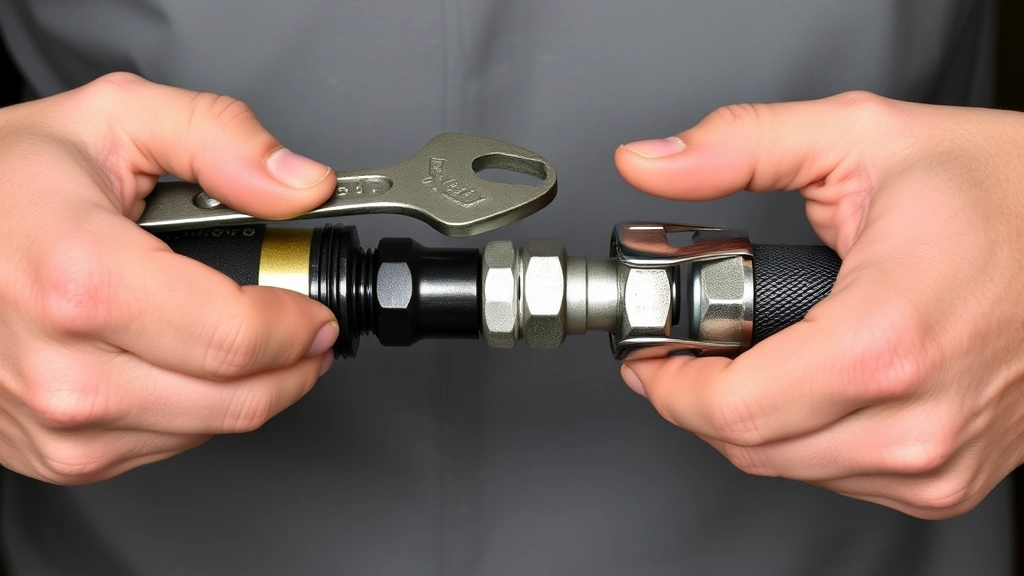
Coupling Connectors: When a hose section becomes irreparably damaged, couplings allow you to join two healthy segments together. Male and female couplings work in pairs, creating a secure connection that restores water flow. These are particularly valuable when damage occurs in the middle of a hose rather than at the ends.
End Connectors and Washers: Leaks frequently develop at connection points where the hose attaches to faucets or spray nozzles. Replacement washers create better seals, while new end connectors provide fresh threading that prevents cross-threading and water loss. Many kits include both threaded and quick-connect varieties to match different garden hose quick connect systems.
Patch Kits: For small punctures or pinhole leaks, self-adhesive patches or rubber repair patches with clamps offer quick fixes. These work best on vinyl or rubber hoses and typically seal holes up to a quarter-inch diameter. Some kits include waterproof tape that wraps around the damaged area for added reinforcement.
Hose Splitters and Shut-Off Valves: Premium repair kits often include components for dividing water flow between multiple zones or adding on-demand water control. These enhance functionality while addressing wear issues at high-stress connection points.
When shopping for a kit, look for one that includes stainless steel components, multiple connector sizes, and clear instruction labels. Brands from reputable garden tool manufacturers typically offer better quality and longer-lasting repairs than budget alternatives.
Types of Hose Damage and Solutions
Different damage types require different repair approaches. Identifying what’s wrong with your hose ensures you apply the most effective solution.
Pinhole Leaks: Tiny punctures often result from contact with sharp objects, thorns, or UV degradation. These leaks waste surprising amounts of water—a single pinhole can lose 20 gallons daily. Patch kits work well for small holes in the hose body, but if the leak is within six inches of an end connector, replacement of that section is more reliable.
Cracks and Splits: Extended freezing, excessive pressure, or age-related brittleness cause longitudinal cracks. While patches can temporarily seal small cracks, hose couplings that bypass the damaged section provide more permanent solutions. For container gardening operations, replacing the entire hose may prove more economical than attempting complex repairs.
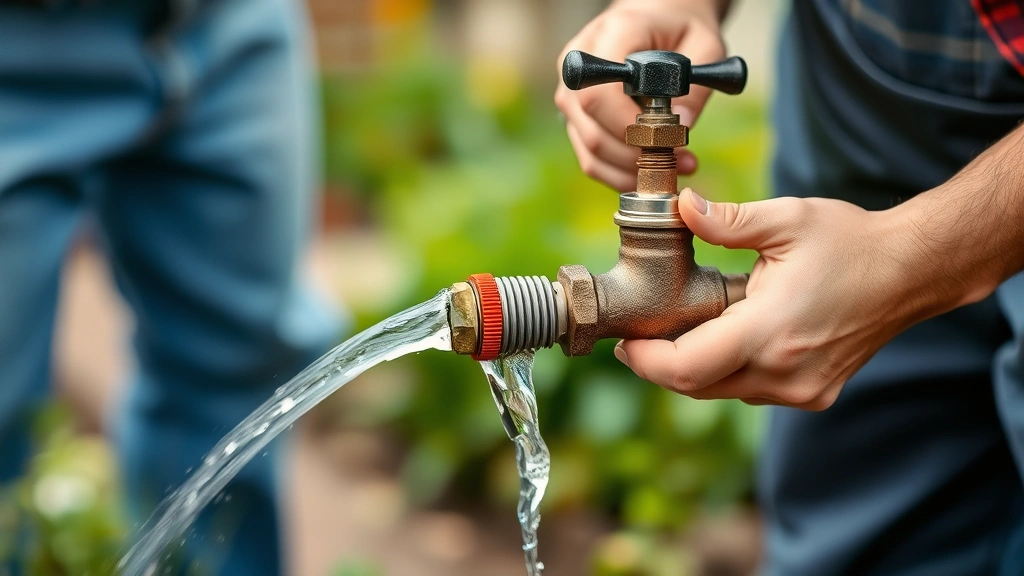
Connection Point Leaks: The most common failure location is where the hose meets the faucet or nozzle. These leaks stem from worn washers, cross-threaded connectors, or mineral buildup. Cleaning the connection, replacing the washer, and reseating the connector usually resolves the issue within minutes.
Kinks and Collapsed Sections: Permanent deformation restricts water flow and can trap pressure that eventually ruptures the hose. Unlike other damage types, kinks cannot be repaired—only the damaged section can be removed and the hose rejoined with couplings. Prevention through proper storage and coiling is more effective than repair.
Leaking Couplings: When you’ve previously repaired a hose with couplings, the connection itself may develop leaks. Tightening the hose clamps, replacing washers, or installing new couplings resolves this issue. Some gardeners apply plumber’s thread seal tape to male connectors for enhanced water-tightness.
Step-by-Step Repair Instructions
Each repair type follows a logical progression. These instructions assume you have a properly stocked garden hose repair kit and basic hand tools.
Repairing Pinhole Leaks: First, turn off the water and locate the exact leak by running your hand along the hose or looking for spray patterns. Dry the area completely with a cloth. If using a self-adhesive patch, remove the backing and press firmly over the hole, holding for 30 seconds. For a clamp-based patch, position the rubber patch over the leak, then wrap and tighten the clamp directly over it. Allow adhesive patches to cure for the manufacturer’s recommended time (typically 5-10 minutes) before resuming water pressure. Test the repair by turning the water back on and observing for any weeping.
Joining Hose Sections with Couplings: Cut the hose cleanly perpendicular to its length using a sharp utility knife or hose cutter, removing the damaged section. Insert the male coupling into one hose end and the female coupling into the other. Tighten hose clamps on both sides, positioning them approximately half an inch from the coupling end. Ensure the clamps are snug but not over-tightened, which can crush the hose material and create new leaks. Install a washer inside the female coupling for extra security. Turn on water gradually to check for leaks before resuming normal pressure.
Replacing Connection Washers: Disconnect the hose from the faucet by turning counterclockwise. Look inside the female connector (the end that attached to the faucet) for a small rubber or plastic washer. Remove the old washer and replace it with a new one from your kit, ensuring it sits flush in the connector. Reconnect the hose and tighten by hand, then use a wrench for one additional quarter-turn. Avoid over-tightening, which can strip the threads.
Installing New End Connectors: If the hose end itself is damaged or the threads are stripped, replacement becomes necessary. Unscrew the old connector completely. Slide a hose clamp onto the hose end, positioning it about half an inch from the cut edge. Insert the new connector and tighten the clamp firmly. For threaded connections, wrap plumber’s thread seal tape around the male connector threads (wrap clockwise, three times around) before attaching to a female connector. This creates a superior seal that resists mineral buildup and cross-threading.
Addressing Leaking Couplings: Turn off the water and dry the connection. Tighten the hose clamp on each side of the coupling by turning clockwise with a screwdriver. If tightening doesn’t stop the leak, disconnect the coupling and inspect the rubber washer. Replace any worn or hardened washers with fresh ones. Reconnect and test. If leaks persist, the coupling itself may be defective and requires replacement.
Preventing Future Hose Damage
Smart storage and handling practices extend hose life dramatically, reducing your reliance on repairs. These prevention strategies complement your repair kit knowledge.
Proper Storage Techniques: Drain your hose completely after each use, especially before winter storage. Coil it loosely without tight kinks—consider using a hose reel or storage container to prevent permanent deformation. Store hoses in a cool, shaded location away from direct sunlight, which degrades rubber and vinyl. Never leave hoses kinked or folded under heavy objects.
Seasonal Considerations: In winter, drain hoses completely to prevent ice expansion, which ruptures the interior. In summer, avoid leaving hoses exposed to intense sun for extended periods. Early morning watering sessions reduce UV exposure during peak heat hours. In spring, inspect hoses before heavy use season, identifying and repairing damage before it worsens.
Protective Practices: Route hoses away from sharp garden edges, thorns, and rough pavement. Use hose guides or stakes to elevate hoses off the ground in high-traffic areas. Avoid dragging hoses across hot surfaces like concrete or asphalt, which accelerates material degradation. When using a hose reel, ensure it rotates smoothly without pinching or over-tensioning the hose.
Connection Care: Hand-tighten connections rather than using wrenches whenever possible—over-tightening is a primary cause of stripped threads and future leaks. Replace washers annually or whenever you notice weeping at connections. Keep connection points clean of mineral deposits by occasionally soaking them in vinegar.
When to Replace vs. Repair
Not every hose warrants repair. Understanding when replacement makes more sense preserves your time and money.
Repair is Worthwhile When: The hose is less than five years old, damage is limited to one or two small areas, or the hose has sentimental value or specialized features. Pinhole leaks in vinyl hoses and connection point issues are typically worth repairing. If you have a quality hose that simply needs a coupling or new washer, repair costs just a few dollars.
Replacement is Better When: The hose is more than eight years old and showing multiple damage signs, damage occurs within six inches of both ends (limiting usable length), or the hose has experienced multiple previous repairs. Hoses with collapsed sections or extensive cracking throughout their length cost more to repair than to replace. Severely kinked hoses that have lost structural integrity require replacement rather than repair.
When planning container gardens or intensive watering systems, investing in a quality hose with superior materials—such as reinforced rubber with anti-kink design—reduces long-term repair needs. These premium hoses often outlast budget models by three to five years, offsetting higher initial costs.
FAQ
How long do hose repairs typically last?
Quality repairs using proper techniques and stainless steel clamps typically last an entire growing season (4-6 months). Patch repairs for small leaks may last 1-2 seasons. Connection repairs often outlast the rest of the hose. Factors like UV exposure, water pressure, and hose material all affect repair longevity.
Can I repair a hose with duct tape instead of a repair kit?
While duct tape provides temporary emergency fixes, it’s not a permanent solution. Duct tape degrades in sunlight, loses adhesion when wet, and cannot withstand water pressure effectively. A proper repair kit investment of $15-30 provides far superior results and reliability.
What’s the difference between vinyl and rubber hoses for repair purposes?
Vinyl hoses are lighter and more affordable but more prone to UV damage and cracking. Rubber hoses are heavier but more durable and resistant to both UV and temperature extremes. Both types respond well to coupling repairs, though rubber hoses generally accept patch repairs more reliably.
Should I repair or replace a hose with multiple leaks?
If a hose has more than three leaks, replacement is usually more economical. Multiple repairs suggest the hose material is deteriorating overall, and additional leaks will likely develop soon. Exception: if damage is clustered in one area, removing that section with couplings may extend the hose’s life economically.
How do I know if my hose clamp is tight enough?
The clamp should be snug enough that you cannot move it by hand, but not so tight that you’re straining to turn the screw. A good test is to pinch the hose gently—if water leaks around the clamp area, tighten further. If the hose material begins to deform or you see cracks forming, you’ve over-tightened.
Can I use a garden hose repair kit on soaker hoses?
Soaker hoses require specialized repair kits designed for their thinner walls and perforated structure. Standard hose repair kits may damage soaker hoses. Consult the soaker hose manufacturer for compatible repair components, or consider replacement if damage is extensive.


