Build a Garden Bed with Trellis: Complete DIY Guide
Creating a garden bed with an integrated trellis system transforms your outdoor space into a productive, visually stunning sanctuary. Whether you’re growing climbing vegetables, flowering vines, or ornamental plants, combining a raised bed with a trellis structure maximizes vertical space while adding architectural interest to your landscape. This comprehensive guide walks you through every step of the process, from planning and material selection to installation and plant selection.
A well-designed garden bed with trellis serves multiple purposes: it increases growing capacity, improves air circulation around plants, makes harvesting easier, and creates natural privacy screens or focal points. Whether you’re a beginner or experienced gardener, this DIY project is achievable with basic tools and careful planning. Let’s explore how to build a functional and beautiful garden bed with trellis system that will thrive for years to come.
Planning Your Garden Bed and Trellis Design
Before purchasing materials or breaking ground, invest time in thoughtful planning. Assess your garden space to determine the ideal location for your bed with trellis. Consider sunlight exposure—most vegetables and flowering plants need 6-8 hours of direct sunlight daily. Note shadows cast by trees, buildings, or fences at different times of day throughout the growing season.
Measure your available space carefully. Standard raised garden beds are 4 feet long by 2-3 feet wide, though you can customize dimensions. Trellis height typically ranges from 4-8 feet depending on what you’re growing. Taller trellises work well for indeterminate tomatoes and pole beans, while shorter structures suit peas and cucumbers.
Sketch your design, noting the trellis placement relative to the bed. Will the trellis run along the north side (creating afternoon shade for sensitive plants), east side (morning sun), or be centered? Consider wind exposure—tall trellises in windy areas need sturdy anchoring. Also think about accessibility: ensure you can comfortably reach plants for pruning, harvesting, and maintenance.
Research local climate conditions and growing zones. Understanding your flower garden basics helps inform plant selection and trellis orientation. Check with your local extension service for region-specific recommendations on best-performing climbing plants and seasonal timing.
Materials and Tools You’ll Need
For the Garden Bed:
- Untreated wood boards (cedar or composite preferred) or galvanized metal: 2″×10″ or 2″×12″ lumber
- Corner brackets or L-brackets (galvanized steel)
- Galvanized screws (3-inch deck screws)
- Landscape fabric or cardboard (optional weed barrier)
- Garden soil and compost (amount depends on bed dimensions)
For the Trellis Structure:
- Pressure-treated or cedar posts (4″×4″ for main supports)
- Horizontal and diagonal support beams (2″×4″ or 2″×6″)
- Lattice panels, bamboo poles, or sturdy twine/wire
- Galvanized bolts, washers, and nuts
- Metal brackets for reinforcement
- Concrete mix (if setting posts in ground)
Essential Tools:
- Circular saw or miter saw
- Power drill with bits
- Level (2-4 feet)
- Tape measure and pencil
- Square for marking angles
- Shovel and spade
- Work gloves and safety glasses
- Screwdriver set
Building the Garden Bed Foundation
Start by selecting your location and marking the bed outline with spray paint or string. Clear the area of grass, weeds, and large debris. If building on a slope, level the ground as much as possible—slight variations are acceptable but major slopes create uneven water drainage.
Cut your lumber to length according to your design. For a 4’×2′ bed, you’ll need two 4-foot pieces and two 2-foot pieces. If using untreated wood, consider a protective sealant safe for vegetable gardens. Assemble the bed frame on level ground by laying boards in a rectangle and securing corners with brackets and screws.
Position the assembled frame in your garden space. Use a level to check that the frame sits evenly—water should distribute uniformly across the bed. Adjust soil underneath if needed. For added stability on uneven ground, you can anchor corners with stakes or rebar driven into the earth.
Lay landscape fabric on the bottom to suppress weeds while allowing water drainage. Some gardeners prefer cardboard (which eventually decomposes) or no barrier at all. If using a barrier, cut corners so water can penetrate, and overlap seams by 6 inches.
Now you’re ready to add soil. This is where preparing garden soil properly becomes crucial for plant success. A quality mix combines topsoil, compost, and peat moss or coconut coir in roughly equal parts. Fill your bed to within 2-3 inches of the top.
Installing Your Trellis Structure
The trellis installation method depends on your design. For a post-based system, determine post placement—typically at corners or at intervals along the bed’s length for longer structures. Mark post locations and dig holes 18-24 inches deep. Posts should extend above ground by your desired trellis height (usually 6-8 feet).
Set posts in concrete for maximum stability. Mix concrete according to package directions and pour into holes, ensuring posts remain vertical using a level. Allow concrete to cure fully (typically 24-48 hours) before adding lateral support beams.
Attach horizontal support beams using galvanized bolts and metal brackets. These frame members should be securely fastened—this is where your trellis supports the weight of mature plants and withstands wind stress. Space horizontal members 12-18 inches apart vertically.
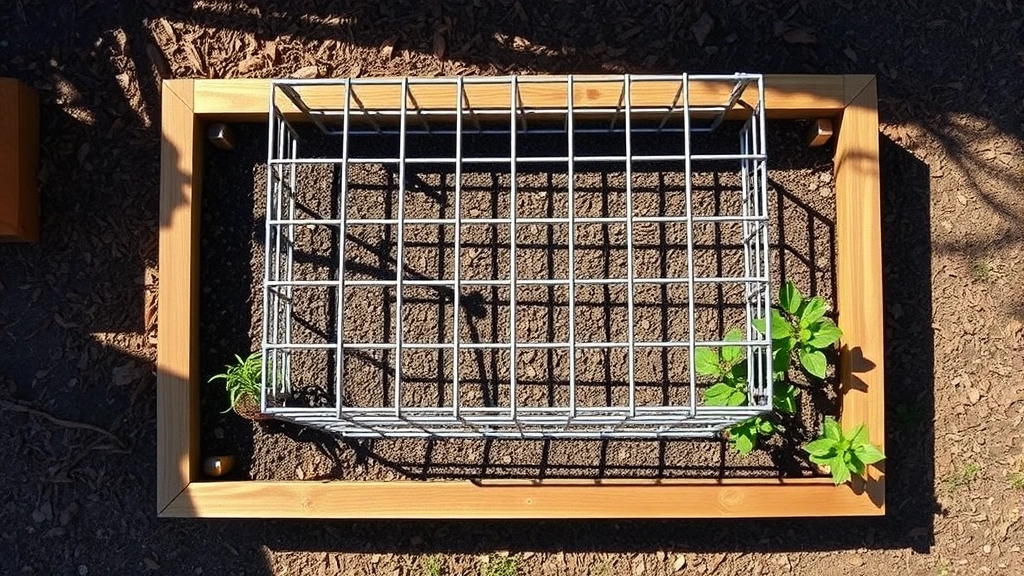
Add your climbing surface—lattice panels, bamboo poles arranged in a grid, or heavy-duty twine strung between horizontal supports. Bamboo creates a naturalistic look and works wonderfully for Asian garden designs. Lattice panels offer adjustable spacing for different plant types. Ensure whatever system you choose can support mature plant weight plus wind loads.
Brace tall structures with diagonal supports to prevent swaying. A garden arbor design with cross-bracing provides both stability and visual appeal. Test the structure by applying pressure—it should feel solid with minimal movement.

Preparing and Filling Your Bed
Once your trellis is securely installed, complete the soil preparation. Top off your bed with additional compost or composted manure, bringing soil level to 1-2 inches from the rim. This allows room for mulch and prevents water from running off during irrigation.
Water the bed thoroughly to settle soil and identify any low spots. Add more soil as needed after settling. Allow the bed to rest for a few days before planting, giving soil time to compact naturally and microbes time to begin colonizing your new growing medium.
Establish a drip irrigation system if desired. Soaker hoses or drip lines positioned along plant rows deliver water directly to roots, reducing waste and fungal diseases. Run irrigation lines along the bed’s edge or beneath mulch before planting.
Apply 2-3 inches of organic mulch (wood chips, straw, or composted bark) around plants once they’re established. This moderates soil temperature, conserves moisture, suppresses weeds, and gradually breaks down to enrich soil. Keep mulch a few inches away from plant stems to prevent rot.
Best Plants for Trellised Garden Beds
Vegetables:
- Tomatoes (indeterminate varieties): These vigorous growers reach 6+ feet and produce abundantly on trellises. Prune suckers and tie stems to supports as they grow. Cherry and heirloom varieties work beautifully.
- Pole beans: These nitrogen-fixing legumes climb naturally and produce prolifically. Plant seeds after last frost when soil warms. They’ll cover a trellis in weeks.
- Cucumbers: Vertical growing improves air circulation and reduces disease. Use sturdy twine or clips to support heavy fruit.
- Peas: Spring and fall crops thrive on trellises. They prefer cooler temperatures and benefit from afternoon shade provided by trellis structures.
- Squash and melons: Smaller varieties work on sturdy trellises. Support fruit with slings made from old fabric scraps or pantyhose.
Ornamental Plants and Vines:
- Clematis: Stunning flowering vines with varieties blooming spring through fall. Prune according to bloom type for best performance.
- Honeysuckle: Fragrant, attractive to pollinators, and vigorous growers that quickly cover structures.
- Morning glories: Fast-growing annuals with trumpet-shaped flowers in blues, purples, and pinks. Reseed readily.
- Ivy varieties: Evergreen options for year-round structure. Choose non-invasive cultivars appropriate for your region.
When selecting plants, consider mature size and growth rate. Fast growers like pole beans and morning glories cover structures quickly, while slower-growing perennial vines like clematis develop gradually but provide long-term structure. Mix plant types to extend harvest seasons or flowering periods throughout the year.
For edible gardens, succession plant vegetables every 2-3 weeks for continuous harvest. When spring peas finish, replace them with heat-loving beans. After tomatoes decline in fall, plant cool-season crops for autumn harvests. This intensive use maximizes your garden bed investment.
If you’re interested in container gardening alongside your trellis bed, learn about growing herbs like mint in containers to create an integrated herb garden nearby.
Maintenance and Care Tips
Regular Monitoring: Check your trellis structure seasonally for damage, loose bolts, or rot. Inspect plant ties and supports, adjusting as plants grow. Look for pest infestations and disease signs early—vertical growing exposes more leaf surface area to beneficial air circulation and inspection.
Pruning and Training: Guide climbing plants onto the trellis framework as they grow. For tomatoes, remove lower leaves once plants are established to improve air circulation and reduce disease. Pinch back vining plants to encourage branching and fuller coverage.
Watering: Trellised plants in raised beds dry faster than in-ground gardens due to increased air exposure. Water deeply and consistently, aiming for 1-2 inches weekly depending on weather. Drip irrigation prevents foliage wetting, reducing fungal issues.
Fertilizing: Refresh compost annually, adding 2-3 inches of finished compost to bed surfaces each spring. For heavy feeders like tomatoes, apply balanced fertilizer every 3-4 weeks during growing season. Organic options include fish emulsion, compost tea, or granular fertilizers.
Winter Preparation: In fall, remove spent plants and add them to compost piles. Cut back perennial vines to appropriate heights. Add a thick compost layer to protect soil and feed spring growth. Consider planting cover crops like clover to prevent erosion and fix nitrogen.
Trellis Longevity: Inspect wooden structures annually for rot, particularly at ground level where moisture accumulates. Treat any affected areas with fungicide or replace compromised sections. Galvanized metal components should last decades with minimal maintenance. Apply rust-preventative spray to bolts and brackets every few years.
Budget for occasional repairs and replacements. A well-maintained trellis system lasts 10-15+ years, making it an excellent long-term garden investment. The vertical growing efficiency and improved aesthetics provide returns far exceeding the initial effort and expense.

FAQ
What’s the best time to build a garden bed with trellis?
Spring (before growing season) is ideal, allowing soil to settle and structures to cure before planting. However, you can build any time year-round. In fall, construction gives you winter to plan spring plantings. Allow concrete at least 48 hours to cure before adding weight or planting.
How deep should my garden bed be?
A minimum of 8-10 inches works for shallow-rooted crops like lettuce. Most vegetables prefer 12-18 inches of soil depth. For root vegetables like carrots or parsnips, aim for 18-24 inches. Deeper beds provide better drainage and more root space for vigorous plants.
Can I build a trellis bed on concrete or hardscape?
Yes, but you’ll need to create a raised bed with adequate drainage. Use landscape fabric to prevent soil compaction while allowing water through. Alternatively, use container-style raised beds with legs that elevate the structure above concrete surfaces.
What’s the most cost-effective trellis material?
Bamboo poles and heavy-duty twine or jute offer budget-friendly options. Untreated wood costs less than cedar or composite materials but requires more maintenance. Lattice panels provide good value when used with sturdy frame supports. Metal structures cost more initially but outlast wood by decades.
How do I prevent my trellis from becoming top-heavy?
Use diagonal bracing, anchor posts in concrete at least 18-24 inches deep, and ensure horizontal supports are properly bolted. Prune plants to maintain balanced growth, and avoid planting all heavy crops on one side. In windy areas, add guy wires or additional diagonal supports.
Can I use recycled materials for my trellis?
Absolutely. Reclaimed wood, old ladders, branches, and salvaged metal create charming, sustainable structures. Ensure materials are structurally sound and won’t introduce contaminants to your garden. Avoid treated wood with harmful chemical preservatives in food gardens.
What soil amendments improve productivity?
Work in compost, aged manure, peat moss, and perlite or vermiculite for drainage. Add bone meal for phosphorus (root development), kelp meal for trace minerals, and greensand for potassium. A soil test through your local extension office guides specific amendments for your soil conditions.


