How to Build a Garden Arbor: DIY Expert Tips
A garden arbor transforms any outdoor space into a charming retreat while providing structural support for climbing plants and vines. Whether you’re looking to frame a garden entrance, create a shaded walkway, or add vertical dimension to your landscape, building your own arbor is an achievable DIY project that requires minimal carpentry skills and moderate investment. This comprehensive guide walks you through every step of constructing a sturdy, beautiful arbor that will enhance your garden for years to come.
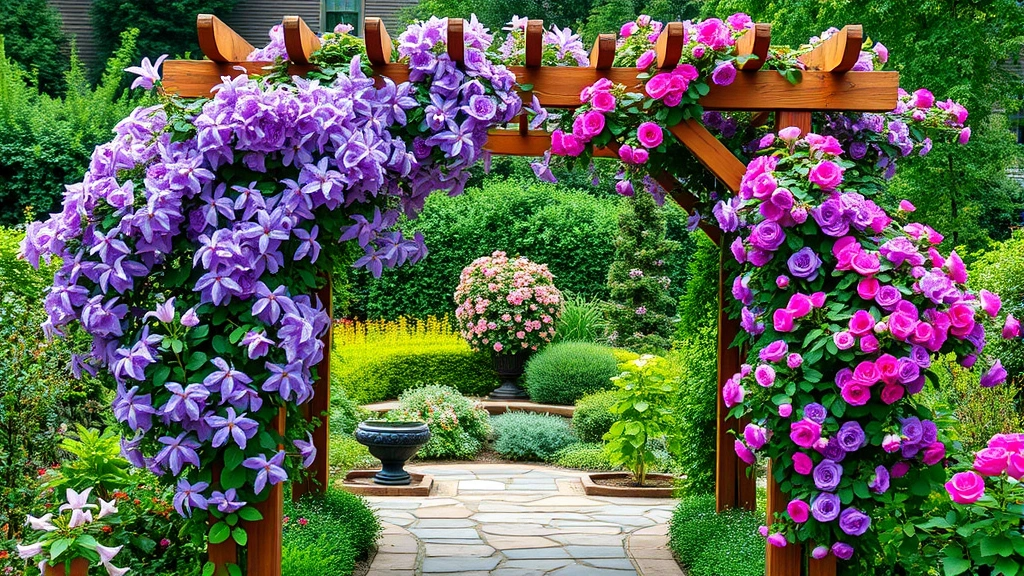
An arbor serves multiple purposes in garden design: it defines spaces, creates focal points, supports flowering vines like clematis and jasmine, and provides shade for sitting areas or pathways. The satisfaction of building something functional with your own hands, combined with the natural beauty it brings to your garden, makes this project worthwhile for both novice and experienced gardeners.
Materials and Tools You’ll Need
Before starting your garden arbor project, gather all necessary materials and tools. The right preparation ensures smooth construction and professional-looking results. Most arbors use pressure-treated lumber for durability, though cedar and redwood offer natural rot resistance and aesthetic appeal.
Essential Materials:
- Pressure-treated or cedar lumber (2×4 or 2×6 boards for main structure)
- Galvanized or stainless steel fasteners (nails, screws, bolts)
- Concrete mix for post footings (60-80 pound bags)
- Wood stain or exterior paint (optional but recommended)
- Wood sealant or preservative
- Gravel or pea gravel for base
- Metal brackets and corner braces for reinforcement
Required Tools:
- Circular saw or miter saw for cutting lumber
- Drill with bits for pilot holes
- Level (4-foot recommended)
- Measuring tape and carpenter’s square
- Shovel for digging post holes
- Mixing container and mixing drill for concrete
- Socket wrench set for bolts
- Pencil for marking cut lines
Investing in quality tools makes the project easier and produces better results. If you don’t own specialized equipment, consider renting from local hardware stores rather than purchasing items you’ll use infrequently.
Choosing the Right Design and Location
Selecting the perfect location and design is crucial for your garden arbor’s success. Consider your garden’s aesthetic, available space, sun exposure, and intended purpose before construction begins.
Design Considerations: The most popular arbor styles include traditional A-frame designs, rectangular tunnel arbors, and decorative pergola-style structures. Simple A-frame arbors work well for entrances and focal points, while longer tunnel designs create dramatic walkways. Your choice should complement your home’s architecture and existing landscape features.
Location Selection: Choose a spot that receives adequate sunlight for climbing plants to thrive, typically 6-8 hours daily. Ensure the location has good drainage to prevent water pooling around post footings. Avoid placing arbors directly under tree canopies where excessive shade and falling debris can damage both structure and plants. Position arbors where they’ll be visible from key vantage points like patios, windows, or garden paths.
Consider sight lines and traffic flow. An arbor should enhance movement through your garden rather than obstruct it. If you’re planning a vertical garden, an arbor provides excellent structural support for climbing vegetables or ornamental vines.
Measure your space carefully and sketch a simple diagram. Standard arbor dimensions range from 4 feet wide by 7 feet tall for compact spaces to 8 feet wide by 8 feet tall for dramatic statements. Account for post depth (typically 2-3 feet underground for stability).
Building the Frame Structure
Constructing the frame is where your garden arbor takes shape. Proper construction techniques ensure structural integrity and longevity.
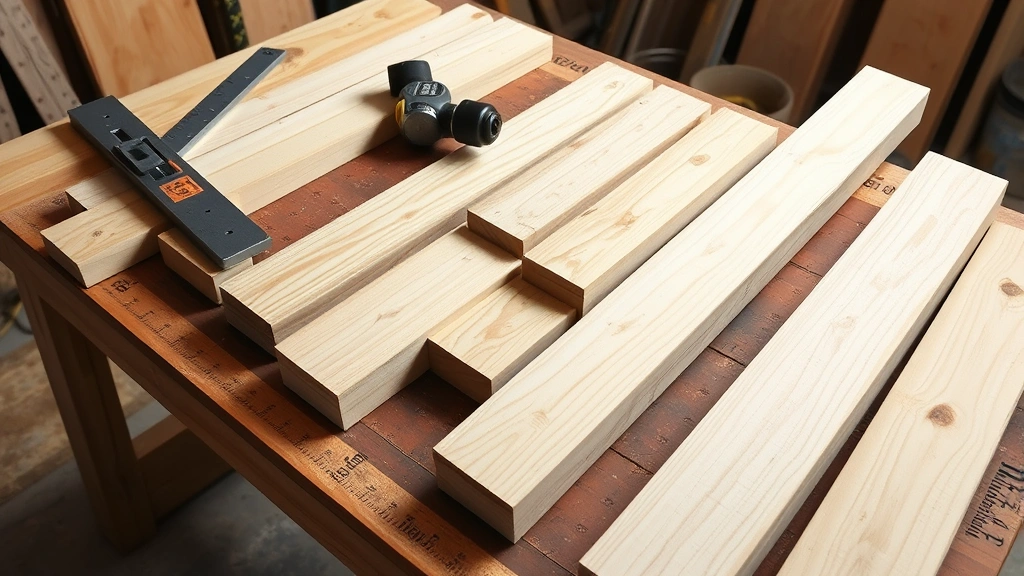
Cutting and Preparing Lumber: Start by cutting all pieces to length. For a basic A-frame arbor, you’ll need four vertical posts, horizontal cross beams, and diagonal supports. Use a miter saw for angled cuts if creating decorative tops. Sand all cut edges to prevent splinters and improve water shedding.
Creating the Frame Sections: Assemble frame sections on a flat surface before installation. This allows you to ensure square corners using a carpenter’s square and to pre-drill holes, which prevents wood splitting. Connect pieces using galvanized screws (3-inch deck screws work well) or bolts with washers for maximum holding power.
For added strength, install diagonal bracing on sides and back. These cross-braces prevent lateral movement and allow the structure to withstand wind loads. Use 2×4 lumber angled at 45 degrees, connecting them securely with bolts.
If building a vertical structure for an herb garden or similar purpose, ensure adequate spacing between horizontal slats (typically 4-6 inches) to allow light penetration and air circulation.
Assembly and Installation
Proper installation determines whether your garden arbor remains stable and level for decades. This phase requires precision and patience.
Setting Post Footings: Mark post locations with flour or chalk. Dig holes 2-3 feet deep (below frost line in cold climates) and 12 inches in diameter. The depth is critical—shallow footings lead to heaving and instability during freeze-thaw cycles. Place 4-6 inches of gravel in each hole for drainage.
Installing Posts: Position the first post in its hole and use a level to ensure it’s perfectly vertical. Have a helper hold it steady while you partially fill the hole with concrete mix (follow package instructions for mixing ratios). Continue filling and checking level until concrete is 2-3 inches above ground. Repeat for all posts, then allow concrete to cure for 24-48 hours before proceeding.
Attaching Cross Beams: Once concrete cures, attach horizontal beams to posts using lag bolts or heavy-duty brackets. Pre-drill all holes to prevent splitting. Use a level to ensure beams are horizontal. This step is where your structure gains its characteristic appearance—take time to ensure everything is square and plumb.
Adding Decorative Elements: Install lattice panels, decorative finials, or curved tops. These elements add visual interest while providing additional support for climbing plants. Secure all components with corrosion-resistant fasteners.
Finishing Touches and Protection
Finishing your garden arbor properly extends its lifespan and enhances its appearance. Wood exposed to the elements requires protection from UV rays, moisture, and insects.
Wood Treatment: Apply a wood preservative or sealant to all surfaces, including cut ends where wood is most vulnerable to moisture penetration. Pressure-treated lumber already contains preservatives, but an additional coat of sealant provides extra protection. Allow sealant to cure fully before painting or staining.
Painting and Staining: Choose exterior-grade paint or stain designed for outdoor wood. White and natural cedar tones are classic choices that complement most gardens, though darker colors create dramatic focal points. Apply at least two coats, allowing proper drying time between applications. Quality exterior paint lasts 3-5 years before requiring touch-ups.
Hardware Inspection: Check that all bolts are tight and all fasteners are secure. Periodically inspect for rust or corrosion, especially on non-stainless fasteners. Replace any corroded hardware immediately to prevent structural compromise.
Consider adding a garden bench underneath your arbor to create a peaceful seating area, or incorporate garden shears for maintaining climbing plant growth.
Planting Your Arbor with Climbing Vines
Your garden arbor is truly complete when adorned with lush climbing plants. Choose vines suited to your climate and light conditions.
Popular Climbing Plants: Clematis offers stunning flowers in various colors, while honeysuckle provides fragrance and attracts pollinators. Ivy creates year-round greenery, though it requires management to prevent excessive growth. Climbing roses add romance and color. For edible options, consider growing grapes, kiwis, or pole beans on your arbor structure.
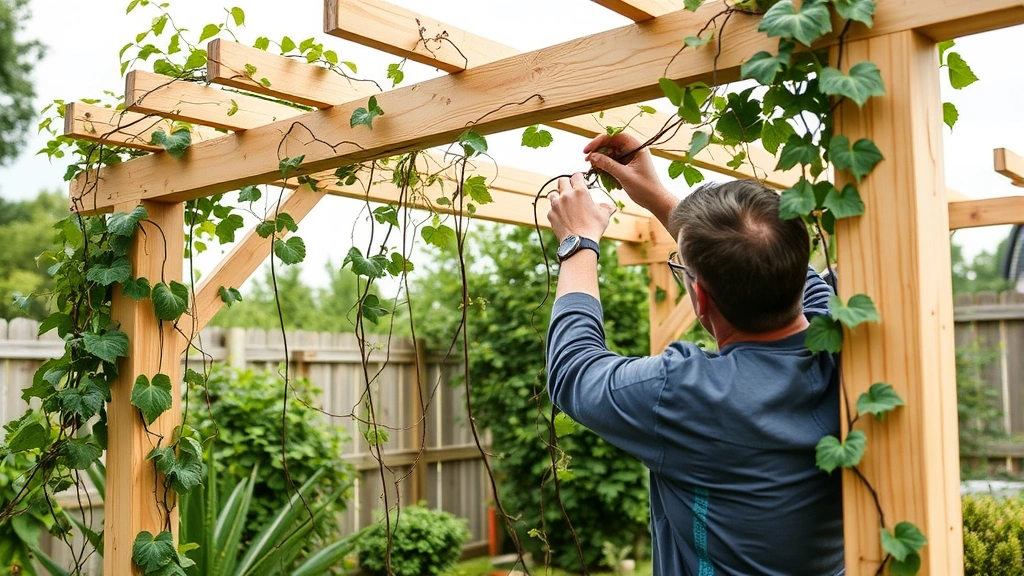
Planting Technique: Space plants 2-3 feet apart at the arbor base. Dig holes slightly larger than root balls and amend soil with compost. Install plant supports like twine or soft ties initially to guide growth toward the arbor structure. Water thoroughly after planting and maintain consistent moisture during the first growing season.
Training Growth: As vines grow, gently weave them through the arbor structure, securing loose stems with soft ties. Prune regularly to encourage bushy growth and maintain desired shape. Many climbers benefit from annual pruning after flowering or in early spring.
If you’re interested in vertical growing for food production, learn about growing blueberries in containers near your arbor, or explore how to propagate plants for expanding your collection of climbing varieties.
Maintenance and Seasonal Care
Regular maintenance keeps your garden arbor beautiful and structurally sound throughout the seasons.
Spring Maintenance: Inspect the arbor for winter damage, checking for loose fasteners and wood rot. Prune climbing plants to remove dead growth and shape new shoots. Apply fresh sealant or paint if needed. This is ideal timing for installing new climbing plants or relocating existing ones.
Summer Care: Monitor climbing plants for pests and diseases. Ensure vines receive adequate water, especially during dry periods. Prune excess growth to maintain the arbor’s visual definition and prevent plants from becoming unruly. Enjoy your shaded retreat!
Fall Tasks: Remove dead plant material and clean up fallen leaves. This prevents pest overwintering and allows better air circulation. If growing deciduous vines, this is when you’ll see the arbor’s structure more clearly—an opportunity to assess any needed repairs.
Winter Considerations: In cold climates, periodically remove snow accumulation from horizontal surfaces to prevent excessive weight stress. Check that posts remain plumb after ground heaving from frost. Inspect for animal damage or nesting. Apply additional sealant to any exposed wood if cracks appear.
Long-term Durability: Plan to refinish your arbor every 3-5 years with fresh paint or stain. Replace any damaged boards promptly before problems spread. Pressure-treated lumber typically lasts 15-20 years, while cedar and redwood may last 20-30 years with proper maintenance. Budget for periodic hardware replacement and structural reinforcement as needed.
FAQ
How deep should arbor posts be buried?
Posts should be buried 2-3 feet deep, extending below your region’s frost line. This prevents heaving during freeze-thaw cycles and ensures stability. Use a level to verify vertical alignment before concrete cures.
What’s the best wood for a garden arbor?
Pressure-treated lumber offers excellent durability and affordability. Cedar and redwood naturally resist rot but cost more. Avoid untreated softwoods like pine, which decay quickly when exposed to moisture.
How long does it take to build a garden arbor?
A basic A-frame arbor takes 2-3 days for an experienced DIYer: one day for preparation and cutting, one day for assembly and installation, and additional time for finishing. Concrete curing requires 24-48 hours before proceeding with frame assembly.
Can I move an installed arbor?
Relocating an established arbor is challenging because posts are set in concrete. Plan location carefully before installation. If relocation becomes necessary, you’ll need to remove concrete footings and reinstall in the new location.
What climbing plants grow fastest on arbors?
Honeysuckle, clematis, and morning glories establish quickly, often covering an arbor within one growing season. Ivy and climbing roses take longer but provide denser coverage long-term. Choose based on your climate zone and aesthetic preferences.
How often should I treat my arbor with sealant?
Apply sealant or paint every 3-5 years, depending on weather exposure and product quality. More frequent applications in harsh climates or with lower-quality products may be necessary. Inspect annually for signs of wear.
Do I need a building permit for a garden arbor?
Requirements vary by location. Small residential arbors typically don’t require permits, but check local regulations before building. Larger structures or those attached to houses may need approval.


