
Candy Apple Recipe: Gardener’s Sweet Treat Guide
There’s something magical about transforming apples you’ve grown yourself into glistening candy apples. Whether you’re harvesting from a mature orchard or nurturing young trees in containers, homemade candy apples represent the ultimate farm-to-table dessert. This guide walks you through selecting the perfect varieties, preparing your fruit, and creating show-stopping candy apple treats that celebrate your gardening success.
Gardeners who grow their own apples unlock a special advantage: complete control over quality and ripeness. Unlike store-bought fruit that may have traveled hundreds of miles, your homegrown apples reach peak sweetness and crispness at harvest. Combined with simple pantry ingredients, these apples become unforgettable confections perfect for autumn celebrations, farmer’s market displays, or simply sharing with fellow gardeners who appreciate homegrown excellence.
Best Apple Varieties for Candy Apples
Selecting the right apple variety dramatically impacts your candy apple success. The ideal candidates are medium-sized apples with firm flesh, balanced sweetness, and natural acidity that complements sugar coatings. Granny Smith apples reign supreme for candy making—their tartness provides excellent contrast to sweet coatings, and their dense flesh resists softening during the candy application process.
Honeycrisp apples deliver exceptional sweetness and satisfying crunch, making them perfect for candy apples destined for immediate consumption. Braeburn varieties offer firm texture and natural sugar content that requires minimal added sweetness. Gala apples provide mild flavor and attractive coloring, ideal for children’s treats. Pink Lady (Cripps Pink) apples combine tartness with natural pink hues that shine beautifully beneath glossy candy coatings.
When growing fruit for recipes, consider your local climate zone. Standard apple trees require 150-200 chill hours annually, though some warm-climate varieties need fewer. If space is limited, raised bed gardening techniques allow container cultivation of dwarf apple varieties, which mature in 3-4 years rather than 5-7 years for full-size trees.
Harvest apples when they reach full color and detach easily from branches with gentle twisting. Peak ripeness typically occurs in late summer through fall, depending on variety and region. Store harvested apples in cool conditions (32-40°F) for up to two weeks before candy coating—this maintains firmness and extends shelf life of your finished products.
Harvesting and Preparing Your Garden Apples
Proper preparation ensures your homegrown apples perform beautifully when coated. Begin by gently washing apples under cool running water, using a soft brush to remove any garden soil or debris. Pat completely dry with paper towels—moisture prevents candy from adhering properly. Remove the stem if present; it can be replaced with a lollipop stick or wooden skewer for easy handling.
Rub each apple with a small amount of vinegar on a soft cloth. This removes the natural waxy coating that apples develop, allowing candy to grip the surface securely. Some gardeners prefer rubbing apples with lemon juice for similar results plus subtle flavor enhancement. This step takes minimal time but proves absolutely crucial for successful coating adhesion.
Bring apples to room temperature before candy coating—cold fruit causes the candy to set too quickly, resulting in uneven coverage. Allow prepared apples to sit on a clean surface for 30-60 minutes. Insert wooden sticks or skewers through the blossom end (opposite the stem end), pushing approximately two inches deep for secure handling during the dipping process.
For uniform results, select apples of similar size. Smaller apples (2-3 inches diameter) work best for candy coating, as they allow complete coverage without excessive candy waste. Larger apples require more coating and may develop thicker, less appetizing candy shells. If your garden soil preparation produced particularly large apples, consider slicing them for other recipes or selecting medium specimens specifically for candy making.
Classic Candy Apple Recipe
Ingredients:
- 2 pounds granulated sugar
- 1 cup light corn syrup
- 1 cup water
- 1 teaspoon white vinegar
- 1/4 teaspoon cream of tartar
- 1 teaspoon vanilla extract
- 1/2 teaspoon red food coloring (or desired color)
- 6-8 medium apples, prepared as described
- Wooden sticks or lollipop sticks
Instructions:
- Combine dry ingredients: In a heavy-bottomed saucepan, combine sugar, corn syrup, water, vinegar, and cream of tartar. Stir gently over medium heat until sugar dissolves completely. Avoid stirring once mixture reaches a boil, as this encourages crystallization.
- Monitor temperature: Clip a candy thermometer to the pan’s side, ensuring the bulb doesn’t touch the bottom. Continue heating until mixture reaches 300°F (hard-crack stage). This requires approximately 15-20 minutes of patient cooking. Hard-crack stage ensures the candy coating hardens properly on apples.
- Add flavorings: Remove from heat immediately upon reaching 300°F. Quickly stir in vanilla extract and food coloring. Work carefully—the mixture is extremely hot and can cause severe burns. Stir gently for 30 seconds to distribute color evenly.
- Prepare dipping station: Line a baking sheet with parchment paper or silicone mat. Arrange prepared apples on sticks within arm’s reach of your cooking station. Have all materials ready before beginning the dipping process.
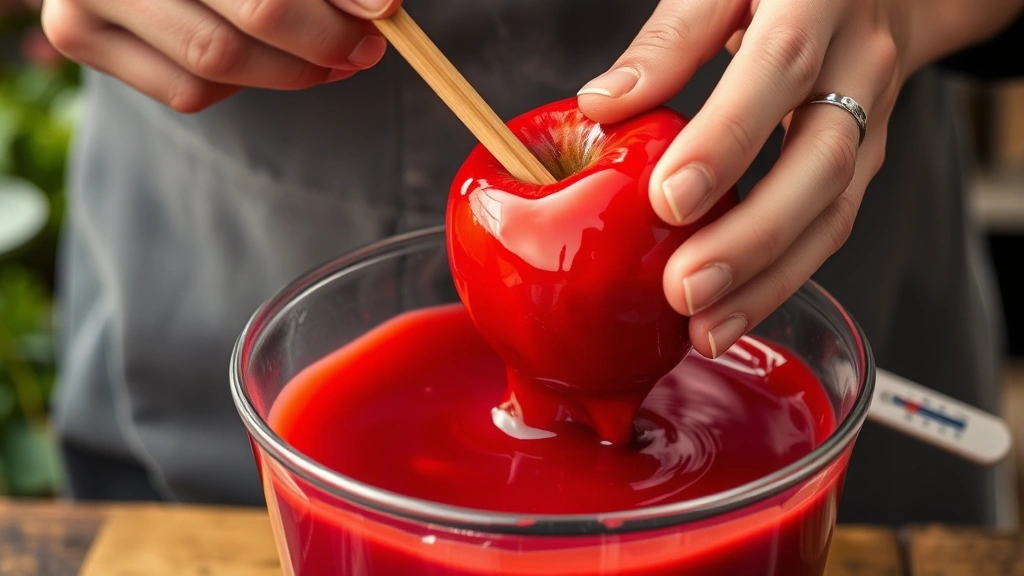
- Dip apples: Working quickly while candy remains fluid, dip each apple into the hot mixture, rotating to coat all sides. Hold each apple in the candy for 2-3 seconds, then remove and allow excess to drip back into the pan for 3-5 seconds.
- Cool on prepared surface: Place coated apples on the parchment-lined baking sheet, stick-side up. The candy will harden within 5-10 minutes. Allow complete cooling (approximately 30 minutes) before handling or wrapping.
Pro Tips: If candy becomes too thick during the dipping process, gently reheat over low heat for 1-2 minutes. Never allow it to exceed 310°F, as overheated candy develops a burnt taste. If you have an herb garden, consider infusing the candy with fresh mint or lavender extract for sophisticated flavor variations.
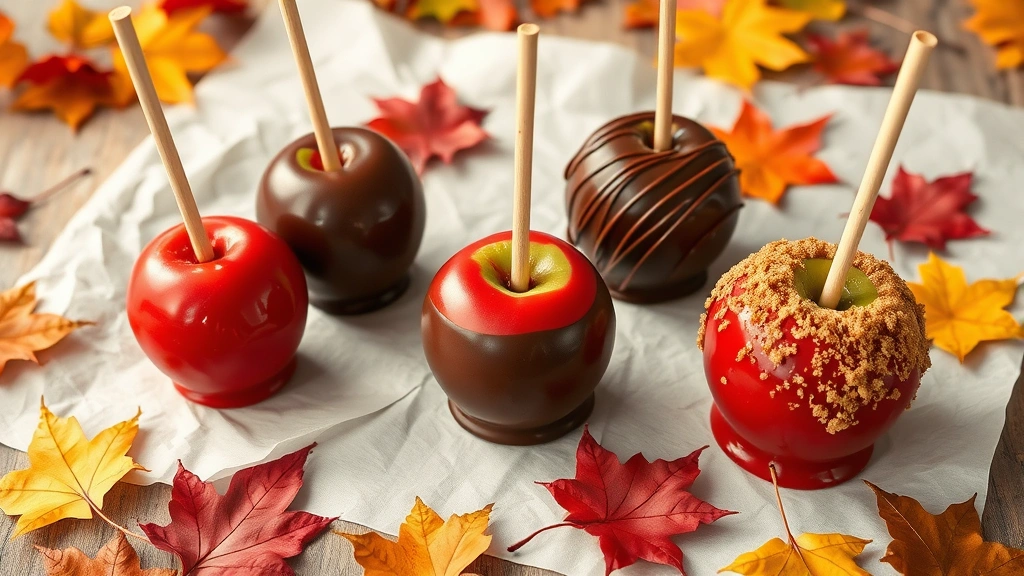
Flavor Variations and Creative Coatings
Once you’ve mastered the classic recipe, endless flavor possibilities await. Caramel apples substitute caramel for hard candy—melt high-quality caramel over low heat until pourable, then dip apples as directed. Caramel coating softens slightly as it cools, creating a chewier texture than hard candy versions.
Spiced candy apples incorporate autumn spices into the basic recipe. Add 1/4 teaspoon cinnamon, 1/8 teaspoon nutmeg, and a pinch of ground cloves along with the vanilla extract. These warming spices complement tart apple varieties beautifully and evoke harvest season nostalgia.
Chocolate-dipped candy apples combine two coatings for sophisticated appeal. Create the hard candy coating as directed, then—once hardened—dip the upper portion into melted dark, milk, or white chocolate. The chocolate sets quickly, creating elegant two-tone effects. Add crushed nuts, sprinkles, or edible glitter to chocolate before it hardens for enhanced visual appeal.
Salted caramel apples balance sweetness with sea salt’s mineral notes. After dipping apples in caramel, immediately sprinkle with fleur de sel or finishing salt while the coating remains tacky. The salt dissolves slightly into the caramel, creating complex flavor that appeals to adult palates.
Cinnamon-sugar apples offer simpler preparation. After dipping in hard candy coating, immediately roll in cinnamon-sugar mixture (1/4 cup sugar combined with 2 tablespoons ground cinnamon) while the candy remains sticky. This creates textured surfaces that catch light beautifully.
Berry-flavored apples substitute fruit extracts for vanilla. Use 1 teaspoon strawberry, raspberry, or blackberry extract instead of vanilla, and pair with corresponding food coloring. These variations work especially well with Gala or Pink Lady apples, creating flavor combinations that celebrate homegrown fruit excellence.
Storage and Serving Tips
Properly stored candy apples maintain quality for up to two weeks, though they’re most delicious within the first 3-4 days. Wrap each cooled apple individually in parchment paper or plastic wrap to prevent moisture loss and dust accumulation. Store in a cool, dry location—not the refrigerator, which introduces humidity that softens the candy coating.
For gift-giving, arrange wrapped candy apples in decorative boxes lined with tissue paper. Include a small card describing the apple variety and any special flavorings used. Homegrown candy apples make exceptional gifts for fellow gardeners, teachers, or community members who appreciate homemade treats.
Display candy apples on a garden bench or outdoor table during harvest celebrations, creating rustic centerpieces that showcase your gardening accomplishments. The glossy candy coatings catch sunlight beautifully, making them natural focal points for autumn gatherings.
For immediate consumption, enjoy candy apples at room temperature. The hard candy coating provides satisfying crunch before yielding to the apple’s crisp flesh. Some gardeners prefer slightly chilled apples—refrigerate for 15-20 minutes before serving to enhance the contrast between cold fruit and room-temperature candy coating.
Growing Apples for Candy Making
Dedicated candy apple enthusiasts often cultivate their own trees to ensure consistent quality and flavor. Apple trees thrive in full-sun locations receiving at least 6-8 hours of direct sunlight daily. Proper garden soil preparation creates the foundation for healthy, productive trees.
Apples prefer well-draining soil with pH between 6.0-7.0. Amend heavy clay soils with compost or aged manure to improve drainage and add organic matter. Most apple varieties require cross-pollination, so plant at least two compatible varieties for optimal fruit set. Consult your local extension service for variety recommendations suited to your specific climate zone.
Dwarf and semi-dwarf apple varieties mature quickly and remain manageable in size, making them ideal for small-space gardeners. These reach 8-15 feet at maturity compared to 25-30 feet for standard trees. They produce fruit within 2-3 years, allowing relatively quick returns on your investment. Space dwarf trees 8-10 feet apart; semi-dwarf varieties need 12-15 feet between trees.
Maintain consistent moisture during the growing season, providing approximately 1-2 inches of water weekly through rainfall or irrigation. Use a quality garden hose to deliver water directly to the soil, avoiding foliage which can develop fungal issues when wet.
Prune apple trees during late winter dormancy to establish strong branch structure and improve light penetration. Remove crossing branches, dead wood, and growth directed toward the center of the tree. Proper pruning encourages bushier growth and more abundant fruiting.
Thin developing fruit in early summer when apples reach marble size. Space remaining fruits 4-6 inches apart along branches, removing smaller or damaged specimens. This concentrates tree energy into fewer, larger apples with superior flavor—ideal for candy making.
Monitor for common pests and diseases throughout the growing season. Integrated pest management techniques minimize damage while avoiding chemical residues on fruit destined for candy making. Consult your regional extension office for pest identification and organic management strategies suited to your area.
Harvest apples when they reach full color and detach easily from branches. Early varieties mature in late August; mid-season types peak in September; late varieties harvest in October. Create a harvest schedule noting which varieties mature when, allowing you to enjoy fresh candy apples throughout autumn.
FAQ
What temperature should candy reach before dipping apples?
Candy must reach 300°F (hard-crack stage) for proper coating. Use an accurate candy thermometer and work quickly once this temperature is achieved, as the mixture hardens rapidly as it cools.
Can I use apples picked several days ago?
Yes, apples picked up to two weeks prior work well for candy making if stored in cool conditions. However, freshly harvested apples often yield superior results due to firmer texture and higher moisture content.
Why isn’t the candy sticking to my apples?
The waxy coating on apple skins prevents adhesion. Always wash apples thoroughly and rub with vinegar or lemon juice before coating. Ensure apples reach room temperature before dipping.
Can I make candy apples ahead for a specific event?
Prepare candy apples 2-3 days before serving for optimal quality. Longer storage periods may result in softening or moisture loss. Wrap individually and store in cool, dry conditions.
What if my candy coating cracks after cooling?
Cracking typically indicates the candy reached too high a temperature or cooled too quickly. Aim for exactly 300°F and allow apples to cool at room temperature away from drafts or air conditioning.
Are homegrown candy apples safe for young children?
Hard candy apples present choking hazards for young children. Supervise closely or offer caramel apples instead, which have softer coating. Always remove sticks before serving to very young children.
How do I prevent the candy from becoming sticky in humid conditions?
Store candy apples in cool, dry locations. In humid climates, wrap individually in parchment paper and place in airtight containers with desiccant packets. Avoid refrigeration, which introduces moisture.


